
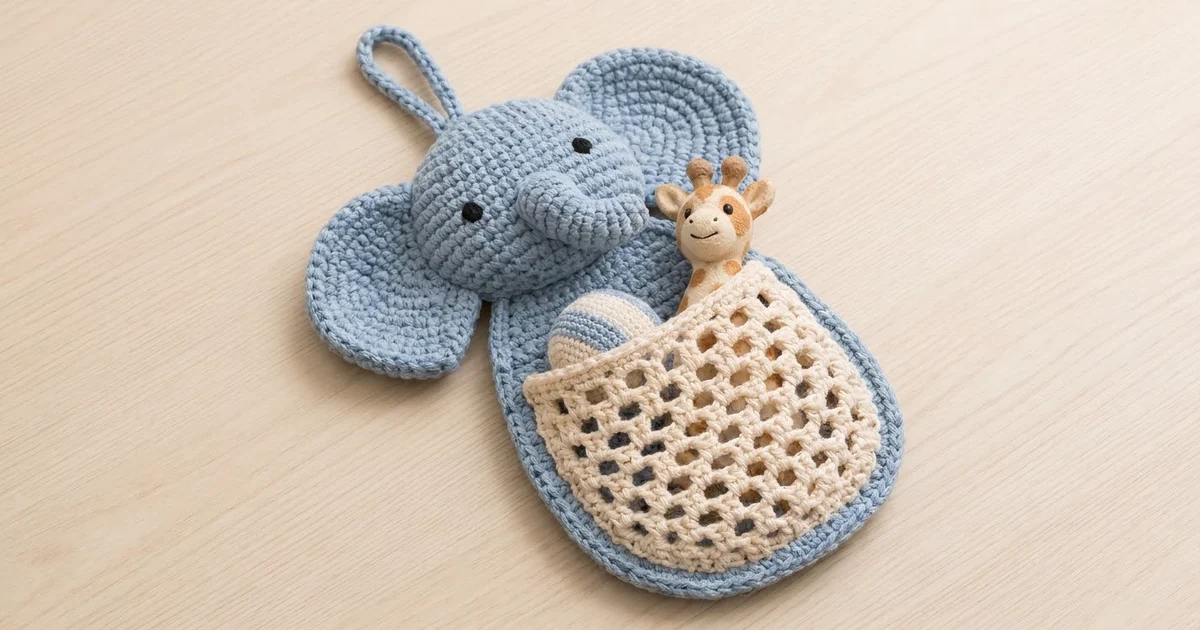
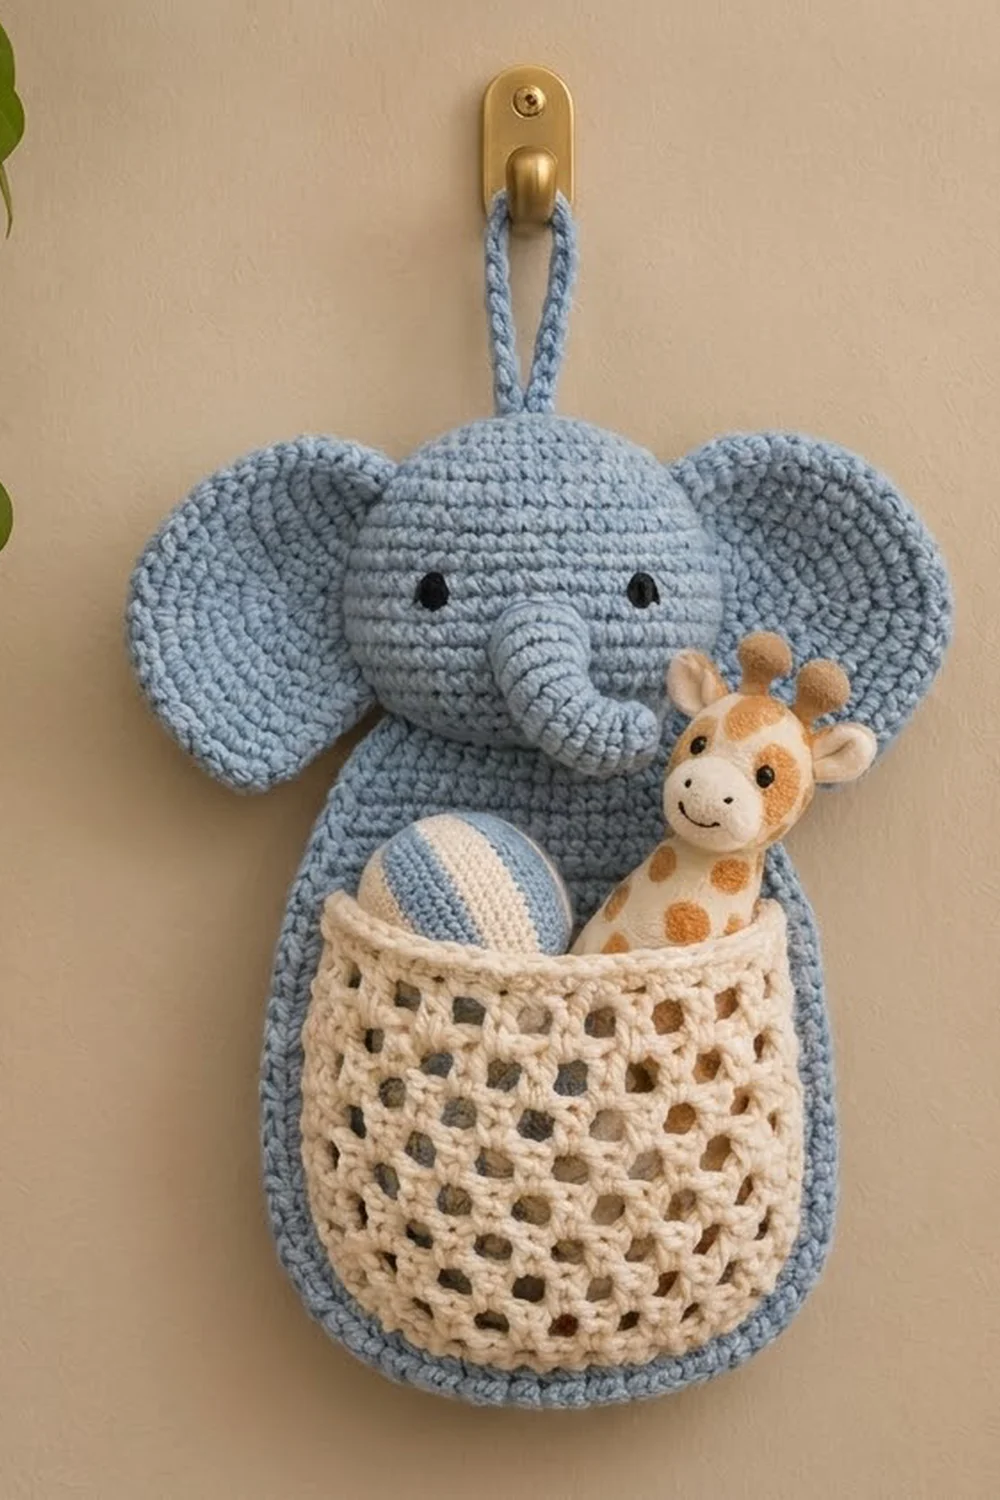
This little elephant is a wall pocket for a nursery. The powder-blue elephant has big rounded ears, a curled 3D trunk and two tiny embroidered eyes. A cream honeycomb-mesh pocket on its tummy holds small toys, a pacifier or a pair of socks.
The colors are soft and calm: powder blue for the elephant and cream for the pocket, plus a few stitches of black for the eyes. The open mesh lets you see what’s inside, and the solid sc band at the top keeps the pocket opening firm.
The finished hanger measures about 9 in (22.9 cm) wide and 15 in (38.1 cm) tall including the loop, or 12 in (30.5 cm) without it. This pattern uses US crochet terms.
You’ll make seven pieces: a body panel in rows, a mesh pocket in rows, a flat circle for the head, two half-circle ears, a small trunk worked in the round and a chain-cord loop. Then you sew on the pocket, work a border around the body and assemble the elephant.
Finished Size and Construction
- Finished size: about 9 in × 15 in (22.9 × 38.1 cm) including the loop
- Skill level: Advanced beginner
- Terminology: US
- Yarn weight: Worsted (Category 4)
- Hook: 4.0 mm (G-6)
- Number of pieces: 7 (body, pocket, head, 2 ears, trunk, loop)
- Layout: head centered over the top of the body, ears behind the head, pocket on the lower body
- Body panel size before border: 7 in × 8 in (17.8 × 20.3 cm)
- Body after border: 7.5 in × 8.5 in (19.1 × 21.6 cm)
- Border depth: 1 round of sc, 0.25 in (0.6 cm)
- Pocket size: 6.5 in wide × about 6.1 in tall (16.5 × 15.5 cm) after edging
- Head: about 4.5 in (11.4 cm) across
Materials
Use a smooth worsted cotton or cotton blend so the stitches look crisp and the mesh holds its shape. Soft acrylic also works, but it stretches more under weight.
- Color A, powder blue: 70 g, about 119 m
- Color B, cream: 30 g, about 51 m
- Color C, black: about 2 m, for the eyes
These quantities include a margin of about 20%.
Tools:
– 4.0 mm (G-6) crochet hook
– Yarn needle
– Small handful of polyester fiberfill (for the trunk)
– Stitch markers
– Straight pins
– Measuring tape
– Scissors
Abbreviations (US Terms)
- ch – chain
- sc – single crochet
- hdc – half double crochet
- dc – double crochet
- sl st – slip stitch
- st(s) – stitch(es)
- sk – skip
- sp – space
- MR – magic ring
- inc – 2 sc in the same st
- sc2tog – single crochet 2 together
- RS – right side
Special stitch: ch-3 loop mesh. Each “loop” is a ch 3 anchored by an sc. At gauge, one loop is 0.5 in (1.3 cm) wide.
Gauge and Checkpoints
- Sc gauge: 16 sc × 18 rows = 4 in (10.2 cm)
- Mesh gauge: 8 loops × 8 mesh rows = 4 in (10.2 cm)
- Chain gauge: 4 ch = 1 in (2.5 cm)
Start with the body panel, because it works as your test piece. After Row 11 it should be 7 in (17.8 cm) wide.
If it’s wider than 7.25 in, go down one hook size. If it’s narrower than 6.75 in, go up one hook size. Small differences add up: an extra 0.5 in (1.3 cm) on the body leaves the pocket margins uneven.
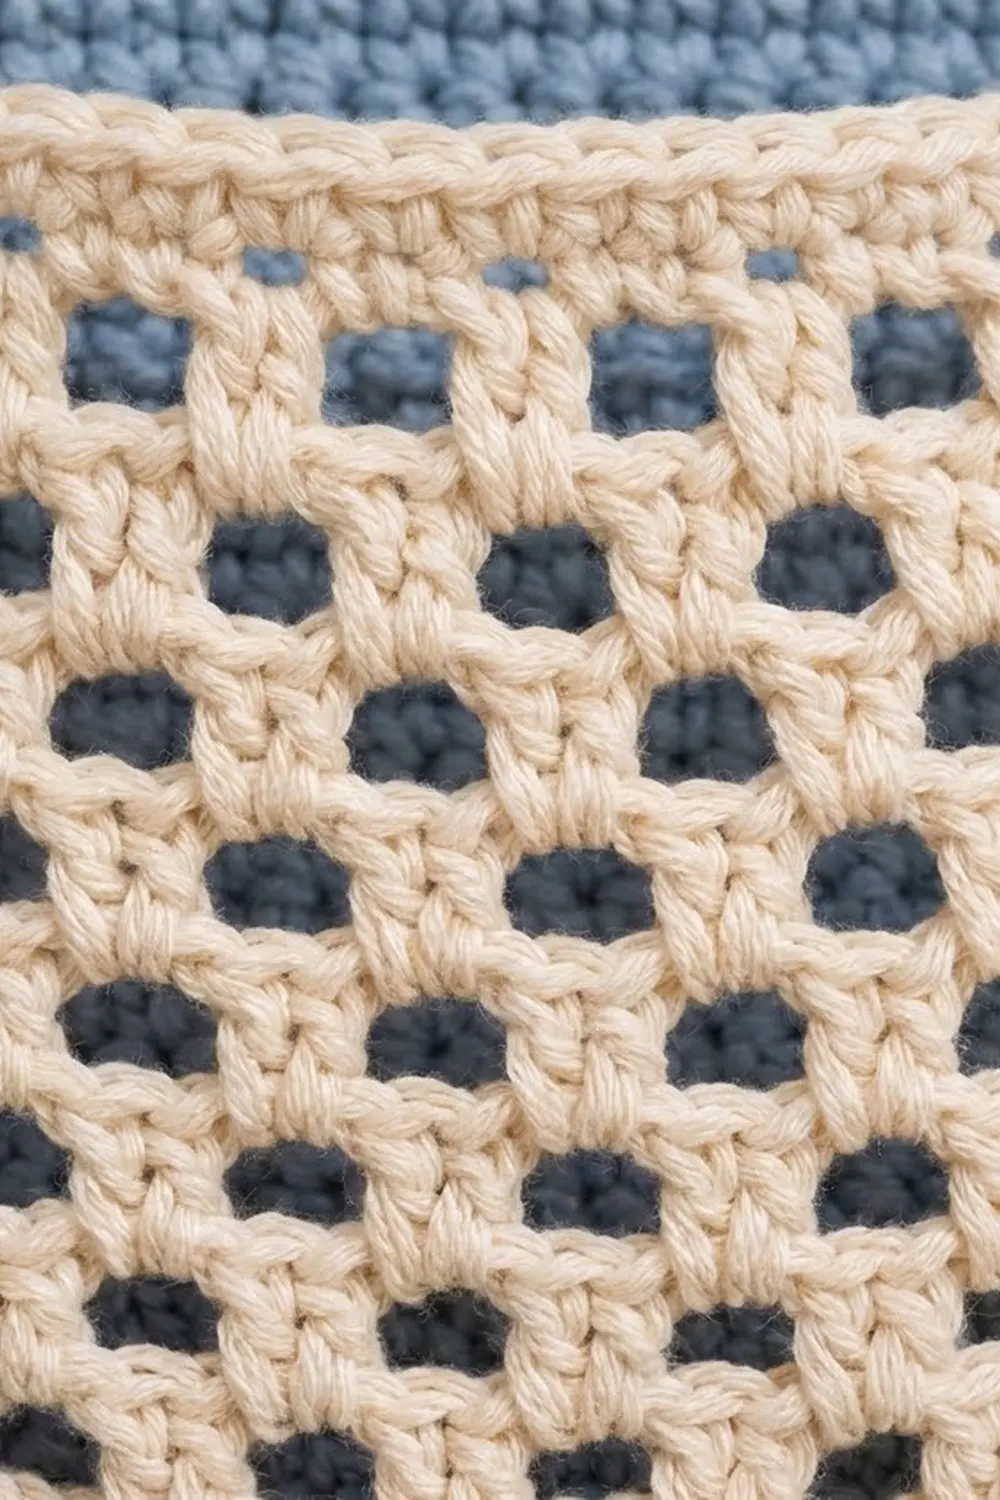
Body Panel (Color A)
Work in rows. Start every row with ch 1 and turn; the ch 1 doesn’t count as a stitch.
Row 1: Ch 13, sc in 2nd ch from hook and in each ch across. (12 sc)
Row 2: Inc in first st, sc in next 10, inc in last st. (14 sc)
Rows 3–7: Inc in first st, sc across to last st, inc in last st. Each of these rows has its own total:
| Row | Sc |
|---|---|
| 3 | 16 |
| 4 | 18 |
| 5 | 20 |
| 6 | 22 |
| 7 | 24 |
Row 8: Sc across. (24 sc)
Row 9: Inc in first st, sc in next 22, inc in last st. (26 sc)
Row 10: Sc across. (26 sc)
Row 11: Inc in first st, sc in next 24, inc in last st. (28 sc)
Checkpoint: the panel is 7 in (17.8 cm) wide and about 2.4 in (6.1 cm) tall, with a rounded U-shaped bottom.
Rows 12–28: Sc across. (28 sc)
Checkpoint: the panel is about 6.2 in (15.7 cm) tall.
Row 29: Sc2tog, sc in next 24, sc2tog. (26 sc)
Row 30: Sc across. (26 sc)
Row 31: Sc2tog, sc in next 22, sc2tog. (24 sc)
Row 32: Sc across. (24 sc)
Row 33: Sc2tog, sc in next 20, sc2tog. (22 sc)
Rows 34–36: Sc across. (22 sc)
Checkpoint: the body is 7 in × 8 in (17.8 × 20.3 cm), with a 5.5 in (14.0 cm) top edge. Don’t fasten off yet if you want to go straight into the border later. Otherwise fasten off and weave in the ends.
Mesh Pocket (Color B)
Row 1: Ch 14, sc in 2nd ch from hook and in each ch across. (13 sc)
Row 2 (set-up): Ch 1, turn, sc in first sc, *ch 3, sk 1 sc, sc in next sc; repeat from * 5 more times. (6 loops, 7 sc)
Row 3 (growth row): Ch 1, turn, sc in first sc, ch 3, *sc in next ch-3 loop, ch 3; repeat from * in each loop across, sc in last sc. (7 loops)
You work one new loop between each pair of sc. Because you anchor into both edge sc as well as every loop, the row gains exactly 1 loop.
Rows 4–7: Repeat Row 3. Each of these rows has its own total:
| Row | Loops |
|---|---|
| 4 | 8 |
| 5 | 9 |
| 6 | 10 |
| 7 | 11 |
Checkpoint: the pocket is about 6 in (15.2 cm) wide and 3.25 in (8.3 cm) tall, with a rounded bottom.
Row 8 (straight row): Ch 4 (counts as dc + ch 1), turn, sc in first ch-3 loop, *ch 3, sc in next loop; repeat from * 9 more times, ch 1, dc in last sc. (10 loops, plus a ch-1 sp at each edge)
Row 9: Ch 1, turn, sc in first dc, ch 3, *sc in next ch-3 loop, ch 3; repeat from * 9 more times, sc in 3rd ch of the turning ch. Skip the ch-1 spaces. (11 loops)
Rows 10–11: Repeat Rows 8–9. (Row 10: 10 loops; Row 11: 11 loops)
Checkpoint: the pocket is about 5.25 in (13.3 cm) tall.
Row 12 (band): Ch 1, turn, sc in first sc, 2 sc in each ch-3 loop across, sc in last sc. Skip the sc between loops. This is a conversion row: 2 edge sc + (11 loops × 2) = 24 sc.
Rows 13–14: Sc across. (24 sc)
Checkpoint: the pocket is 6 in (15.2 cm) wide and about 5.9 in (15.0 cm) tall.
Pocket edging: With the RS facing, join Color B at the top corner of the Row 14 side.
- Working down the side, sc 1 in each band row end (3 sc), then 2 sc in each mesh row end for Rows 11–2 (20 sc). The side has 23 sc.
- Across the foundation edge, work 3 sc in the first ch, sc in the next 11 ch, and 3 sc in the last ch. That’s 13 foundation loops worked 1 per stitch, plus 4 extra = 17 sc.
- Work 23 sc up the other side.
Total: 63 sc. Fasten off.
Leave the top band unedged. The finished pocket is 6.5 in (16.5 cm) wide and about 6.1 in (15.5 cm) tall.
Head (Color A)
Work in continuous rounds and move a marker up each round.
| Round | Instructions | Sc |
|---|---|---|
| 1 | 6 sc in MR | 6 |
| 2 | Inc in each st | 12 |
| 3 | Sc 1, inc; repeat 6 times | 18 |
| 4 | Sc 2, inc; repeat 6 times | 24 |
| 5 | Sc 3, inc; repeat 6 times | 30 |
| 6 | Sc 4, inc; repeat 6 times | 36 |
| 7 | Sc 5, inc; repeat 6 times | 42 |
| 8 | Sc 6, inc; repeat 6 times | 48 |
| 9 | Sc 7, inc; repeat 6 times | 54 |
| 10 | Sc 8, inc; repeat 6 times | 60 |
Checkpoint after Round 5: about 2.25 in (5.7 cm) across.
After Round 10, sl st to the next st and fasten off, leaving a 24 in tail. The head is about 4.5 in (11.4 cm) across and lies flat.
Ears (Make 2, Color A)
Work in rows. Start every row with ch 1 and turn.
| Row | Instructions | Sc |
|---|---|---|
| 1 | 3 sc in MR, pulled closed | 3 |
| 2 | Inc in each st | 6 |
| 3 | Sc 1, inc; repeat 3 times | 9 |
| 4 | Sc 2, inc; repeat 3 times | 12 |
| 5–12 | Continue increasing 3 per row (one more sc before each inc every row) | 15, 18, 21, 24, 27, 30, 33, 36 |
A flat half circle needs 3 increases per row (half of a full circle’s 6), so the ear lies flat. Fasten off, leaving a 16 in tail.
Each ear is a D shape, about 5.3 in (13.5 cm) along the straight edge and 2.7 in (6.9 cm) deep.
Trunk (Color A)
| Round | Instructions | Stitches |
|---|---|---|
| 1 | 6 sc in MR | 6 |
| 2 | Sc 1, inc; repeat 3 times | 9 |
| 3–4 | Sc around | 9 |
| 5 | Sc 2, inc; repeat 3 times | 12 |
| 6–7 | Sc 6, hdc 6 | 12 |
| 8 | Sc 3, inc; repeat 3 times | 15 |
| 9 | Sc around | 15 |
In Rounds 6–7, the taller hdc on one side push the tip into a curl.
Stuff lightly and fasten off, leaving a 12 in tail. The trunk is about 2 in (5.1 cm) long, and the base flattens to about 1.75 in (4.4 cm).
Hanging Loop (Color A)
- Ch 30, then sl st into the first ch to make a ring.
- Sl st in the back bump of each ch around (30 sl st). This makes a firm cord.
- Fasten off.
The ring is about 7.5 in (19.1 cm) around and folds flat to about 3.75 in.
Make All Pieces
- Color A: 1 body, 1 head, 2 ears, 1 trunk, 1 loop (6 pieces)
- Color B: 1 pocket
- Color C: used for the eyes only
Layout, front view:
              [  loop  ]
[ ear ][        head + trunk        ][ ear ]
       [            body            ]
       [   [     mesh pocket     ]  ]
       [____________________________]
Joining
Use whipstitch throughout. Make one stitch per edge stitch and keep the tension snug but not tight; the fabric should not ripple.
Step 1 – Pocket to body.
1. Lay the body flat with the RS up.
2. Center the pocket so its bottom edge sits 0.25 in (0.6 cm) above the body’s foundation row, with 0.25 in (0.6 cm) of body showing at each side.
3. Pin at the two top corners and the bottom center.
4. With Color B, whipstitch through the outer loop of each of the 63 edging sc and into the body stitch directly underneath. Leave the top band open.
Let the mesh lie flat with no ease added.
Checkpoint: the top of the pocket is about 1.65 in (4.2 cm) below the top edge of the body.
Step 2 – Head unit.
1. Sew the trunk base to the head, centered over Rounds 2–5 just below the center. Point the curled tip upward.
2. With Color C, embroider two small eyes, each 2 horizontal stitches over 1 sc. Place them in Round 7, about 1.5 in (3.8 cm) apart, above the trunk.
3. Place each ear’s straight edge behind one side of the head, with 0.5 in (1.3 cm) tucked behind. The top of each ear should be about 0.5 in (1.3 cm) below the top of the head.
4. Whipstitch the ears to the back of the head.
Step 3 – Work the body border now (see Border, below), then return to Step 4.
Step 4 – Head to body.
1. Center the head unit over the body so the bottom of the head overlaps the top edge of the body by 1 in (2.5 cm).
2. Whipstitch the head’s back loops to the body across the overlap.
Step 5 – Loop.
1. Fold the ring flat.
2. Sew the bottom 0.75 in (1.9 cm) to the back of the head at the top center, so 3 in (7.6 cm) of loop shows above the head.
Final size checkpoint: about 9 in × 15 in (22.9 × 38.1 cm).
Border (Body Panel, Color A)
Border gauge: same as the sc gauge, 4 sc = 1 in (2.5 cm).
With the RS facing, join Color A in the first st of Row 36, ch 1, and work one round:
- Top: 3 sc in the first st, sc in the next 20, 3 sc in the last st. That’s 22 stitches worked 1 per stitch, plus 4 extra = 26 sc.
- First side: On Rows 35–12 (24 row ends), sc in each row end but skip 1 row end in every 8, for 21 sc. On Rows 11–2 (10 row ends), sc once in each, for 10 sc. Side total: 31 sc.
- Bottom: 3 sc in the first foundation ch, sc in the next 10, 3 sc in the last ch. That’s 12 worked 1 per stitch, plus 4 extra = 16 sc.
- Second side: mirror the first side for 31 sc.
Total: 26 + 31 + 16 + 31 = 104 sc. Sl st to the first sc and fasten off.
Why the math works: sc rows are 4.5 per inch, but sc are 4 per inch. Along the straight part, 24 rows measure 5.33 in, and 21 sc cover 5.25 in, so the edge lies flat. The curved rows have slanted, longer edges, so they get a full 1 sc per row end. The 3-sc corners leave room to turn without cupping.
The finished body is 7.5 in × 8.5 in (19.1 × 21.6 cm).
Final Blocking
- Pin the assembled elephant face up on a blocking mat at 9 in × 15 in (22.9 × 38.1 cm).
- Pin the body edges straight and the bottom curve smooth.
- Open the mesh loops evenly by hand.
- Spray lightly with water until the piece is damp. Don’t soak it.
- Shape the ears into smooth D curves and fluff the trunk curl.
- Let it dry completely, at least 12 hours.
- Unpin. Steam the top band of the pocket lightly if it flips.
Final Quality-Control Checklist
- The body is 7.5 in × 8.5 in (19.1 × 21.6 cm), and the border lies flat.
- The pocket margins are even: 0.5 in (1.3 cm) of blue at the sides, including the border.
- The pocket top band is open and firm.
- The head is centered, and the ears are level and symmetrical.
- The trunk is centered and the eyes are evenly spaced.
- The loop is sewn securely at the center back and 3 in (7.6 cm) shows.
- All ends are woven in on the back.
Troubleshooting
- The body border ruffles: skip one more row end in the straight section.
- The body border cups or pulls: add 1 sc in the curve rows.
- The pocket is too wide: your loops are too long; make tighter ch 3s or use a smaller hook.
- The mesh edges are uneven: check that you skip the ch-1 spaces on Rows 9 and 11.
- The ears ripple: you’ve added too many increases; recount 3 per row.
- The ears cup: block them flat, or add 1 extra inc in the last row.
- The trunk doesn’t curl: make sure all the hdc are on the same side of Rounds 6–7.
- The head flops forward: add a few tacking stitches to the body behind the ears.
Care
Hand wash in cool water, press out the water in a towel, and dry flat. Reshape the ears and pocket while the piece is damp.
Final Notes
Here’s the measurement chain:
- Gauge is 16 sc = 4 in (10.2 cm).
- The body grows to 28 sc = 7 in (17.8 cm) and reaches 8 in (20.3 cm) tall.
- The 104-st border brings it to 7.5 in × 8.5 in (19.1 × 21.6 cm).
- The 11-loop pocket edges out to 6.5 in (16.5 cm) and is centered on the body.
- The 4.5 in (11.4 cm) head with 2.7 in (6.9 cm) ears spans 9 in (22.9 cm).
- The 3 in (7.6 cm) loop finishes the hanger at 15 in (38.1 cm).
Check each stage before moving on, and the elephant will come together straight and even.
Happy crocheting!