
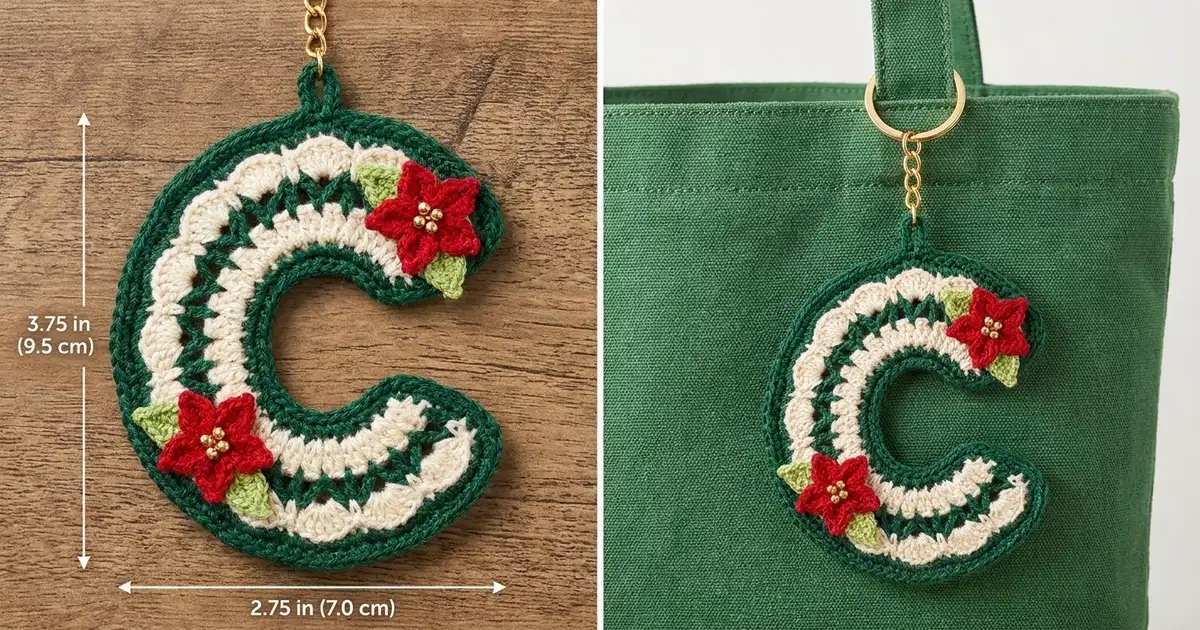
This little letter C is a festive keychain made from one crocheted piece. Green and cream rows alternate in curved bands of shells and arches. A solid green border frames the whole letter, and two tiny red poinsettias with green leaves and gold bead centers sit on the top tip and the lower curve.
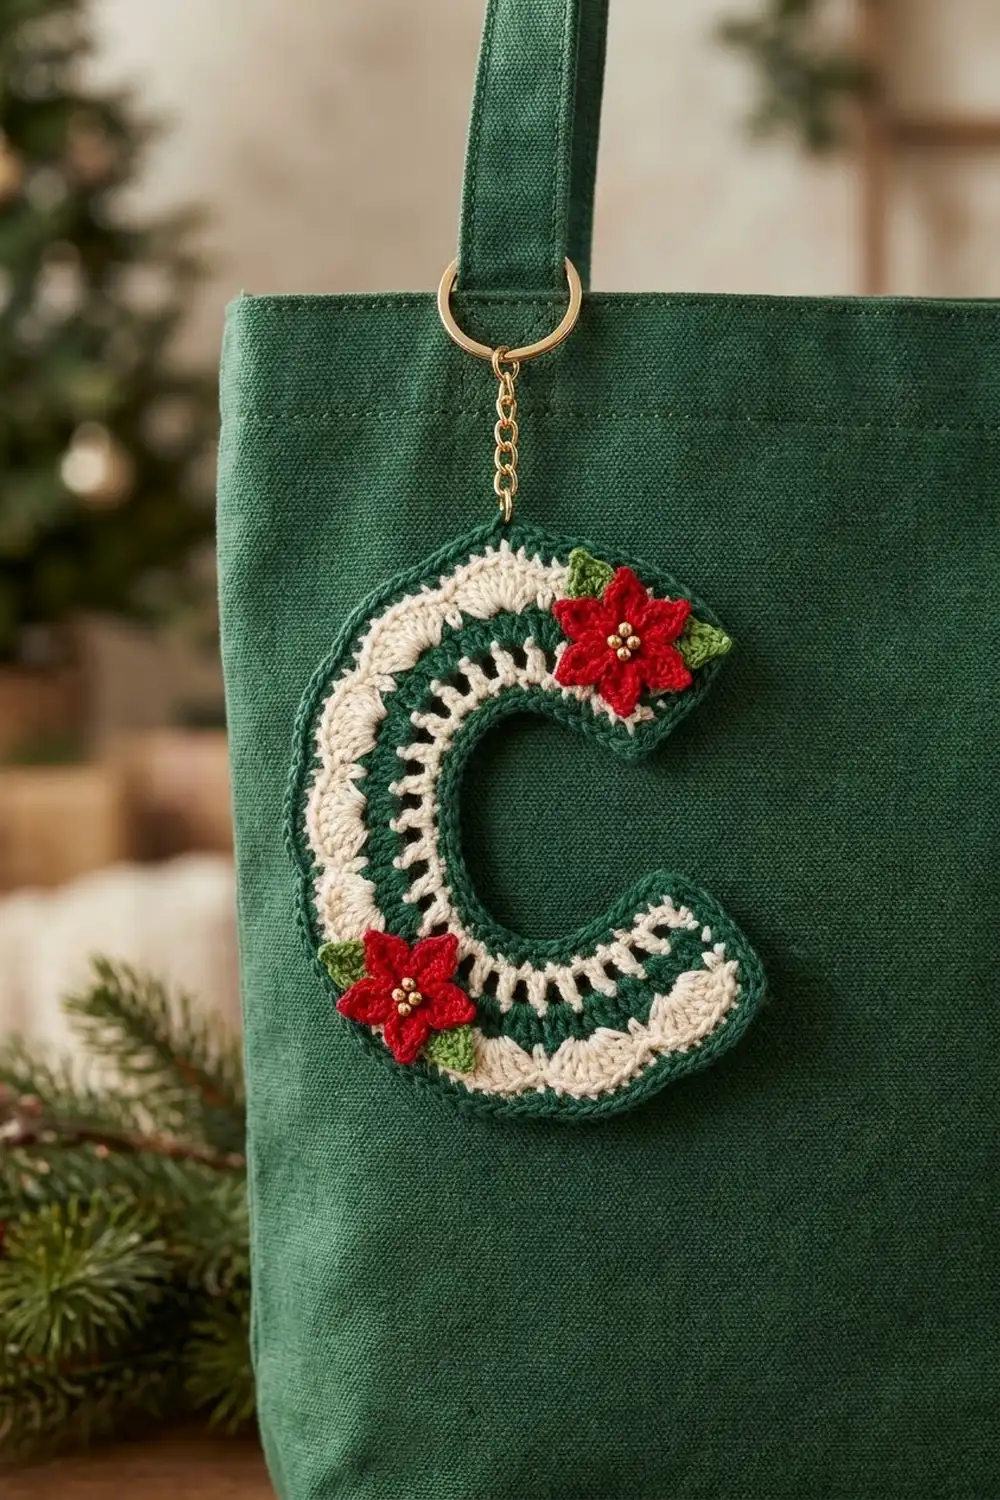
The colors are classic Christmas: deep forest green, soft cream, bright red, and a lighter leaf green, with gold beads and a gold split ring and chain. It looks lovely clipped to a tote bag or a set of keys. It also works as a personalized gift tag.
The pattern uses US crochet terms. The finished letter is about 3.75 in (9.5 cm) tall and 2.75 in (7.0 cm) wide, and the band is about 1.25 in (3.2 cm) wide.
Construction is simple. You work a short strip in five rows with the right side always facing, starting at the inner edge of the C. Each outer row has more stitches than the row before it, so the strip curves on its own. Next comes one border round all the way around, and blocking sets the C shape. Last, you add a hanging loop, the hardware, and the two poinsettia appliqués.
Finished Size and Construction
- Finished size: 3.75 in (9.5 cm) tall x 2.75 in (7.0 cm) wide
- Skill level: Easy to intermediate
- Terminology: US crochet terms
- Yarn weight: Super fine (#1) fingering-weight cotton
- Hook: 2.25 mm (US B-1)
- Number of pieces: 1 letter C, plus 2 poinsettias and 6 leaves sewn on as appliqués
- Layout: One curved strip, no joining
- Band width before border: 1 in (2.5 cm)
- Letter size before border: 3.5 in (8.9 cm) tall x 2.5 in (6.4 cm) wide
- Border depth: 1 round of sc, about 0.125 in (0.3 cm) on each edge
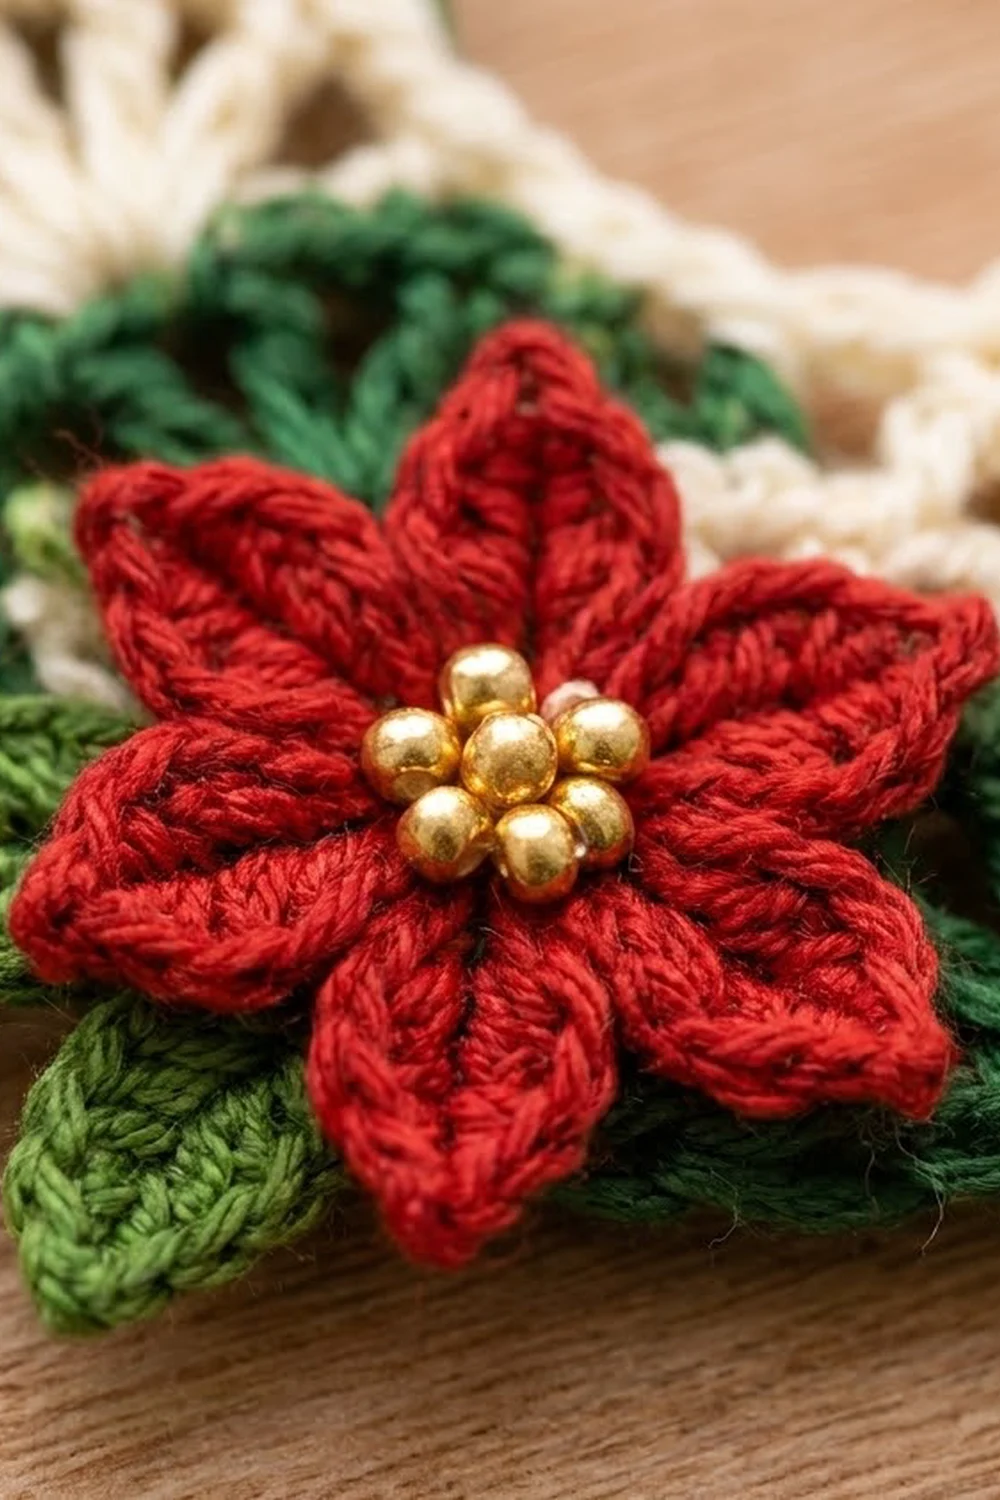
- Poinsettia size: about 1.1 in (2.8 cm) across
Materials
Choose a smooth, mercerized cotton in fingering weight. Cotton keeps the shells crisp, blocks well, and doesn’t stretch much, which matters on a keychain that gets handled every day. Avoid fuzzy or very soft acrylics, because they blur the open stitches.
Yarn:
- Forest green (letter Rows 1, 3, 5 and border): 5 g, about 17 m
- Cream (shell Rows 2 and 4): 3 g, about 10 m
- Red (poinsettias): 2 g, about 7 m
- Leaf green (leaves): 1 g, about 3 m
These amounts include a small extra margin for a test piece and for weaving in ends. Any leftover fingering cotton in these shades will do.
Tools and notions:
- 2.25 mm (US B-1) crochet hook, plus 2.0 mm and 2.5 mm hooks in case you need to adjust gauge
- Tapestry needle
- Beading needle and red sewing thread
- 10 gold seed beads, size 8/0 (5 per flower)
- 1 gold split key ring, 1 in (2.5 cm)
- Short gold chain, about 1 in (2.5 cm), with 2 jump rings
- Small flat-nose pliers
- Stitch markers, rust-proof pins, blocking mat, spray bottle
Abbreviations (US Terms)
- ch – chain
- sl st – slip stitch
- sc – single crochet
- hdc – half double crochet
- dc – double crochet
- sk – skip
- sp – space
- st(s) – stitch(es)
- RS – right side
Special stitches:
- Shell: 5 dc (Row 2) or 7 dc (Row 4) worked in the same stitch or space.
- V-st: (dc, ch 1, dc) in the same stitch.
- Standing sc: Start with a slip knot on the hook. Insert the hook in the stitch, yarn over, pull up a loop, yarn over, and pull through both loops.
Gauge and Checkpoints
Gauge: 8 sc and 9 rows of sc = 1 in (2.5 cm) with a 2.25 mm hook.
Make one test letter before you plan a batch of gifts. Gauge errors show up quickly on a small piece, and a keychain that comes out too large looks clumsy. Make a swatch of 12 sc x 10 rows, measure the middle 8 stitches, and then start the letter.
Checkpoints:
- After Row 1: the 17 sc measure about 2.1 in (5.3 cm) along the inner edge.
- After Row 2: the strip is about 0.5 in (1.3 cm) wide.
- After Row 4: the strip is about 0.9 in (2.3 cm) wide and clearly curving.
- After Row 5: the band is 1 in (2.5 cm) wide.
- After the border: the band is 1.25 in (3.2 cm) wide, and the blocked letter is 3.75 in (9.5 cm) x 2.75 in (7.0 cm).
If your piece is too big: switch to a 2.0 mm hook, or check that your dc aren’t too tall. If it’s too small: switch to a 2.5 mm hook. Don’t change the stitch counts, because the curve depends on them.
Letter C
Work every row with the RS facing, and don’t turn. Fasten off at the end of each row, then join the next color at the right-hand end of the row you just finished. Leave 4 in (10.2 cm) tails. You’ll crochet over most of them in the border.
Row 1 (forest green): Ch 18. Sc in 2nd ch from hook and in each ch across. Fasten off. (17 sc)
This row is the inner edge of the C.
Row 2 (cream): Standing sc in first sc. Sk 1 sc, 5 dc in next sc, sk 1 sc, sc in next sc; repeat from * 3 more times. Fasten off. (4 shells, 5 sc: 25 sts)
Check: 1 + (4 x 4) = 17, which uses every stitch of Row 1.
Row 3 (forest green): Join with sl st in first sc. Ch 4 (counts as dc and ch 1), dc in same sc (first V-st made). Ch 2, sk 2 dc, sc in center dc of shell, ch 2, sk 2 dc, V-st in next sc; repeat from * 3 more times. Fasten off. (5 V-sts, 4 sc, 8 ch-2 sps)
The V-sts sit above the cream sc and the sc sit on the shell centers. Together they form the green lattice between the two cream bands.
Row 4 (cream): Join with sl st in ch-1 sp of first V-st. Ch 3 (counts as dc), 6 dc in same sp. Sk ch-2 sp, sc in next sc, sk ch-2 sp, 7 dc in ch-1 sp of next V-st; repeat from * 3 more times. Fasten off. (5 shells, 4 sc: 39 sts)
Row 4 has 5 shells where Row 2 had 4, and each shell is bigger. That makes the outer edge longer than the inner edge, which bends the strip into a curve.
Row 5 (forest green): Join with sl st in top of beginning ch-3. Ch 1, sc in same st. Ch 4, sk 2 dc, sc in center (4th) dc of shell, ch 4, sc in next sc; repeat from * 3 more times. Ch 4, sk 2 dc, sc in center dc of last shell, ch 4, sc in last dc. Don’t fasten off. (10 ch-4 sps, 11 sc)
These open green arches make the airy outer band of the letter.
Checkpoint: The band measures 1 in (2.5 cm) from Row 1 to the tops of the arches. Lay it flat. It should already curve into a loose arc.
Border
The border is one round of forest-green sc worked all around the strip. It closes in the open rows, squares off the arm ends, and gives the keychain a firm edge. Crochet over the color tails as you go.
Border gauge: The same 8 sc = 1 in (2.5 cm). Each corner gets 3 sc in one stitch so the arm ends stay square.
Round 1: Continuing from Row 5, ch 1 and work along the outer edge:
- Outer edge: 3 sc in first sc of Row 5 (corner), 4 sc in next ch-4 sp, sc in next sc; repeat from * 8 more times, 4 sc in last ch-4 sp, 3 sc in last sc (corner). (55 sc)
- First arm end: Working across row ends, 2 sc in end of Row 4, 2 sc in end of Row 3, 2 sc in end of Row 2, 1 sc in end of Row 1. (7 sc)
- Inner edge: Working into the free loops of the foundation chain, 3 sc in first ch (corner), sc in each of next 15 ch, 3 sc in last ch (corner). (21 sc)
- Second arm end: 1 sc in end of Row 1, 2 sc in end of Row 2, 2 sc in end of Row 3, 2 sc in end of Row 4. (7 sc)
Sl st in first sc to join. Fasten off. (90 sc)
Why the math works:
- Outer edge: Row 5 has 11 sc. The 9 middle sc take 1 sc each, the 2 end sc take 3 sc each, and the 10 ch-4 sps take 4 sc each: 9 + 6 + 40 = 55. The 6 corner sc are already counted in the 55.
- Inner edge: The foundation has 17 loops. The 15 middle loops take 1 sc each and the 2 end loops take 3 sc each: 15 + 6 = 21.
- Arm ends: 2 sc per dc-height row and 1 sc for the sc-height row: 2 + 2 + 2 + 1 = 7. Row 5 and the foundation chain aren’t counted here because their end stitches are the corners.
- Total: 55 + 7 + 21 + 7 = 90 sc.
At 8 sc per inch, the outer edge is about 6.9 in (17.5 cm) and the inner edge is about 2.6 in (6.6 cm). That difference in length across a 1.25 in (3.2 cm) band is what lets the strip settle into a C.
Hanging Loop
Decide which arm will be the top. Starting from the center sc of that arm’s outer corner, count 14 sc along the outer edge. Join forest green with a sl st in that sc, ch 8, and sl st in the same sc. Fasten off and weave in the ends. The loop is about 0.5 in (1.3 cm) long.
Poinsettias (make 2)
Round 1 (red): Make a magic ring. Ch 1, 5 sc in ring. Pull the ring closed, sl st in first sc. (5 sc)
Round 2 (red): Ch 6, sl st in 2nd ch from hook, sc in next ch, hdc in next ch, dc in each of next 2 ch, sl st in next sc of Round 1; repeat from * 4 more times, working the last sl st into the joining sl st. Fasten off, leaving a 10 in (25.4 cm) tail for sewing. (5 petals, 5 sts each)
The sl st at the tip gives each petal a point, and the dc at the base make it wide near the center.
Center: With the beading needle and red sewing thread, sew 5 gold seed beads in a small cluster over the magic ring.
Leaves (make 6)
Leaf (leaf green): Ch 6, sl st in 2nd ch from hook, sc in next ch, hdc in next ch, dc in next ch, sc in last ch. Fasten off, leaving a 6 in (15.2 cm) tail. (5 sts)
Each leaf is about 0.6 in (1.5 cm) long with a pointed tip.
Assembly
- Top flower: Sew 3 leaves to the back of one poinsettia so their tips peek out between the petals, two on one side and one below. Sew this flower over the tip of the top arm so it overlaps the end of the band.
- Bottom flower: Sew 3 leaves behind the second poinsettia the same way. Sew it to the lower outer curve of the C, about one third of the way up from the bottom arm tip, slightly overlapping the outer edge.
- Sew through the flower center and the leaf bases only, so the petal tips stay free and slightly raised.
- Hardware: Open a jump ring with the pliers, slip it through the hanging loop, attach one end of the chain, and close it. Use the second jump ring to connect the chain to the split ring.
Final Blocking
- Before blocking, weave in all remaining ends on the wrong side.
- Pin the letter flat on a blocking mat, RS up. If the flowers are already sewn on, pin around them rather than through them.
- Shape the C. Pin the inner edge into an even curve first, then pin the outer edge so the band stays 1.25 in (3.2 cm) wide all the way around.
- Pin the shells so their dc fan out evenly, and pin each green arch open.
- Check the size: 3.75 in (9.5 cm) tall and 2.75 in (7.0 cm) wide.
- Spray with water until damp, not soaked.
- Let it dry completely, at least 4 hours, before you remove the pins.
- If needed, block the flowers and leaves separately, ideally before sewing them on. Flatten the petals with a pin at each tip.
Final Quality-Control Checklist
- Row 1 has 17 sc, Row 2 has 25 sts, and Row 4 has 39 sts.
- Row 5 has 10 arches and 11 sc.
- The border has 90 sc: 55 on the outer edge, 7 on each end, and 21 on the inner edge.
- The arm ends are square with neat corners.
- The C lies flat without ruffling or cupping.
- The blocked size is 3.75 in (9.5 cm) x 2.75 in (7.0 cm).
- Each poinsettia has 5 even petals and 5 secure beads.
- The leaves are hidden at the base and visible at the tips.
- The hanging loop and jump rings are secure. Tug firmly to test.
- No tails show from the front.
Troubleshooting
- The strip stays straight instead of curving: Your shells may be too tight. Check that Row 4 has 7 dc per shell and that the green arches are ch 4, not ch 3.
- The outer edge ruffles: Your dc may be too loose. Try a 2.0 mm hook for Rows 2 and 4 only.
- Gaps at the arm ends: Work the row-end sc around the post of the end dc, not just into the edge loop.
- The border count is off: Recount the outer edge first. It’s the easiest place to miss a ch-4 sp.
- The color tails show through: Crochet over them for only 4 to 5 stitches, then trim them closely.
- The petals curl: Block them flat with a pin at each tip and let them dry fully.
- The beads come loose: Sew each bead twice and knot the thread on the back.
Care
Hand wash in cool water with mild soap, press out the water in a towel, and reshape the letter flat to dry. Don’t tumble dry, because the heat and tumbling can loosen the beads and distort the curve.
Final Notes
The measurement chain is short and easy to check. A gauge of 8 sc = 1 in (2.5 cm) gives a 17-sc inner edge of 2.1 in (5.3 cm). Growing from 4 shells to 5 shells and then 10 arches builds a band 1 in (2.5 cm) wide and a letter 3.5 in (8.9 cm) x 2.5 in (6.4 cm). The 90-sc border adds 0.125 in (0.3 cm) on each edge. That brings the band to 1.25 in (3.2 cm) and the finished letter to 3.75 in (9.5 cm) x 2.75 in (7.0 cm). Add the two poinsettias and the gold ring, and your C is ready to hang.
Happy crocheting!