
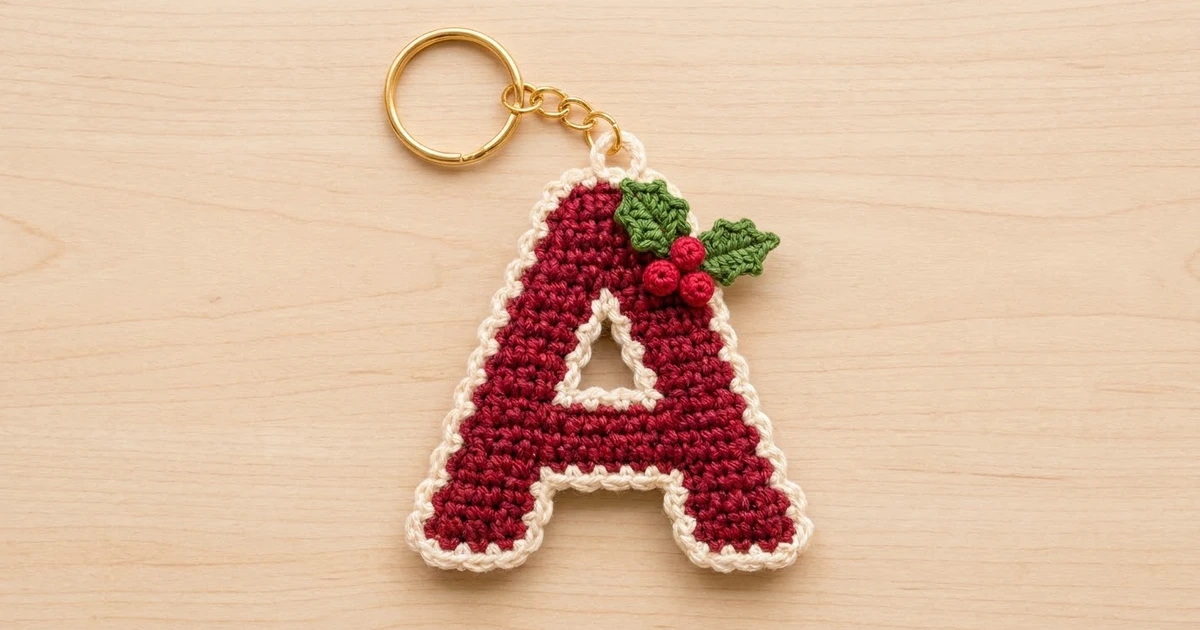
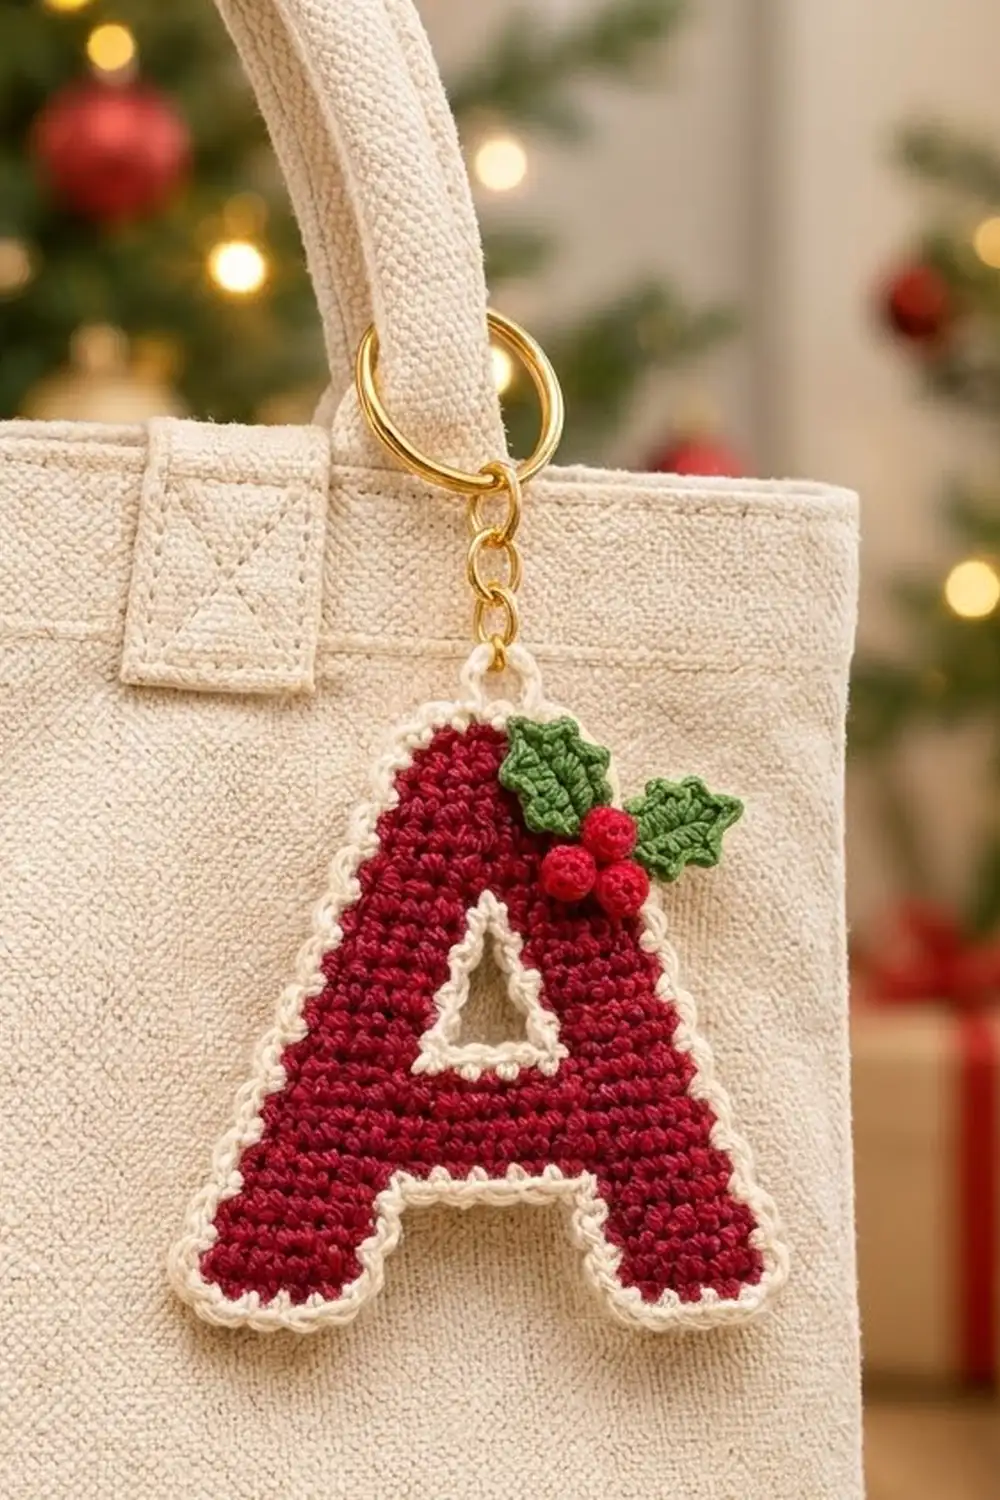
This little letter A keychain is a quick holiday make that looks good clipped to a tote bag, a backpack zipper, or a set of house keys. The letter is solid cranberry single crochet with a crisp cream outline. A small sprig of holly sits on the shoulder.
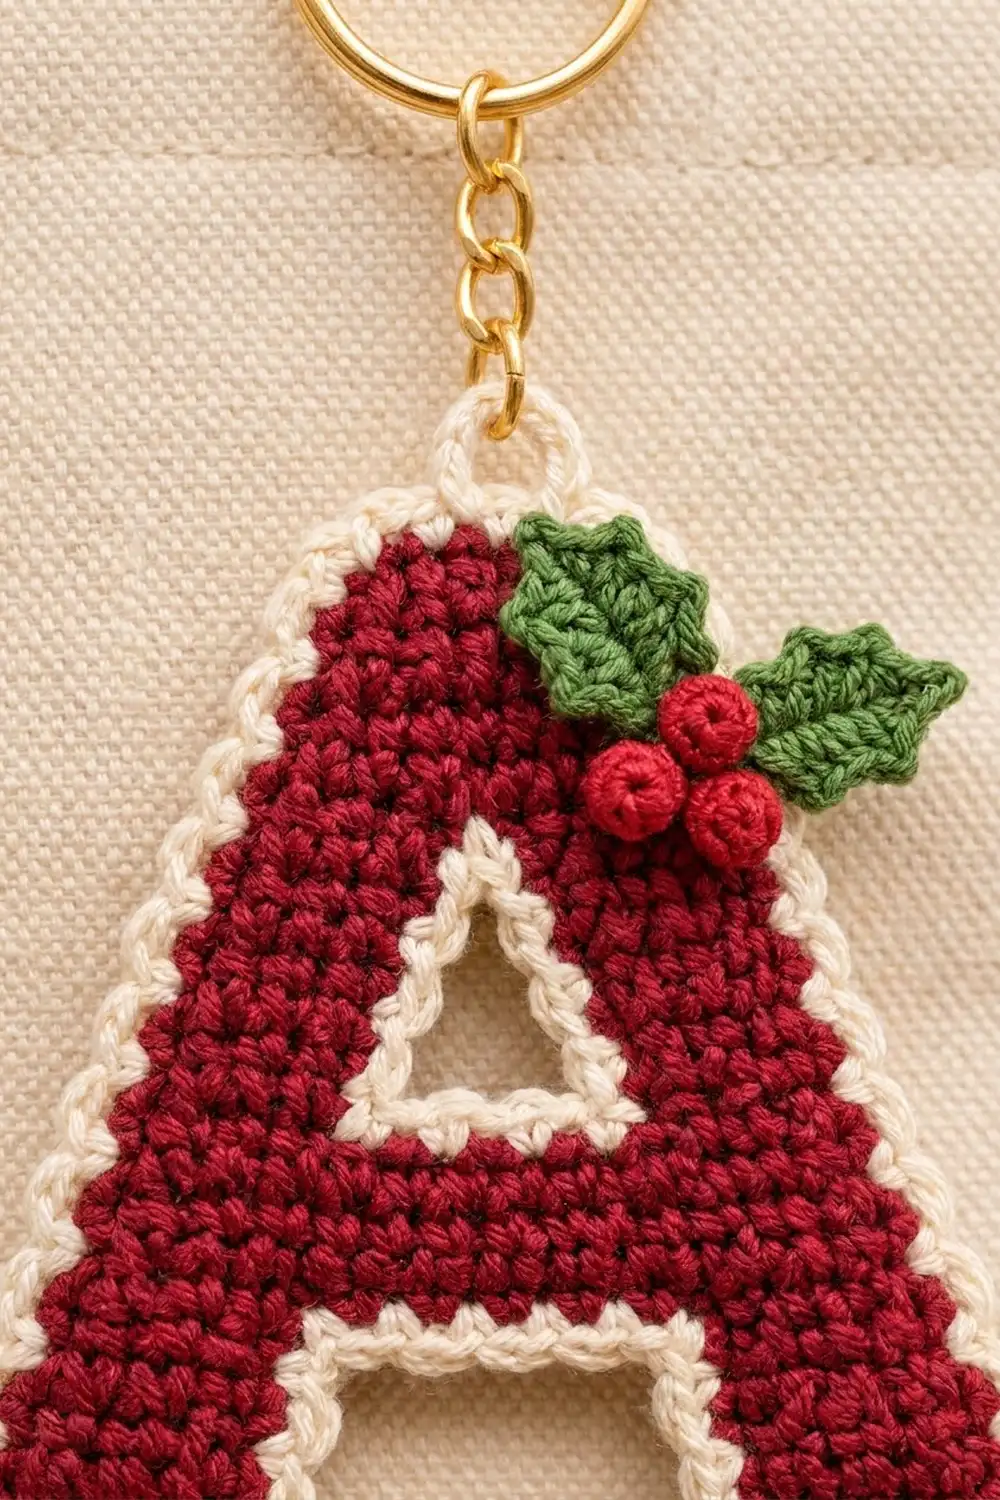
The colors are cranberry red, warm cream, bright holly green, and a brighter red for the berries. Dense single crochet keeps the fabric firm, and the cream crab stitch border gives the outline a neat, rope-like edge.
This pattern uses US crochet terms. The finished letter measures about 3.5 in (8.9 cm) tall and 3.5 in (8.9 cm) wide, not counting the hanging loop.
You’ll make the letter in rows from the bottom up. First you make two short legs. Next, a joining row adds a chain across the gap to form the crossbar. Then you split the work around a small triangular opening, close it again, and decrease to a flat top. A cream border, a lining round for the opening, a hanging loop, and the sewn-on holly finish the piece.
Finished Size and Construction
- Finished size: 3.5 in x 3.5 in (8.9 cm x 8.9 cm), plus a 0.5 in (1.3 cm) hanging loop
- Skill level: Easy to intermediate (row shaping and crab stitch)
- Terminology: US crochet terms
- Yarn weight: Sport weight (2, fine), mercerized cotton
- Hook: 2.5 mm (US B/1 or C/2, depending on brand)
- Number of pieces: 1 letter, plus 2 holly leaves and 3 berries sewn on top
- Layout: Single standalone piece; no joining
- Letter size before border: 3 in x 3 in (7.6 cm x 7.6 cm), 21 rows tall, 18 sts wide at the base
- Border depth: about 0.25 in (0.6 cm) on each side (2 rounds)
Materials
Mercerized cotton works best here. It has good stitch definition, holds its shape when blocked, and wears well on a keychain. Use a smooth, non-fuzzy yarn so the crab stitch edge looks clean.
- Color A, cranberry red (letter body): 5 g, about 20 m
- Color B, cream (border, opening lining, loop): 3 g, about 12 m
- Color C, holly green (leaves): 1 g, about 4 m
- Color D, bright red (berries): 1 g, about 3 m
All quantities include a small safety margin.
Tools:
- 2.5 mm crochet hook
- Tapestry needle
- Scissors
- Stitch markers (2)
- 1 in (2.5 cm) gold split key ring with a short chain and jump ring
- Small pliers for opening the jump ring
- Pins, a foam mat, and a steam iron or spray bottle for blocking
Abbreviations (US Terms)
- ch – chain
- sl st – slip stitch
- sc – single crochet
- hdc – half double crochet
- dc – double crochet
- sc2tog – single crochet 2 together (decrease)
- rev sc – reverse single crochet (crab stitch)
- st(s) – stitch(es)
- RS – right side
Special stitches
- Reverse single crochet (crab stitch): Working from left to right (right-handed), insert the hook in the next stitch to the right, yarn over, pull up a loop, then yarn over and pull through both loops on the hook.
- Picot: Ch 2, sl st in the first ch made.
Gauge and Checkpoints
Gauge: 6 sc and 7 rows = 1 in (2.5 cm) in Color A with a 2.5 mm hook.
Work a small swatch first: 12 sts by 14 rows, which should measure 2 in x 2 in (5.1 cm x 5.1 cm). Keep the fabric firm. If the swatch feels floppy, the letter won’t stay flat.
Checkpoints as you go:
- After Row 6 (each leg): about 0.8 in (2.0 cm) wide and 7/8 in (2.2 cm) tall
- After Row 7: about 2.7 in (6.9 cm) across
- After Row 14: 2 in (5.1 cm) wide and 2 in (5.1 cm) tall
- After Row 21: 3 in (7.6 cm) tall, 3 in (7.6 cm) wide at the base, 1 in (2.5 cm) wide at the top
- After the border: 3.5 in x 3.5 in (8.9 cm x 8.9 cm)
If your piece is too big: Change to a hook 0.25 mm smaller and work another swatch.
If your piece is too small: Change to a hook 0.25 mm larger.
Don’t try to fix size by changing stitch counts. The shaping depends on these exact numbers.
Letter Body (Color A)
Each row starts with ch 1, turn. The ch 1 does not count as a stitch. Wherever a row works across a chain, count each chain as one stitch.
Leg A (keep the yarn attached)
Ch 6.
Row 1: Sc in 2nd ch from hook and in each ch across. (5 sts)
Rows 2–3: Ch 1, turn, sc in each st across. (5 sts)
Row 4: Ch 1, turn, 2 sc in first st, sc in next 2 sts, sc2tog. (5 sts)
Rows 5–6: Ch 1, turn, sc in each st across. (5 sts)
Don’t fasten off. Place a marker in the working loop. This is the left leg. The foundation tail sits at its inner edge, and the working loop sits at its outer edge.
Leg B (fasten off)
Ch 6.
Row 1: Sc in 2nd ch from hook and in each ch across. (5 sts)
Rows 2–3: Ch 1, turn, sc in each st across. (5 sts)
Row 4: Ch 1, turn, sc2tog, sc in next 2 sts, 2 sc in last st. (5 sts)
Rows 5–6: Ch 1, turn, sc in each st across. (5 sts)
Fasten off. This is the right leg. Its foundation tail sits at its outer edge.
Row 4 moves each leg one stitch toward the center: the outer edge decreases and the inner edge increases. That gives each leg its slant. Lay the legs side by side with the slants leaning toward each other and the tops level.
Joining Row and Crossbar
Row 7: Return to Leg A’s working loop. Ch 1, turn, sc in each of the 5 sts of Leg A, ch 6, then sc in each of the 5 sts of Leg B, starting at its inner edge. (16 sts: 5 + 6 ch + 5)
Row 8: Ch 1, turn, sc in each of the 5 sc, sc in each of the 6 ch, sc in each of the 5 sc. (16 sts)
Row 9: Ch 1, turn, sc2tog, sc in next 12 sts, sc2tog. (14 sts)
The 6-ch span closes the gap between the legs and forms the bottom edge of the crossbar. Rows 7–9 are the crossbar.
Triangular Opening
Work the opening by making the two side columns separately.
First column
Row 10: Ch 1, turn, sc in next 5 sts. Leave the remaining 9 sts unworked. (5 sts)
Row 11: Ch 1, turn, sc in each st across. (5 sts)
Row 12: Ch 1, turn, sc2tog, sc in next 2 sts, 2 sc in last st. (5 sts)
Row 13: Ch 1, turn, sc in each st across. (5 sts)
Don’t fasten off. Move the marker to the working loop, which is now at the outer edge.
Second column
Skip the next 4 unworked sts of Row 9. Join Color A in the next st.
Row 10: Ch 1, sc in the same st and in the next 4 sts. (5 sts)
Row 11: Ch 1, turn, sc in each st across. (5 sts)
Row 12: Ch 1, turn, 2 sc in first st, sc in next 2 sts, sc2tog. (5 sts)
Row 13: Ch 1, turn, sc in each st across. (5 sts)
Fasten off. The yarn ends at the inner edge of this column.
In Row 12, each column decreases on its outer edge and increases on its inner edge. This narrows the opening from 4 sts wide (Rows 10–11) to 2 sts wide (Rows 12–13), so it comes out as a small triangle.
Upper Body
Row 14: Return to the first column’s working loop. Ch 1, turn, sc in each of the 5 sts, ch 2, then sc in each of the 5 sts of the second column. (12 sts: 5 + 2 ch + 5)
Row 15: Ch 1, turn, sc2tog, sc in next 8 sts, sc2tog. (10 sts)
Rows 16–17: Ch 1, turn, sc in each st across. (10 sts)
Row 18: Ch 1, turn, sc2tog, sc in next 6 sts, sc2tog. (8 sts)
Row 19: Ch 1, turn, sc in each st across. (8 sts)
Row 20: Ch 1, turn, sc2tog, sc in next 4 sts, sc2tog. (6 sts)
Row 21: Ch 1, turn, sc in each st across. (6 sts)
Fasten off and weave in all Color A ends. The letter should now measure 3 in (7.6 cm) tall, 3 in (7.6 cm) at the base, and 1 in (2.5 cm) at the top.
Holly Appliqué
Leaf (make 2, Color C)
Ch 8.
Work along one side of the chain, starting in the 2nd ch from hook: sl st, sc in next ch, (hdc, picot) in next ch, dc in next ch, (hdc, picot) in next ch, sc in next ch. In the last ch, work (sc, picot, sc) for the tip.
Rotate and work along the other side of the chain: sc in next ch, (hdc, picot) in next ch, dc in next ch, (hdc, picot) in next ch, sc in next ch, sl st in the last ch.
Fasten off and leave a 6 in (15.2 cm) tail. Each leaf is about 1 in (2.5 cm) long, with two picot points on each side and one at the tip.
Berry (make 3, Color D)
Make a magic ring. Work 6 sc in the ring, pull it tight, and sl st to the first sc. Fasten off and leave a 6 in (15.2 cm) tail. Run the tail around the edge and cinch it slightly so the berry domes. Each berry is about 0.3 in (0.8 cm) across.
Border (Color B)
Border gauge: Work one sc in each stitch along top and bottom edges, and one sc in each row end along side edges. On a straight vertical edge, 7 row ends per inch would pack the border slightly tighter than the 6 sts/in gauge. The long outer sides here are slanted, though. Each one runs 3 in (7.6 cm) up and 1 in (2.5 cm) across, so it is about 3.2 in (8.1 cm) long. That puts 1 sc per row end close to your stitch gauge, so the border lies flat.
Round 1 (sc)
With the RS facing, join Color B in the first st of Row 21 (top left corner).
- Top edge: 3 sc in first st, sc in next 4 sts, 3 sc in last st. (10 sts)
- Right slanted side: Sc in each row end from Row 20 down to Row 2. (19 sts)
- Right leg bottom: Working into the foundation chain, 3 sc in first ch, sc in next 3 ch, 3 sc in last ch. (9 sts)
- Right leg inner edge: Sc in each row end from Row 2 up to Row 6. (5 sts)
- Crossbar underside: Sc in each of the 6 foundation loops of the Row 7 chain. (6 sts)
- Left leg inner edge: Sc in each row end from Row 6 down to Row 2. (5 sts)
- Left leg bottom: 3 sc in first ch, sc in next 3 ch, 3 sc in last ch. (9 sts)
- Left slanted side: Sc in each row end from Row 2 up to Row 20. (19 sts)
Sl st to the first sc. Round 1 total: 82 sts (10 + 19 + 9 + 5 + 6 + 5 + 9 + 19).
Why the math works: Row 21 and Row 1 have row ends too, but the 3-sc corner groups at the top and at each leg bottom already cover them. That’s why each slanted side runs from Row 20 to Row 2 (19 row ends), and no corner is counted twice. The two inner concave corners have no increases, so the edge stays snug against the crossbar.
Round 2 (crab stitch)
Ch 1. Do not turn. Rev sc in each st around. (82 sts) Sl st to the first rev sc and fasten off.
The crab stitch makes the raised, beaded rope edge. Together, Rounds 1 and 2 add about 0.25 in (0.6 cm) all around.
Opening Lining
Join Color B in the first of the 4 skipped sts of Row 9, inside the opening. Work:
- Sc in each of the 4 skipped sts. (4 sts)
- Sc in each row end of Rows 10–13 up one side. (4 sts)
- Sc in each of the 2 foundation loops of the Row 14 chain. (2 sts)
- Sc in each row end of Rows 13–10 down the other side. (4 sts)
Sl st to the first sc. (14 sts) Fasten off.
Hanging Loop
Find the center of the top edge: the space between the 5th and 6th of the 10 top-edge stitches from Round 1. Join Color B there, ch 8, and sl st in the same place. Work 12 sc over the ch-8 loop and sl st to the base. Fasten off. The loop stands about 0.5 in (1.3 cm) tall.
Final Blocking
- Weave in all ends except the leaf and berry tails.
- Pin the letter face up on a foam mat at 3.5 in x 3.5 in (8.9 cm x 8.9 cm).
- Check that the top edge is 1 in (2.5 cm) plus the border, and that both legs are level.
- Steam lightly without touching the iron to the yarn, or spray until damp.
- Leave it pinned until it is completely dry.
- Block the leaves flat at the same time, pinning out each picot point.
- Once everything is dry, sew the leaves onto the upper right shoulder, one angled up and one angled out toward the right edge.
- Sew the three berries in a tight cluster where the leaves meet.
- Open the jump ring with pliers, slip it through the hanging loop, and close it firmly.
Final Quality-Control Checklist
- The letter measures 3.5 in x 3.5 in (8.9 cm x 8.9 cm).
- Both legs are 5 sts wide and level at the bottom.
- The triangular opening is clear and fully lined in cream.
- Border Round 1 has 82 sts, with no gaps at the inner corners.
- The crab stitch edge is even all the way around.
- Leaves and berries are stitched down securely, with no loose points.
- The hanging loop is firm and the jump ring is fully closed.
- All ends are woven in and trimmed.
Troubleshooting
Legs lean outward instead of inward: The Row 4 increase and decrease were swapped. Rework Row 4 so the decrease sits on the outer edge.
Border ruffles along the sides: Your row gauge is looser than 7 rows per inch. Skip 1 row end every 6 rows, and keep the count the same on both sides.
Border pulls in: Your border tension is too tight. Go up 0.25 mm for the border only.
Opening looks square: Check that Row 12 moved both columns inward.
Crab stitch looks twisted or uneven: Keep each loop loose before the final yarn over.
Key ring tears the loop: Work the 12 sc firmly and anchor the ends well.
Care
Hand wash in cool water, reshape while damp, and lay flat to dry. Don’t wring it, so the leaf points stay crisp.
Final Notes
Here is the measurement chain. A gauge of 6 sc and 7 rows per 1 in (2.5 cm) gives a 3 in x 3 in (7.6 cm x 7.6 cm) letter over 21 rows. The 2-round cream border adds 0.25 in (0.6 cm) on every side, for a finished keychain of 3.5 in x 3.5 in (8.9 cm x 8.9 cm). Check each stage as you go, and the A will block flat and even.
Happy crocheting!