

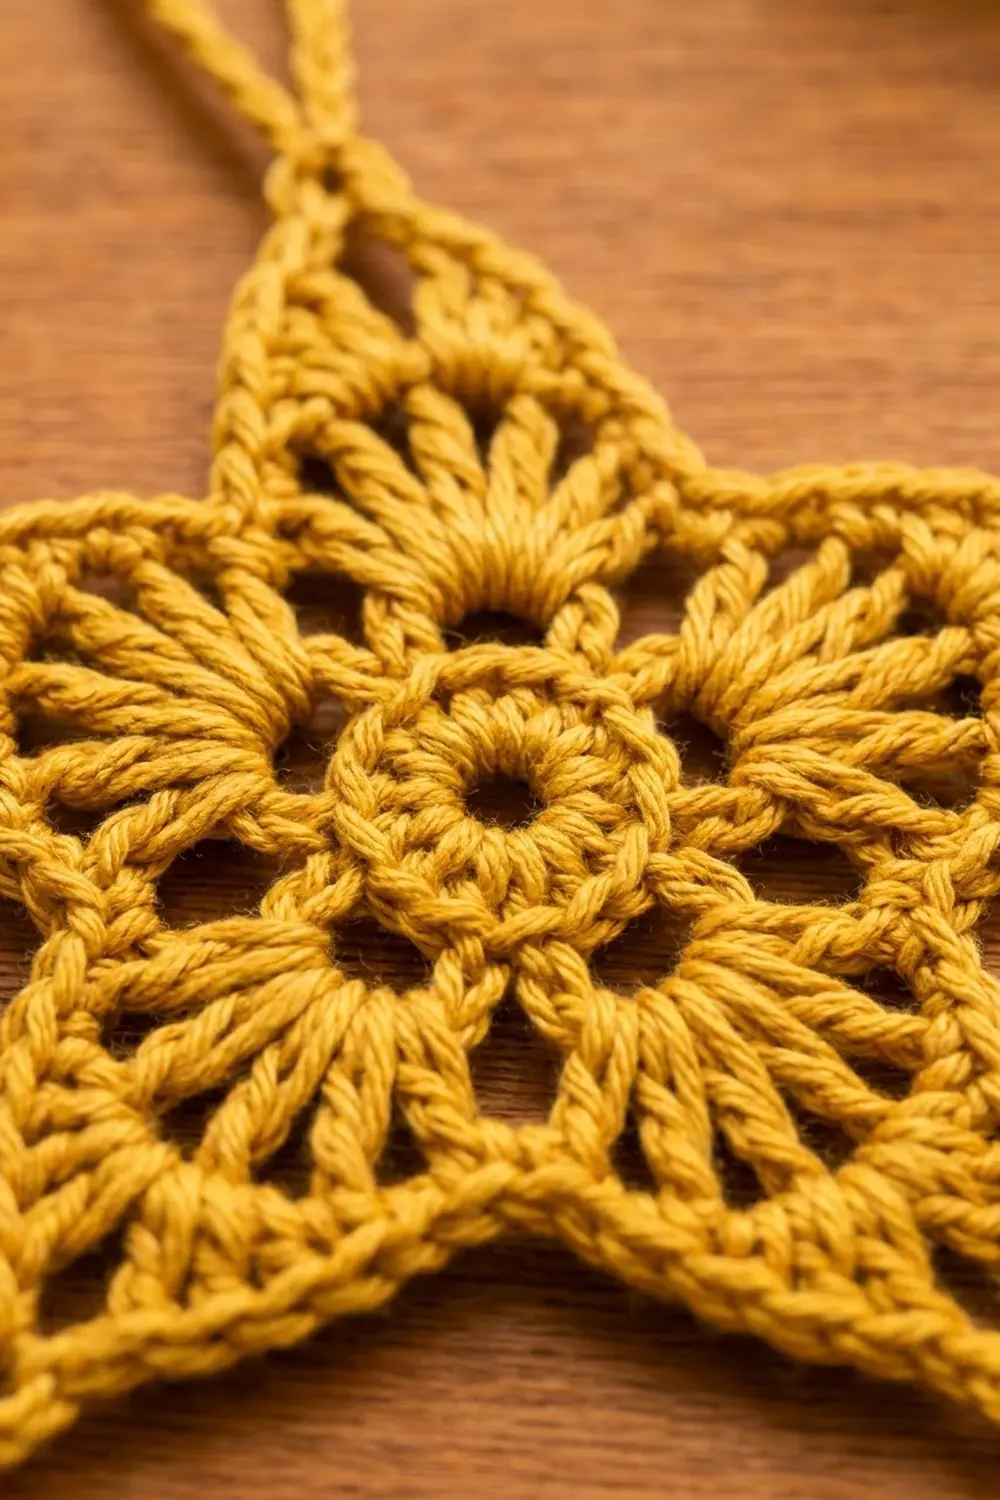
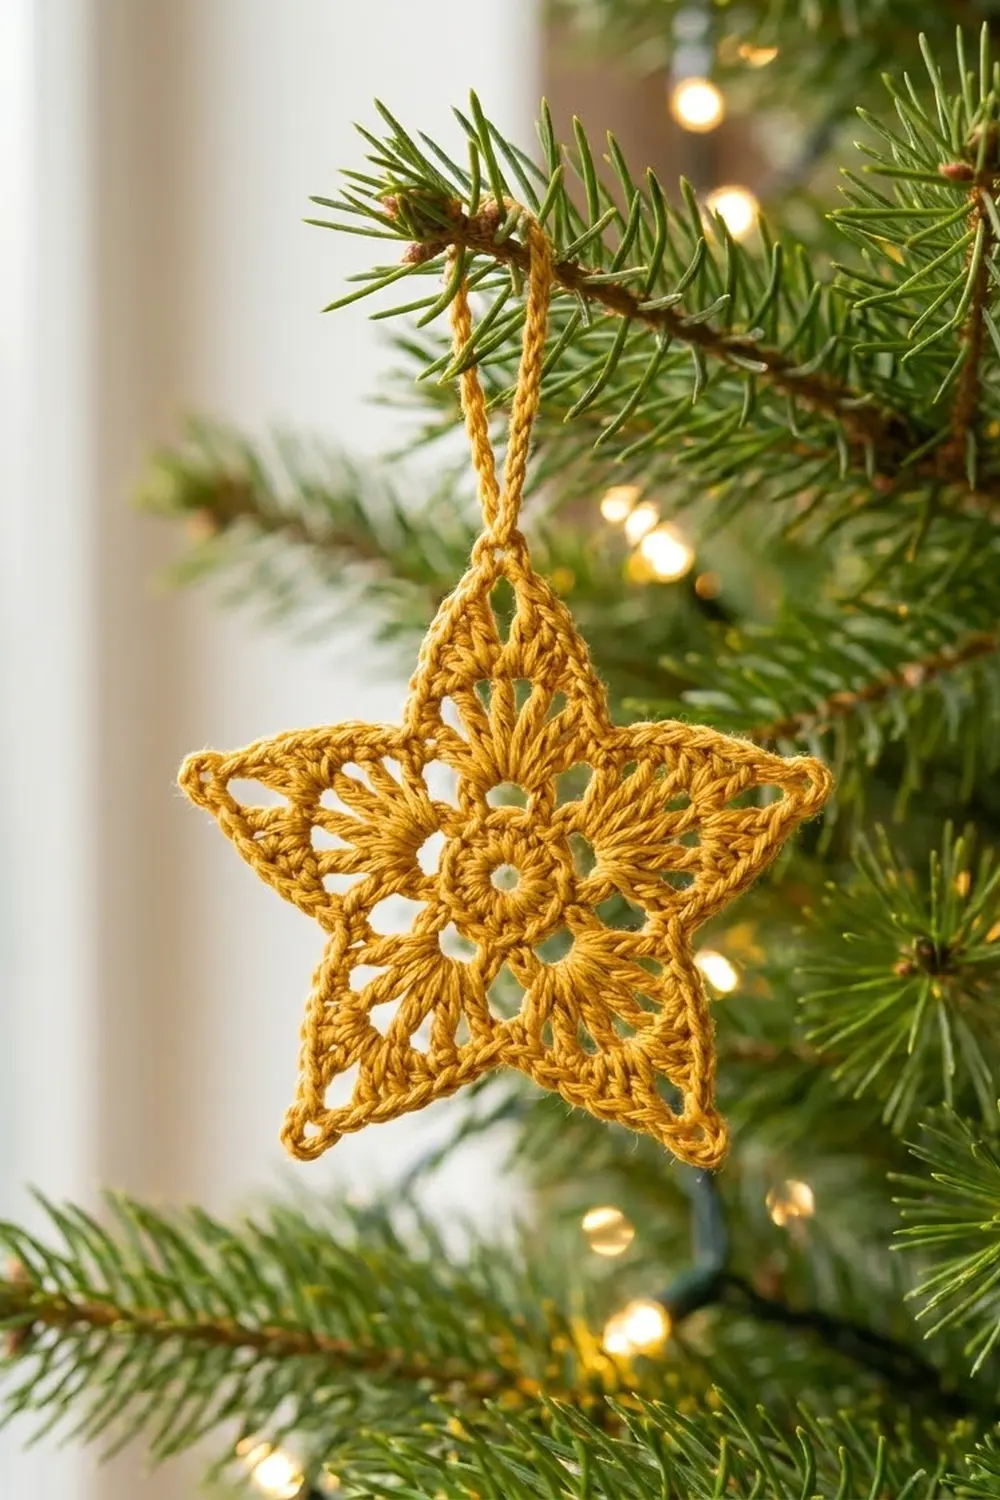
This lacy star ornament glows like a little piece of warm candlelight on the tree. A round center opens into five petal loops. Each loop is filled with a fan of tall stitches, so every point gets a radiating sunburst texture. A neat single crochet edge sharpens the outline and holds the shape.
The sample uses one color, a rich mustard gold, in smooth DK-weight cotton. The look is classic and a little vintage. It works on a tree, as a gift tag, or hung in a window. The pattern uses US crochet terms throughout.
The finished star measures 5 in (12.7 cm) across the widest points and 4.75 in (12.1 cm) tall, plus a 3 in (7.6 cm) hanging loop.
The star is one piece, worked in the round from the center out. You make a ring of double crochet, add five chain loops, fill each loop to form a point, and then work one edging round. A chain hanging loop goes on last. There is no sewing and no joining.
Finished Size and Construction
- Finished size: 5 in (12.7 cm) wide x 4.75 in (12.1 cm) tall
- Hanging loop: 3 in (7.6 cm) long when folded
- Skill level: Easy to Intermediate
- Terminology: US crochet terms
- Yarn weight: DK (light, #3)
- Hook: 3.5 mm (E-4)
- Number of pieces: 1
- Layout: one single star motif, no assembly
- Piece size: 5 in x 4.75 in (12.7 cm x 12.1 cm)
- Size before border: 4.75 in x 4.5 in (12.1 cm x 11.4 cm)
- Border depth: about 1/8 in (0.3 cm) on each edge
Materials
Yarn: Use a smooth, tightly plied DK cotton or cotton blend. Mercerized cotton gives the crispest points and the clearest stitch definition. It also holds a blocked shape better than acrylic. Avoid fuzzy or loosely spun yarns, because they blur the sunburst texture.
- Mustard gold: 15 g, about 36 m (39 yd)
The quantity includes a comfortable margin for a gauge swatch, the hanging loop, and weaving in ends. One star uses about 11 g.
Tools:
– 3.5 mm (E-4) crochet hook
– Tapestry needle
– Scissors
– Stitch marker
– Blocking mat and rust-proof pins
– Spray bottle with water
– Optional: fabric stiffener or a light starch spray
Abbreviations (US Terms)
- ch – chain
- sl st – slip stitch
- sc – single crochet
- hdc – half double crochet
- dc – double crochet
- tr – treble crochet
- sc2tog – single crochet 2 together
- sp – space
- st(s) – stitch(es)
- rep – repeat
Special stitch: sc2tog across a valley. Insert the hook in the next stitch, yarn over, and pull up a loop. Skip the slip stitch at the valley. Insert the hook in the following stitch, yarn over, and pull up a loop. Yarn over and pull through all 3 loops on the hook. This draws the inner corner of the star in neatly.
Gauge and Checkpoints
The star is the gauge swatch. Make one, measure it at each checkpoint, and adjust the hook before you make a set.
- After Round 1: the dc ring measures 1 in (2.5 cm) across, outer edge to outer edge.
- After Round 2: with the loops laid flat like petals, the flower measures about 3.5 in (8.9 cm) across.
- After Round 3: the unbordered star measures 4.75 in (12.1 cm) wide x 4.5 in (11.4 cm) tall.
- After Round 4: the finished star measures 5 in (12.7 cm) wide x 4.75 in (12.1 cm) tall.
Border gauge: about 6 sc = 1 in (2.5 cm) along the edge. Each star edge from valley to tip holds 11 sc and measures about 1.75 in (4.4 cm).
If your Round 1 ring is more than 1/8 in (0.3 cm) bigger than the checkpoint, go down to a 3.25 mm hook. If it is more than 1/8 in (0.3 cm) smaller, go up to a 3.75 mm hook. Small differences in the center grow across the star, so fix them early.
Star Pattern
Round 1: Center Ring
Make a magic ring.
Ch 3 (counts as the first dc). Work 14 dc into the ring. Pull the ring closed, leaving a small open hole in the center about 3/8 in (1.0 cm) across. Join with a sl st to the top of the beginning ch-3.
Stitch count: 15 dc.
Don’t pull the ring completely shut. The open center hole is part of the design.
Round 2: Petal Loops
This round uses the 15 dc in five groups of 3 stitches. Each group makes one chain loop and one valley stitch.
Ch 1. Sc in the same st as the join, ch 12, sc in the next st, sc in the next st.
*Sc in the next st, ch 12, sc in the next st, sc in the next st. Rep from * 3 more times.
Join with a sl st to the first sc.
Stitch count: 15 sc and 5 ch-12 loops.
Each repeat has three sc: the loop starts from the first, the loop ends at the second, and the third sits alone between petals. That third sc is the valley sc. The star’s inner corners form there in the next round.
Let the loops lie flat around the ring like five petals. They should not twist. If one twists, undo it and chain again more loosely.
Round 3: Sunburst Points
Each ch-12 loop becomes one point of the star. Work all stitches into the loop space, over the chain, not into individual chains. This lets the tall stitches fan out evenly.
Sl st into the first ch-12 loop.
Each point, worked into one ch-12 loop:
2 sc, 2 hdc, 3 dc, 3 tr, ch 3, 3 tr, 3 dc, 2 hdc, 2 sc.
That is 20 stitches plus one ch-3 tip per point: 10 stitches before the tip and 10 after.
After finishing the point, skip the sc that anchors the end of the loop. Sl st in the valley sc. Skip the sc that starts the next loop and go straight into the next ch-12 loop.
Rep the point and valley sl st 4 more times. The last sl st goes into the final valley sc, which closes the round.
Stitch count: 100 stitches (5 points x 20), 5 ch-3 tips, and 5 valley sl sts.
As you work, push the stitches together along the loop so they cover the chain completely. The tr stitches near the tip spread outward and form the sunburst rays. The shorter stitches at each end hug the center ring. Check the size against the Round 3 checkpoint.
Round 4: Edging (Border)
See the Border section below for the full round, counts, and math.
Hanging Loop
After Round 4, fasten off and weave in the tail. Choose the top point. Join the yarn with a sl st in that point’s ch-2 tip space.
Ch 30. Sl st in the same ch-2 space. Fasten off, leaving a 6 in (15.2 cm) tail. Thread the tail onto the needle, pass it through the base of the loop twice to secure it, and weave it in along the edge.
The ch-30 makes a loop about 3 in (7.6 cm) long when folded.
Border
The border is a single round of sc that firms the outline, sharpens the tips, and pulls in the valleys.
Border gauge: about 6 sc = 1 in (2.5 cm) along the edge.
In Round 3, number the 20 stitches of each point 1 through 20. Stitches 1–10 come before the ch-3 tip and stitches 11–20 come after it.
Round 4:
Sl st in stitch 1 of the first point. Ch 1. Sc in stitch 2 (place a marker in this sc), then sc in stitches 3–10. That is 9 sc.
Work (2 sc, ch 2, 2 sc) in the ch-3 tip. Sc in stitches 11–19 (9 sc). Sc2tog over stitch 20 of this point and stitch 1 of the next point, skipping the valley sl st between them. Sc in stitches 2–10 of the next point (9 sc). Rep from * 3 more times.
For the fifth point: work (2 sc, ch 2, 2 sc) in the ch-3 tip, sc in stitches 11–19 (9 sc), then sc2tog over stitch 20 of this point and stitch 1 of the first point. Stitch 1 of the first point already holds the opening sl st, so work through it.
Join with a sl st to the marked first sc.
Counts per point: 9 sc + 4 sc at the tip + 9 sc + 1 sc2tog = 23 stitches, plus 1 ch-2 tip.
Counts per side: Each star has 10 sides, two per point, running from valley to tip. Each side has 9 sc + 2 tip sc = 11 sc. The sc2tog sits in the valley and is shared by two sides, so it is counted separately.
Round total: 10 sides x 11 sc = 110 sc, plus 5 valley sc2tog = 115 stitches and 5 ch-2 tips.
Why the math works: Each point in Round 3 has 20 stitches. Round 4 uses all 20: stitch 1 and stitch 20 go into the sc2tog stitches, stitches 2–10 and 11–19 each get 9 sc, and the tip adds 4 extra sc. That gives 20 stitches worked 1-for-1 (with stitches 1 and 20 combined into the shared sc2tog), plus 4 extra stitches at the tip. Per point that is 18 sc + 4 tip sc + 1 sc2tog = 23. Five points x 23 = 115, which matches 110 side sc + 5 sc2tog.
The extra tip stitches let the edge turn sharply outward. The sc2tog at each valley removes 1 stitch so the inner corner pulls in cleanly instead of rippling. Eleven sc at about 6 sc per inch gives a side length of about 1.75 in (4.4 cm). That matches the 5 in (12.7 cm) finished width.
Final Blocking
- Weave in all ends before blocking, except the hanging loop tail if you plan to adjust it.
- Spray the star evenly with water until it is damp all the way through, but not dripping.
- Lay it on the blocking mat. Gently open the center hole with your fingertip.
- Pin the top point first, then the four other points, spacing them evenly. Pull each ch-2 tip into a sharp point.
- Measure: 5 in (12.7 cm) across the widest points and 4.75 in (12.1 cm) from the top tip to the bottom tips.
- Push each valley gently toward the center and pin it. All five valleys should sit at the same distance from the center ring.
- Smooth the sunburst stitches with your fingers so they radiate straight out from the center.
- For a stiffer ornament, brush on a light coat of fabric stiffener or spray starch now.
- Let it dry completely, usually 6–12 hours, before unpinning.
- Lay the hanging loop out straight while the star dries so it doesn’t kink.
Final Quality-Control Checklist
- Center hole is open, round, and about 3/8 in (1.0 cm) across.
- Round 1 has 15 dc and measures 1 in (2.5 cm) across.
- Round 2 has 5 even loops of 12 chains, with no twists.
- Each point in Round 3 has 20 stitches plus a ch-3 tip.
- Round 4 has 115 stitches: 11 sc on each of 10 sides plus 5 valley sc2tog.
- All 5 tips are sharp and the same length.
- All 5 valleys are drawn in evenly.
- Finished star is 5 in (12.7 cm) wide x 4.75 in (12.1 cm) tall.
- Hanging loop is 3 in (7.6 cm) long and firmly attached to the top point.
- All ends are woven in securely and hidden on the back.
Troubleshooting
Points are different lengths. The ch-12 loops in Round 2 were probably uneven. Count the chains in each loop, and keep the chain tension the same for all five.
The star cups or curls upward. The Round 3 stitches are too tight for the loops. Go up a hook size for Round 3 only, or make the loops ch 13.
Points ruffle or wave. There are too many stitches for the loop length, or your tension is loose. Go down a hook size for Round 3.
Valleys look gappy. You may have missed the sc2tog in Round 4, or worked it without skipping the sl st. Redo the valley with the sc2tog worked exactly as written.
Tips look rounded. Pull the ch-2 tips firmly when blocking, and use stiffener. Make sure you worked all 4 sc into the tip space.
Stitch count is off in Round 4. Use your numbering. Each point should have 9 sc on each side of the tip. Recount one point at a time.
Center hole closed up. The magic ring was pulled too tight. Next time, leave about 3/8 in (1.0 cm) open before joining.
Care
Hand wash in cool water with a mild soap, press out the water in a towel, and re-block flat to dry. If you used stiffener, reapply it after washing.
Final Notes
The measurement chain is simple, and every stage builds on the one before it. A 1 in (2.5 cm) center ring of 15 dc grows into a 3.5 in (8.9 cm) flower of five ch-12 loops. Filling those loops with 20 stitches each gives a 4.75 in x 4.5 in (12.1 cm x 11.4 cm) star. The 115-stitch edging adds about 1/8 in (0.3 cm) on each edge, so the finished size is 5 in x 4.75 in (12.7 cm x 12.1 cm). If each checkpoint matches, the finished star will too.
Make one in gold for a classic look, or try white or silver for a frosty set. Each star takes less than an hour once you know the rhythm.
Happy crocheting!