
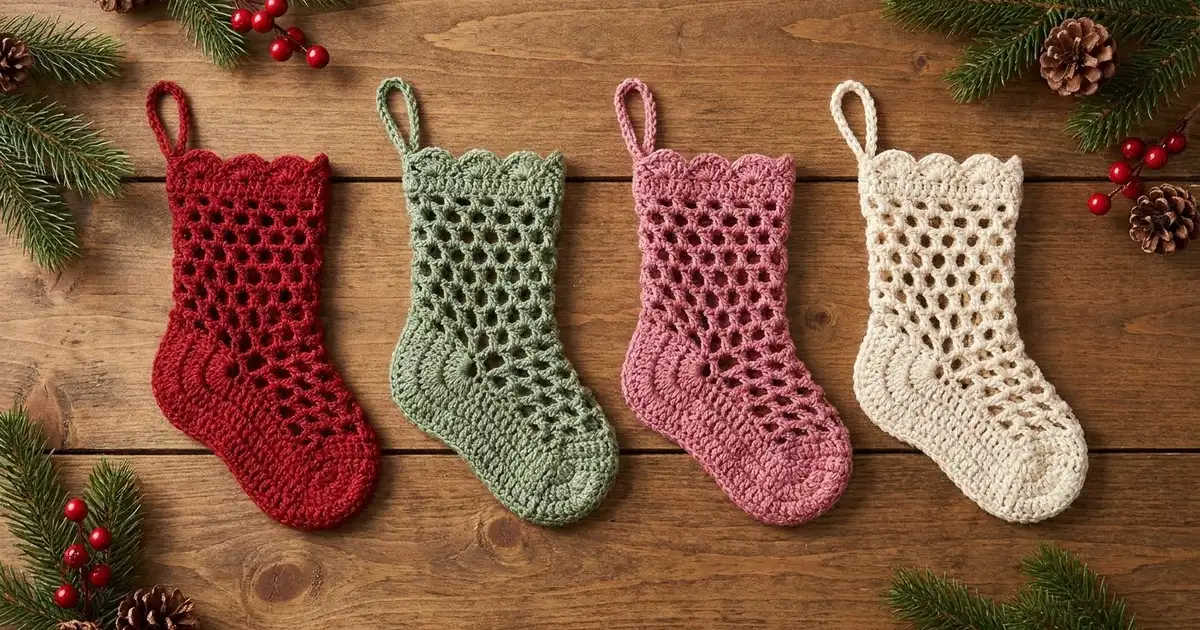
This little stocking is a quick, lacy ornament. It has a solid sole, a fanned heel, an open net leg and a scalloped cuff. It lies flat, so it works well on a tree, a gift tag or a garland hook.
The sample is cranberry red cotton. It also looks lovely in sage green, rose pink and cream, so you can make a small set in different colors. Each ornament is a separate, single piece.
The pattern uses US crochet terms. The finished stocking measures 3.75 in (9.5 cm) wide by 4.5 in (11.4 cm) tall, plus a 1.5 in (3.8 cm) hanging loop.
You work it flat in rows from the sole up. Row 1 makes the sole. Row 2 sets up the net and the heel fan. Rows 3–7 build the open leg, and Rows 8–11 make the cuff and scallops. One round of single crochet edging finishes the sides and sole, then you add the hanging loop.
Finished Size and Construction
- Finished size: 3.75 in (9.5 cm) wide × 4.5 in (11.4 cm) tall, not counting the loop
- Skill level: Easy / advanced beginner
- Terminology: US crochet terms
- Yarn weight: Sport (#2) cotton
- Hook: 3.25 mm (US D/3)
- Number of pieces: 1
- Layout: Single flat stocking, toe pointing left, heel on the right
- Piece size before edging: 3.5 in (8.9 cm) wide × 4.375 in (11.1 cm) tall
- Edging depth: 0.125 in (0.3 cm) on each side and along the sole
- Hanging loop: 1.5 in (3.8 cm) tall when folded
Materials
Yarn: Use a smooth, mercerized or combed sport-weight cotton. Cotton keeps the mesh crisp and holds its shape after blocking. Acrylic will work, but the net will look softer and rounder.
- Main color (cranberry red): 10 g / about 30 m (33 yd)
- Optional alternate colors: sage green, rose pink or cream, 10 g / about 30 m (33 yd) per ornament
These quantities include a margin for your gauge swatch and yarn tails. One ornament uses about 7 g.
Tools:
– 3.25 mm (US D/3) crochet hook
– Tapestry needle
– Scissors
– Rustproof pins and a blocking mat or folded towel
– Spray bottle with water
– Optional: spray starch for an extra-crisp finish
Abbreviations (US Terms)
- ch – chain
- sl st – slip stitch
- sc – single crochet
- dc – double crochet
- tr – treble crochet
- sk – skip
- st(s) – stitch(es)
- lp(s) – loop(s)
- sp – space
- tch – turning chain
- RS / WS – right side / wrong side
Special stitches:
– Shell: 5 dc in the same stitch.
– Heel fan: 7 tr in the same stitch.
Gauge and Checkpoints
Gauge: 6 dc = 1 in (2.5 cm), and 12 dc = 2 in (5.1 cm).
Before you start, crochet one full stocking as your test piece. The ornament is small, so a full test tells you more than a swatch. Measure at each checkpoint:
- After Row 1: The sole measures 3.5 in (8.9 cm) across.
- After Row 2: The piece is 1 in (2.5 cm) tall at the top of the heel fan.
- After Row 7: The piece is 3 in (7.6 cm) tall, and the mesh leg is about 3.25 in (8.3 cm) wide.
- After Row 10: The piece is 4 in (10.2 cm) tall.
- After Row 11: The piece is 4.375 in (11.1 cm) tall and 3.5 in (8.9 cm) wide.
- After edging: The stocking is 3.75 in (9.5 cm) × 4.5 in (11.4 cm).
If it is too big, change to a 3.0 mm hook or crochet your chains a little tighter. If it is too small, change to a 3.5 mm hook. If only the leg is off, adjust the size of your ch-5 loops rather than changing the hook for the whole piece.
Pattern
Sole
Foundation: Ch 20.
Row 1 (RS): Work 2 dc in the 4th ch from the hook. The skipped 3 ch count as 1 dc, so this makes 3 sts. Dc in each of the next 15 ch, then work 3 dc in the last ch. Turn.
(21 sts)
The 3 sts in each end chain flare the sole so the toe and heel come out rounded.
Heel Fan and Net Foundation
Row 2 (WS): Ch 1. Sc in the first dc, then [ch 5, sk 3 dc, sc in the next dc] 4 times. You now have sc in sts 1, 5, 9, 13 and 17.
To make the heel: sk 1 dc, work 7 tr in the next dc (st 19), sk 1 dc, then sc in the top of the tch (st 21). Turn.
(6 sc, 4 ch-5 lps, 1 heel fan of 7 tr)
The fan sits at the right-hand (heel) end of the foot when you look at the RS.
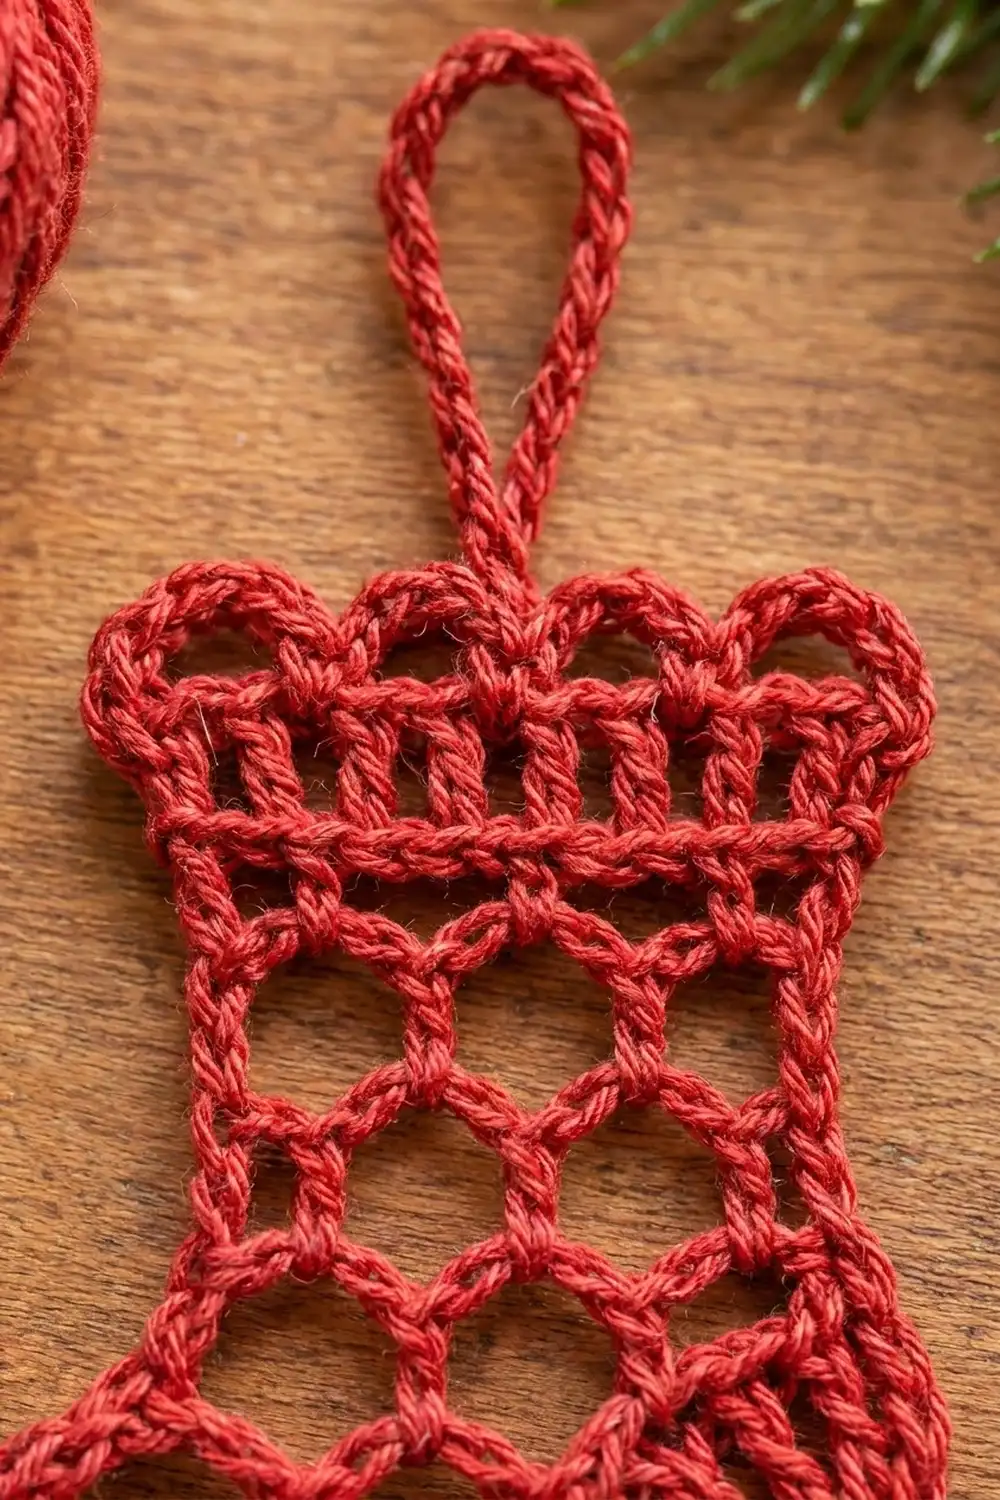
Mesh Leg
Row 3 (RS): Sl st in the first sc and in each of the next 4 tr. That is 5 sl sts, and you end in the center tr of the fan. Next, [ch 5, sc in the next ch-5 lp] 4 times. Ch 2, then dc in the last sc. Turn.
(4 ch-5 lps, 4 sc, 1 ch-2 sp, 1 dc)
The sl sts move the leg in to the center of the fan. This leaves the outer half of the fan sticking out as the heel. The ch-2 and dc at the end square off the toe-side edge.
Row 4 (WS): Ch 1. Sc in the first dc, then [ch 5, sc in the next ch-5 lp] 4 times. Ch 2, then dc in the center tr of the fan, where the last Row 3 sl st sits. Turn.
(5 sc, 4 ch-5 lps, 1 ch-2 sp, 1 dc)
Rows 5–7: Ch 1. Sc in the first dc, then [ch 5, sc in the next ch-5 lp] 4 times. Ch 2, then dc in the last sc. Turn.
(5 sc, 4 ch-5 lps, 1 ch-2 sp, 1 dc in each row)
Each new row sits its sc in the middle of the loops below. This offset is what makes the rounded hexagon holes. Rows 3, 5 and 7 end on the toe side, and Rows 4 and 6 end on the heel side. That gives you a dc post on alternating edges.
Checkpoint: 3 in (7.6 cm) tall.
Cuff
Row 8 (WS, conversion row): Ch 3 (counts as dc). Work 3 dc in the ch-2 sp, then dc in the next sc. Then [3 dc in the next ch-5 lp, dc in the next sc] 4 times. Turn.
Count: 6 sts worked into existing sts (the starting dc plus 5 sc) + 15 sts added in spaces (3 in the ch-2 sp + 3 in each of the 4 lps) = 21 sts.
Row 9 (RS): Ch 1. Sc in each st across. Turn.
(21 sc)
Row 10 (WS): Ch 3 (counts as dc). Dc in each st across. Turn.
(21 sts)
Checkpoint: 4 in (10.2 cm) tall.
Scalloped Top
Row 11 (RS): Ch 1. Sc in the first dc, then [sk 1 st, shell in the next st, sk 1 st, sc in the next st] 5 times. The last sc goes in the top of the tch. Do not fasten off.
(6 sc, 5 shells = 31 sts in total)
Shells sit in sts 3, 7, 11, 15 and 19, and the sc sit in sts 1, 5, 9, 13, 17 and 21. Twenty-one sts is a multiple of 4 plus 1, so all five scallops fit exactly.
Checkpoint: 4.375 in (11.1 cm) tall × 3.5 in (8.9 cm) wide.
Edging
Edging gauge: 1 sc for each sc row end, 2 sc for each dc row end, and 3 sc around each dc post in the mesh.
You will now be at the top-left (toe side) corner. Do not turn. Rotate the piece to work down the toe side.
Edging round: Ch 1, then work all of the following.
Toe side (top to bottom):
– 2 sc around the Row 10 tch
– 1 sc in the end of Row 9
– 2 sc around the Row 8 tch
– 3 sc around the Row 7 dc
– 1 sc in the end of Row 6
– 3 sc around the Row 5 dc
– 1 sc in the end of Row 4
– 3 sc around the Row 3 dc
– 1 sc in the end of Row 2
– 2 sc around the last dc of Row 1
Toe side total: 19 sc
Sole (along the foundation chain, toe to heel):
– 3 sc in the last foundation ch (the toe corner)
– 1 sc in each of the next 15 ch
– 3 sc in the 4th ch from the start (the heel corner)
Sole total: 21 sc
Heel side (bottom to top):
– 2 sc around the Row 1 tch
– 1 sc in the Row 2 end sc
– 2 sc in each of the next 3 sl sts on top of the fan
– 1 sc in the center fan sl st
– 3 sc around the Row 4 dc
– 1 sc in the end of Row 5
– 3 sc around the Row 6 dc
– 1 sc in the end of Row 7
– 2 sc around the last dc of Row 8
– 1 sc in the end of Row 9
– 2 sc around the last dc of Row 10
Heel side total: 23 sc
Sl st in the first sc of Row 11 to join, then fasten off.
Round total: 19 + 21 + 23 = 63 sc
Why the math works: Each edging stitch is matched to the height of the row it covers. A dc row is about twice as tall as a sc, so it gets 2 sc. A mesh row is taller because of the arching ch-5 loops, so its dc post gets 3 sc. The three corners get 3 sc because Row 1 put 3 dc into each end chain. The 2-sc increases over the fan let the edging follow its curve. Matching stitches to height like this keeps the edges flat with no ruffling or cupping. Each edge grows by only 0.125 in (0.3 cm), which takes the piece from 3.5 in (8.9 cm) to 3.75 in (9.5 cm) wide and from 4.375 in (11.1 cm) to 4.5 in (11.4 cm) tall.
Hanging Loop
With the RS facing, join the yarn with a sl st in the 3rd dc of the center (3rd) shell. Ch 24, sl st in the same st, and fasten off. The loop folds to about 1.5 in (3.8 cm) tall.
Weave in all ends along the edging, not through the mesh, so the holes stay clean.
Final Blocking
- Wet the stocking or spray it until it is damp all the way through.
- Lay it RS up on your blocking mat with the toe pointing left.
- Pin the sole straight to 3.75 in (9.5 cm) across the widest point.
- Pin each of the five scallops into a neat round bump.
- Open each mesh hole with a fingertip and pin the sides so the leg is about 3.25 in (8.3 cm) wide plus edging.
- Smooth the heel fan into an even curve.
- Check that the height is 4.5 in (11.4 cm), not counting the loop.
- For a firm ornament, mist it lightly with spray starch.
- Let it dry completely before you unpin it.
Final Quality-Control Checklist
- Row 1 has 21 sts.
- Row 2 has 6 sc, 4 loops and a 7-tr fan.
- Each mesh row has 4 full ch-5 loops and 1 ch-2 half loop.
- Rows 8–10 each have 21 sts.
- There are exactly five shells, all evenly spaced.
- The edging totals 63 sc (19 + 21 + 23).
- The piece measures 3.75 in (9.5 cm) × 4.5 in (11.4 cm).
- The loop is centered over the middle shell.
- All ends are hidden in solid stitches.
Troubleshooting
- The leg leans or twists: Make sure each sc goes into the center of a loop, not into the chain next to it.
- The heel fan cups: Your tr are too tight. Loosen your yarn-overs, or use a 3.5 mm hook for the fan only.
- The cuff ruffles: Recount Row 8. It should have 3 dc per loop, not 4.
- The scallops don’t fit: Row 10 must have exactly 21 sts. Count the tch as a stitch.
- The edging waves: You may have put 3 sc around a dc row end in the cuff. Use 2 there.
- The holes look closed: Block more firmly and pin each hole open.
Care
Hand wash in cool water, press the water out in a towel, and lay it flat to dry. Re-starch if needed to restore its crisp shape.

Final Notes
The measurements build on each other in this order:
- The 21-st sole sets the 3.5 in (8.9 cm) width.
- The heel fan brings the piece to 1 in (2.5 cm) tall.
- Five mesh rows bring it to 3 in (7.6 cm).
- The conversion row puts the count back at 21 sts.
- The cuff reaches 4 in (10.2 cm), and the scallops bring it to 4.375 in (11.1 cm).
- The 63-sc edging finishes the stocking at 3.75 in (9.5 cm) × 4.5 in (11.4 cm).
If you hit each checkpoint, you’ll end up with a neat, lacy ornament ready for the tree.
Happy crocheting!