

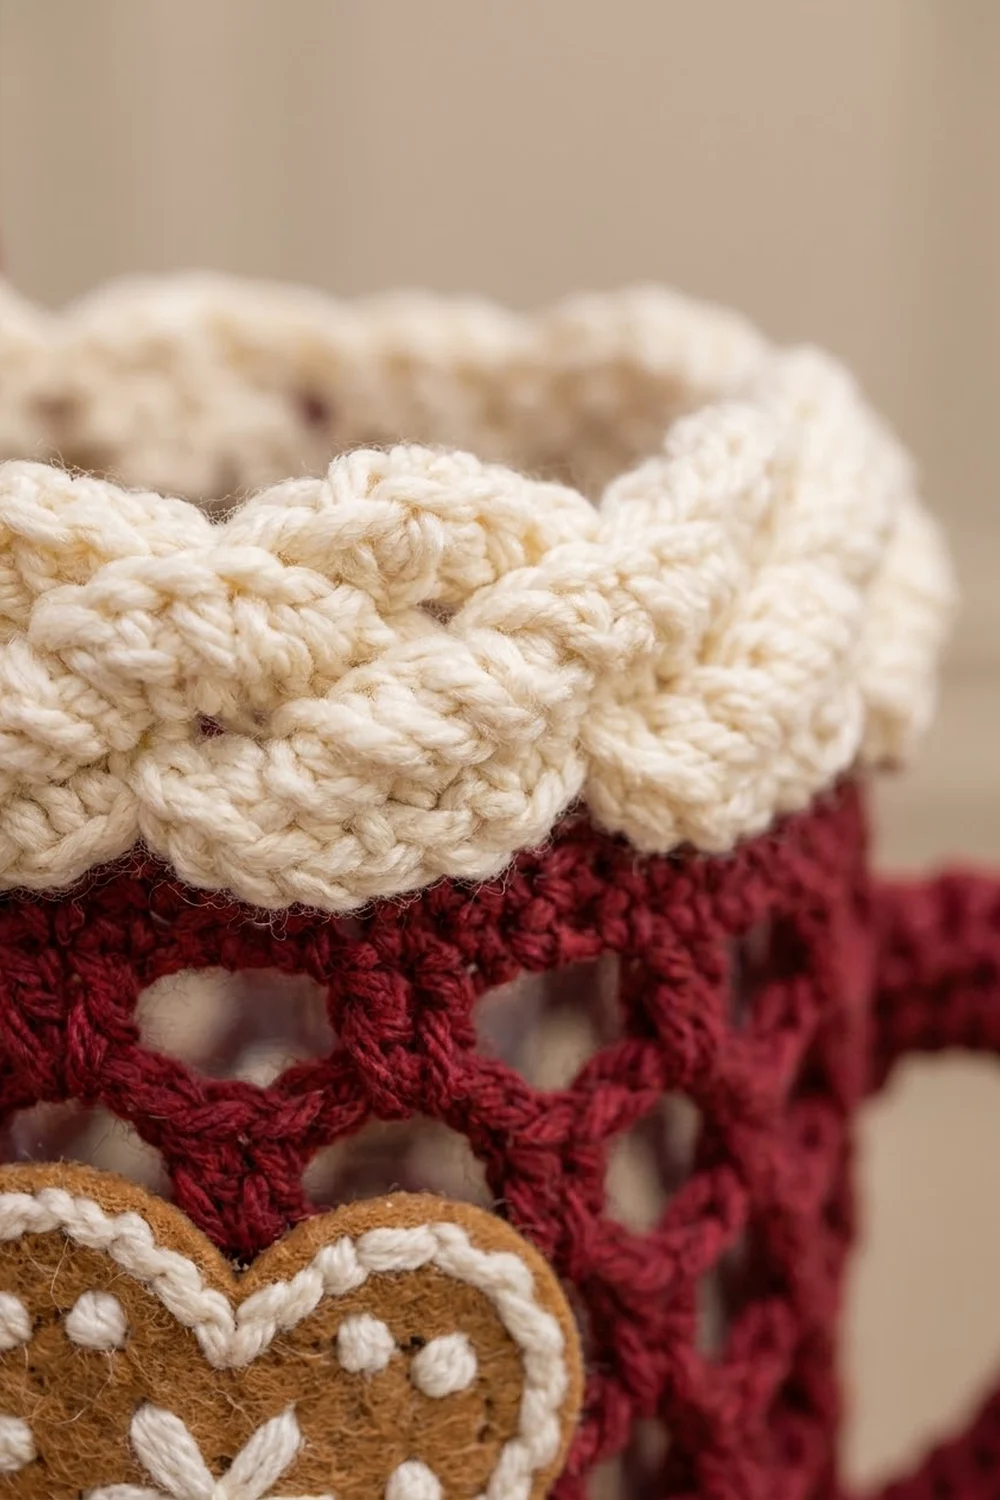
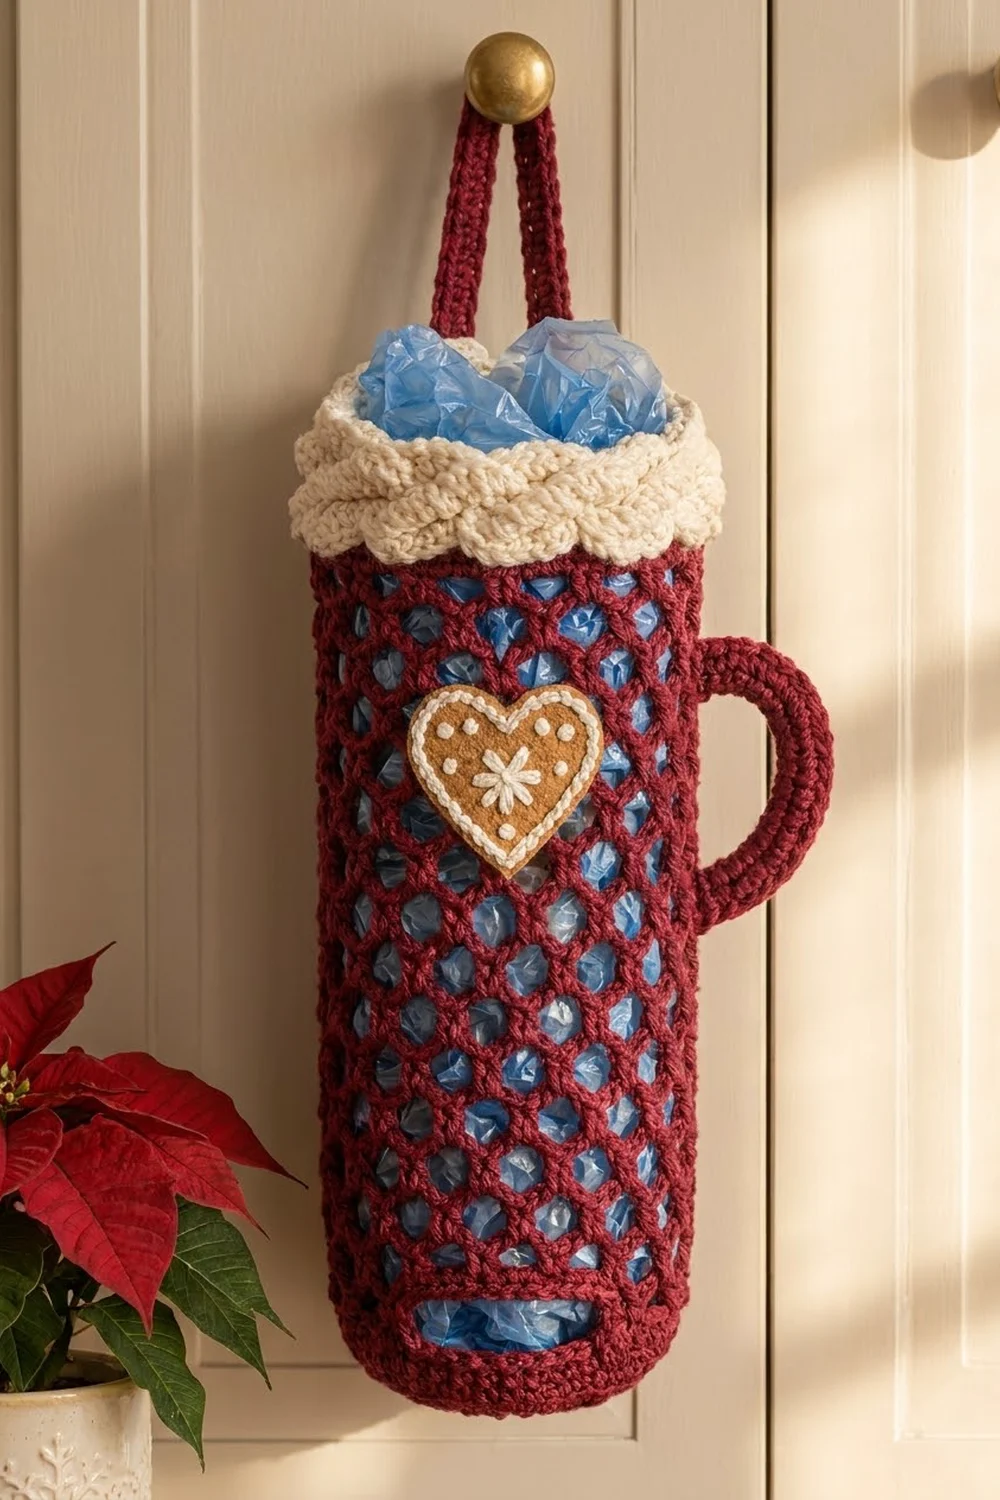
This holder is a tall cocoa mug that keeps plastic grocery bags tidy all season. The body is a cranberry diamond mesh with a solid base and a pull-out slot near the bottom. A thick cream cuff with a braid and scalloped edges looks like whipped cream on top. A small gingerbread heart decorates the front.
The colors are cranberry (deep burgundy), cream, a warm gingerbread tan, and a little white for the icing. The style is cozy and festive without being loud. It also works in sage green with the same cream cuff.
The pattern uses US crochet terms throughout. The finished holder measures about 4.75 in (12.1 cm) across and 12 in (30.5 cm) tall. The hanging loop adds about 6 in (15.2 cm), for a hanging length of about 18 in (45.7 cm).
Here is how it is built. You work the base and body in joined rounds from the bottom up: a flat circle, a solid band with the dispensing slot, the mesh, and a solid top band. Then you join cream and work the cuff and both scalloped edges. Last, you make the handle, strap, and heart separately and sew them on.
Finished Size and Construction
- Finished size: 4.75 in (12.1 cm) diameter × 12 in (30.5 cm) tall, plus a 6 in (15.2 cm) loop
- Skill level: Intermediate (front-post cables, working in rounds)
- Terminology: US
- Yarn weight: Worsted (#4), cotton or cotton blend
- Hook: 5.0 mm (H-8)
- Number of pieces: 1 body plus 3 small attached parts (handle, strap, heart)
- Layout: Single upright cylinder; heart centered on the front, handle on the right side, strap at the back
- Body size before cuff: 4.75 in (12.1 cm) diameter × 9 in (22.9 cm) tall
- Cuff (“border”) depth: 3 in (7.6 cm), including scallops
Materials
Use a smooth worsted-weight cotton or cotton blend. Cotton holds its shape well and the mesh won’t sag under the weight of the bags. Avoid fuzzy yarns, because they hide the cable braid.
- Cranberry (Color A): 100 g / 170 m, for the body, handle, and strap
- Cream (Color B): 50 g / 85 m, for the cuff and scallops
- Gingerbread tan (Color C): 6 g / 10 m, for the heart
- White (Color D): 3 g / 5 m, for the embroidered icing
All quantities include a small safety margin.
Tools
– 5.0 mm (H-8) crochet hook
– Tapestry needle
– 2 stitch markers
– Scissors
– Measuring tape
– Pins and a spray bottle for blocking
– A tall jar, bottle, or rolled towel about 4.75 in (12.1 cm) across, for shaping
Abbreviations (US Terms)
- ch – chain
- sl st – slip stitch
- sc – single crochet
- hdc – half double crochet
- dc – double crochet
- tr – treble crochet
- fptr – front post treble crochet
- BLO / FLO – back loop only / front loop only
- MR – magic ring
- sk – skip
- sp – space
- st(s) – stitch(es)
Special stitch – Cross4 (4-stitch cable): Skip the next 2 sts. Fptr around each of the next 2 sts. Then, working in front of the 2 stitches you just made, fptr around each of the 2 skipped sts. This uses 4 sts and makes 4 sts.
Gauge and Checkpoints
Sc gauge: 16 sts and 19 rounds = 4 in (10.2 cm).
Mesh gauge: 4 mesh rounds = 2 in (5.1 cm) tall.
Work the base first and use it as your swatch. Check it before going on:
- After Round 10 (base): 60 sts, a flat circle about 4.75 in (12.1 cm) across.
- After Round 16 (solid band): the wall is about 1.25 in (3.2 cm) tall.
- After Round 20 (4 mesh rounds): the mesh is about 2 in (5.1 cm) tall.
- After Round 33: the burgundy body is about 9 in (22.9 cm) tall.
If the base is too big, go down one hook size. If it is too small, go up one size. If the base curls up like a bowl, your tension is tight. If it ruffles, your tension is loose.
Body (Color A)
Work in joined rounds. Start every round with ch 1 (it doesn’t count as a stitch) and join with a sl st to the first sc unless stated otherwise. Place a marker in the first stitch of each round.
Base (growth rounds)
- Rnd 1: In a MR, work 6 sc. (6 sts)
- Rnd 2: 2 sc in each st around. (12 sts)
- Rnd 3: Sc 1, 2 sc in next; repeat around. (18 sts)
- Rnd 4: Sc 2, 2 sc in next; repeat around. (24 sts)
- Rnd 5: Sc 3, 2 sc in next; repeat around. (30 sts)
- Rnd 6: Sc 4, 2 sc in next; repeat around. (36 sts)
- Rnd 7: Sc 5, 2 sc in next; repeat around. (42 sts)
- Rnd 8: Sc 6, 2 sc in next; repeat around. (48 sts)
- Rnd 9: Sc 7, 2 sc in next; repeat around. (54 sts)
- Rnd 10: Sc 8, 2 sc in next; repeat around. (60 sts)
Checkpoint: 4.75 in (12.1 cm) across, with a circumference of 15 in (38.1 cm).
Solid band with dispensing slot
- Rnd 11: Sc in BLO of each st around. This turns the edge up into a crisp base. (60 sts)
- Rnd 12: Sc in each st around. (60 sts)
- Rnd 13 (slot): Sc 23, ch 14, sk 14, sc 23. (46 sc + 14 ch = 60)
- Rnd 14 (conversion): Sc in each of the 23 sc, sc in each of the 14 ch, sc in each of the 23 sc. (46 sc worked into sc + 14 sc worked into chains = 60)
- Rnds 15–16: Sc in each st around. (60 sts)
The slot is 3.5 in (8.9 cm) wide and centered on stitch 30. That spot marks the center front. Stitch 1 (the round join) marks the center back. Checkpoint: the wall is about 1.25 in (3.2 cm) tall.
Diamond mesh
- Rnd 17 (conversion): Ch 1, sc in first st, [ch 5, sk 2, sc in next] 19 times, ch 2, sk last 2 sts, dc in first sc. The ch 2 plus dc counts as the 20th loop and ends at the center of that loop. (20 sc + 20 ch-5 loops; 60 sts ÷ 3 = 20 loops)
- Rnds 18–29: Ch 1, sc around the post of the dc just made, [ch 5, sc in next ch-5 sp] 19 times, ch 2, dc in first sc. (20 loops)
- Rnd 30: Ch 1, sc around the post of the dc, [ch 5, sc in next ch-5 sp] 19 times, ch 5, sl st in first sc. This closes the round with a full ch-5 loop. (20 loops)
That makes 14 mesh rounds (Rnds 17–30), about 7 in (17.8 cm) tall. Each sc sits in the center of a loop below, which forms the diamond lattice.
Top band
- Rnd 31 (conversion): Ch 1, 3 sc in each ch-5 sp around. (20 loops × 3 sc = 60 sts)
- Rnds 32–33: Sc in each st around. (60 sts)
Fasten off Color A. Checkpoint: the body is about 9 in (22.9 cm) tall and still 15 in (38.1 cm) around.
Cream Cuff (the “Border”)
The cuff works like a border on the top edge of the body. It stays at 60 stitches the whole way, so it sits straight and doesn’t flare or pinch.
Border gauge: 1 dc round = 0.5 in (1.3 cm). 1 cable round = about 0.6 in (1.5 cm).
Join Color B in the BLO of any stitch at the center back of Rnd 33.
- Cuff Rnd 1: Ch 1, sc in BLO of each st around. (60 sts) The free front loops stay behind for the lower scallops.
- Cuff Rnd 2: Ch 3 (counts as dc), dc in each st around, sl st to top of ch-3. (60 sts)
- Cuff Rnd 3 (cable): Ch 1, work Cross4 15 times around the dc posts of Rnd 2, sl st to the first fptr. (15 × 4 = 60 sts)
- Cuff Rnd 4: Ch 3, dc in each st around, sl st to join. (60 sts)
- Cuff Rnd 5 (offset cable): Ch 3 (counts as dc), dc 1, work Cross4 14 times, dc 2, sl st to join. (2 + 56 + 2 = 60 sts) Shifting the cables by 2 sts makes the crosses alternate like a braid.
- Cuff Rnd 6: Ch 1, sc in each st around. (60 sts)
- Cuff Rnd 7 (top scallops): Ch 1, sl st in first st, sk 2, 5 dc in next st, sk 2, sl st in next st; repeat 10 times. Work the last sl st in the first sl st. (10 scallops; 10 × 6 = 60 sts)
Fasten off.
Lower scallops: Turn the holder upside down. Join Color B in any free front loop of Rnd 33 at the center back.
- Scallop Rnd: Ch 1, sl st in the same loop, sk 2, 5 dc in next loop, sk 2, sl st in next loop; repeat 10 times, ending in the first sl st. (10 scallops; 60 front loops ÷ 6 = 10)
Fasten off. The lower scallops hang down over the mesh like dripping cream.
Why the math works: Every cuff round starts with the body’s 60 sts. The 4-stitch cable divides evenly (15 repeats). The offset round is 2 + 56 + 2 = 60. The 6-stitch scallop repeat divides evenly into 60 (10 repeats). Nothing needs fudging, and the cuff depth comes to about 3 in (7.6 cm).
Handle (Color A)
- Ch 31.
- Row 1: Sc in 2nd ch from hook and in each ch across, turn. (30 sts)
- Rows 2–6: Ch 1, sc in each st across, turn. (30 sts)
Fold the strip in half lengthwise and sl st the long edges together through both layers to make a flat tube. It should be about 7.5 in (19.1 cm) long. Leave a long tail.
Hanging Strap (Color A)
- Ch 61.
- Row 1: Sc in 2nd ch from hook and in each ch across, turn. (60 sts)
- Row 2: Ch 1, sc in each st across. (60 sts)
The strap is 15 in (38.1 cm) long. Leave a long tail.
Gingerbread Heart (Color C, then D)
- Rnd 1: In a MR, ch 3 (counts as tr), 4 tr, 3 dc, ch 1, tr (this is the point), ch 1, 3 dc, 5 tr, ch 3, sl st into the ring. Pull the ring tight to form the top dip. (17 sts + 2 ch-1 sps)
- Rnd 2: Ch 1, 2 sc in each of next 5 tr (including the ch-3), sc in each of next 3 dc, sc in ch-1 sp, (sc, ch 2, sc) in point tr, sc in ch-1 sp, sc in each of next 3 dc, 2 sc in each of next 5 tr, sl st into the center dip. (30 sc + ch-2 point)
Fasten off. The heart is about 2.25 in (5.7 cm) wide and 2 in (5.1 cm) tall.
Icing: With Color D, sew small running stitches about 1/8 in (0.3 cm) long, 0.25 in (0.6 cm) in from the edge, all the way around. In the center, sew 3 straight stitches crossing to make a six-point snowflake, with a French knot in the middle.
Assembly
- Heart: Center the heart on the front, above the slot, covering mesh Rnds 22–26. Pin it in place and whipstitch around the edge with Color C, catching the mesh strands behind it.
- Handle: Bend the handle into a C shape. Sew the top end to the right side of the body at mesh Rnd 27 and the bottom end at mesh Rnd 19. The ends are about 4 in (10.2 cm) apart, which leaves a rounded handle that sticks out about 2 in (5.1 cm).
- Strap: At the center back, sew each strap end to the inside of the cuff. Let each end overlap the cuff by 1.5 in (3.8 cm), with the two ends side by side. That leaves a 6 in (15.2 cm) loop above the cuff.
Weave in all ends.
Final Blocking
- Lightly spray the whole holder with water until it is damp but not soaking.
- Slide it over a jar or rolled towel about 4.75 in (12.1 cm) across.
- Pull the mesh gently up and down so the diamonds open evenly, until the body is 9 in (22.9 cm) tall.
- Pinch each cream scallop into a rounded curl with your fingers.
- Lay the heart flat against the form and press it smooth.
- Let it dry completely before you remove it from the form.
Final Quality-Control Checklist
- [ ] The base is flat and measures 4.75 in (12.1 cm) across.
- [ ] The slot is 3.5 in (8.9 cm) wide and centered on the front.
- [ ] There are 20 even mesh loops in every round.
- [ ] The cuff has 15 + 14 cable crosses and 10 scallops at each edge.
- [ ] The total height is 12 in (30.5 cm), with a 6 in (15.2 cm) loop.
- [ ] The handle ends are firmly sewn on and 4 in (10.2 cm) apart.
- [ ] The heart is centered and stitched all the way around.
- [ ] All ends are woven in securely.
Troubleshooting
- The mesh slants in a spiral: You missed the ch 2 + dc join. Check that each round starts at the center of a loop.
- The cuff flares out: Your dc tension is loose. Redo Cuff Rnds 2 and 4 with tighter stitches.
- The cuff pulls in: Fptr stitches eat up width. Work them looser, or use a 5.5 mm hook for the cable rounds.
- The slot gapes open: Make the ch-14 snug, and work Rnd 14’s sc firmly into the chains.
- The heart cups: Rnd 1 is too tight. Block it flat, or redo it with looser tr stitches.
- The handle droops: Stuff the tube with a little fiberfill, or add a seventh row.
Care
Hand wash in cool water and reshape while damp. Dry flat or over the jar you used for blocking.
Final Notes
Here is the measurement chain in short. A 60-stitch base gives a 4.75 in (12.1 cm) diameter and a 15 in (38.1 cm) circumference. The solid band is 1.25 in (3.2 cm), the mesh adds 7 in (17.8 cm), and the top band brings the body to 9 in (22.9 cm). The 60-stitch cuff adds 3 in (7.6 cm), for a total of 12 in (30.5 cm), and the strap adds a 6 in (15.2 cm) loop. If each checkpoint matches, the finished mug will too.
Happy crocheting!