

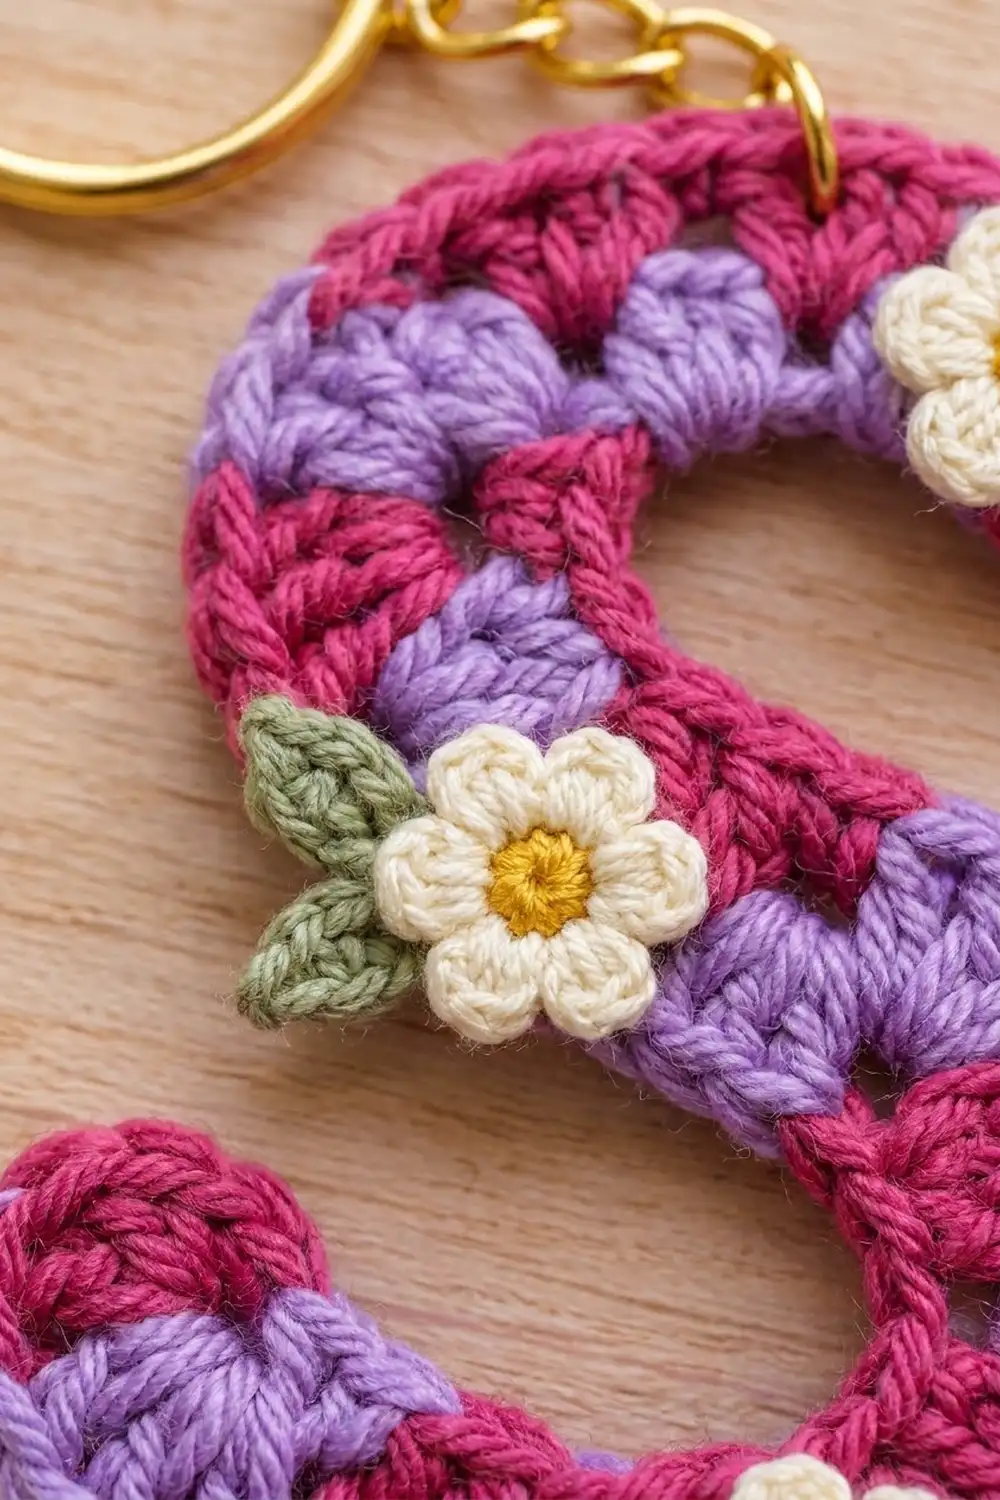
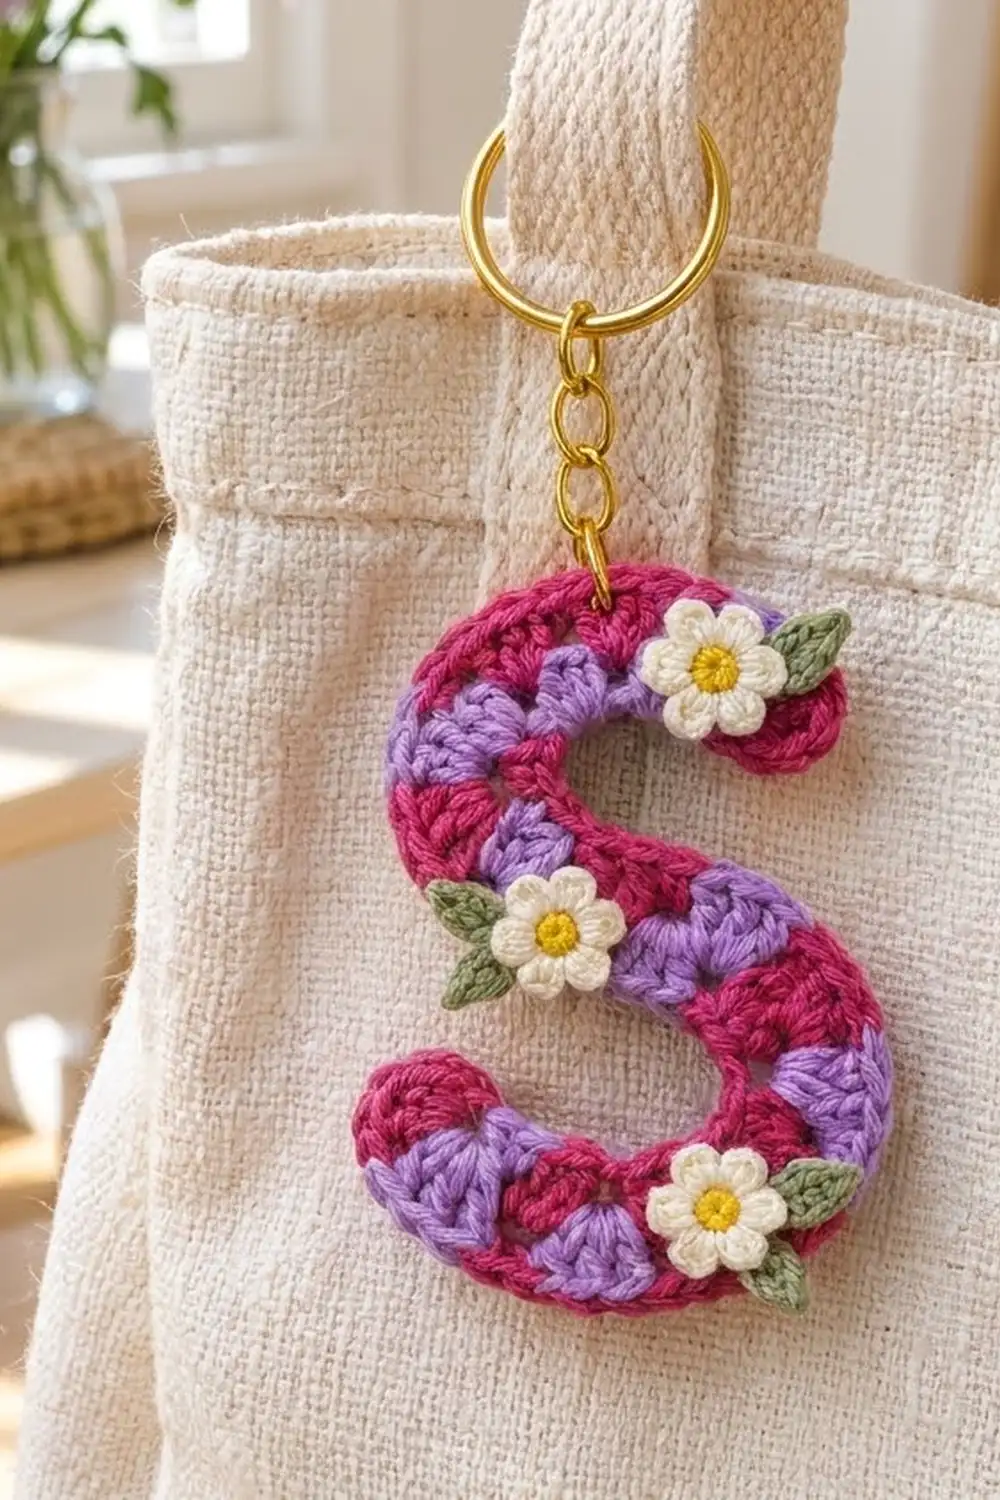
This little letter S is a cheerful, chunky bag charm. It’s made from tiny granny-style shells that alternate raspberry magenta and soft lavender, so both edges look like a row of checkered fans. A single magenta outline sharpens the shape, and three cream daisies with yellow centers and sage-green leaves give it a spring-garden finish.
The pattern uses US crochet terms throughout. The finished letter measures about 4.5 in (11.4 cm) tall and 3 in (7.6 cm) wide. The strip is 1.2 in (3.0 cm) wide once the border is on, which makes it sturdy enough to swing from a keyring every day.
Construction is simple. You chain one spine for the whole letter, then work shells around both sides of it in one round, a bit like an oval granny. On the outside of each curve the shells are packed close together. On the inside they are spaced further apart. That difference bends the strip into an S as you work.
This is a single-piece project with nothing to join. One round of border, three small flowers, five leaves and the hardware finish it.
Finished Size and Construction
- Finished size: 4.5 in (11.4 cm) tall x 3 in (7.6 cm) wide
- Skill level: Easy-intermediate (color changes, working around a chain)
- Terminology: US crochet terms
- Yarn weight: DK (#3), cotton or cotton blend
- Hook: 3.5 mm (E/4)
- Number of pieces: 1 letter body, plus 3 flowers and 5 leaves as appliqués
- Layout: One letter S, no joining
- Strip width after Round 1: 0.8 in (2.0 cm)
- Size before border: 4.1 in (10.4 cm) x 2.6 in (6.6 cm)
- Border depth: 0.2 in (0.5 cm), one round of sc
- Flower size: 0.9 in (2.3 cm) across; leaf length 0.6 in (1.5 cm)
Materials
Choose a smooth, firm DK cotton. Mercerized cotton gives crisp shells and stands up well to life on a bag. Avoid fuzzy or very stretchy yarns, because the curve depends on the shells holding their shape.
- Color M (raspberry magenta): 7 g / 16 m
- Color L (lavender): 4 g / 8 m
- Color C (cream): 2 g / 4 m
- Color Y (golden yellow): 1 g / 2 m
- Color G (sage green): 2 g / 3 m
All quantities include extra for a test swatch and for weaving in ends.
Tools:
– 3.5 mm (E/4) crochet hook
– Tapestry needle
– Scissors
– 4 stitch markers
– Gold-tone split keyring, 1 in (2.5 cm), with about 1.25 in (3.2 cm) of chain
– 1 gold-tone jump ring and 2 pairs of flat-nose pliers
– Blocking mat, rust-proof pins and a spray bottle
– Optional: a paper template of an S, 4.5 in (11.4 cm) tall
Abbreviations (US Terms)
- ch: chain
- sl st: slip stitch
- sc: single crochet
- hdc: half double crochet
- dc: double crochet
- st(s): stitch(es)
- M, L, C, Y, G: colors as listed above
Special stitch (Shell): 3 dc worked into the same chain.
Color change: Work the last dc of a shell until 2 loops remain on the hook. Drop the old color, yarn over with the new color and pull through. Carry the unused color along the top of the spine and work the next shells over it so it stays hidden.
Gauge and Checkpoints
Gauge controls the curve, so make a quick test piece first.
Test piece: With M, ch 12. Starting in the 4th ch from the hook, work [skip 1 ch, shell in next ch] 4 times. Your gauge should be 10 ch = 2 in (5.1 cm), and each dc should stand about 0.35 in (0.9 cm) tall.
Checkpoints:
1. Foundation chain: The 35 working chains measure about 7 in (17.8 cm) laid straight.
2. After Round 1: The strip is 0.8 in (2.0 cm) wide. Nudged flat, the letter is about 4.1 in (10.4 cm) x 2.6 in (6.6 cm).
3. After the border: The strip is 1.2 in (3.0 cm) wide and the letter is 4.5 in (11.4 cm) x 3 in (7.6 cm).
If your piece is too big: Go down to a 3.25 mm hook, or tighten your chain. A loose chain is the most common cause.
If your piece is too small, or the shells crowd and cup: Go up to a 3.75 mm hook. Never change the stitch counts, because they are what create the curve.
Letter Body
Foundation
With M, ch 38.
The first 3 chains from the hook are the turning chain and count as the first dc. Label the remaining chains C1 (the 4th ch from the hook) through C35 (the first chain you made). Put a marker in C18, the midpoint where the curve changes direction.
Round 1 (shells around the spine)
Work Side A into one loop of each chain. Then rotate and work Side B into the free loops.
Start fan, part 1 (M): Work 3 dc in C1. The skipped ch-3 counts as a dc, so C1 now holds 4 dc. Change to L on the last dc.
Side A, outer curve: [Skip 1 ch, shell in next ch] 8 times, alternating colors L, M, L, M, L, M, L, M. The shells sit in C3, C5, C7, C9, C11, C13, C15 and C17. (24 dc)
Side A, inner curve: [Skip 2 ch, shell in next ch] 5 times, alternating colors L, M, L, M, L. The shells sit in C20, C23, C26, C29 and C32. (15 dc)
Far fan (M): Skip C33 and C34, then work 7 dc in C35. (7 dc)
Rotate so you’re working along the free loops.
Side B, outer curve: [Skip 1 ch, shell in next ch] 8 times, alternating colors L, M, L, M, L, M, L, M. The shells sit in C33, C31, C29, C27, C25, C23, C21 and C19. (24 dc)
Side B, inner curve: [Skip 2 ch, shell in next ch] 5 times, alternating colors L, M, L, M, L. The shells sit in C16, C13, C10, C7 and C4. (15 dc)
Start fan, part 2 (M): Skip C3 and C2. Change to M and work 3 dc in C1, so C1 holds 7 dc in total. Join with sl st to the top of the beginning ch-3.
Round 1 count: 4 + 24 + 15 + 7 + 24 + 15 + 3 = 92 dc. That makes 28 color blocks: 14 in M (2 fans and 12 shells, 50 dc) and 14 L shells (42 dc). Fasten off L only.
Lay the piece flat. Side A bows outward along C1–C18 and Side B bows outward along C18–C35. Those two opposite curves make the S. If yours reads as a backward S, flip it over and use that side as the back.
Border
Border gauge: 5 sc = 1 in (2.5 cm) along the edge. The round adds 0.2 in (0.5 cm) all around.
Round 2 (M)
Ch 1. Work into the top of each dc:
- Start fan, part 1: 2 sc in each of the first 3 sts, then sc in the next st. (7 sc)
- Side A: sc in each of the next 39 dc. (39 sc: 24 on the outer curve, 15 on the inner curve)
- Far fan: sc in the first dc, 2 sc in each of the next 5 dc, sc in the last dc. (12 sc)
- Side B: sc in each of the next 39 dc. (39 sc: 24 outer, 15 inner)
- Start fan, part 2: sc in the next dc, then 2 sc in each of the last 2 dc. (5 sc)
Join with sl st to the first sc and fasten off.
Round 2 count: 92 sc worked one per existing stitch + 10 increase sc = 102 sc. Check it by section: 12 + 39 + 12 + 39 = 102.
Why the math works: Each end fan has 7 dc. Putting 2 sc in each of its middle 5 sts turns it into 12 sc, which is enough to lie flat around a rounded terminal without ruffling. In each half of the letter, the outer edge carries 24 sts and the inner edge only 15. That difference of 9 sts bends each half by roughly a half-turn, and with the end fans this forms the S. The long sides get no increases, so the inner curves stay snug and the openings inside the S stay crisp.
Flowers and Leaves
Flower (make 3)
Center (Y): Make a magic ring and ch 1. Work 5 sc in the ring, pull it closed and join with sl st to the first sc. (5 sc) Fasten off.
Petals (C): Join C in any sc. [Ch 2, 2 dc, ch 2, sl st] all in the same sc, then sl st in the next sc. Repeat from * 4 more times, working the last sl st into the joining sc. (5 petals) Fasten off and leave a 6 in (15.2 cm) tail. The flower is 0.9 in (2.3 cm) across.
Leaf (make 5)
With G, ch 6. Sl st in the 2nd ch from the hook, then work sc, hdc and sc in the next 3 ch, and sl st in the last ch. Ch 1 and rotate. Along the free loops, work sl st, sc, hdc, sc, and sl st in the last ch. Join with sl st to the first sl st. (10 sts) Fasten off, leaving a tail. The leaf is 0.6 in (1.5 cm) long with a pointed tip.
Placement
Hold the S so the C1 fan is the lower-left terminal.
- Flower 1: On the upper-right terminal (the C35 fan), with 1 leaf peeking out to the right.
- Flower 2: On the left side of the upper curve, just above the middle, with 2 leaves fanning out to the left.
- Flower 3: On the lower-right bend, with 2 leaves pointing right and down.
Tuck the base of each leaf under its flower. Sew the leaves on first, then the flowers, stitching through the yellow center and between the petals. Keep the stitches shallow so they don’t show on the back.
Final Blocking
- Weave in all ends through stitches of the same color. Leave the hardware off for now.
- Mist the letter until it’s damp but not soaked.
- Lay it face down on the mat, over the template if you’re using one.
- Pin both terminals first, then the top of the upper curve and the bottom of the lower curve.
- Ease the outer curves outward and the inner curves inward until the strip is 1.2 in (3.0 cm) wide everywhere.
- Check that the letter is 4.5 in (11.4 cm) x 3 in (7.6 cm) and adjust the pins if it isn’t.
- Let it dry completely, which takes at least 4 hours.
- Open the jump ring with both pliers. Pass it through 2 border sc at the top of the upper curve, above the Side B shell in C29. Add the keyring chain and close the jump ring tightly.
Final Quality-Control Checklist
- Round 1 has 92 dc and 28 color blocks that alternate cleanly.
- No carried strand shows between the shells on the front.
- The border has 102 sc, with 12 sc around each end fan.
- The strip is 1.2 in (3.0 cm) wide along its whole length.
- The letter measures 4.5 in (11.4 cm) x 3 in (7.6 cm).
- The S reads the right way from the front.
- The flowers and leaves are secure and the stitching is hidden.
- The jump ring is fully closed.
Troubleshooting
The letter barely curves. The chain is probably too loose. Remake it more tightly, or use a smaller hook for the chain only.
The outer edges ruffle. Your dc may be too tall, or you skipped more than 1 ch. Go down a hook size and recount.
The openings inside the S close up. Check that you skipped exactly 2 ch between the inner-curve shells, then block the openings wide.
Carried yarn peeks through. Hold the carried strand along the top of the chain and work snugly over it.
The end fans cup. Count again: you need 12 sc around each fan.
The S is mirrored. Turn it over. The letter looks the same when rotated, so either side can be the front.
Care
Hand wash in cool water with mild soap. Press out the water in a towel and dry the letter flat in shape, taking the metal hardware off first.
Final Notes
Here is the full measurement chain:
- The 35 working chains measure 7 in (17.8 cm).
- Round 1 gives you 92 dc, a 0.8 in (2.0 cm) strip and a letter of 4.1 in (10.4 cm) x 2.6 in (6.6 cm).
- The 102-sc border widens the strip to 1.2 in (3.0 cm) and brings the S to 4.5 in (11.4 cm) x 3 in (7.6 cm).
If each checkpoint matches, the keychain will match. You can use the same idea to plan other curved letters: pack the shells on the outside of each bend and space them out on the inside.
Happy crocheting!