

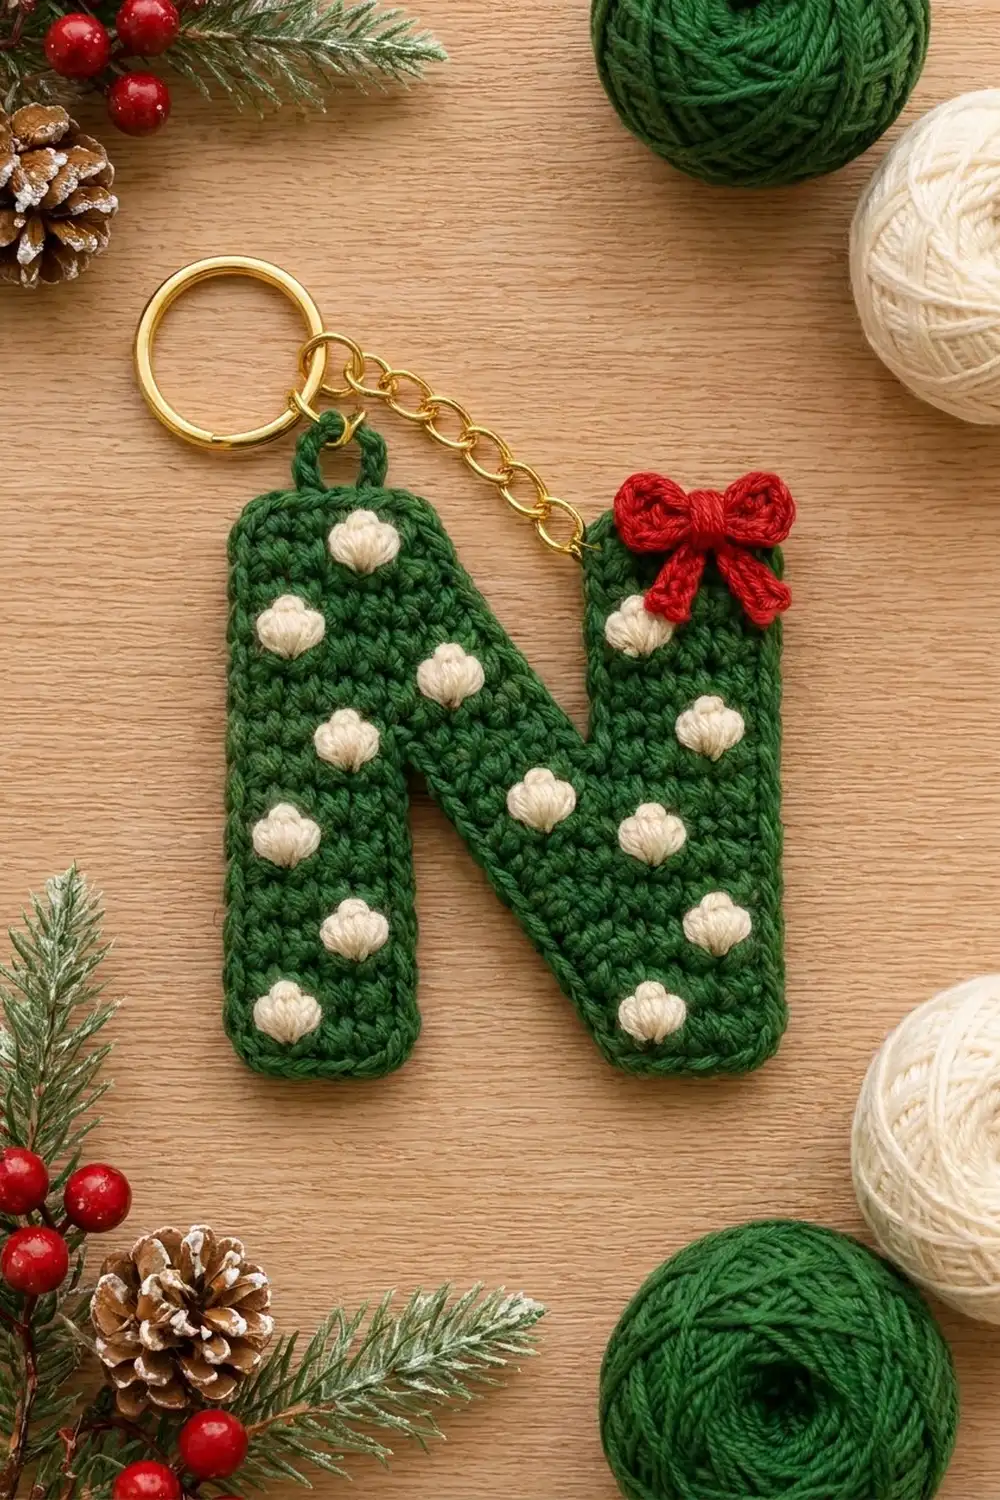
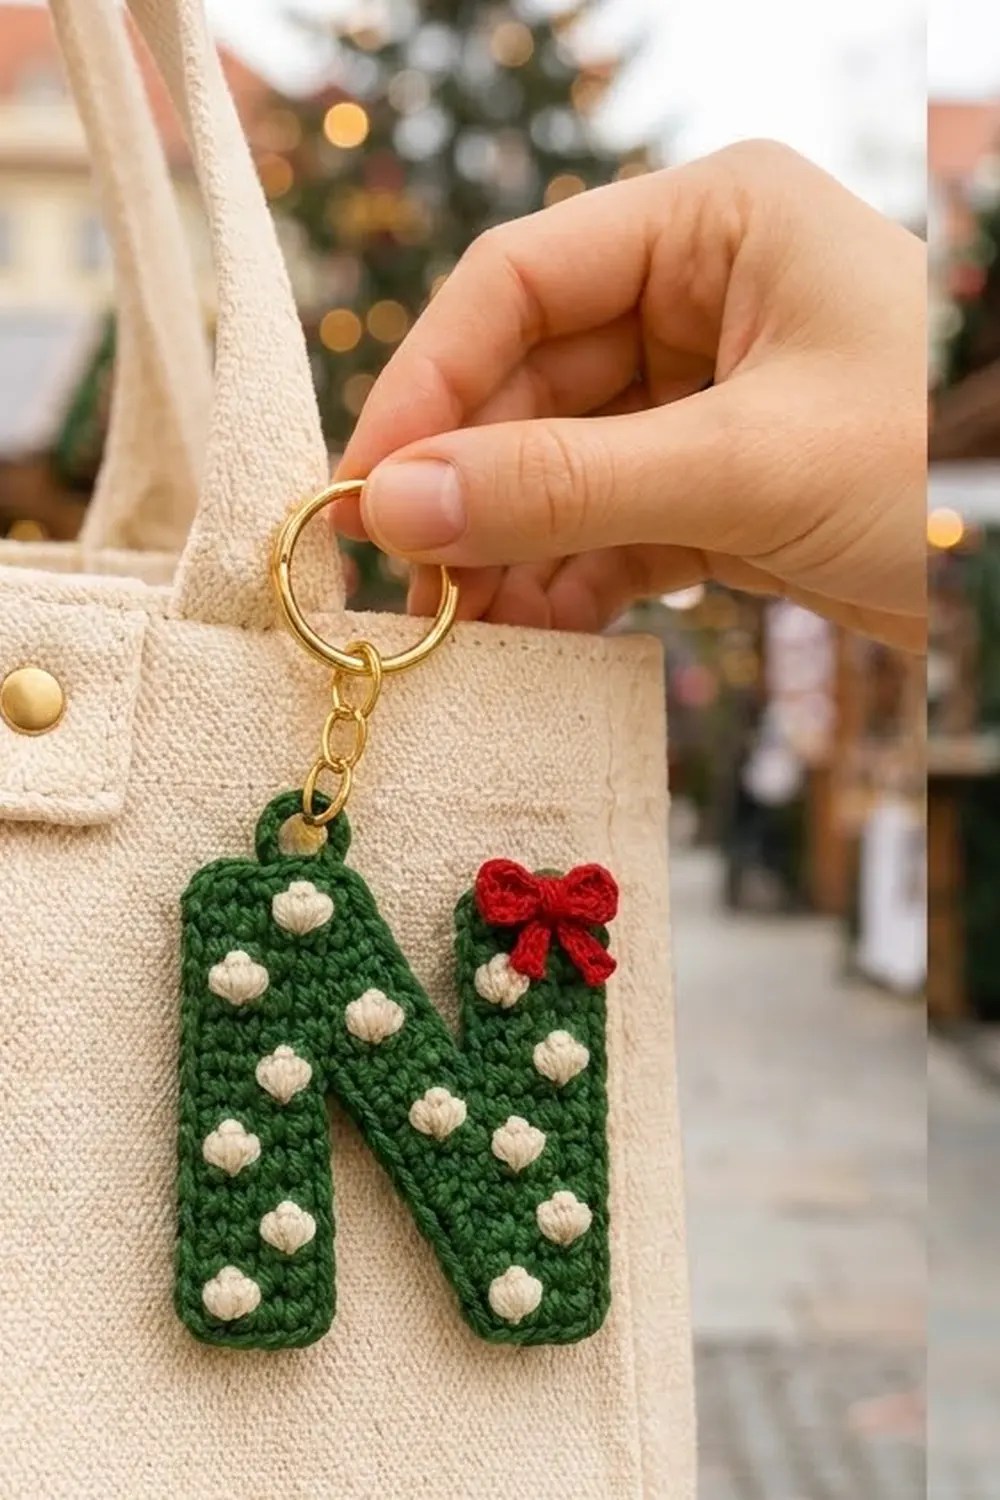
This monogram keychain is a solid letter N in deep forest green, dotted with soft cream bobbles and finished with a tiny red bow. It hangs from a gold keyring and short chain, ready for a tote bag, backpack zipper, or set of keys.
The palette is classic Christmas: forest green, cream, and bright red. Dense single crochet keeps the letter flat and firm, and the bobbles pop out on the front only, like little snowballs.
The pattern uses US terms. The finished letter measures 4.0 in (10.2 cm) tall x 3.2 in (8.1 cm) wide, including the border.
The N is worked sideways in rows, so each row runs vertically. You make the left stem, shift a six-stitch strip down two stitches per row to form the diagonal, then extend back to full height for the right stem. The letter is one piece with no sewing. A single crochet border, a hanging tab, a bow, and the hardware finish it.
Finished Size and Construction
- Finished size: 4.0 in (10.2 cm) tall x 3.2 in (8.1 cm) wide
- Skill level: Easy-intermediate (bobbles, color changes, foundation single crochet extensions)
- Terminology: US
- Yarn weight: DK / light worsted (#3) cotton
- Hook: 3.0 mm (US C/2 or D/3)
- Number of pieces: 1 letter body, plus a 2-part bow appliqué
- Layout: Single piece, no joining
- Size before border: 3.6 in (9.1 cm) x 2.8 in (7.1 cm) (18 sts x 17 rows)
- Stem width before border: 0.8 in (2.0 cm), 5 rows
- Border depth: 1 round of sc, 0.2 in (0.5 cm) per side
Materials
Choose a smooth, tightly plied DK cotton. It keeps the bobbles crisp and won’t stretch on a keychain.
- Forest green: 12 g, about 28 m
- Cream: 4 g, about 9 m
- Red: 3 g, about 7 m
Quantities include a margin for a test stem and weaving in.
Tools: 3.0 mm hook, tapestry needle, scissors, 1 in (2.5 cm) gold split keyring, 2 in (5.1 cm) gold chain with 2 jump rings, flat-nose pliers, ruler, pins, and a blocking mat.
Abbreviations (US Terms)
- ch – chain
- sl st – slip stitch
- sc – single crochet
- sc2tog – single crochet 2 together
- fsc – foundation single crochet extension
- bo – bobble
- st(s) – stitch(es)
- RS / WS – right side / wrong side
- rep – repeat
Bobble (bo), in cream: Drop green. With cream, [yo, insert hook in next st, yo, pull up a loop, yo, draw through 2 loops] 4 times (5 loops on hook). With green, yo and draw through all 5 loops. Use a fresh 12 in (30.5 cm) cream strand for each bobble, leaving 3 in (7.6 cm) tails on the side facing you. Bobbles are worked on WS rows only, so they push through to the RS. Each bobble counts as 1 st.
Foundation single crochet extension (fsc): Insert hook into the base of the last st made, yo, pull up a loop, yo, draw through 1 loop (the “chain”), yo, draw through 2 loops. For each following fsc, insert hook into the “chain” of the previous fsc.
Gauge and Checkpoints
Gauge: 20 sc and 24 rows = 4 in (10.2 cm), so 5 sts and 6 rows = 1 in (2.5 cm).
Test one piece first: the left stem (Rows 1–5) is your gauge swatch. Measure it before continuing.
- After Row 5: 3.6 in (9.1 cm) tall x 0.8 in (2.0 cm) wide.
- After Row 12: 2.0 in (5.1 cm) wide; the diagonal reaches the bottom edge.
- After Row 17: 3.6 in (9.1 cm) x 2.8 in (7.1 cm).
- After the border: 4.0 in (10.2 cm) x 3.2 in (8.1 cm).
Stem too long? Go down to a 2.75 mm hook. Too short? Go up to a 3.25 mm hook. Within 0.1 in (0.3 cm), carry on; blocking will even it out. Never change stitch counts, because the bobble positions depend on the 18-stitch height.
Pattern Notes
- Every row runs vertically. Odd rows run bottom to top (RS facing). Even rows run top to bottom (WS facing); all bobbles are on even rows.
- “Position” counts each stitch’s place in the letter’s height from the top: position 1 is the top edge, position 18 the bottom edge.
- Beginning ch 1 does not count as a stitch.
- After each bobble row, tie each pair of cream tails in a square knot on the WS, weave each under 2–3 green sts, and trim.
Letter Body
Left Stem
With green, ch 19, holding the chain so the hook end is at the bottom of the letter.
Row 1 (RS, bottom to top): Sc in 2nd ch from hook and in each ch across, turn. (18 sc)
Row 2 (WS, top to bottom): Ch 1, sc in first 2 sts, [bo, sc in next 3 sts] 4 times, turn. (18 sts: 14 sc + 4 bo, at positions 3, 7, 11, 15)
Row 3: Ch 1, sc in each st across, turn. (18 sc)
Row 4: Ch 1, sc in first 4 sts, [bo, sc in next 3 sts] 2 times, bo, sc in last 5 sts, turn. (18 sts: 15 sc + 3 bo, at positions 5, 9, 13)
Row 5: Ch 1, sc in each st across, turn. (18 sc)
You end at the top of the letter.
Diagonal
The diagonal is a 6-stitch strip that moves down 2 positions every row. Odd rows add 2 chain stitches at the bottom and leave 2 sts unworked at the top. Even rows slip stitch past 2 sts at the top and add 2 fsc at the bottom.
Row 6 (top to bottom): Ch 1, sc in first 2 sts, bo, sc in next 3 sts, turn, leaving the remaining 12 sts of Row 5 unworked. (6 sts, positions 1–6, bobble at 3)
Row 7: Ch 3, sc in 2nd ch from hook and in next ch, sc in next 4 sts, turn, leaving the last 2 sts unworked. (6 sc, positions 3–8)
Row 8: Sl st in first 2 sts, ch 1, sc in next 2 sts, bo, sc in next st, fsc 2, turn. (6 sts, positions 5–10, bobble at 7)
Row 9: Rep Row 7. (6 sc, positions 7–12)
Row 10: Rep Row 8. (6 sts, positions 9–14, bobble at 11)
Row 11: Rep Row 7. (6 sc, positions 11–16)
Row 12: Rep Row 8. (6 sts, positions 13–18, bobble at 15)
The last fsc sits level with the bottom of the left stem. You end at the bottom.
Right Stem
Row 13 (bottom to top): Ch 1, sc in each of the 6 sts, fsc 12, turn. (18 sts: 6 sc + 12 fsc)
The 12 fsc rise past the diagonal to form the inner edge of the right stem.
Row 14: Rep Row 4. (18 sts: 15 sc + 3 bo)
Row 15: Ch 1, sc in each st across, turn. (18 sc)
Row 16: Rep Row 2. (18 sts: 14 sc + 4 bo)
Row 17: Ch 1, sc in each st across. (18 sc) Fasten off.
The body now has 18 bobbles: 7 on each stem and 4 on the diagonal. Weave in all ends before the border.
Border
Border gauge: 5 sc = 1 in (2.5 cm), same as the body.
Rules:
- Work 1 sc in each stitch on straight edges and 1 sc in each row-end.
- Work 2 sc on each diagonal step: 1 in the step’s corner and 1 in its row-end.
- Work 3 sc in the corner st at each outer corner.
- Work 1 sc2tog at each inner notch.
The edge counts below do not include the corner groups, which are listed separately.
Rnd 1 (RS): Join green with a standing sc in the free loop of the foundation ch at position 1 (top-left corner), and work 2 more sc in the same ch. Then work:
- Left outer edge: sc in foundation ch positions 2–17. (16 sc)
- Bottom-left corner: 3 sc in position 18.
- Bottom of left stem: 1 sc in each row-end of Rows 1–5. (5 sc)
- Corner: 3 sc in Row 5, position 18.
- Inner left edge: sc in Row 5, positions 17–8. (10 sc)
- Lower notch: sc2tog over Row 5 position 7 and the bottom row-end of Row 6. (1 st)
- Lower diagonal: 2 sc on each step of Rows 7–11. (10 sc)
- Corner: 3 sc in the last fsc of Row 12.
- Bottom of right stem: 1 sc in each row-end of Rows 13–17. (5 sc)
- Bottom-right corner: 3 sc in Row 17, position 18.
- Right outer edge: sc in Row 17, positions 17–2. (16 sc)
- Top-right corner: 3 sc in Row 17, position 1.
- Top of right stem: 1 sc in each row-end of Rows 17–13. (5 sc)
- Corner: 3 sc in the base of the Row 13 fsc at position 1.
- Inner right edge: sc in the fsc bases at positions 2–11. (10 sc)
- Upper notch: sc2tog over the fsc base at position 12 and the top row-end of Row 12. (1 st)
- Upper diagonal: 2 sc on each step of Rows 11–7. (10 sc)
- Corner: 3 sc in the unworked top of Row 6, position 1.
- Top of left stem: 1 sc in each row-end of Rows 5–1. (5 sc)
Sl st to the first sc to join. Fasten off.
Count check:
- Edges: 16 + 5 + 10 + 10 + 5 + 16 + 5 + 10 + 10 + 5 = 92 sc
- Outer corners: 8 x 3 = 24 sc
- Notches: 2 sc2tog = 2 sts
- Total: 118 sts
Why the math works: Each outer edge is 18 sts. Taking away its 2 corner sts leaves 16 sc, so the long sides stay 3.6 in (9.1 cm) between corners. Each stem end gets 5 sc, one per row, and the 3-sc corners on either side round it off, just like the finished letter. Each diagonal step moves 1 row across and 2 sts down, which is about 0.4 in (1.0 cm) along the slant. Two sc per step also measure 0.4 in (1.0 cm), so the edge lies flat. The notch decreases keep the narrow V shapes crisp. Each half of the round reads 16-5-10-10-5, so the letter stays balanced.
Hanging Tab
With RS facing, join green with a sl st in the center (3rd) sc on top of the left stem. Ch 8, sl st in the same st. Ch 1, work 12 sc into the ch-8 loop, sl st in the same st. Fasten off. The tab is about 0.5 in (1.3 cm) tall.
Red Bow
Loops: With red, ch 11 and sl st to the first ch to form a ring, without twisting.
- Rnd 1: Ch 1, sc in each ch around, sl st to first sc. (11 sc)
- Rnd 2: Ch 1, sc in each st around, sl st to first sc. (11 sc)
Fasten off, leaving a 12 in (30.5 cm) tail. Flatten the ring with the join at the back center. It measures about 1.1 in (2.8 cm) across.
Tails: With red, ch 7. Sc in 2nd ch from hook and in each ch across. (6 sc, about 1.2 in / 3.0 cm) Fasten off and weave in the ends.
Assembly: Fold the tail strip into a V behind the center of the flattened ring. Wrap the long red tail tightly around the center 8 times. Secure it with 2 stitches through the back, and keep the remaining tail for sewing.
Final Blocking
- Weave in all ends except the bow tail.
- Spritz the letter until damp, or soak it and press it in a towel.
- Lay it RS up on the mat. Pin the outer edges straight to 4.0 in (10.2 cm) tall and 3.2 in (8.1 cm) wide.
- Push each bobble forward from the WS with a fingertip.
- Let it dry completely, about 6–8 hours.
- Sew the bow over the top of the right stem, with the knot about 0.4 in (1.0 cm) below the top edge. The loops may sit slightly past the outer border. Weave the tail in on the WS.
- Using pliers and a jump ring, attach one chain end to the hanging tab. Attach the other end to the keyring with the second jump ring. Close both rings fully.
Final Quality-Control Checklist
- Letter measures 4.0 in (10.2 cm) x 3.2 in (8.1 cm).
- 18 cream bobbles, all popped to the RS and secure.
- Border has 118 sts and no gaps at the notches.
- Both stems are straight and 1.2 in (3.0 cm) wide including the border.
- Diagonal runs cleanly from top-left to bottom-right.
- Bow is sewn firmly with even loops; jump rings are fully closed.
- No ends show on the RS.
Troubleshooting
- Bobbles show on the back: they were worked on an odd row. Bobbles go on even rows only.
- Bobbles look flat: push them forward before blocking, or use 5 yarn-overs instead of 4.
- Diagonal too short or too long: check that each odd row leaves exactly 2 sts unworked.
- Diagonal looks stretched: keep the ch-3 extensions snug and the sl sts loose.
- Border ruffles at stem ends: change those 3-sc corners to 2 sc.
- Gap at a notch: work the sc2tog legs deep into the V, then close any hole with a green tail on the WS.
Care
Spot clean with mild soap and cool water, and lay flat to dry. Avoid machine washing, which can snag the hardware.
Final Notes
The measurements build on each other. A gauge of 5 sts per 1 in (2.5 cm) gives an 18-stitch height of 3.6 in (9.1 cm), and 17 rows give a 2.8 in (7.1 cm) body width. A 0.2 in (0.5 cm) border on every side brings the letter to 4.0 in (10.2 cm) x 3.2 in (8.1 cm). If each checkpoint matches, the finished keychain will too.
Happy crocheting!