

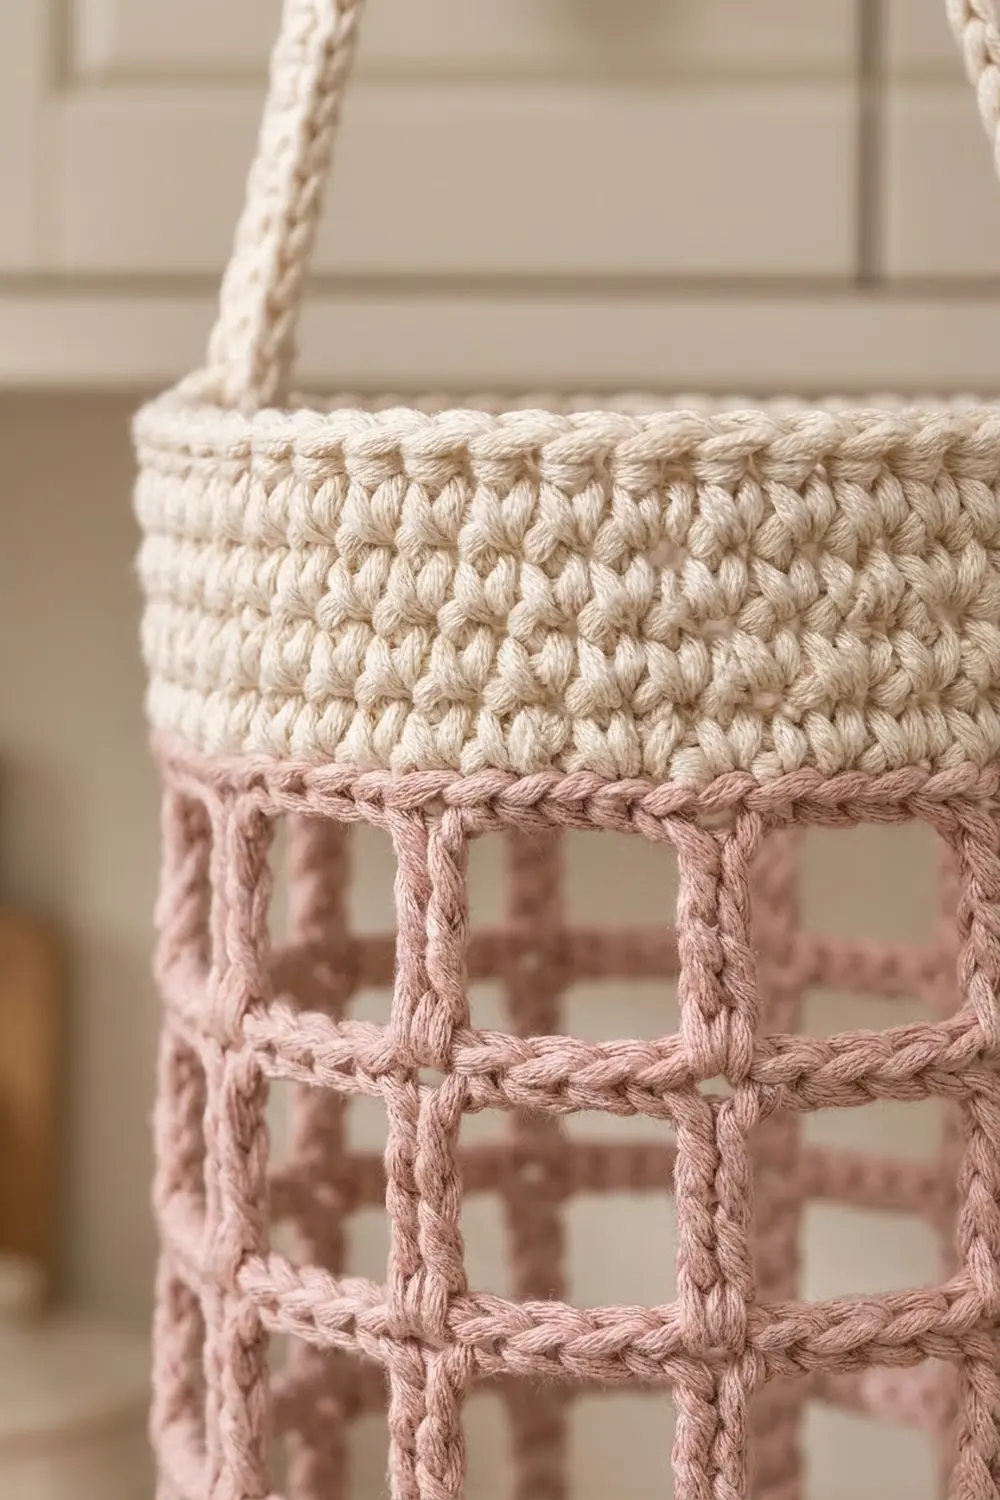
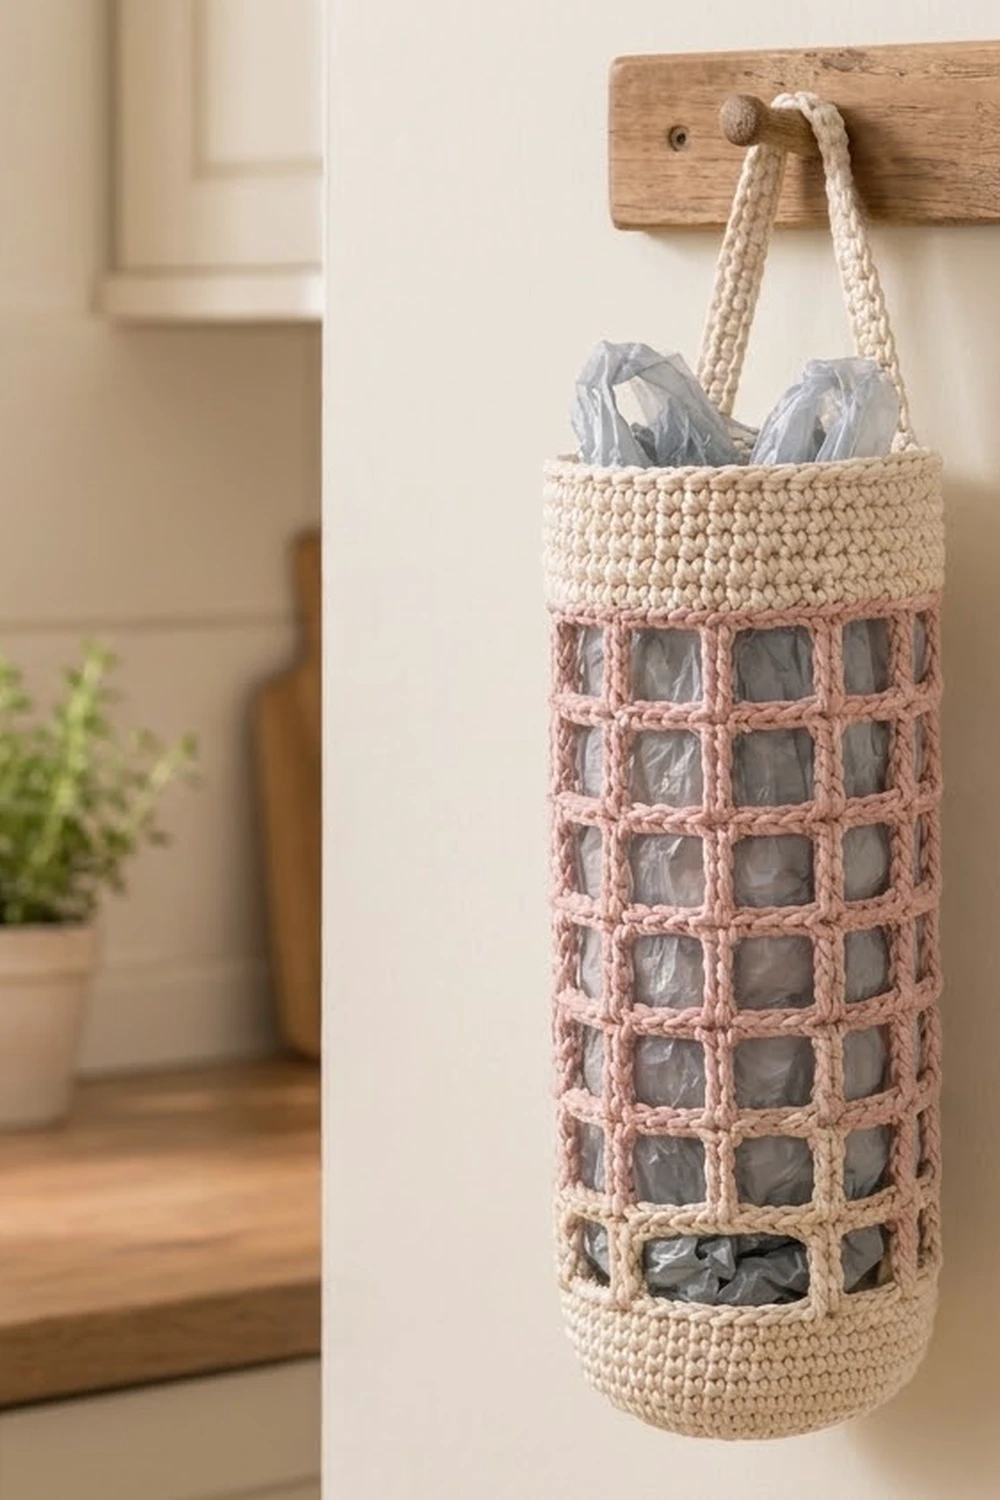
The Rosewood Window Bag Holder is a tall, slim crochet cylinder for storing plastic grocery bags. It has a solid cream base, an open pink grid through the middle, a solid cream band at the top, and a narrow cream strap for hanging it from a cabinet knob or hook.
The pink section is a simple mesh of tall stitches and single-crochet bars, so you get neat, nearly square windows. You can see the bags through them, and the grid looks light and tidy. The cream sections are firm single crochet, which keeps the bottom flat and the opening round.
This pattern uses US crochet terms. The finished holder is about 4.4 in (11.2 cm) across, 11.5 in (29.2 cm) tall from the base edge to the rim, and 13.7 in (34.8 cm) around. The strap forms a hanging loop that stands about 3 in (7.6 cm) above the rim.
You work the body in one piece from the bottom up: a flat round base, a short solid wall, eight rows of pink windows, and a cream top band. The strap is made separately in rows and sewn inside the top band.
Finished Size and Construction
- Finished size: 4.4 in (11.2 cm) diameter x 11.5 in (29.2 cm) tall, plus a strap loop of about 3 in (7.6 cm)
- Circumference: 13.7 in (34.8 cm), or 48 stitches
- Skill level: Easy / advanced beginner
- Terminology: US crochet terms
- Yarn weight: Worsted (#4) cotton
- Hook: 5.0 mm (H-8)
- Number of pieces: 1 body plus 1 strap, sewn into one finished holder
- Layout: Closed round base, then a solid cream wall, then 8 rows of pink windows (12 windows per row), then a solid cream top band
- Base size: 4.25–4.5 in (10.8–11.4 cm) across when flat
- Size before top band: 9.5 in (24.1 cm) tall from the base edge
- Top band depth: 2 in (5.1 cm), 8 rounds
Materials
Yarn: Use a smooth worsted-weight cotton or cotton blend, roughly 190 m per 100 g. Cotton holds its shape, doesn’t stretch much under the weight of the bags, and makes crisp grid lines. Avoid fuzzy or very stretchy acrylic, because the windows will blur and the holder will sag.
- Color A, Cream: 55 g, about 105 m (base, lower wall, top band, strap)
- Color B, Dusty Pink: 35 g, about 67 m (window mesh)
These amounts include a margin of about 15 percent, so you have enough for a gauge swatch and small mistakes.
Tools:
- 5.0 mm (H-8) crochet hook
- Locking stitch markers (at least 3)
- Tapestry needle
- Scissors
- Measuring tape or ruler
- Optional: a cardboard tube or rolled towel about 4.4 in (11.2 cm) across, for blocking
Abbreviations (US Terms)
- ch – chain
- sl st – slip stitch
- sc – single crochet
- tr – treble (triple) crochet: yarn over twice, insert hook, pull up a loop, then (yarn over, pull through 2 loops) 3 times
- BLO – back loop only
- sk – skip
- sp – space
- st(s) – stitch(es)
- rnd – round
- MR – magic ring
Special stitch – window unit: A window unit is 2 rounds. Rnd A has 1 tr and 3 ch, repeated 12 times. Rnd B has 1 sc in each tr and 3 sc in each ch-3 space. Each unit makes one row of 12 windows and finishes with 48 sts.
Gauge and Checkpoints
Gauge: 14 sc and 16 sc rounds = 4 in (10.2 cm), worked in the round with a 5.0 mm hook. That is 3.5 sts and 4 rounds per inch, so each sc round adds about 0.25 in (0.6 cm).
Mesh gauge: One window unit (1 tr round + 1 sc round) = 1 in (2.5 cm) tall. Each window is 4 sts wide, about 1.1 in (2.8 cm), so the windows come out close to square.
The base is your gauge swatch. Make Rnds 1–8 first and measure before you go on.
Checkpoints:
- After Rnd 8 (base): Lay it flat. It should measure 4.25–4.5 in (10.8–11.4 cm) across and sit flat without ruffles or cupping.
- After Rnd 14 (cream wall): The wall should be 1.5 in (3.8 cm) tall, measured from the BLO ridge.
- After Rnd 16 (first window unit): The pink section should be 1 in (2.5 cm) tall.
- After Rnd 30 (all windows): The pink mesh should be 8 in (20.3 cm) tall, and the body should be 9.5 in (24.1 cm) tall from the base edge.
- After Rnd 38 (top band): The body should be 11.5 in (29.2 cm) tall.
If your base is too big (over 4.5 in / 11.4 cm), switch to a 4.5 mm hook and start over. If it is too small (under 4.25 in / 10.8 cm), switch to a 5.5 mm hook. If the base ruffles, your increases are too tight compared with your plain stitches, so loosen up on the increase stitches. If it cups, try going up half a hook size for the base only.
If your windows are taller than they are wide, your tr stitches are loose. Pull each loop snug as you finish it.
Pattern
Work in joined rounds: join with a sl st at the end of each round, and ch 1 at the start of each sc round. The ch 1 does not count as a stitch. Put a marker in the first stitch of every round.
Base (Color A, Cream)
Rnd 1: Make a MR, then 6 sc in the ring. Pull the ring closed and sl st to the first sc. (6 sts)
Rnd 2: Ch 1, 2 sc in each st around, sl st to join. (12 sts)
Rnd 3: Ch 1, sc in next st, 2 sc in next st; repeat from * 6 times total, sl st to join. (18 sts)
Rnd 4: Ch 1, sc in next 2 sts, 2 sc in next st; repeat 6 times, join. (24 sts)
Rnd 5: Ch 1, sc in next 3 sts, 2 sc in next st; repeat 6 times, join. (30 sts)
Rnd 6: Ch 1, sc in next 4 sts, 2 sc in next st; repeat 6 times, join. (36 sts)
Rnd 7: Ch 1, sc in next 5 sts, 2 sc in next st; repeat 6 times, join. (42 sts)
Rnd 8: Ch 1, sc in next 6 sts, 2 sc in next st; repeat 6 times, join. (48 sts)
Checkpoint 1: The base should measure 4.25–4.5 in (10.8–11.4 cm) across.
Lower Wall (Color A, Cream)
Rnd 9: Ch 1, sc in BLO of each st around, join. (48 sts) This makes a clean ridge where the base turns into the wall.
Rnds 10–14: Ch 1, sc in each st around, join. (48 sts in each round)
On the final sl st of Rnd 14, drop Cream, pick up Pink, and pull it through to finish the join. Cut Cream and leave a 6 in (15.2 cm) tail.
Checkpoint 2: The wall should be 1.5 in (3.8 cm) tall from the ridge.
Window Mesh (Color B, Pink)
Rnd 15 (Rnd A): Ch 4 (counts as the first tr), ch 3, sk next 3 sts, tr in next st, ch 3, sk next 3 sts; repeat from * 11 more times, then sl st to the 4th ch of the beginning ch-4. (12 tr + 12 ch-3 spaces = 48 sts)
Rnd 16 (Rnd B): Ch 1, sc in the same st as the join, 3 sc in the next ch-3 sp, sc in next tr, 3 sc in next ch-3 sp; repeat from * 10 more times, then sl st to the first sc. (12 sc on top of the tr + 36 sc in the spaces = 48 sts)
This finishes the first row of 12 windows. Each vertical post is 1 tr, and each horizontal bar is 4 sc.
Rnds 17–30: Repeat Rnds 15 and 16 seven more times. Every odd round has 12 tr and 12 ch-3 spaces (48 sts), and every even round has 48 sc. Because each Rnd B starts with an sc on top of a tr, the next Rnd A’s ch-4 lines up on that same post. That keeps all 12 posts running straight up.
That gives 8 window units, so 8 rows of 12 windows (96 windows in total).
On the final sl st of Rnd 30, drop Pink, pick up Cream, and pull it through. Cut Pink and leave a 6 in (15.2 cm) tail.
Checkpoints 3 and 4: The first unit should be 1 in (2.5 cm) tall. The finished mesh should be 8 in (20.3 cm), and the body should be 9.5 in (24.1 cm) from the base edge.
Border: Top Band and Strap
The solid cream top band is the border on this holder. It frames the opening, keeps the rim round when you pull bags out, and is where the strap is sewn on.
Border gauge: Same as the main gauge, 3.5 sts and 4 rounds per inch. Eight rounds give 2 in (5.1 cm).
Rnd 31: Ch 1, sc in each st around, join. (48 sts)
Rnds 32–38: Ch 1, sc in each st around, join. (48 sts in each round)
Fasten off and weave in the end.
Counts by side: A cylinder has no corners, so think of it as two halves. Put markers in st 1 and st 25 of Rnd 38. The back half is sts 1–24 and the front half is sts 25–48, and each half has 24 sts. Each half sits on top of exactly 6 windows (6 x 4 = 24), so no stitches are counted twice.
Why the math works: The mesh ends with 48 sc, which is 12 windows x 4 sts. The band keeps exactly those 48 sts, so its circumference matches the mesh below: 48 ÷ 3.5 = 13.7 in (34.8 cm). If you added stitches, the rim would flare. If you dropped any, the opening would pull in and make it hard to stuff bags inside.
Checkpoint 5: The body should be 11.5 in (29.2 cm) tall.
Strap (Color A, Cream)
Row 1: Ch 5, sc in 2nd ch from hook and in each ch across. (4 sts)
Rows 2–40: Ch 1, turn, sc in each st across. (4 sts in each row)
Fasten off and leave an 18 in (45.7 cm) tail. The strap should be 10 in (25.4 cm) long and about 1.1 in (2.8 cm) wide.
Attaching: Make sure the strap isn’t twisted. Find the center of the back half (between sts 12 and 13). Put one end of the strap on the inside of the band over sts 7–10, and the other end over sts 15–18. That leaves 4 sts, about 1.1 in (2.8 cm), between the strap ends. Let each end overlap the band by 1.5 in (3.8 cm), or 6 rows. Use the tail to whipstitch all the way around each overlapped end, through the band only and not the mesh. That leaves a free loop of 7 in (17.8 cm), which stands about 3 in (7.6 cm) above the rim.
Final Blocking
- Weave each tail into stitches of the same color: pink tails along the sc bars and cream tails into the solid rounds.
- Wet the holder in cool water. Press out the water gently. Do not wring it.
- Roll it in a towel to remove the extra moisture.
- Slide it over a tube or rolled towel about 4.4 in (11.2 cm) across.
- Pull lightly from top to bottom so the body measures 11.5 in (29.2 cm). Then line up the tr posts so each one runs straight up and the windows are square.
- Pat the base flat and round, and lay the strap straight.
- Let it dry completely, usually 24 hours, before you take it off the form.
Final Quality-Control Checklist
- Base is flat and measures 4.25–4.5 in (10.8–11.4 cm) across
- The BLO ridge makes a clean edge at the bottom
- Every round in the cream and pink sections has 48 sts
- 8 rows of windows, each with 12 windows
- All 12 posts run straight up without leaning
- Windows are about 1.1 in (2.8 cm) wide and 1 in (2.5 cm) tall
- Top band is 2 in (5.1 cm) deep and the rim neither flares nor pulls in
- Body measures 11.5 in (29.2 cm) tall
- Strap is 10 in (25.4 cm) long, not twisted, and sewn firmly through the band only
- All tails are hidden
Troubleshooting
The posts lean in a spiral. The ch-4 of Rnd A isn’t lined up over the previous post. Always start Rnd A in the same st as the join of Rnd B.
The mesh is narrower than the base. Your ch-3 spaces are too tight. Make the chains a little looser.
The mesh is wider than the band. Check the counts. Rnd B must have exactly 3 sc in each space, not 4.
The base ruffles or cups. Recount the increases. Each round should add exactly 6 sts. Then adjust your tension as described in the gauge section.
The strap sags or tears loose. Sew through all 6 overlapped band rounds, and sew all the way around the end of the strap, not just across its top.
The rim folds in. Make the band firmer by switching to a 4.5 mm hook for Rnds 31–38.
Care
Hand wash in cool water with mild soap, press out the water gently, and dry over a form so the cylinder stays round. Do not tumble dry, because it can shrink the cotton and distort the grid.
Final Notes
Everything in this holder depends on one chain of measurements. The base has 48 sts and measures 4.25–4.5 in (10.8–11.4 cm) across. Those same 48 sts run up the cream wall, 1.5 in (3.8 cm) tall, and through 8 window units of 1 in (2.5 cm) each, adding 8 in (20.3 cm) of mesh. The cream band adds the final 2 in (5.1 cm), for a total of 11.5 in (29.2 cm). Because 48 sts divide evenly into 12 windows of 4 sts, the posts line up and the circumference stays at 13.7 in (34.8 cm) from bottom to top.
If you’d like a second holder, try reversing the colors. Use pink for the base, wall, top band, and strap, and cream or beige for the mesh. The stitch counts are exactly the same.
Happy crocheting!