
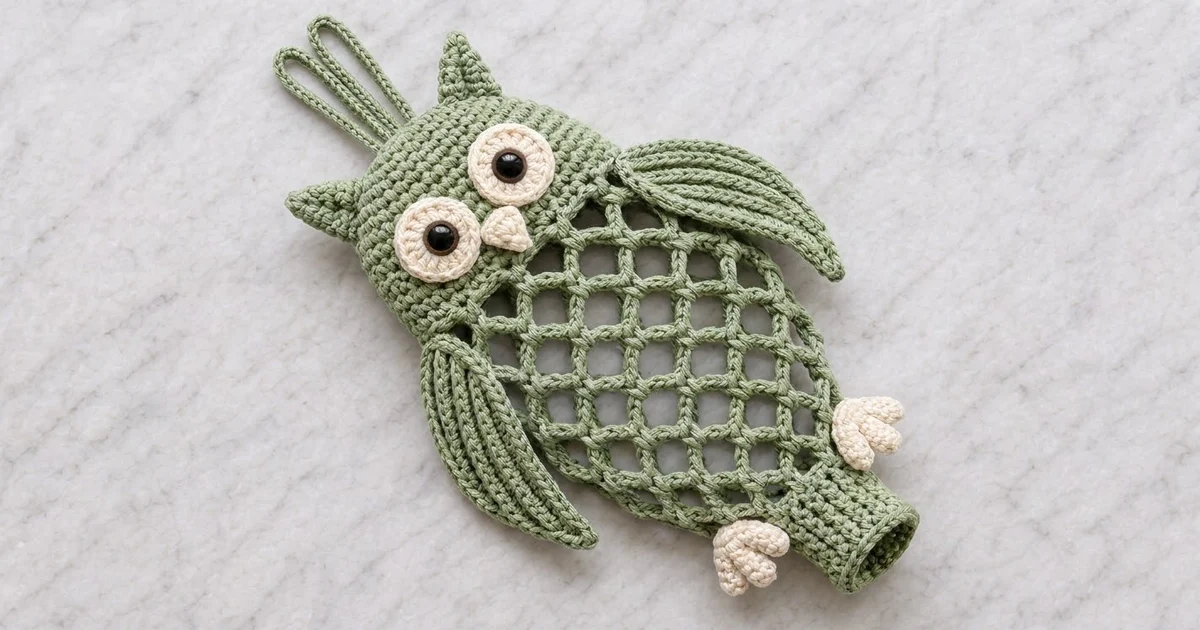
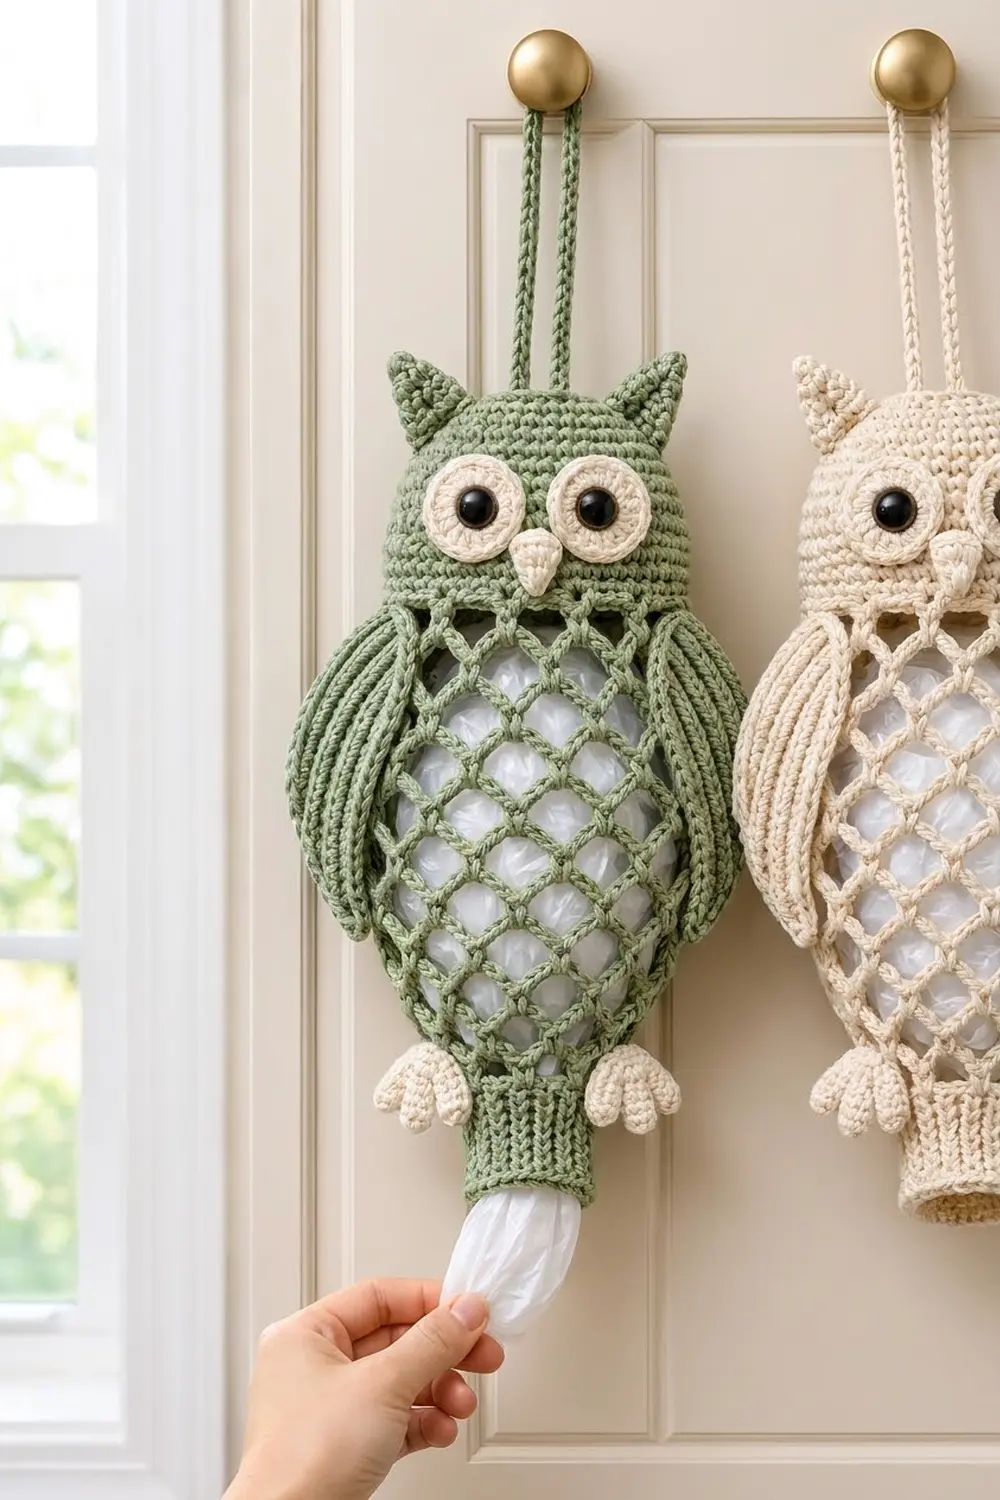
Meet Sage Hoot, a friendly owl that hangs on a cabinet knob and keeps your plastic grocery bags under control. You push the bags in through the stretchy bottom cuff, and when you need one you pull it out the same way.
The owl is made in sage green worsted cotton, with cream for the eyes, beak and feet. Two large black safety eyes give it a bright, alert face. The style is clean and modern: a solid crochet head with two pointed ears sits on an open diamond net, so you can see the white bags through the body.
This pattern uses US crochet terms. The finished body measures about 7 in (17.8 cm) wide at the belly and 18 in (45.7 cm) long, not counting the hanging straps.
Construction is simple. You crochet the head from the top down in rounds, switch to chain-loop mesh for the body, then finish with a ribbed cuff. The ears, eyes, beak, wings, feet and straps are made separately and sewn on.
Finished Size and Construction
- Finished size: about 7 in (17.8 cm) wide at the belly × 18 in (45.7 cm) long
- Skill level: Intermediate (front/back post stitches, clusters, assembly)
- Terminology: US crochet terms
- Yarn weight: Worsted (#4) cotton or cotton blend
- Hook: 5.0 mm (US H-8)
- Number of pieces: 1 main body + 11 small parts
- Layout: one standalone owl; all small parts are sewn onto the body
- Head: 6 in (15.2 cm) wide flat × about 5 in (12.7 cm) tall
- Mesh body: 11 in (27.9 cm) long, 7 in (17.8 cm) wide at its widest point
- Size before cuff: about 16 in (40.6 cm) long
- Cuff depth: 2 in (5.1 cm), 3 in (7.6 cm) wide flat
The small parts are: 2 ears, 2 eyes, 1 beak, 2 wings, 2 feet and 2 straps, for 11 small parts in total.
Materials
Choose a smooth, firm cotton or cotton blend. Cotton holds the mesh shape well, does not stretch out under the weight of bags, and washes easily. A twisted or cabled cotton gives the crisp, cord-like look shown.
- Sage green (MC): 120 g / about 188 m (205 yd)
- Cream (CC): 20 g / about 31 m (34 yd)
- 5.0 mm (US H-8) crochet hook
- 2 black safety eyes, 15 mm
- Stitch markers
- Tapestry needle
- Scissors
- Pins for placing parts
- Tape measure
The yarn amounts include a margin of about 15% for gauge swatching and sewing tails.
Abbreviations (US Terms)
- ch – chain
- sl st – slip stitch
- sc – single crochet
- dc – double crochet
- inc – 2 sc in the same stitch
- BLO – back loop only
- FLO – front loop only
- MR – magic ring
- FPdc – front post double crochet: yarn over, insert hook from front to back to front around the post of the stitch, complete as a dc
- BPdc – back post double crochet: yarn over, insert hook from back to front to back around the post, complete as a dc
- st(s) – stitch(es)
Special stitch – 4-dc cluster: yarn over, insert hook in the stitch, pull up a loop, yarn over, pull through 2 loops; repeat from * 3 more times in the same stitch (5 loops on hook), yarn over, pull through all 5 loops.
Gauge and Checkpoints
Gauge: 16 sc × 18 rounds = 4 in (10.2 cm) in sc worked in the round.
Test one part first. The head is the best swatch because its size controls the whole body. Work Rounds 1–8 and lay the disc flat. It should measure about 3.5–3.75 in (8.9–9.5 cm) across.
Checkpoints:
- After Rnd 8: disc 3.5–3.75 in (8.9–9.5 cm) across
- After Rnd 22: head 6 in (15.2 cm) wide flat, about 5 in (12.7 cm) tall
- After Rnd 33: belly 7 in (17.8 cm) wide flat
- After Rnd 41: mesh 11 in (27.9 cm) long, about 4 in (10.2 cm) wide at the lower edge
- After Rnd 47: cuff 3 in (7.6 cm) wide flat, 2 in (5.1 cm) deep
If your disc is too big, go down one hook size. If it is too small, go up one size. The mesh is looser by nature, so measure it gently without stretching.
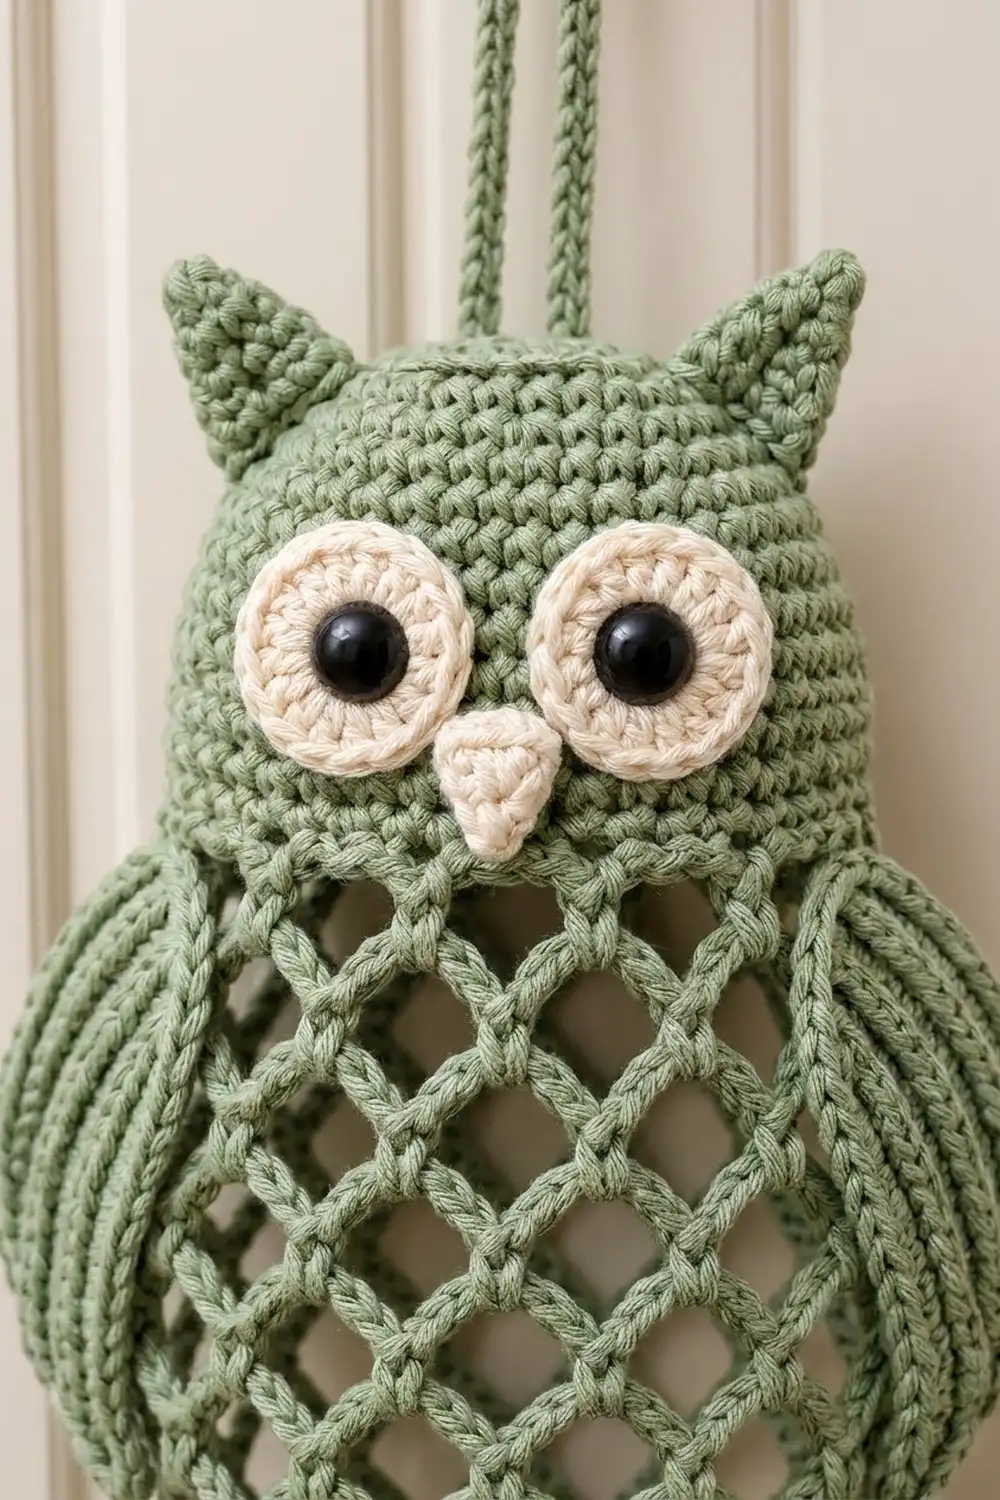
Main Body
Work the head in a continuous spiral, with a marker in the first stitch of each round. The mesh and cuff rounds are joined.
Head (MC)
Rnd 1: 6 sc in MR. (6)
Rnd 2: inc in each st around. (12)
Rnd 3: (sc, inc) 6 times. (18)
Rnd 4: (2 sc, inc) 6 times. (24)
Rnd 5: (3 sc, inc) 6 times. (30)
Rnd 6: (4 sc, inc) 6 times. (36)
Rnd 7: (5 sc, inc) 6 times. (42)
Rnd 8: (6 sc, inc) 6 times. (48)
Checkpoint: 3.5–3.75 in (8.9–9.5 cm) across.
Rnds 9–22: sc in each st around. (48)
Sl st in the next st to smooth out the step at the end of the spiral. Checkpoint: the head is 6 in (15.2 cm) wide flat and about 5 in (12.7 cm) tall. The top is a closed dome, so bags cannot escape upward.
Mesh Body (MC)
Rnd 23 (setup): ch 1, sc in first st, ch 5, skip 3 sts, sc in next st; repeat from * 10 more times, ch 5, skip 3 sts, sl st to first sc. (12 ch-5 loops)
Math check: 12 repeats × 4 sts used (1 sc + 3 skipped) = 48 sts.
For each mesh round after this: sl st along the chains to the center of the first loop, ch 1, sc in the same loop, work the round as stated, then sl st to the first sc. Each round keeps 12 loops.
Rnds 24–27: ch 5, sc in next loop around. (12 ch-5 loops)
Checkpoint: about 6.5 in (16.5 cm) wide flat.
Rnds 28–33: ch 6, sc in next loop around. (12 ch-6 loops)
The longer chains open the diamonds and widen the belly. Checkpoint: 7 in (17.8 cm) wide flat.
Rnds 34–37: ch 5, sc in next loop around. (12 ch-5 loops)
Rnds 38–39: ch 4, sc in next loop around. (12 ch-4 loops)
Rnds 40–41: ch 3, sc in next loop around. (12 ch-3 loops)
The shorter chains pull the net in and narrow the lower body. Checkpoint: the mesh is 11 in (27.9 cm) long and about 4 in (10.2 cm) wide at the lower edge. Do not fasten off; the cuff continues from here.
Small Parts
Leave a long tail on every part for sewing.
Ears (make 2, MC)
Rnd 1: 4 sc in MR. (4)
Rnd 2: (sc, inc) 2 times. (6)
Rnd 3: (2 sc, inc) 2 times. (8)
Rnd 4: (3 sc, inc) 2 times. (10)
Rnd 5: (4 sc, inc) 2 times. (12)
Rnd 6: sc around. (12)
Flatten and sc 6 sts across through both layers. Each ear is about 1.3 in (3.3 cm) tall.
Eyes (make 2, CC)
Rnd 1: 8 sc in MR. (8)
Rnd 2: inc in each st around. (16)
Rnd 3: (sc, inc) 8 times. (24)
Rnd 4: working in FLO, sl st in each st around. (24)
The slip-stitch round sits on top of the edge as a raised ridge. Fasten off. Push a 15 mm safety eye through the center of the MR and lock the washer. Each eye is 1.5 in (3.8 cm) across.
Beak (CC)
Row 1: ch 2, sc in 2nd ch from hook. Turn. (1)
Row 2: ch 1, 3 sc in sc. Turn. (3)
Row 3: ch 1, inc, sc, inc. Turn. (5)
Row 4: ch 1, sc across. (5)
Edge: ch 1, sc evenly around the triangle, sl st to join. The beak is about 1 in (2.5 cm) wide × 0.8 in (2.0 cm) tall. Tuck a small yarn scrap behind it as you sew to make it puffy.
Wings (make 2, MC)
Ch 21.
Row 1: sc in 2nd ch from hook and next 18 ch, 3 sc in last ch; working along the other side of the chain, sc in next 18 ch, leaving the last ch unworked. Turn. (19 + 3 + 18 = 40)
Rows 2–4: ch 1, sc in BLO of each st up to the center st of the 3-sc tip, 3 sc in BLO of the center st, sc in BLO of each st down the other side, leaving the last st unworked. Turn.
Counts: Row 2 = 41, Row 3 = 42, Row 4 = 43. Each row adds 2 sts at the tip and leaves 1 unworked, so each row has 1 more st than the last.
The BLO rows create the lengthwise ridges. Each wing is a leaf about 5.5 in (14.0 cm) long × 2 in (5.1 cm) wide.
Feet (make 2, CC)
Ch 4.
Row 1: sc in 2nd ch from hook and next 2 ch. Turn. (3)
Row 2: in each of the 3 sts work: sl st, ch 2, 4-dc cluster, ch 2, sl st. (3 toes)
Each foot is about 1.5 in (3.8 cm) wide.
Hanging Straps (make 2, MC)
Ch 41.
Rnd 1: sc in 2nd ch from hook and next 38 ch, 3 sc in last ch; working along the other side, sc in next 38 ch, 2 sc in the same ch as the first sc; sl st to first sc. (39 + 3 + 38 + 2 = 82)
Each strap is a narrow flat oval about 10 in (25.4 cm) long. The chain center stays open as a slot.
Border: Ribbed Bottom Cuff
The cuff is the finishing edge of this piece. You work it straight off the last mesh round.
Border gauge: 24 sts = 6 in (15.2 cm) around, so 12 sts per flattened side = 3 in (7.6 cm).
Rnd 42 (conversion): ch 1, 2 sc in each ch-3 loop around, skipping the sc between loops; sl st to first sc. (12 loops × 2 sc = 24 sc; 12 per side)
Rnd 43: ch 2 (does not count), FPdc around next st, BPdc around next st; repeat from * 11 more times, sl st to first FPdc. (12 FPdc + 12 BPdc = 24; 12 per side)
Rnds 44–46: repeat Rnd 43, working FPdc around FPdc and BPdc around BPdc. (24; 12 per side)
Rnd 47: ch 1, sc in each st around, sl st to first sc. (24; 12 per side)
Fasten off and weave in.
Why the math works: 12 loops × 2 sc gives exactly 24 sts. 24 is even, so the 1×1 rib repeats 12 times with no leftover stitch. Flattened, the tube shows 12 sts on the front and 12 on the back. At 4 sts per inch, 12 sts give the 3 in (7.6 cm) cuff width. The cuff is 2 in (5.1 cm) deep: one sc round, four post-stitch rounds and one more sc round.
Assembly
- Ears: pin on top of the head between Rnds 6 and 8, about 3 in (7.6 cm) apart. Sew along the flat base.
- Eyes: pin between Rnds 12 and 19, 0.25 in (0.6 cm) apart at the center. Sew around the outer ridge.
- Beak: center it just below the eyes, point down. Sew around.
- Wings: place one on each side with the top tip at Rnd 23 and the curved edge facing out. Sew down the center spine and along the top 1 in (2.5 cm) of the edge so the lower part of the wing stands a little free.
- Feet: sew to the front at Rnd 41, toes pointing down, about 1 in (2.5 cm) apart.
- Straps: sew the bottom 0.5 in (1.3 cm) of each strap to the crown, about 1.5 in (3.8 cm) apart. To hang, slip both strap slots over a knob or hook.
Final Blocking
- Lightly mist the body with water.
- Stuff it loosely with plastic bags or a rolled towel to open the mesh.
- Shape the diamonds evenly with your fingers.
- Flatten the wings and ears; pin them if they curl.
- Check width: 6 in (15.2 cm) head, 7 in (17.8 cm) belly, 3 in (7.6 cm) cuff.
- Let it dry completely before hanging.
Final Quality-Control Checklist
- Head is 6 in (15.2 cm) wide and fully closed at the top
- Every mesh round has 12 loops
- Belly measures 7 in (17.8 cm) flat
- Cuff has 24 sts with clean vertical ribs
- Safety eye washers are locked tight
- Ears, wings and feet match each other and sit level
- Straps are secure and the same length
- All ends are woven in
Troubleshooting
Head ripples: you have too many stitches for your tension; use a smaller hook.
Head cups too much: go up a hook size.
Mesh twists: you may be landing off-center in a loop; always join into the center chain.
Loop count changes: recount after each round; you need 12 every time.
Cuff flares: work the post stitches more firmly, or go down a hook size for the cuff only.
Wing curls: steam block it flat.
Bags fall out: add one more rib round to tighten the cuff.
Care
Hand wash in cool water and lay flat to dry. Reshape the mesh while it is damp.
Final Notes
The measurement chain is simple. A 48-stitch head at 6 in (15.2 cm) sets the base. The 12 mesh loops widen to 7 in (17.8 cm) and narrow to 4 in (10.2 cm). The 24-stitch cuff finishes at 3 in (7.6 cm) wide and 2 in (5.1 cm) deep. Check each stage and the owl will come out 18 in (45.7 cm) long. For a matching twin, make a second owl entirely in cream.
Happy crocheting!