

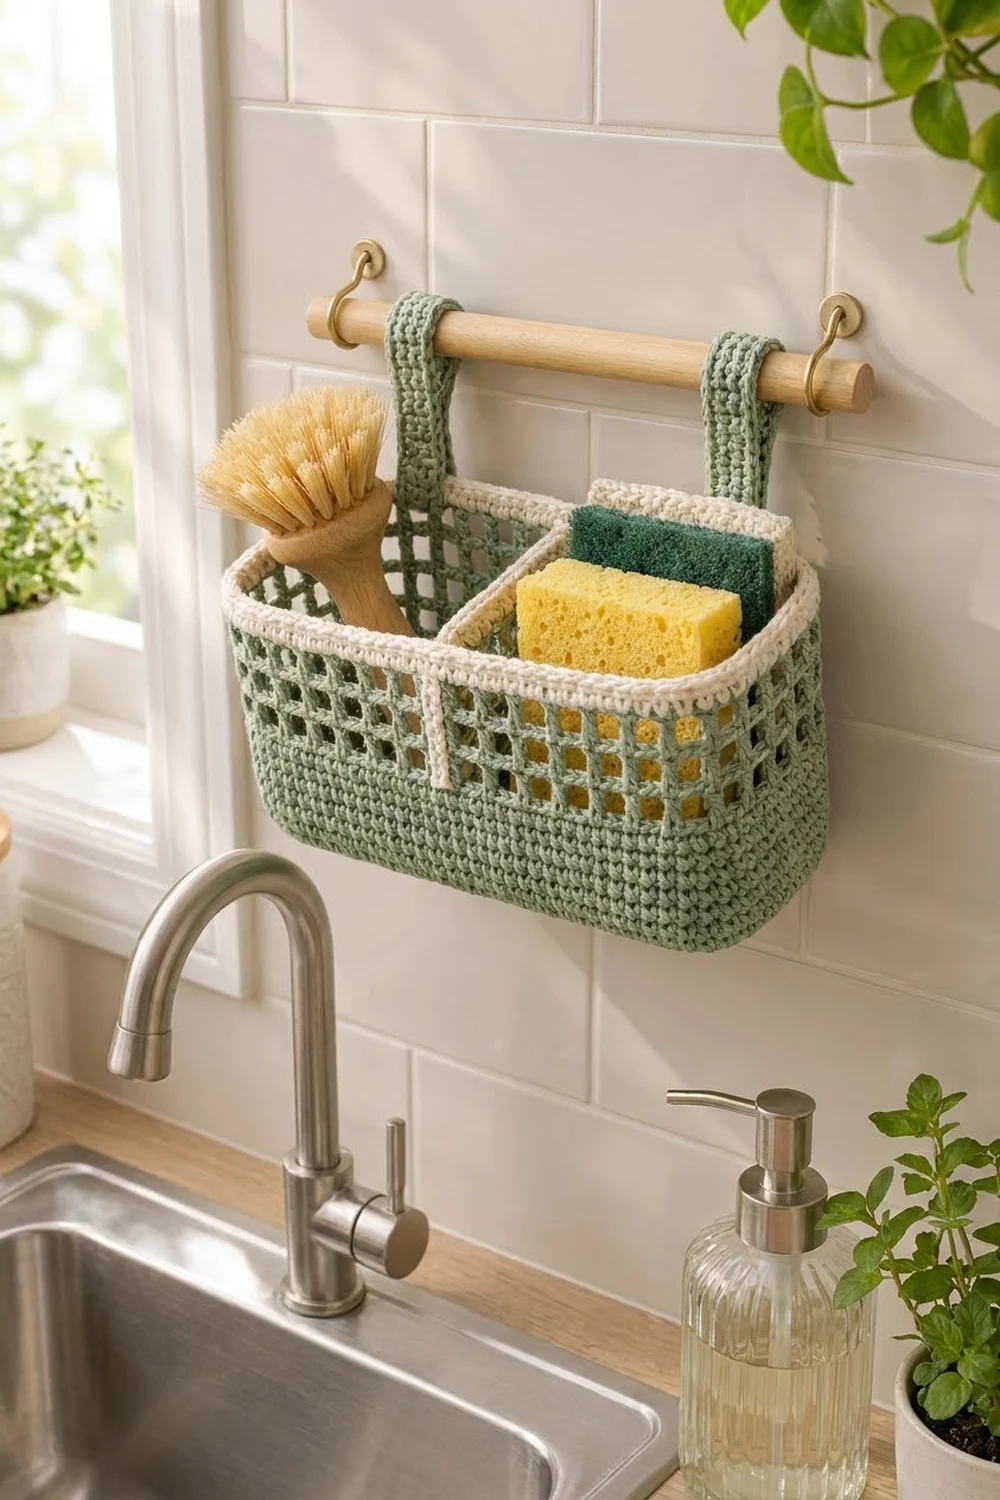
This hanging sink caddy keeps your dish brush and sponges off the counter so they can drip dry. It has a solid oval base, a sturdy single crochet lower wall, and an open filet mesh upper wall that lets air move through.
The colors are calm and suit a kitchen. The body, divider, and straps are sage green, and the rim and the divider edge are cream. The look is clean, modern, and practical.
The pattern uses US crochet terms. The finished basket measures about 9.4 in (23.9 cm) long, 3.4 in (8.6 cm) deep, and 5.1 in (13.0 cm) tall.
You will crochet four pieces. The base and walls are one continuous piece worked in joined rounds. You work a small divider panel and two straps with rings separately, then sew them in. The basket hangs from a short wooden dowel threaded through the strap rings.
Finished Size and Construction
- Finished size: 9.4 in (23.9 cm) long x 3.4 in (8.6 cm) deep x 5.1 in (13.0 cm) tall
- Skill level: Easy-Intermediate
- Terminology: US
- Yarn weight: Worsted (#4) cotton
- Hook: 4.0 mm (G-6)
- Number of pieces: 4 (1 basket body, 1 divider, 2 straps)
- Layout: Divider centered across the width; straps on the back wall
- Base size: 9.4 x 3.4 in (23.9 x 8.6 cm), 102 sts around
- Height before rim: 4.5 in (11.4 cm)
- Rim depth: 0.6 in (1.5 cm)
Materials
Choose a firm, smooth worsted yarn in 100% cotton or a cotton blend. Cotton holds its shape when damp and dries well near a sink. Don’t use acrylic here: it stretches when wet and the basket will sag.
- Sage green (Color A): 100 g, about 180 m (197 yd)
- Cream (Color B): 25 g, about 45 m (49 yd)
These amounts include about 20% extra.
Tools:
- 4.0 mm (G-6) crochet hook
- Tapestry needle
- 4 locking stitch markers
- Scissors and a measuring tape
- Wooden dowel, 5/8 in (1.6 cm) diameter, 12 in (30.5 cm) long
- 2 cup hooks with wall anchors
Abbreviations (US Terms)
- ch – chain
- sl st – slip stitch
- sc – single crochet
- dc – double crochet
- inc – 2 sc in the same stitch
- BLO – back loop only
- sk – skip
- sp – space
- st(s) – stitch(es)
Special stitch – mesh square: (dc in next st or dc, ch 2, sk 2 sts or the ch-2 sp). Each mesh square is 3 stitches wide.
Gauge and Checkpoints
Gauge: 18 sc x 20 rows = 4 in (10.2 cm) in sc. One sc row is about 0.2 in (0.5 cm) tall. One dc mesh round is about 0.5 in (1.3 cm) tall, and one mesh square is about 0.7 in (1.8 cm) wide.
Work the base first and use it as your test piece. Gauge matters more than usual here because the divider and straps have to fit the body.
Checkpoints:
- After Round 8, the base measures 9.4 x 3.4 in (23.9 x 8.6 cm).
- After Round 18, the solid wall is 2 in (5.1 cm) tall.
- After Round 23, the wall is 4.5 in (11.4 cm) tall.
- After Round 27, the full height is 5.1 in (13.0 cm).
If your base is too big, go down to a 3.75 mm hook. If it is too small, go up to 4.5 mm. Don’t change the stitch counts, because the mesh needs a multiple of 3.
Basket Body (Make 1)
Use Color A. Work in joined rounds. Join each round with a sl st to the first sc, then ch 1 (does not count as a st). Place a marker in the first st of each round.
Foundation: Ch 30.
Round 1: 2 sc in 2nd ch from hook, sc in next 27 ch, 3 sc in last ch. Turn the piece and work along the bottom loops: sc in next 27 ch, 1 sc in the same ch as the first 2 sc. Join. (60 sts)
Each end now has 3 sts, and each long side has 27 sts.
Round 2: Inc in next 2 sts, sc in next 27 sts, inc in next 3 sts, sc in next 27 sts, inc in last st. Join. (66 sts)
Round 3: (Sc in next st, inc) 2 times, sc in next 27 sts, (sc in next st, inc) 3 times, sc in next 27 sts, (sc in next st, inc) once. Join. (72 sts)
Round 4: (Sc in next 2 sts, inc) 2 times, sc in next 27 sts, (sc in next 2 sts, inc) 3 times, sc in next 27 sts, (sc in next 2 sts, inc) once. Join. (78 sts)
Round 5: Repeat Round 4, working sc in next 3 sts before each inc. (84 sts)
Round 6: Repeat, working sc in next 4 sts before each inc. (90 sts)
Round 7: Repeat, working sc in next 5 sts before each inc. (96 sts)
Round 8: Repeat, working sc in next 6 sts before each inc. (102 sts)
The base is now a flat stadium shape, 9.4 x 3.4 in (23.9 x 8.6 cm). The straight sides are 6.0 in (15.2 cm) long, and the edge measures about 22.7 in (57.7 cm) all the way around.
Round 9 (turning ridge): Sc in BLO of each st around. Join. (102 sts)
This round turns the wall sharply upward and leaves a visible ridge along the bottom edge.
Rounds 10–18: Sc in each st around. Join. (102 sts each)
The solid lower wall is now 2 in (5.1 cm) tall.
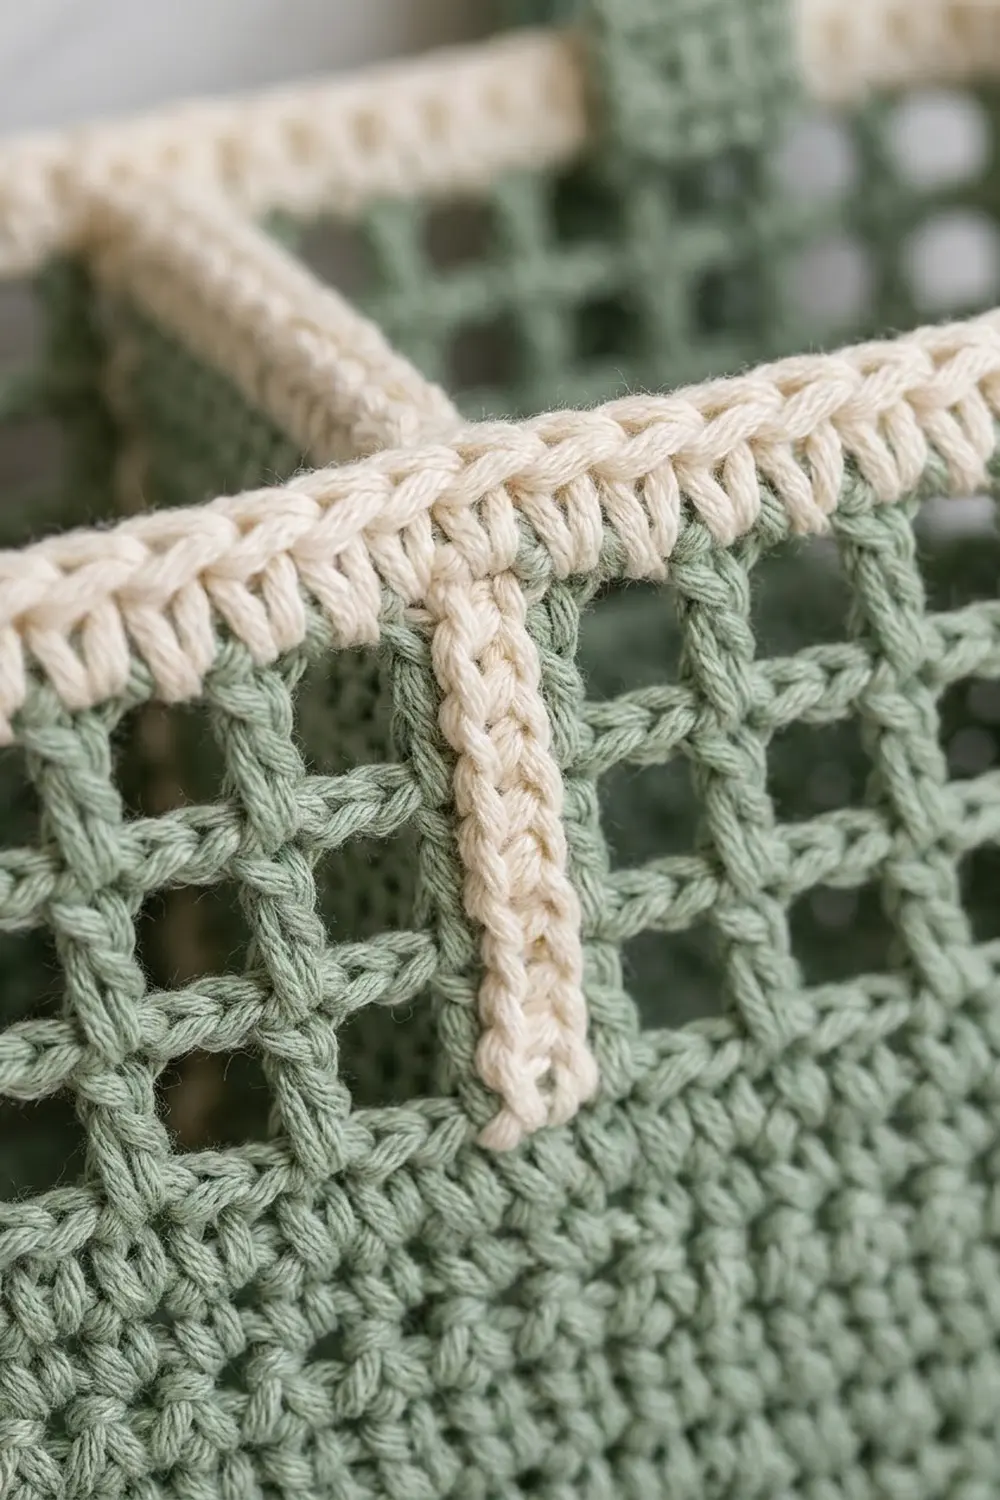
Round 19 (mesh set-up): Ch 5 (counts as dc + ch 2), sk next 2 sts, dc in next st, ch 2, sk next 2 sts; repeat from * around. Join with a sl st to the 3rd ch of the beginning ch-5. (34 dc, 34 ch-2 sps; 34 mesh squares)
The count works because 102 ÷ 3 = 34. You don’t lose or add any stitches.
Rounds 20–23: Ch 5 (counts as dc + ch 2), dc in next dc, ch 2; repeat from * around. Join to the 3rd ch of the beginning ch-5. (34 mesh squares each)
You now have 5 mesh rounds, 2.5 in (6.4 cm) tall, and the wall is 4.5 in (11.4 cm) tall. Fasten off Color A. The rim is worked in the Border section.
Divider (Make 1)
Use Color A. Work in turned rows.
Foundation: Ch 13.
Row 1: Sc in 2nd ch from hook and in each ch across. Turn. (12 sts)
Rows 2–23: Ch 1, sc in each st across. Turn. (12 sts each)
The panel measures 2.7 in (6.9 cm) wide x 4.6 in (11.7 cm) tall. Fasten off and leave a 16 in (40.6 cm) tail of Color A for sewing. The cream edge is worked in the Border section.
Hanging Straps (Make 2)
Use Color A.
Ring: Ch 12 and join with a sl st to form a ring.
Ring Round: Ch 1, work 24 sc into the ring. Join. (24 sts)
The ring is about 1.3 in (3.3 cm) across on the outside, with a 0.8 in (2.0 cm) opening. A 5/8 in (1.6 cm) dowel fits through it with room to spare.
Row 1: Ch 1, sc in the same st and in the next 4 sts. Turn. (5 sts)
Rows 2–20: Ch 1, sc in each st across. Turn. (5 sts each)
The strap is 1.1 in (2.8 cm) wide. The flat part is 4 in (10.2 cm) long, and the whole strap with its ring is about 5.3 in (13.5 cm). Fasten off and leave a 12 in (30.5 cm) tail for sewing.
Make All Pieces
Before assembly, check that you have:
- Color A: 1 basket body (Rounds 1–23), 1 divider panel, 2 straps
- Color B: the rim and the divider edge, both worked in the Border section
Assembly layout (back wall, seen from inside):
   [ring]                    [ring]
   |strap|                   |strap|
 +--|---|---------------------|---|--+  <- cream rim
 |  |___|          ||         |___|  |  <- 1 in strap overlap
 |                 ||                |  <- mesh wall
 |  <-1 in->    divider     <-1 in-> |
 |  (from each end of 6.0 in side)   |
 +-----------------------------------+  <- solid wall + base
Joining
Sew all joins with the Color A tails, using a whipstitch through matching stitches.
Divider: Fold the basket flat and mark the center stitch of each long side at the turning ridge and at the top of the wall. Stand the divider upright across the base between the two ridge markers, with the foundation edge down. Whipstitch its 12 foundation stitches evenly along that line, catching one base stitch on each pass. Then whipstitch each side edge to the inside of the wall, one row end to each wall stitch or mesh post, working up to the rim.
Straps: Pick one long side as the back. Place each strap 1 in (2.5 cm) in from an end of the 6.0 in (15.2 cm) straight section, so the strap centers sit 4 in (10.2 cm) apart. Lay the bottom 5 rows of each strap, 1 in (2.5 cm), against the inside of the wall just below the rim. Sew around all four edges of that overlap, catching the solid rim rows and the top mesh posts.
Tension: Pull each whipstitch snug but not tight. Stitches that are too tight pucker the mesh and tilt the divider.
Checkpoint: The top of the divider should sit about 0.3 in (0.8 cm) below the top of the rim, and both rings should stand level above the rim.
Border
Border gauge: Same as the body, 18 sc = 4 in (10.2 cm). Use Color B.
Basket Rim
Round 24 (conversion round): Join Color B in any dc. Ch 1, sc in the dc, 2 sc in the next ch-2 sp; repeat from * around. Join. (34 sts worked 1-per-dc + 68 sts worked 2-per-space = 102 sts)
Rounds 25–26: Ch 1, sc in each st around. Join. (102 sts each)
Round 27: Sl st loosely in each st around. (102 sl sts) Fasten off and weave in.
Why the math works: Each mesh square is 3 stitches wide (1 dc + 2 ch). Working 1 sc on each dc and 2 sc in each space gives exactly 3 sc per square. That brings the rim back to the original 102 stitches, so it doesn’t flare or pull in. The rim is 0.6 in (1.5 cm) deep.
Divider Edge
This edge is easiest to work before you sew the divider in.
Edging Row: With the right side facing, join Color B at the bottom of the left side. Work 23 sc evenly up the side, 1 in each row end. Work 3 sc in the first top stitch (corner), sc in the next 10 sts, and 3 sc in the last top stitch (corner). Work 23 sc down the right side. Fasten off. (23 + 3 + 10 + 3 + 23 = 62 sts)
The 12 top stitches become 3 + 10 + 3 = 16. The bottom edge stays green for sewing. The finished divider is 3.1 in (7.9 cm) wide and 4.8 in (12.2 cm) tall, which fits the inside width of the basket.
Final Blocking
- Soak the finished basket in cool water and gently squeeze out the extra water. Don’t wring it.
- Roll it in a towel and press to remove more water.
- Stuff the inside firmly with a plastic bag or rolled towel, filling both compartments.
- Shape the base flat and the walls straight. Pinch the turning ridge into a sharp fold.
- Straighten each mesh square so the dc posts stand vertical.
- Pin the straps upright, with the rings level.
- Let it dry completely, about 24–48 hours.
Final Quality-Control Checklist
- Base measures 9.4 x 3.4 in (23.9 x 8.6 cm) and lies flat.
- Rounds 1–8 end with 60, 66, 72, 78, 84, 90, 96, and 102 sts.
- Wall rounds have 102 sts, and every mesh round has 34 squares.
- Turning ridge shows all the way around.
- Rim has 102 sts and sits level, with no ripples.
- Divider is centered, upright, and about 0.3 in (0.8 cm) below the rim top.
- Strap centers are 4 in (10.2 cm) apart, and the rings line up.
- All ends are woven in securely.
Troubleshooting
Base curls into a bowl: You’re working the increase rounds too tightly. Go up one hook size for the base only.
Base ruffles: Recount, because you may have extra stitches. Each round should add exactly 6.
Mesh squares lean: You’re working into the wrong spot. Always dc into the top of the dc below, not into the chain space.
Rim flares: Some spaces have 3 sc. Use exactly 2 sc in each ch-2 space.
Divider bows: It’s too tall or too wide. Take out a row, or redo the edge with tighter tension.
Basket tips forward when full: Move the straps a little lower on the back wall, or add a row of sl sts around the strap overlap to reinforce it.
Care
Hand wash in cool water with mild soap and reshape while damp. Lay flat or hang to dry, and let it dry fully between heavy uses.
Final Notes
The measurement chain is simple. The base grows to 102 stitches and 9.4 x 3.4 in (23.9 x 8.6 cm). Ten solid rounds add 2 in (5.1 cm), five mesh rounds of 34 squares add 2.5 in (6.4 cm), and the 102-stitch cream rim adds 0.6 in (1.5 cm), for 5.1 in (13.0 cm) in total. The 3.1 x 4.8 in (7.9 x 12.2 cm) divider fits inside, and the two 5.3 in (13.5 cm) straps hold the basket on the dowel.
Check each stage against these numbers and the pieces will fit together cleanly.
Happy crocheting!