
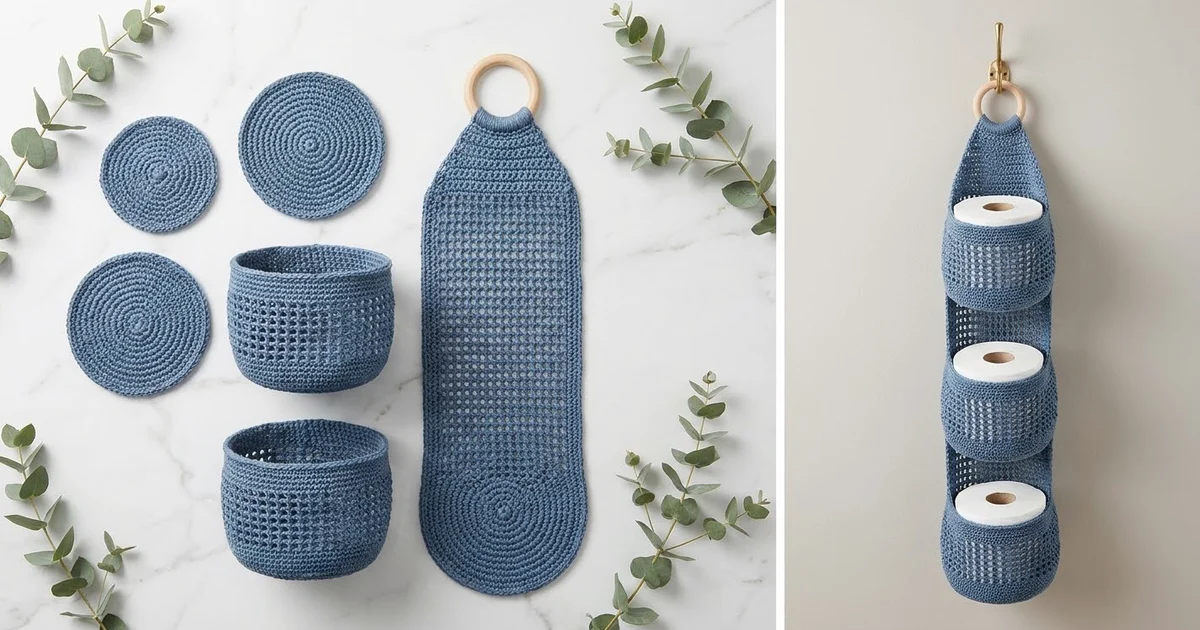
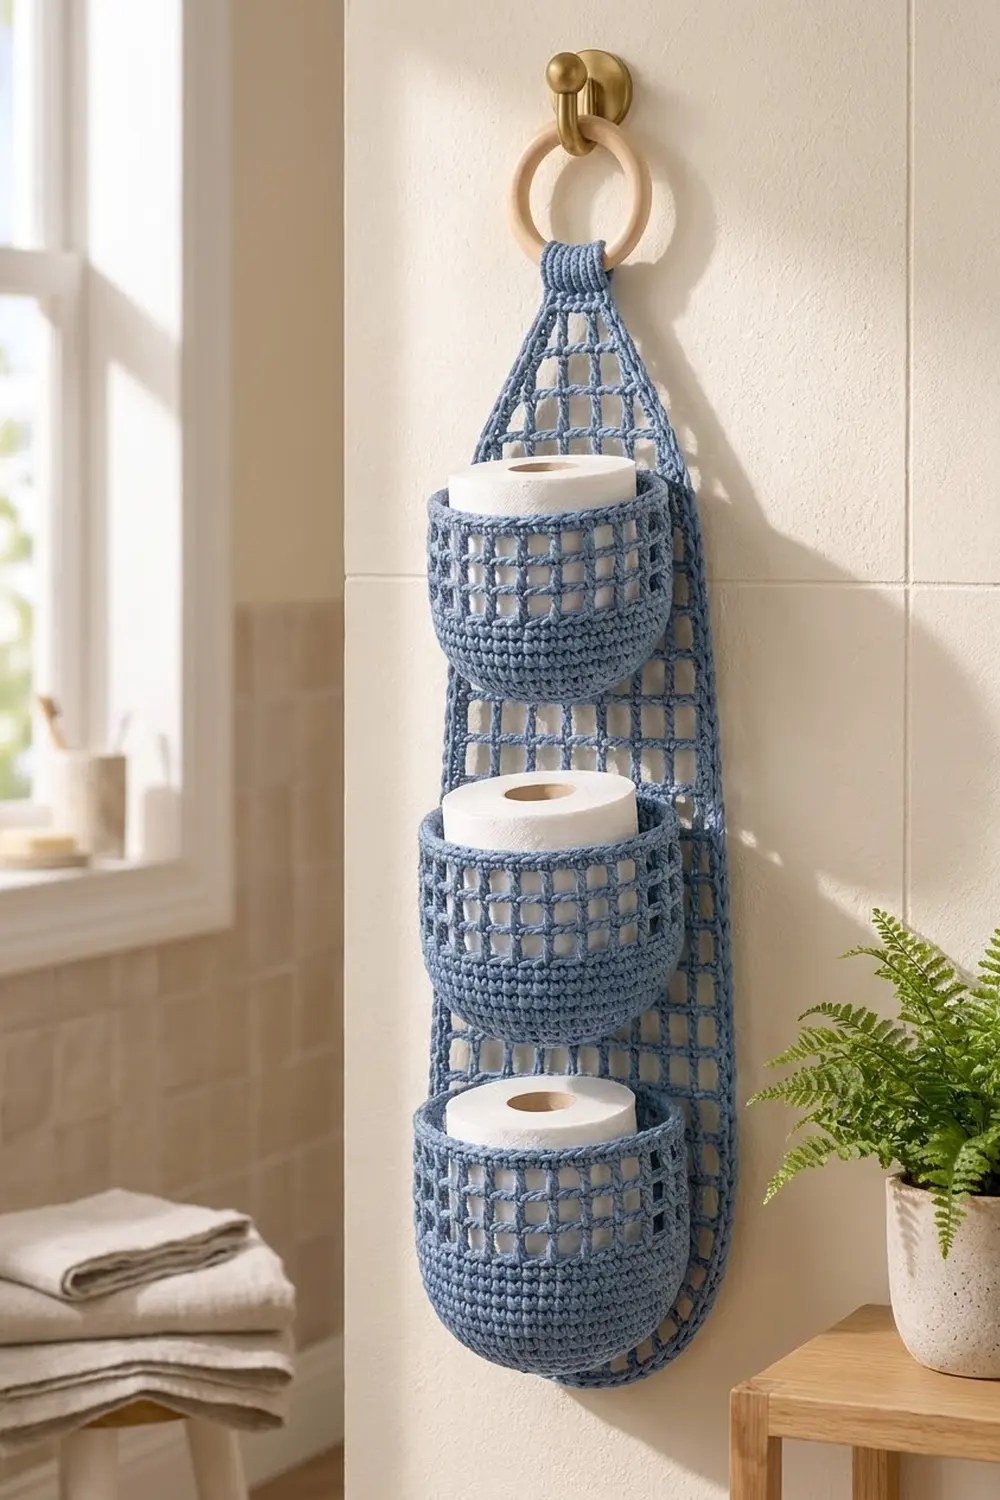
The Bluebell Grid holder is a tall, airy wall organizer that stores three spare toilet rolls in round mesh baskets. A long filet mesh panel hangs from a wooden ring, and three soft bowls are sewn down its front. Each bowl has a solid base, a band of square windows and a rounded rim.
The sample is worked in one dusty denim blue cotton. The single color keeps the focus on texture: a crisp grid behind round, sculpted pockets. It suits a calm, modern bathroom and is sturdy enough for everyday use.
This pattern uses US crochet terms. The finished panel measures 6¾ in (17.1 cm) wide by 21¾ in (55.2 cm) long, not counting the tab. Hung on its ring, the holder is about 25½ in (64.8 cm) long overall.
The panel is worked in rows from the foundation upward, then tapered into a tab. After that, three short rows are added below the foundation to round the bottom. The baskets are worked in the round from the center out. A two-row border finishes the panel, and the baskets are whipstitched in place.
Finished Size and Construction
- Finished size: 6¾ in × 21¾ in (17.1 cm × 55.2 cm) panel; about 25½ in (64.8 cm) hanging length
- Skill level: Easy-intermediate
- Terminology: US
- Yarn weight: Worsted (#4) cotton
- Hook: 5.0 mm (H-8)
- Number of pieces: 4 crocheted pieces (1 panel, 3 baskets) plus 1 wooden ring
- Layout: 3 baskets stacked in a single vertical column
- Basket size: 4¾ in (12.1 cm) base diameter, about 3¼ in (8.3 cm) deep, 5 in (12.7 cm) wide once mounted
- Panel size before border: 6¼ in × 21½ in (15.9 cm × 54.6 cm)
- Border depth: ¼ in (0.6 cm)
Materials
Use a smooth worsted cotton or cotton blend. Cotton holds the mesh square and the baskets round, while acrylic will sag under the weight of the rolls.
- Denim Blue: 120 g, about 205 m (224 yd)
- 5.0 mm (H-8) crochet hook
- Wooden ring, 2½ in (6.4 cm) diameter
- Tapestry needle
- Stitch markers
- Rustproof pins
- Measuring tape
- Blocking mat and spray bottle
The quantities include about a 25% margin for gauge swatching and differences in tension.
Abbreviations (US Terms)
- ch – chain
- sl st – slip stitch
- sc – single crochet
- dc – double crochet
- sp – space
- st(s) – stitch(es)
- RS – right side
- WS – wrong side
Special stitch – Mesh: dc, ch 1, skip 1 st (or skip the ch-1 sp below), dc in the next dc. Each mesh is 2 sts wide: one dc plus one ch-1. A row of n mesh has (2n + 1) sts.
Mesh decrease (1 mesh at each end): At the start of the row, sl st in the first dc, the next ch-1 sp and the next dc, then ch 4 (this counts as dc + ch 1). At the end of the row, stop 1 mesh early by working the last dc into the second-to-last dc.
Gauge and Checkpoints
- Sc gauge: 16 sc and 18 rows = 4 in (10.2 cm)
- Mesh gauge: 8 mesh (16 sts) and 8 rows = 4 in (10.2 cm), so each mesh square is ½ in × ½ in (1.3 cm × 1.3 cm)
Make one basket first. It works as your gauge test.
- Basket checkpoint: After Round 10 the base should measure 4¾ in (12.1 cm) across, with a circumference of 15 in (38.1 cm).
- Panel checkpoint 1: After Row 8 the panel should be 6¼ in (15.9 cm) wide and 4 in (10.2 cm) tall.
- Panel checkpoint 2: After Row 30 it should be 15 in (38.1 cm) tall.
If your pieces come out too big, go down 0.5 mm. If they are too small, go up 0.5 mm. If the width is right but the mesh rows are too tall, wrap the yarn more snugly on each dc, or try a shorter-shanked hook.
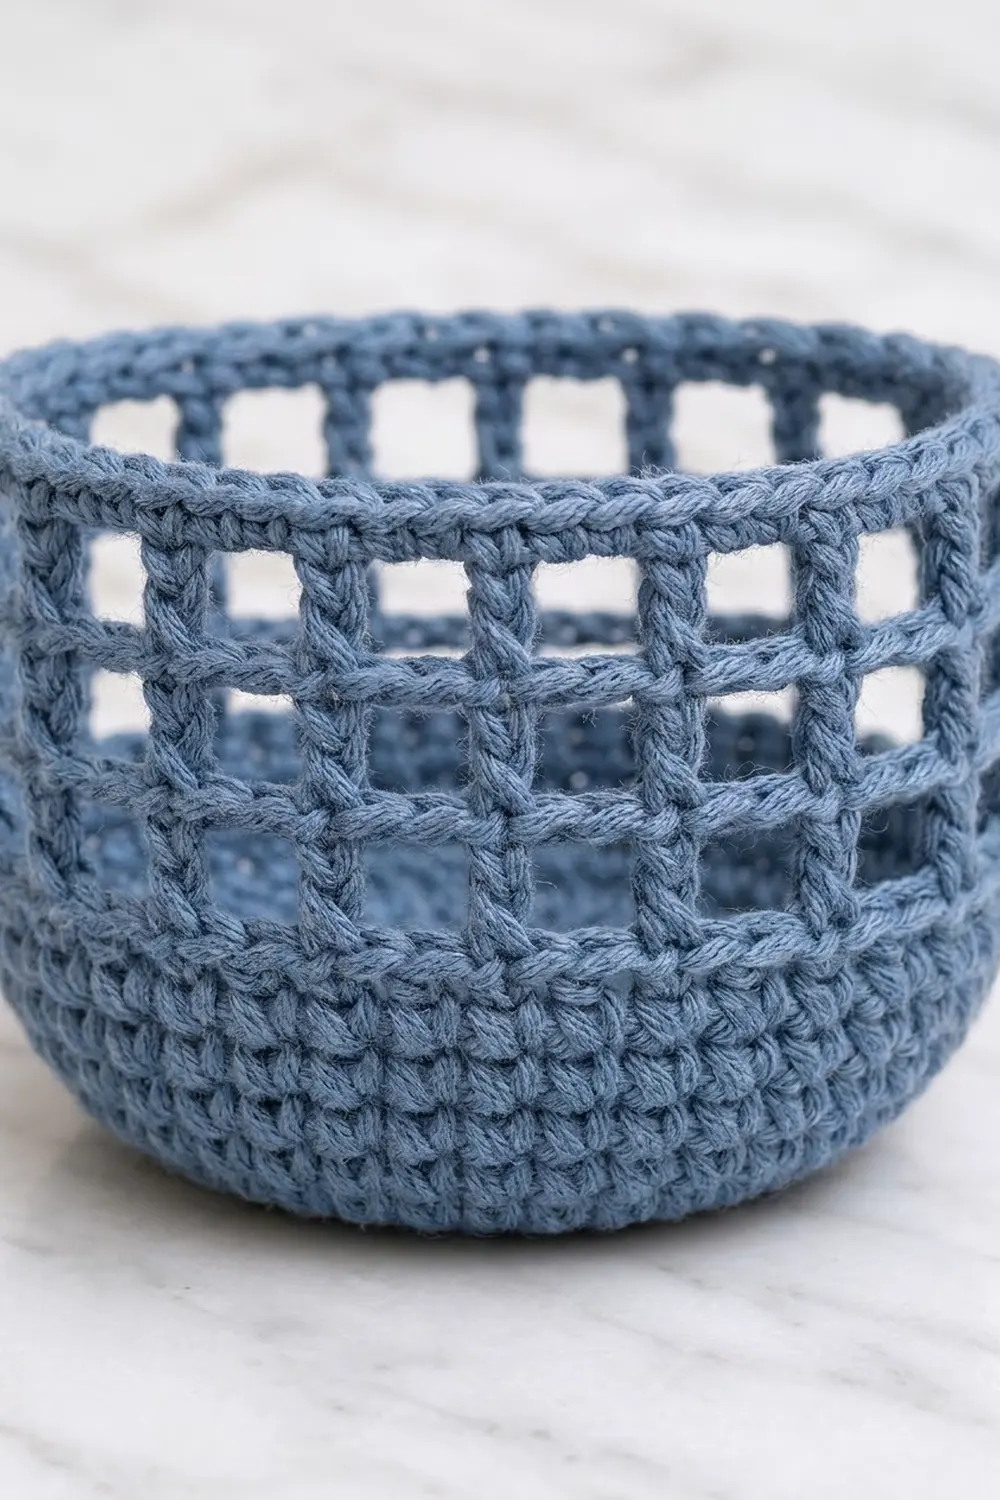
Baskets (make 3)
Work Rounds 1–16 in a continuous spiral and move a marker up to the first stitch of each round.
Round 1: Make a magic ring and work 6 sc into it. (6 sts)
Round 2: 2 sc in each st around. (12 sts)
Round 3: Sc in next st, 2 sc in next st 6 times. (18 sts)
Round 4: Sc in next 2 sts, 2 sc in next st 6 times. (24 sts)
Round 5: Sc in next 3 sts, 2 sc in next st 6 times. (30 sts)
Round 6: Sc in next 4 sts, 2 sc in next st 6 times. (36 sts)
Round 7: Sc in next 5 sts, 2 sc in next st 6 times. (42 sts)
Round 8: Sc in next 6 sts, 2 sc in next st 6 times. (48 sts)
Round 9: Sc in next 7 sts, 2 sc in next st 6 times. (54 sts)
Round 10: Sc in next 8 sts, 2 sc in next st 6 times. (60 sts)
To keep the circle round instead of hexagonal, shift the position of the increases on alternate rounds. For example, on Round 9 work 3 sc, then repeat 2 sc in next, sc in next 7 6 times, ending with 4 sc.
Checkpoint: The base lies flat and measures 4¾ in (12.1 cm) across.
Rounds 11–16: Sc in each st around. (60 sts each round)
Because there are no more increases, the wall curves up into a soft bowl shape. At the end of Round 16, sl st into the next st to smooth the step left by the spiral.
Round 17 (conversion to mesh): Ch 4 (counts as dc + ch 1), skip next st, dc in next st, ch 1, skip next st 29 times. Join with a sl st to the 3rd ch of the starting ch-4. (30 dc + 30 ch-1 = 60 sts, or 30 mesh)
Rounds 18–19: Ch 4, skip the ch-1 sp, dc in next dc, ch 1, skip the ch-1 sp 29 times. Join with a sl st to the 3rd ch of the starting ch-4. (30 mesh, 60 sts)
Each dc sits directly above the dc below it, which makes the square windows.
Round 20 (conversion to sc): Ch 1, then sc in each dc and each ch-1 sp around. Join with a sl st to the first sc. (30 sc in dc + 30 sc in sps = 60 sts)
Round 21: Ch 1, sc in each st around. Join with a sl st. (60 sts)
Fasten off and leave a 30 in (76.2 cm) tail for sewing.
Checkpoint: The side wall should be about 3¼ in (8.3 cm) tall. That is 1⅓ in (3.4 cm) of solid sc, 1½ in (3.8 cm) of mesh and a rim just under ½ in (1.1 cm) tall.
Backing Panel
Main Section
Foundation: Ch 28.
Row 1: Dc in the 6th ch from the hook. The 5 skipped ch count as dc, ch 1 and 1 skipped ch. Then ch 1, skip 1 ch, dc in next ch 11 times. Turn. (13 dc + 12 ch-1 = 25 sts, or 12 mesh)
Row 2: Ch 4 (counts as dc + ch 1), skip the ch-1 sp, dc in next dc. Then ch 1, dc in next dc across. Work the last dc into the 3rd ch of the turning chain. Turn. (12 mesh, 25 sts)
Rows 3–30: Repeat Row 2. (12 mesh, 25 sts each row)
Checkpoint: The panel is 6¼ in × 15 in (15.9 cm × 38.1 cm).
Taper
The taper decreases 1 mesh at each end on odd rows and works even rows straight.
- Row 31: Mesh decrease at both ends. (10 mesh, 21 sts)
- Row 32: Repeat Row 2. (10 mesh)
- Row 33: Decrease. (8 mesh, 17 sts)
- Row 34: Even. (8 mesh)
- Row 35: Decrease. (6 mesh, 13 sts)
- Row 36: Even. (6 mesh)
- Row 37: Decrease. (4 mesh, 9 sts)
- Row 38: Even. (4 mesh)
- Row 39: Decrease. (2 mesh, 5 sts)
- Row 40: Even. (2 mesh, 5 sts)
Checkpoint: The panel measures 20 in (50.8 cm) from the foundation.
Tab
Row 41 (conversion to sc): Ch 1, then sc in each dc and each ch-1 sp across. Turn. (3 sc in dc + 2 sc in sps = 5 sts)
Rows 42–55: Ch 1, sc in each st across. Turn. (5 sts)
Fasten off and leave a 12 in (30.5 cm) tail. The tab is 1¼ in (3.2 cm) wide and about 3¼ in (8.3 cm) long.
Rounded Bottom
Turn the panel upside down so the foundation chain is on top. You will work into the free loop at the base of each Row 1 dc and ch-1 sp.
Row B1: Join the yarn at the base of the 2nd dc, ch 4 (counts as dc + ch 1), then dc at the base of the next dc, ch 1 across. Work the last dc at the base of the 12th dc. Turn. (10 mesh, 21 sts)
Row B2: Mesh decrease at both ends. Turn. (8 mesh, 17 sts)
Row B3: Mesh decrease at both ends. Do not fasten off. (6 mesh, 13 sts)
Checkpoint: The panel now measures 6¼ in × 21½ in (15.9 cm × 54.6 cm).
Make All Pieces
- Denim Blue: 1 panel and 3 baskets
Layout, top to bottom:
        [ ring ]
         | tab |
        /taper \
   | Basket 3 (rim at top of Row 28) |
   |          mesh gap             |
   | Basket 2 (rim at top of Row 17) |
   |          mesh gap             |
   | Basket 1 (rim at top of Row 6)  |
        \ rounded /
Border
Border gauge: 4 sc = 1 in (2.5 cm) along any edge. A mesh row is ½ in (1.3 cm) tall and a mesh is ½ in (1.3 cm) wide, so each one takes 2 sc.
Border Row 1: Continue from Row B3. Ch 1, then sc in each dc and each ch-1 sp across B3. Do not turn. Work up the side to the right of the tab and back down the other side, counting as follows:
- Bottom edge: 13 sc (7 sc in dc + 6 sc in sps)
- Each bottom curve: 9 sc. Work 2 sc in each of the 3 row ends (B3, B2, B1) and 1 sc in each of the 3 exposed ch-1 sps (B2, B1, Row 1).
- Each straight side: 60 sc. Work 2 sc in each row end of Rows 1–30.
- Each taper: 22 sc. Work 2 sc in each row end of Rows 31–40 (20 sc), plus 1 sc in the exposed ch-1 sp of Row 30 and of Row 32 (2 sc).
Each side, from the bottom edge to the tab, gets 9 + 60 + 22 = 91 sc. Down the second side, work the same groups in reverse order: taper, straight side, curve.
End at the base of the tab on the second side. Turn. (91 + 13 + 91 = 195 sts)
Border Row 2: Ch 1, then sl st loosely in each sc across. (195 sts)
Fasten off.
Why the math works: Every count matches the length of its edge at 4 sc per inch.
- The straight side is 15 in (38.1 cm) long and gets 60 sc.
- The bottom edge is 3¼ in (8.3 cm) wide, matching its 13 sts, and gets 13 sc.
- Each taper edge runs about 5.6 in (14.2 cm) on the diagonal. The 22 sc give it the same length, with no ruffling or cupping.
- Each bottom curve is about 2.1 in (5.3 cm) on the diagonal. Its 9 sc add a slight ease, which helps the convex curve lie flat.
The finished panel measures 6¾ in × 21¾ in (17.1 cm × 55.2 cm).
Joining
Method: Whipstitch with the basket tails.
- Attach the ring: Fold the last 1½ in (3.8 cm) of the tab around the wooden ring to the WS. Whipstitch each of the 5 tab stitches to the matching stitch on the tab.
- Prepare each basket: Pinch the basket so that 20 of the rim’s 60 stitches lie flat across the back. The other 40 stitches curve out at the front in a D shape. Mark the first and the 20th back stitch.
- Place the rims: Lay the panel RS up. Measure up from the bottom edge to each rim line:
- Basket 1 at the top of Row 6: 4¾ in (12.1 cm)
- Basket 2 at the top of Row 17: 10¼ in (26.0 cm)
- Basket 3 at the top of Row 28: 15¾ in (40.0 cm)
The rims are 5½ in (14.0 cm) apart, which leaves about 2¼ in (5.7 cm) of mesh showing between baskets.
4. Sew stitch to stitch: Leave 1 mesh free at each side of the panel and anchor at the 2nd dc. In each of the next 10 mesh, sew one rim stitch to the ch-1 sp and the next rim stitch to the following dc. That pairs 20 rim stitches with 20 panel stitches (2 per mesh), so the rim stays flat and centered.
5. Tack the base: Flatten the back wall down the panel. Tack the back of base Round 10 with 5 evenly spaced stitches across the center 8 mesh, about 3¼ in (8.3 cm) below the rim line.
Tension advice: Pull each stitch only until the pieces touch. Tight sewing puckers the mesh, and loose sewing lets a full basket tip forward.
Checkpoint: The panel should still lie flat and measure 6¾ in (17.1 cm) wide at every basket.
Final Blocking
- Lightly mist the whole holder until it is damp, not wet.
- Lay it flat and pin the panel to 6¾ in × 21¾ in (17.1 cm × 55.2 cm).
- Square up the mesh by eye, running a ruler along the columns.
- Stuff each basket with a toilet roll or a rolled towel so it holds its round shape.
- Pin the border curves smooth.
- Let it dry completely, then unpin.
Final Quality-Control Checklist
- The mesh columns run straight and every window is square.
- Each basket has 60 stitches on Rounds 10–21 and 30 mesh on Rounds 17–19.
- The panel counts are 12 mesh through Row 30 and 2 mesh at Row 40.
- The border counts are 13, 91 and 91, for 195 stitches in total.
- The rims are level and centered, with 1 mesh free on each side.
- The tab is secure, and the ring cannot slip out.
- All ends are woven in along solid stitches, not across the mesh holes.
Troubleshooting
- The mesh slants or the edges wander: You missed the turning-chain dc. Always finish the row in the 3rd ch of the turning chain.
- The base ruffles: Your increases are too loose, or you added an extra stitch. Count to 60 after Round 10.
- The base cups: Go up 0.5 mm for Rounds 1–10 only.
- The baskets are too shallow for the rolls: Add one more solid sc round (60 sts) before Round 17.
- The border waves on the taper: Leave out the 2 extra step stitches, for 20 sc per taper.
- A loaded basket droops: Add 2 more tacks on the base and reinforce the rim ends.
Care
Wash by hand in cool water, press out the water in a towel, and dry flat with a roll inside each basket. Avoid hot tumble drying, which can shrink cotton and distort the mesh.
Final Notes
The measurement chain runs like this:
- The basket base reaches 60 sts and 4¾ in (12.1 cm).
- Rounds 11–21 build a wall about 3¼ in (8.3 cm) tall.
- The panel is 12 mesh across, which is 6¼ in (15.9 cm).
- Thirty rows reach 15 in (38.1 cm), and the taper plus bottom bring the panel to 21½ in (54.6 cm).
- The 195-st border finishes it at 6¾ in × 21¾ in (17.1 cm × 55.2 cm).
- Each rim is sewn 20 sts to 10 mesh.
If every checkpoint matches, the holder will hang straight and hold its rolls neatly.
Happy crocheting!