
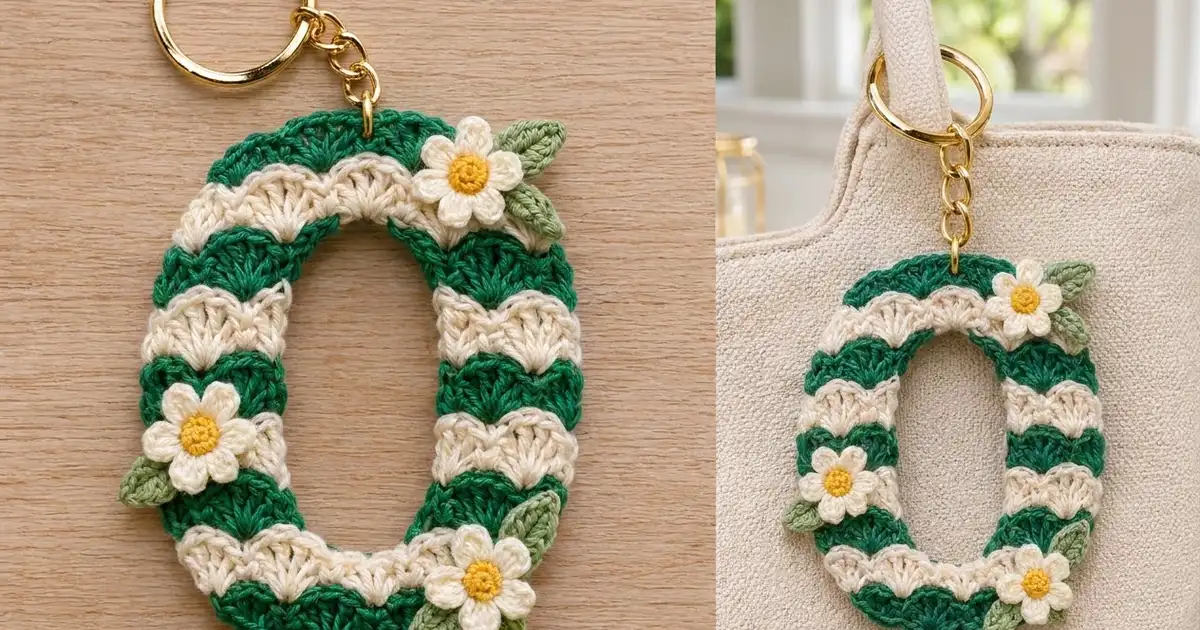
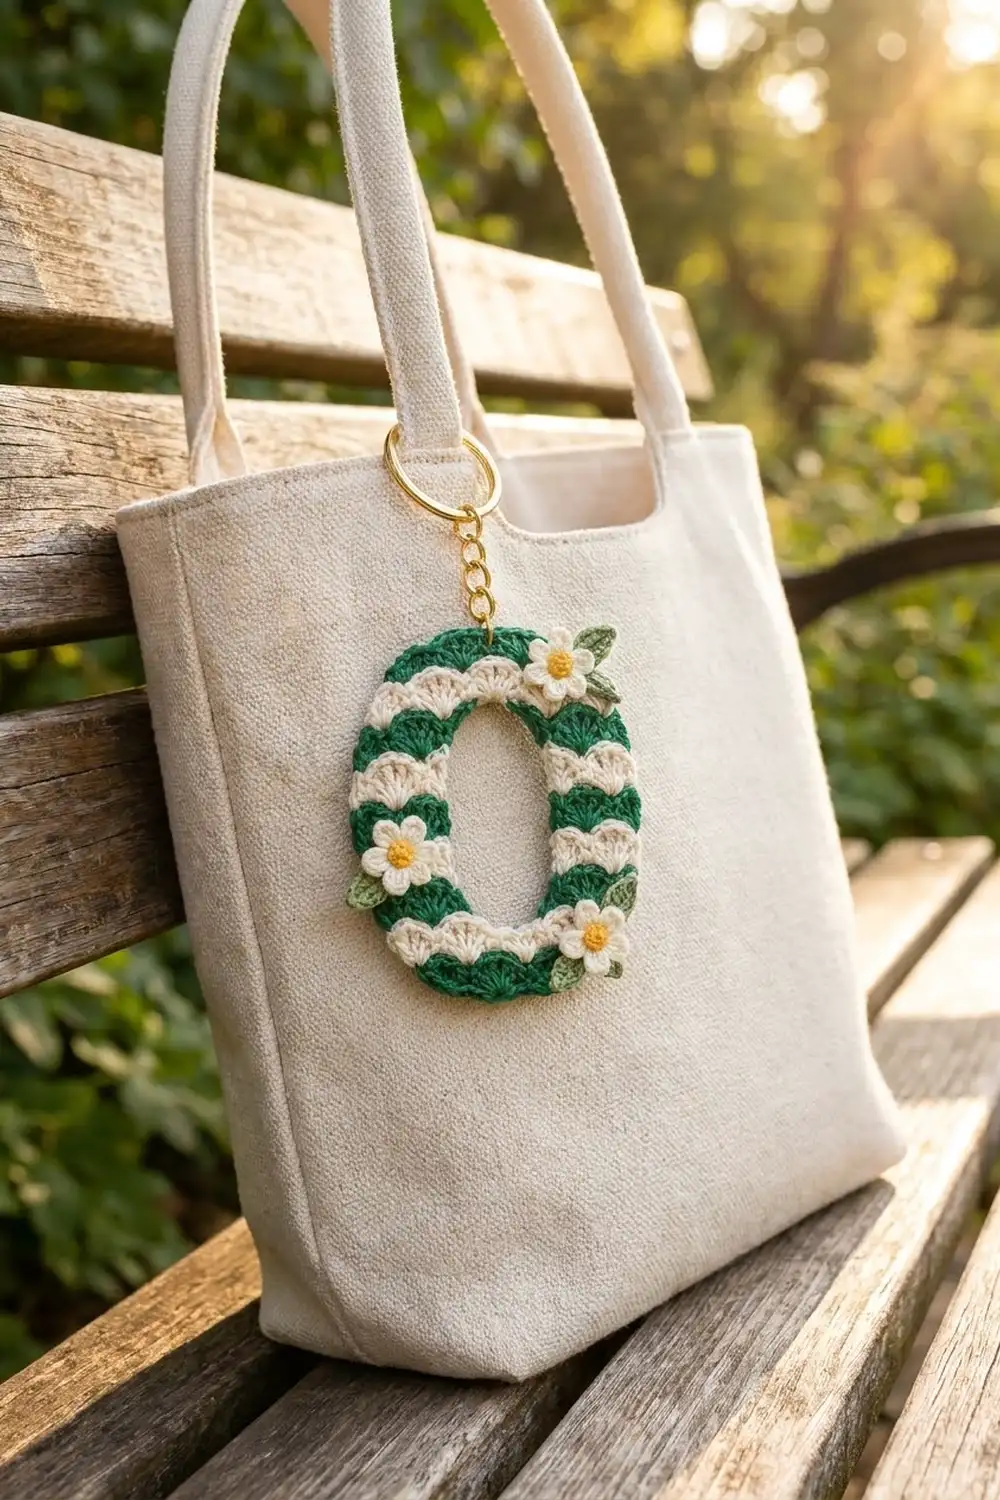
This little letter O is a bright, cheerful bag charm. Emerald green and cream shells alternate row by row around the oval, and three small cream daisies with golden centers and sage-green leaves sit on top. A gold split ring and short chain finish it as a keychain.
The style is fresh and a little vintage, and the crisp two-color stripes stand out against a canvas tote. The pattern uses US crochet terms throughout. The finished letter measures about 3.2 in (8.1 cm) wide and 4.1 in (10.4 cm) tall, with a band about 1 in (2.5 cm) wide.
The O is made as one narrow strip of shell-stitch rows, changing color every row. Short “curve rows” use tall treble shells on the outer edge and short single-crochet fans on the inner edge, so the strip bends into a smooth curve. Plain “straight rows” make the sides. The two ends are sewn together at the top, and an edge round in matching colors finishes the outline. Last, you add the flowers, the leaves and the hardware.
Finished Size and Construction
- Finished size: 3.2 in (8.1 cm) wide x 4.1 in (10.4 cm) tall
- Center hole: about 1 in (2.5 cm) x 1.9 in (4.8 cm)
- Skill level: Intermediate
- Terminology: US crochet terms
- Yarn weight: Sport weight (#2) cotton
- Hook: 2.75 mm (C-2)
- Number of pieces: 1 main ring, plus 3 flowers and 5 leaves
- Layout: One strip of 26 rows, closed into an oval
- Band width: 13 stitches = 1 in (2.5 cm)
- Size before border: 2.9 in (7.4 cm) x 3.8 in (9.7 cm)
- Border depth: about 0.15 in (0.4 cm) on the outer edge
Materials
Use a smooth mercerized cotton in sport weight. It shows the shells clearly, stays firm on a keychain and doesn’t fuzz with handling.
- Emerald green: 8 g / 16 m (ring stripes)
- Cream: 10 g / 20 m (ring stripes and petals)
- Golden yellow: 2 g / 4 m (flower centers)
- Sage green: 2 g / 4 m (leaves)
These quantities include a margin for color-change tails and a gauge swatch.
Tools:
– 2.75 mm (C-2) crochet hook
– Tapestry needle
– 2 stitch markers
– Gold split keyring, 1 in (2.5 cm)
– Short gold chain (about 4 links) and one 6 mm jump ring
– Two pairs of flat-nose pliers
– Pins, blocking mat and spray bottle
– Paper template (instructions in Final Blocking)
Abbreviations (US Terms)
- ch – chain
- sl st – slip stitch
- sc – single crochet
- hdc – half double crochet
- dc – double crochet
- tr – treble crochet
- sk – skip
- st(s) – stitch(es)
Special stitches:
– Shell: 5 dc in the same stitch.
– Tall shell: 5 tr in the same stitch.
– Sc fan: 5 sc in the same stitch.
– Color change: Work the last stitch of the row until 2 loops remain on the hook. Yarn over with the new color and pull through. Cut the old color, leaving a 3 in (7.6 cm) tail.
Gauge and Checkpoints
Gauge: In straight shell rows, 13 sts = 1 in (2.5 cm) wide, and 10 rows = 3 in (7.6 cm), so 1 row = 0.3 in (0.8 cm).
In curve rows, the outer edge grows about 0.45 in (1.1 cm) per row and the inner edge about 0.15 in (0.4 cm) per row.
Test piece first: Work Rows 1–8 and check them before going on.
- After Row 5: The strip bends through a quarter turn. The outer edge measures 2.25 in (5.7 cm) and the inner edge 0.75 in (1.9 cm).
- After Row 8: The outer edge measures 3.15 in (8.0 cm) and the inner edge 1.65 in (4.2 cm).
- Width: 1 in (2.5 cm) at every row.
Too big? Change to a 2.5 mm hook.
Too small? Change to a 3.0 mm hook.
If the curve is too gentle, tighten your sc fans. If the strip cups, loosen your treble shells.
Main Ring
Rules for every row:
– Odd rows are green. Even rows are cream.
– Odd rows start at the outer edge. Even rows start at the inner edge.
– Change color in the last stitch of every row, then turn.
– Every row has 13 sts. A ch 1 never counts as a stitch. A ch 3 counts as 1 dc.
Row map:
– Rows 1–5: curve (first half of the top)
– Rows 6–8: straight (first side)
– Rows 9–18: curve (bottom)
– Rows 19–21: straight (second side)
– Rows 22–26: curve (second half of the top)
Foundation and Row 1 (Curve A)
With green, ch 14.
Row 1: Sc in 2nd ch from hook. Place a marker in this sc; it marks the outer edge. Sk 2 ch, tall shell in next ch, sk 2 ch, sc in next ch, sk 2 ch, sc fan in next ch, sk 2 ch, sc in last ch. Change to cream. (13 sts: 3 sc, 1 tall shell, 1 sc fan)
Curve Row B (even curve rows)
Ch 1. Work 3 sc in the first st. Sk 2, sc in the center st of the sc fan. Sk 2, shell in next sc. Sk 2, sc in the center tr of the tall shell. Sk 2, 3 tr in the last st. Change color. (13 sts)
The 3 tr at the end make a tall half shell on the outer edge. The 3 sc at the start make a short half fan on the inner edge.
Curve Row A (odd curve rows after Row 1)
Ch 1. Sc in the first st. Sk 2, tall shell in next sc. Sk 2, sc in the center dc of the shell. Sk 2, sc fan in next sc. Sk 2, sc in the last st. Change color. (13 sts)
Straight Row B (even straight rows)
Ch 3 (counts as dc). Work 2 dc in the first st. Sk 2, sc in the center st of the next fan or shell. Sk 2, shell in next sc. Sk 2, sc in the center st of the next shell. Sk 2, 3 dc in the last st. Change color. (13 sts)
Straight Row A (odd straight rows)
Ch 1. Sc in the first st. Sk 2, shell in next sc. Sk 2, sc in the center dc. Sk 2, shell in next sc. Sk 2, sc in the last st (the top of the ch 3 if the row below began with one). Change color. (13 sts)
Work the Strip
- Rows 2–5: Alternate Curve Row B and Curve Row A, starting with B. Row 5 is green. (13 sts each)
- Rows 6–8: Straight Row B, Straight Row A, Straight Row B. (13 sts each)
- Rows 9–18: Alternate Curve Row A and Curve Row B, starting with A. The strip now forms a U. (13 sts each)
- Rows 19–21: Straight Row A, Straight Row B, Straight Row A. (13 sts each)
- Rows 22–26: Alternate Curve Row B and Curve Row A, starting with B. Row 26 is cream. At the end of Row 26, don’t change color. Cut the cream, leaving a 12 in (30.5 cm) tail.
Checkpoint after Row 26:
– Outer edge: 10.8 in (27.4 cm)
– Inner edge: 4.8 in (12.2 cm)
– 26 rows, 13 sts per row
Close the Ring
Bring the ends together so the marked outer edge of Row 1 meets the outer end of Row 26. Check that the strip isn’t twisted.
Using the cream tail, whipstitch the 13 sts of Row 26 to the 13 unused loops of the foundation chain, one stitch to one loop. Keep the tension snug but not puckered: the seam should be just as wide as the band, 1 in (2.5 cm).
The green Row 1 now sits next to the cream Row 26, so the stripes keep alternating across the seam.
Border
Border gauge: 20 sc = 3 in (7.6 cm) along the outer edge.
Outer Round
Work in each stripe’s own color, tapestry style. Carry the unused color inside your stitches, and enclose all row tails as you go.
Join green with a standing sc at the outer edge of Row 1, next to the seam. Work into the row ends:
– 3 sc in each curve-row end
– 2 sc in each straight-row end
Change color at each new stripe.
| Section | Rows | Sc |
|---|---|---|
| First half of top curve | 1–5 | 15 |
| First side | 6–8 | 6 |
| Bottom curve | 9–18 | 30 |
| Second side | 19–21 | 6 |
| Second half of top curve | 22–26 | 15 |
The total is 72 sc: 30 across the full top curve, 30 across the bottom and 6 on each side. Sl st to the first sc. Don’t add any stitches at the seam.
Why the math works: A curve row’s outer edge is 0.45 in (1.1 cm) tall, and 3 sc fit it at 20 sc per 3 in (7.6 cm). A straight row is 0.3 in (0.8 cm), which fits 2 sc. Every section uses the same rate along an outer edge of 10.8 in (27.4 cm), so the edge lies flat without ruffling or cupping.
Inner Round
Again matching the colors, work loose sl sts into the row ends:
– 1 sl st per curve row
– 2 sl sts per straight row
The total is 32 sl sts (20 + 12). The inner sl sts hide the tails without making the hole smaller. Fasten off and weave in the ends.
Size checkpoint: 3.2 in (8.1 cm) x 4.1 in (10.4 cm).
Flowers (make 3)
Center: With yellow, make a magic ring and work 5 sc into it. Pull the ring tight and sl st to the first sc. Fasten off yellow. (5 sc)
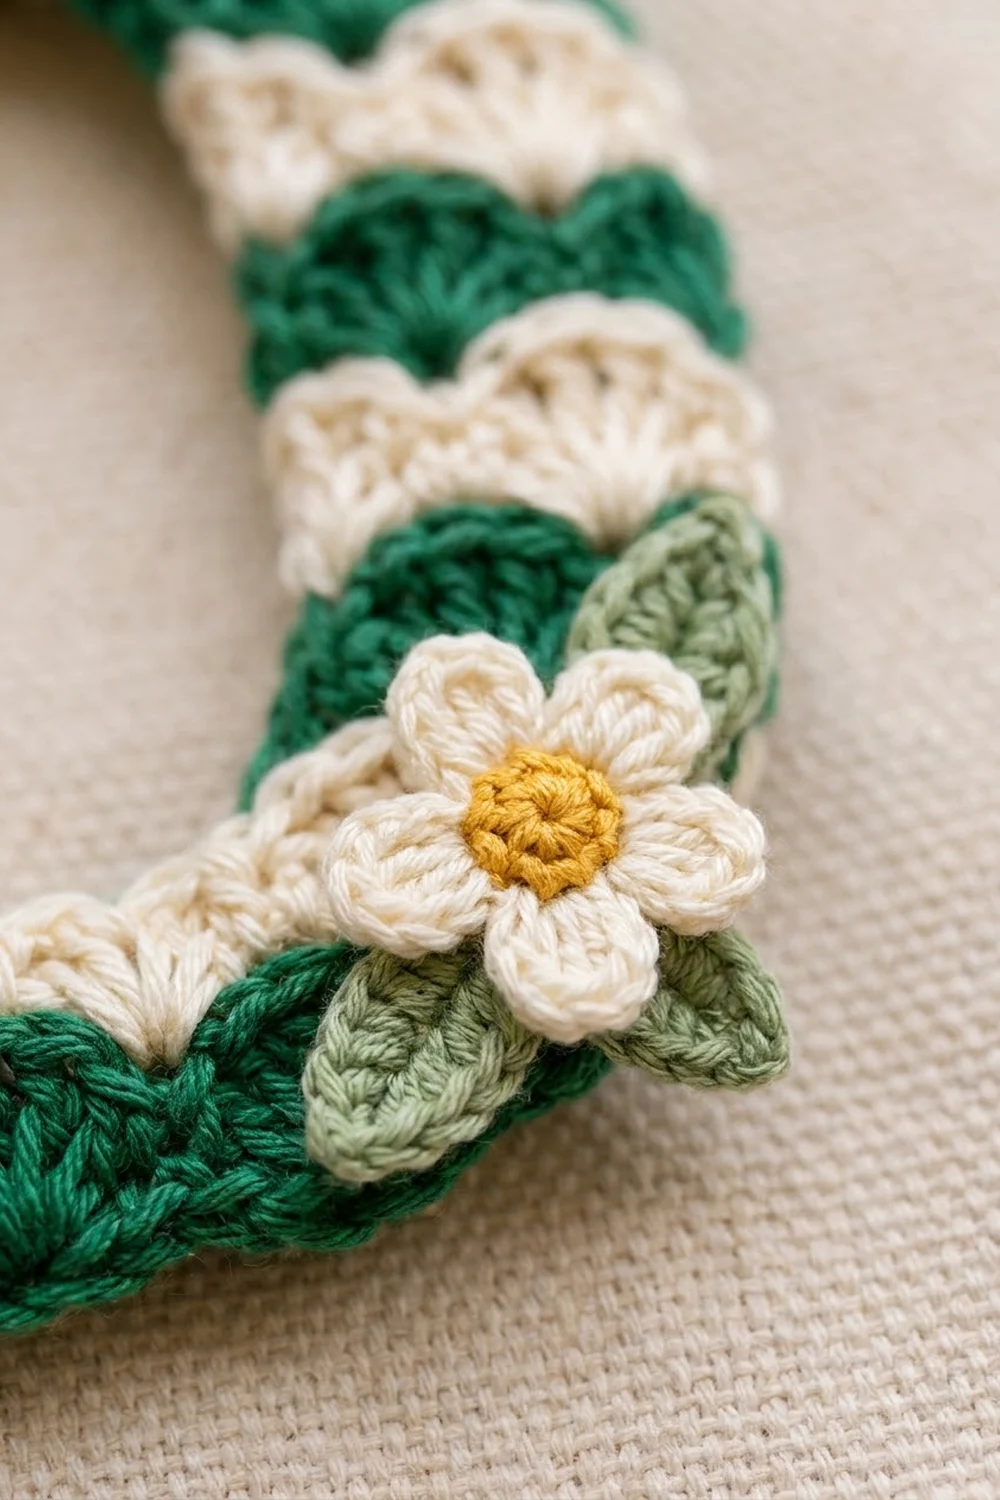
Petals: Join cream in any sc. (Ch 2, 3 dc, ch 2, sl st) in the same sc, then move to the next sc. Repeat 5 times in total. (5 petals)
Fasten off, leaving a 6 in (15.2 cm) tail for sewing. Each flower measures about 0.9 in (2.3 cm) across. Push the center forward from the back so it looks raised.
Leaves (make 5)
With sage, ch 6.
1. Sc in 2nd ch from hook, hdc in next ch, dc in next 2 ch.
2. In the last ch: (hdc, ch 2, sl st in 2nd ch from hook, hdc). This makes the pointed tip.
3. Working along the other side of the chain: dc in next 2 ch, hdc in next ch, sc in last ch.
4. Sl st to the first sc.
Each leaf measures about 0.75 in (1.9 cm) long.
Assembly of Trims
- Sew one flower to the upper right of the band, with a leaf tucked above it and another below it.
- Sew one flower on the left side just below the middle, with one leaf pointing down and out.
- Sew one flower at the lower right, with one leaf above it and one below.
- Use pliers to open the jump ring. Pass it through 2 border sc at the top center, over the seam, and attach the chain and split ring. Close the jump ring fully.
Final Blocking
- On paper, draw an oval 3.2 in (8.1 cm) wide x 4.1 in (10.4 cm) tall. Inside it, draw the hole, 1 in (2.5 cm) x 1.9 in (4.8 cm). Place the paper under a clear sheet on your mat.
- Lightly mist the ring until it is damp, not wet.
- Pin the outer edge to the template, starting at the top seam, then the bottom center, then both sides.
- Pin the inner edge to the hole outline.
- Ease the shells so each stripe sits straight across the band.
- Let it dry completely, then unpin. Block before adding the flowers and hardware if you prefer.
Final Quality-Control Checklist
- [ ] All 26 rows have 13 sts.
- [ ] The stripes alternate all the way around, including across the seam.
- [ ] The outer border has 72 sc: 30 on the top curve, 30 on the bottom and 6 on each side.
- [ ] The inner round has 32 sl sts.
- [ ] Size is 3.2 in (8.1 cm) x 4.1 in (10.4 cm).
- [ ] The band is 1 in (2.5 cm) wide everywhere.
- [ ] All tails are enclosed or woven in.
- [ ] The flowers and leaves are stitched securely.
- [ ] The jump ring is fully closed.
Troubleshooting
- The strip won’t curve enough: Your sc fans are too loose, or your treble shells are too short. Pull the trebles up taller.
- The inner edge ruffles: Tighten the sc fans, or use a hook one size smaller for curve rows.
- The O is lopsided: Check that each curve section has exactly 10 rows and each straight section exactly 3.
- The seam looks bulky: Whipstitch through the outer loops only and tug gently.
- The border flares: Work 2 sc instead of 3 in every other curve-row end, then block firmly.
- Carried yarn shows through: Keep the carried strand tight against the stitch tops.
Care
Hand wash in cool water with mild soap, press out the water in a towel and dry it flat. Remove the metal hardware first if it can tarnish.
Final Notes
Here is the measurement chain:
– 13 sts make a band 1 in (2.5 cm) wide.
– 10 curve rows make each half-oval: 4.5 in (11.4 cm) on the outer edge and 1.5 in (3.8 cm) on the inner edge.
– 3 straight rows make each side, 0.9 in (2.3 cm).
– Together these give an outer edge of 10.8 in (27.4 cm) and a ring of 2.9 in (7.4 cm) x 3.8 in (9.7 cm).
– The 72-sc border brings it to 3.2 in (8.1 cm) x 4.1 in (10.4 cm).
Check your gauge at each step and the letter will come out the right size.
Happy crocheting!