

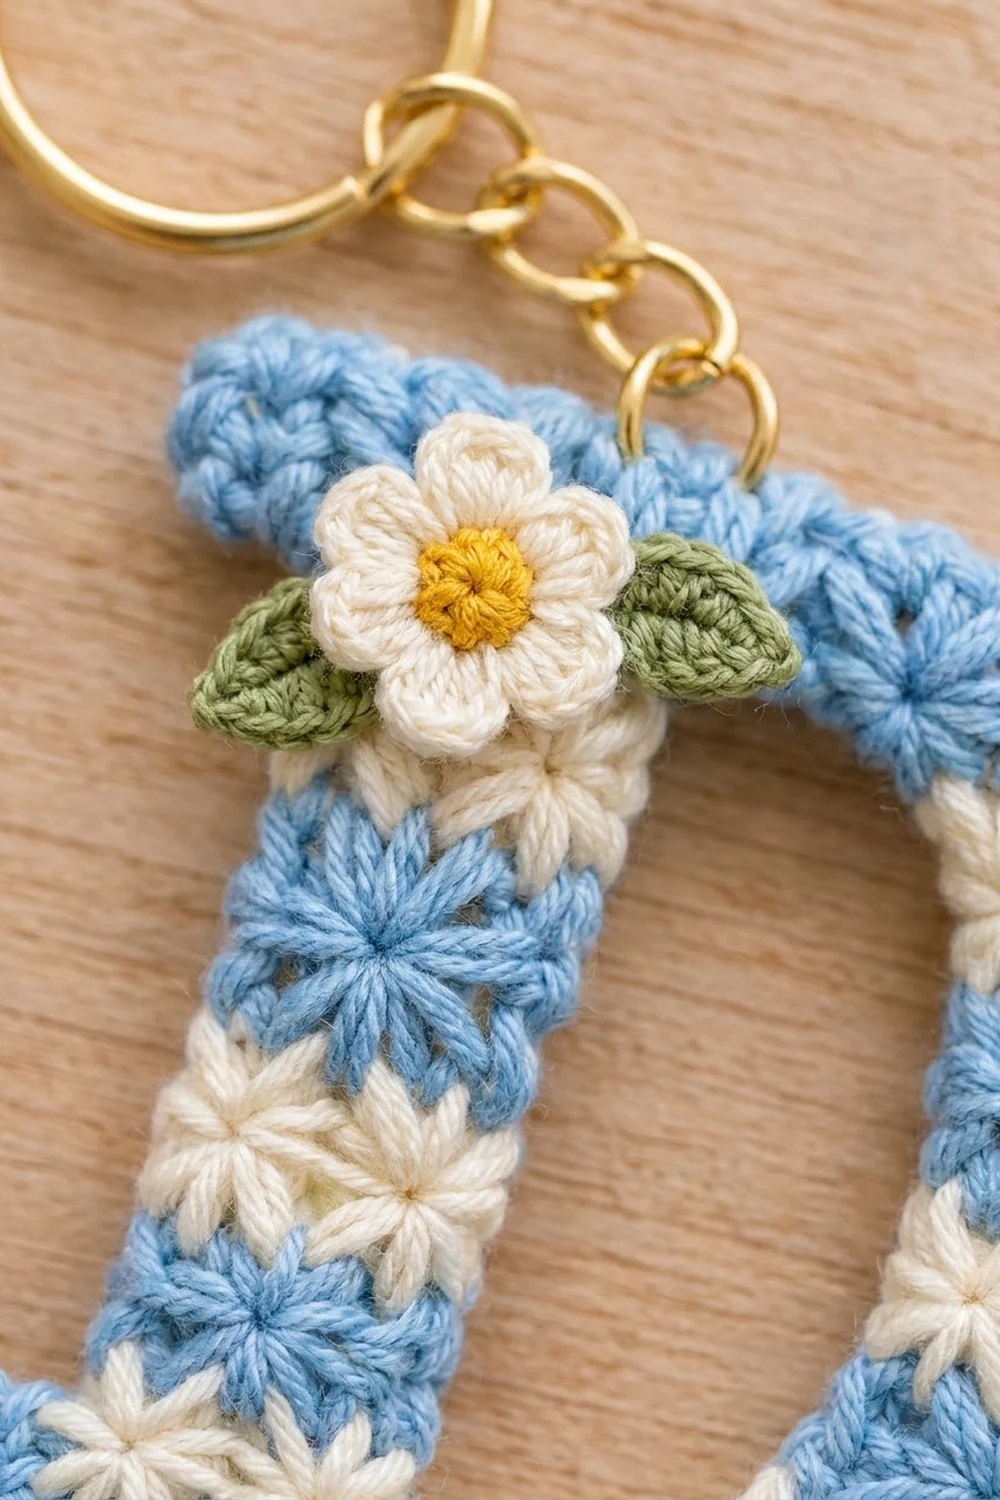
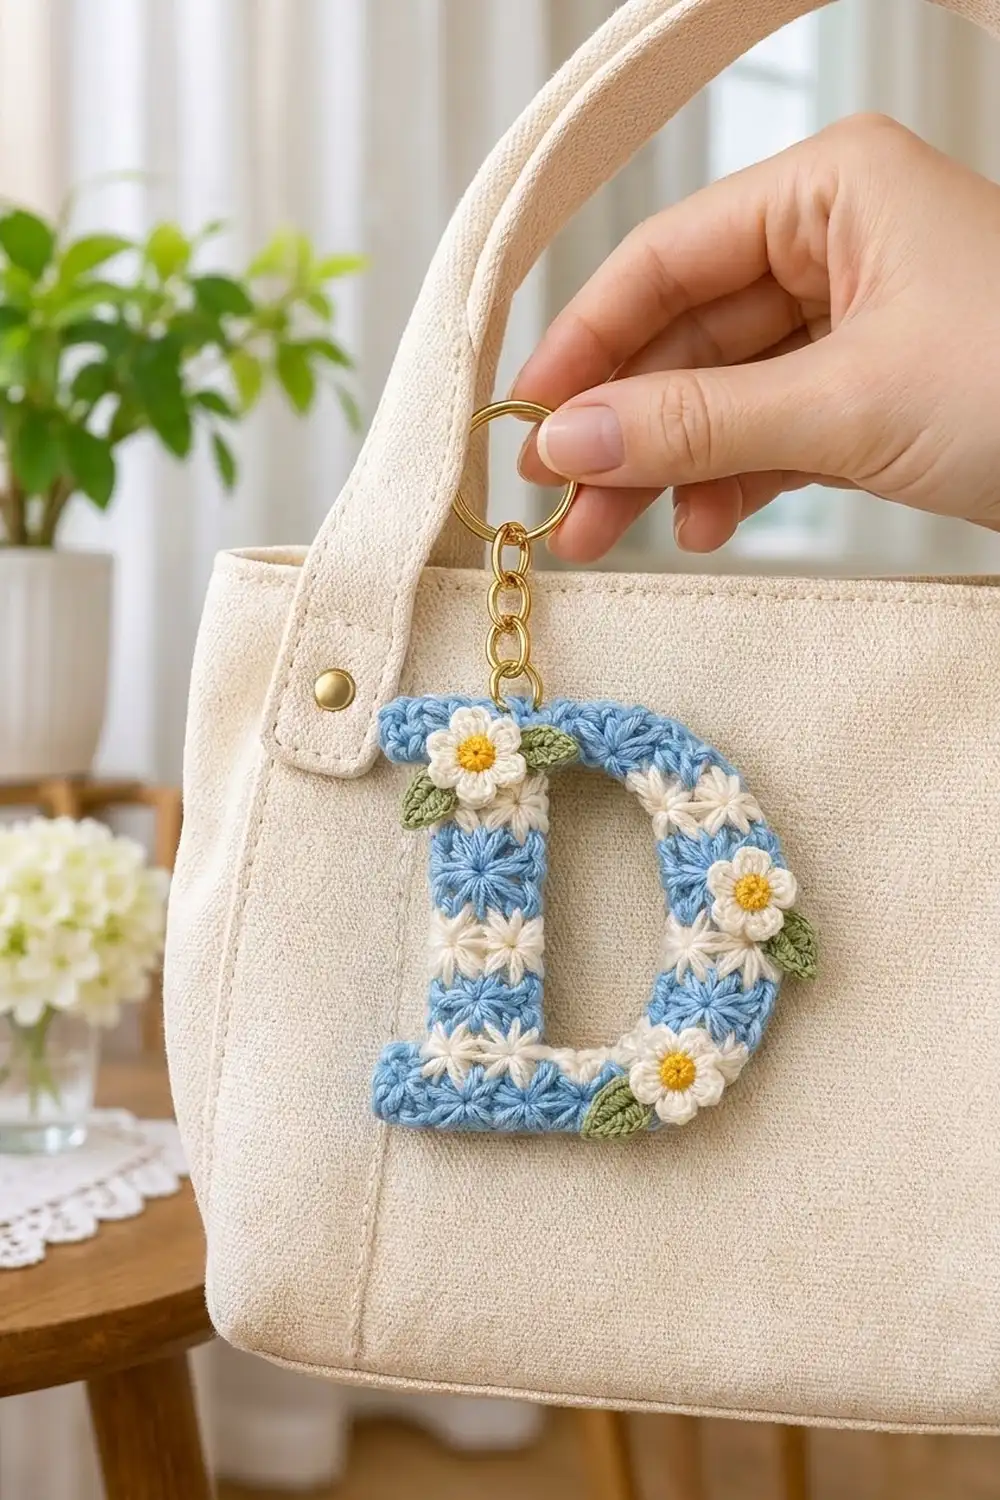
This monogram keychain is a chunky letter D worked in soft star-stitch stripes of sky blue and cream. A single round of blue edging frames it, and three tiny cream daisies with sunny yellow centers and small green leaves finish it off. It looks fresh, springlike, and a little vintage, which makes it a sweet bag charm or personalized gift.
The pattern uses US crochet terms throughout. The finished letter measures about 4 in (10.2 cm) wide and 4.5 in (11.4 cm) tall, including the edging.
The letter is one piece worked flat from the bottom up. You work the bottom bar first, then split the work into two narrow columns (the stem and the bowl) around the opening. Next you join both columns into the top bar with a short chain bridge. A blue edging round smooths the outline. Finally, you sew on the daisies and leaves and attach the key ring.
Each color stripe is two rows: a star-stitch row and a half double crochet return row. That keeps the counts simple and easy to check as you go.
Finished Size and Construction
- Finished size: 4 in (10.2 cm) wide x 4.5 in (11.4 cm) tall
- Skill level: Intermediate (star stitch, working in sections)
- Terminology: US
- Yarn weight: DK / light worsted (#3), cotton or cotton blend
- Hook: 3.5 mm (E-4) for the letter; 2.75 mm (C-2) for flowers and leaves
- Number of pieces: 1 letter, plus 3 flowers and 4 leaves sewn on as appliqués
- Layout: single motif, no joining
- Letter body size before edging: 3.5 in (8.9 cm) wide x 4 in (10.2 cm) tall
- Edging depth: 0.25 in (0.6 cm) on each side
Materials
Choose a smooth, mercerized or soft cotton DK. Cotton holds the star texture crisply and survives life on a keyring. Avoid fuzzy yarns, which blur the stars.
- Light blue: 12 g / 28 m
- Cream: 8 g / 18 m
- Yellow: 2 g / 5 m
- Green: 2 g / 5 m
All quantities include a margin for swatching, tails, and the occasional frogged row.
Tools:
– 3.5 mm (E-4) and 2.75 mm (C-2) hooks
– Tapestry needle
– Stitch marker
– Gold split key ring, about 1.2 in (3.0 cm), with a short chain and a jump ring
– Two pairs of flat-nose pliers
– Rust-proof pins and a blocking mat
– Scissors
Abbreviations (US Terms)
- ch – chain
- sl st – slip stitch
- sc – single crochet
- hdc – half double crochet
- dc – double crochet
- st(s) – stitch(es)
- RS / WS – right side / wrong side
- rep – repeat
Special stitches
Beginning star (beg star): Ch 3. Pull up a loop in each of these: the 2nd ch from the hook, the 3rd ch from the hook, the base stitch, and the next 2 sts (6 loops on hook). Yo and draw through all 6 loops, then ch 1 to close; this ch-1 is the “eye.” A beg star covers 3 sts.
Star: Pull up a loop in the eye of the previous star. Pull up a loop in the back of the last loop of the previous star, then in the same st as that last loop, then in each of the next 2 sts (6 loops on hook). Yo and draw through all 6, then ch 1 to close (eye). Each star covers 2 new sts.
End hdc: At the end of every star row, work 1 hdc in the same st as the last loop of the last star.
Star row math: A star row worked over an odd number of sts (N) makes (N − 1) ÷ 2 stars. The hdc row after it gives back 1 + 2 x (stars) = N sts.
Gauge and Checkpoints
Gauge (3.5 mm hook, star pattern): 15 sts = 3.5 in (8.9 cm), and 4 pattern rows (2 stripes) = 1 in (2.5 cm). The two single-crochet rows (Rows 1 and 16) each add about 0.25 in (0.6 cm).
The letter is small, so it works as its own gauge test. Measure at these points:
- After Row 1 (13 sc): about 3 in (7.6 cm) wide.
- After Row 3 (15 hdc): 3.5 in (8.9 cm) wide; height about 0.75 in (1.9 cm).
- After Row 7: height 1.75 in (4.4 cm).
- Each column (5 sts): about 1.2 in (3.0 cm) wide. The opening between them (3 sts) is about 0.7 in (1.8 cm).
- After Row 12: height 3 in (7.6 cm).
- After Row 16: 3.5 in (8.9 cm) x 4 in (10.2 cm).
If Row 3 measures more than 3.75 in (9.5 cm), go down 0.25–0.5 mm in hook size and restart. If it measures less than 3.25 in (8.3 cm), go up 0.25–0.5 mm. Row height matters less than width, because blocking can even it out.
Letter D Pattern
Column numbers (Col 1–15) are counted left to right with the RS facing you. RS rows (the star rows) are worked right to left. WS rows (the hdc rows) are worked left to right, as seen from the RS.
Bottom Bar (Blue)
Row 1 (WS): With blue and the 3.5 mm hook, ch 14. Sc in the 2nd ch from the hook and in each ch across. (13 sc, Cols 1–13)
Row 2 (RS): Turn. Work 1 beg star, 5 stars, and an end hdc. (6 stars + 1 end hdc, covering all 13 sts)
Row 3 (WS, increase row): Ch 2 (does not count), turn. Hdc in the end hdc, then 2 hdc in the eye of each of the 6 stars. Finish with 2 hdc in the top of the beg star’s ch-3 at the right edge. (1 + 12 + 2 = 15 hdc, Cols 1–15)
Fasten off blue. The two extra hdc at Cols 14–15 start the bulge of the bowl.
Stem Column (Cols 3–7)
Cut each color at every change in this column, leaving 4 in (10.2 cm) tails. Its right edge becomes the inner wall of the opening, so any carried strands would show there.
Row 4 (RS): With RS facing, join cream with a sl st in the 7th hdc from the left edge (Col 7). Work 1 beg star, 1 star, and an end hdc in Col 3. (2 stars + 1 end hdc, covering 5 sts)
Cols 1–2 stay unworked; they form the bottom serif.
Row 5 (WS): Ch 2, turn. Hdc in the end hdc, then 2 hdc in each of the 2 eyes. (5 hdc)
Rows 6–7: Join blue in the first st and repeat Rows 4–5 (working the stars over the 5 sts of the column).
Rows 8–9: With cream, repeat Rows 4–5.
Rows 10–11: With blue, repeat Rows 4–5.
Row 12: With cream, repeat Row 4. (2 stars + 1 end hdc)
Don’t fasten off. Enlarge the loop and put a stitch marker in it to hold it.
Bowl Column (Cols 11–15)
In this column you can carry the unused color loosely up the right edge, because the edging will cover it.
Row 4 (RS): Join cream with a sl st in the last hdc of Row 3 (Col 15). Work 1 beg star, 1 star, and an end hdc in Col 11. (2 stars + 1 end hdc)
Cols 8–10 stay unworked; they form the floor of the opening.
Rows 5–12: Work these exactly as for the stem column, using the same color sequence. After Row 12 you have 2 stars + 1 end hdc. Fasten off.
Checkpoint: Both columns should be 9 rows tall, about 2.25 in (5.7 cm). The opening between them should be 3 sts, about 0.7 in (1.8 cm), wide.
Top Bar
Row 13 (WS, joining row, cream): Put the stem loop back on the hook.
- Ch 4 and turn. Hdc in the 3rd ch from the hook and in the next ch (2 hdc, Cols 1–2).
- Hdc in the stem’s end hdc, then 2 hdc in each of the stem’s 2 eyes (5 sts).
- Ch 3 for the bridge across Cols 8–10.
- Hdc in the bowl’s end hdc (Col 11), then 2 hdc in each of the bowl’s 2 eyes (5 sts).
(2 + 5 + 3 ch + 5 = 15 sts, Cols 1–15)
Fasten off cream. The two extended hdc form the top serif.
Row 14 (RS, blue): Turn. Work 1 beg star, 6 stars, and an end hdc. Work the stars over the chains just as you would over stitches. (7 stars + 1 end hdc, covering 15 sts)
Row 15 (WS): Ch 2, turn. Hdc in the end hdc, then 2 hdc in each of the 7 eyes. (1 + 14 = 15 hdc)
Row 16 (RS): Ch 1, turn. Sl st in the first 2 hdc (not counted), then sc in each of the next 13 hdc. (13 sc, Cols 1–13)
Fasten off. The slipped Cols 14–15 mirror the step at the bottom and round off the top-right corner.
Checkpoint: The body measures 3.5 in (8.9 cm) x 4 in (10.2 cm). The stripe order from bottom to top is blue, cream, blue, cream, blue, cream, blue.
Daisies (make 3)
Use the 2.75 mm hook.
Rnd 1: With yellow, work 5 sc in a magic ring and pull it tight. Sl st to the first sc. (5 sc) Fasten off.
Rnd 2: Join cream with a sl st in any sc. Work (ch 2, 2 dc, ch 2, sl st) all in the same sc, then sl st in the next sc. Rep from * 4 more times; the last sl st lands in the joining st. (5 petals)
Fasten off, leaving an 8 in (20.3 cm) tail. Each daisy measures about 0.9 in (2.3 cm) across.
Leaves (make 4)
With green and the 2.75 mm hook, ch 6.
- Sl st in the 2nd ch from the hook (the tip). Work sc, hdc, and dc in the next 3 chs, then sc in the last ch (the base).
- Ch 1 and rotate. Working into the free loops of the chain, work sc in the first ch, then dc, hdc, and sc in the next 3 chs, and sl st at the tip.
Fasten off, leaving an 8 in (20.3 cm) tail. Each leaf is about 0.6 in (1.5 cm) long.
Border
Border gauge: Work 1 sc in each stitch and 1 sc in each row end. The star rows and hdc rows are about 0.25 in (0.6 cm) tall, close to one sc width at about 4.3 sc per inch, so this lies flat.
Square corners get 3 sc. Rounded corners on the bowl get 2 sc. Inner (concave) corners get no extra sts.
Edging Rnd (RS, blue, 3.5 mm hook): Join blue with a standing sc in the last sc of Row 16 (Col 1), then work 2 more sc in the same st.
- Top-left corner: 3 sc
- Left side: 18 sc total, worked in this order:
- Top serif end: 1 sc in the row end of each of Rows 15, 14, and 13 (3).
- Underside of the top serif: 1 sc in each of the 2 extension chains (2).
- Stem: 1 sc in each row end of Rows 12–4 (9).
- Top of the bottom serif: 1 sc in each unworked hdc at Cols 2 and 1 of Row 3 (2).
- Bottom serif end: 1 sc in the row end of each of Rows 3 and 2 (2).
- Bottom-left corner: 3 sc in the first foundation ch.
- Bottom: 1 sc in each foundation ch at Cols 2–12 (11 sc).
- Bottom-right curve: 8 sc total:
- 2 sc in the foundation ch at Col 13.
- 1 sc in each row end of Rows 1 and 2.
- 2 sc across the underside of the 2 increase hdc.
- 2 sc in the row end of Row 3.
- Right side of the bowl: 13 sc total:
- 1 sc in each row end of Rows 4–14 (11).
- 2 sc in the row end of Row 15.
- Top: 15 sc total:
- 1 sc in each slipped st at Cols 15 and 14 (2).
- 2 sc in the sc at Col 13.
- 1 sc in each sc at Cols 12–2 (11).
Sl st to the first sc. (3 + 18 + 3 + 11 + 8 + 13 + 15 = 71 sc) Fasten off.
Why the math works: Every edge stitch sits on exactly one existing stitch or row end. The only extras are on the curves and corners: 2 at each square corner (3 sc in one st) and 1 at each of the four rounded bowl corners (2 sc in one spot). An edging that is 0.25 in (0.6 cm) deep on all sides takes the body from 3.5 in x 4 in (8.9 cm x 10.2 cm) to 4 in x 4.5 in (10.2 cm x 11.4 cm).
Leave the opening unedged. Any sc there would shrink the 0.7 in (1.8 cm) gap too much.
Final Blocking
- Weave in all ends on the WS, following stripes of the same color. Don’t sew the flowers yet.
- Lightly mist the letter with water, or pin it and hover steam over it.
- Pin it to 4 in (10.2 cm) wide x 4.5 in (11.4 cm) tall.
- Pin the serifs square. Pin the bowl into a smooth curve, and pin the opening open to about 0.7 in (1.8 cm).
- Leave it to dry completely.
- Use the long tails to sew the daisies on:
- one over the upper-left serif and stem junction
- one on the right side of the bowl at mid-height
- one at the lower right of the bowl
- Sew the leaves on, tucking each base under a daisy:
- top daisy: one leaf on its left and one on its right
- middle daisy: one leaf on its right
- bottom daisy: one leaf on its left
- Open a jump ring with pliers and pass it through the top edging above Col 11, along with the chain. Close it fully.
Final Quality-Control Checklist
- 7 stripes alternating blue and cream, with blue at the top and bottom
- Stem and bowl columns are both 5 sts wide and 9 rows tall
- Opening is 3 sts wide and stays open
- Edging totals 71 sc and lies flat with no ruffling
- Finished size is 4 in x 4.5 in (10.2 cm x 11.4 cm)
- Daisies are firmly stitched and leaves are tucked under the petals
- Jump ring is fully closed, with no gap for the yarn to slip through
Troubleshooting
- Star row comes up short: You probably skipped the “back of the last loop” step. Each star must share one stitch with the one before it.
- Hdc row is the wrong count: Check that you worked 2 hdc in every eye and 1 hdc in the end hdc.
- Letter is curling: Your star rows are too tight. Pull each loop up to the height of an hdc.
- Edging ruffles: Work 1 sc per row end, not 2, and keep the extra stitches only on the corners.
- Edging cups inward: Add 1 sc at each rounded corner and loosen your tension.
- Opening is too narrow: Pin it wider while blocking. Make sure you worked exactly 3 bridge chains.
Care
Hand wash the keychain in cool water, press it gently in a towel, and let it dry flat. Remove the metal hardware before washing if possible.
Final Notes
The measurement chain:
- Row 3 gives 15 sts at 3.5 in (8.9 cm) wide.
- The 14 pattern rows plus the two sc rows bring the body to 4 in (10.2 cm) tall.
- The 71-stitch edging adds 0.25 in (0.6 cm) on every side.
- The finished letter measures 4 in x 4.5 in (10.2 cm x 11.4 cm).
Check the width at Row 3 and the rest falls into place. Happy crocheting!