

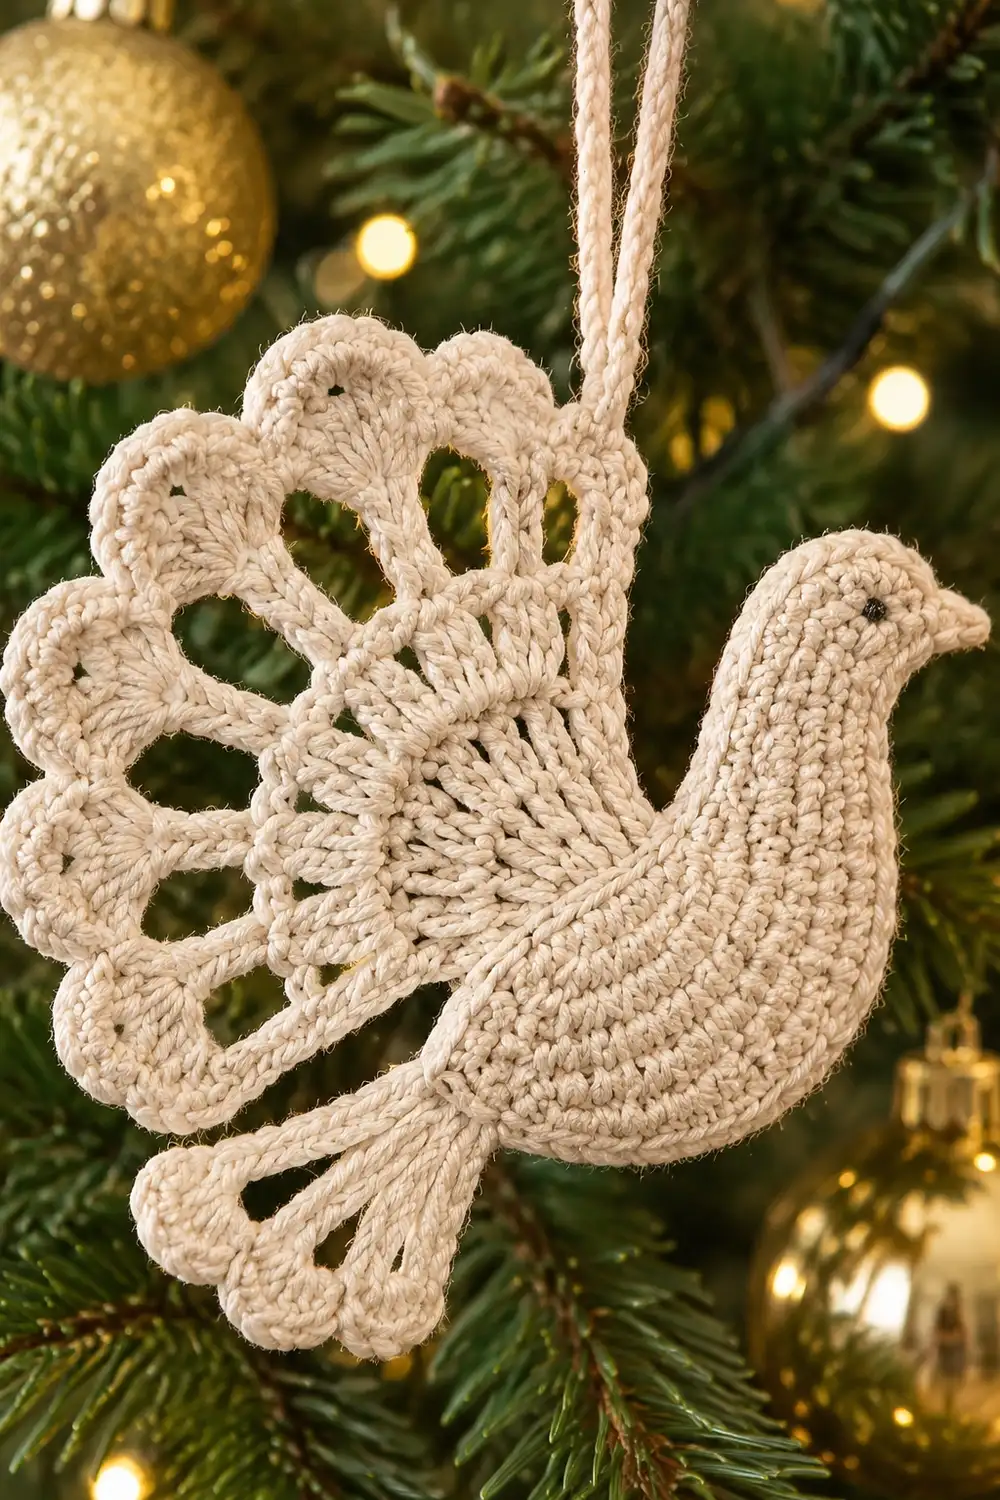
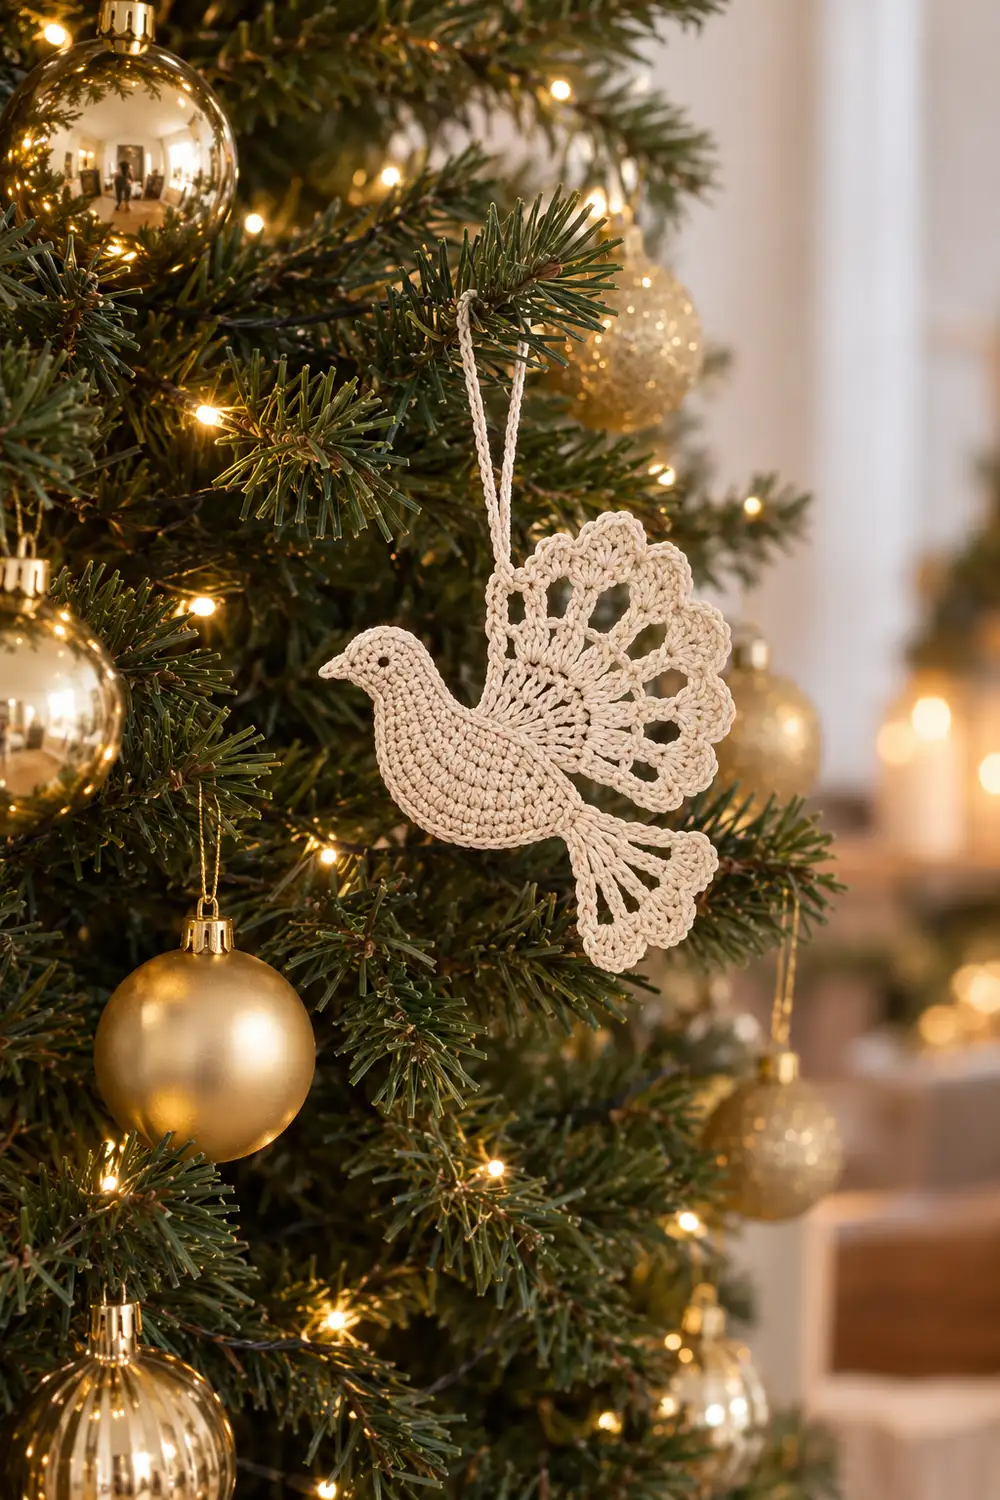
This little dove is a flat, lacy tree ornament with a solid rounded body, a small raised head, and a tail that opens into large shell-edged fans like a peacock’s display. Two smaller fanned wings sit below the body, one toward the front and one toward the back. The open spaces between the spokes let the tree lights glow through.
It is worked in a single cream or off-white yarn, which gives it a soft heirloom look next to gold baubles and warm white fairy lights. The texture is simple: tight single crochet rounds on the body, and open treble crochet spokes in the tail and wings.
This pattern uses US crochet terms. The finished ornament measures about 3.5 in (8.9 cm) tall and 4 in (10.2 cm) wide, not counting the hanging loop.
Construction is all one piece. You work the body as an oval in rounds around a foundation chain and shape the head in the last round. The tail grows straight off the upper back edge, and the two wings are worked off the belly edge. One continuous shell border then runs around the whole outline. A chain hanging loop finishes it.
Finished Size and Construction
- Finished size: 3.5 in (8.9 cm) tall x 4 in (10.2 cm) wide
- Skill level: Intermediate (row-end edging, treble fans)
- Terminology: US
- Yarn weight: #1 super fine / fingering, mercerized cotton
- Hook: 2.75 mm (C-2)
- Number of pieces: 1
- Layout: body in the center, tail fan rising from the upper back, two wings hanging from the belly
- Piece size: 3.5 in x 4 in (8.9 cm x 10.2 cm)
- Size before border: 3.25 in x 3.75 in (8.3 cm x 9.5 cm)
- Border depth: about 1/8 in (0.3 cm) per edge
Materials
Choose a smooth mercerized cotton in fingering weight. Cotton holds crisp points after blocking, and the slight sheen catches tree lights. Avoid fuzzy or very soft yarns, because the fan spokes will droop.
- Cream / off-white: 6 g, about 20 m (21.9 yd)
- Optional eye: a 12 in (30.5 cm) scrap of brown embroidery floss
Yarn quantities include a margin for a gauge swatch and weaving in ends.
Tools:
– 2.75 mm (C-2) crochet hook
– Tapestry needle
– Scissors
– 2 stitch markers
– Blocking mat and rustproof pins
– Spray bottle
– Optional: fabric stiffener or spray starch
Abbreviations (US Terms)
- ch – chain
- sl st – slip stitch
- sc – single crochet
- hdc – half double crochet
- dc – double crochet
- tr – treble crochet
- st(s) – stitch(es)
- sp(s) – space(s)
- sk – skip
- rnd – round
- RS – right side
Special stitches:
– Shell: (sc, hdc, dc, hdc, sc) all in the same sp. That is 5 sts.
– Fan: (tr, ch 2) 4 times, then tr, all in the same st. That makes 5 tr and 4 ch-2 sps.
– Beak: (sc, ch 3, sc) in the same st. That is 2 sc plus 1 ch-3 sp.
Gauge and Checkpoints
Gauge: 14 sc and 14 rows = 2 in (5.1 cm) in sc, worked firmly.
Your test piece is the dove itself. Make one body through Rnd 3 and measure it before you continue. Thread-weight work is fast, so restarting costs very little.
Checkpoints:
– After Rnd 1: oval about 1.75 in (4.4 cm) long
– After Rnd 3: about 2.25 in (5.7 cm) long x 1 in (2.5 cm) tall
– After Rnd 4: about 2.75 in (7.0 cm) long including the beak, and 1.5 in (3.8 cm) tall at the head
– After the tail: about 2.25 in (5.7 cm) from belly to tail tips
– After the wings: 3.25 in x 3.75 in (8.3 cm x 9.5 cm)
– After the border: 3.5 in x 4 in (8.9 cm x 10.2 cm)
If your piece is too big: change to a 2.5 mm hook, or tighten your tension on the sc rounds.
If your piece is too small: change to a 3.0 mm hook.
Fix gauge at the Rnd 3 checkpoint. Every later section builds on the body’s stitch count, so a body that is off in size will throw off the whole silhouette.
Body
Ch 12.
Rnd 1: Sc in 2nd ch from hook (place marker), sc in next 9 ch, 3 sc in last ch. Rotate and work along the other side of the chain: sc in next 9 ch, 2 sc in last ch (the same ch as the first sc). Join with a sl st in the first sc. (24 sts)
Rnd 2: Ch 1, 2 sc in first st, sc in next 9 sts, 2 sc in each of next 3 sts, sc in next 9 sts, 2 sc in each of next 2 sts. Join. (30 sts)
Rnd 3: Ch 1, 2 sc in first st, sc in next st, sc in next 9 sts, (2 sc in next st, sc in next st) 3 times, sc in next 9 sts, (2 sc in next st, sc in next st) 2 times. Join. (36 sts)
Rnd 3 divides into four sections of 9 sts:
– Back end: sts 31–36 and 1–3
– Top edge: sts 4–12
– Front end: sts 13–21
– Belly edge: sts 22–30
Hold the oval so the front end points left and the top edge is on top. If the top edge lands at the bottom, turn the piece over. Sc fabric is reversible, so either face can be the RS.
Rnd 4 (head shaping): Ch 1, sc in sts 1–12, hdc in st 13, dc in st 14, 2 tr in st 15, 2 tr in st 16, Beak in st 17, hdc in st 18, sc in sts 19–36. Join with a sl st in the first sc. (39 sts plus 1 ch-3 beak sp)
Check the count: 12 sc + 1 hdc + 1 dc + 4 tr + 2 beak sc + 1 hdc + 18 sc = 39 sts. These 39 sts come from the 36 sts of Rnd 3. The extra 3 sts are the second tr in sts 15 and 16 and the second beak sc.
Rnd 4 stitch map (used in later sections):
– sts 1–12 sc (back and top edge)
– 13 hdc
– 14 dc
– 15–18 tr (the crown of the head)
– 19 sc, beak sp, 20 sc
– 21 hdc
– 22–24 sc (front of chest)
– 25–33 sc (belly)
– 34–39 sc (lower back end)
Do not fasten off. Sl st in st 2 to move into position for the tail.
Tail
The tail is worked in rows over Rnd 4 sts 2–8.
Row 1: Ch 5 (counts as dc + ch 2), dc in st 3, (ch 2, dc in next st) 5 times, ending in st 8. Turn. (7 dc, 6 ch-2 sps)
Row 2: Ch 4 (counts as tr), [ch 3, tr in next ch-2 sp, ch 3, tr in next dc] 5 times, ch 3, tr in last ch-2 sp, ch 3, tr in 3rd ch of turning ch-5. Turn. (13 tr, 12 ch-3 sps)
This row doubles the spokes, which makes the tail spread into a half circle.
Row 3 (fans): Ch 1, sc in first tr. Ch 3, sk next ch-3 sp, tr, and ch-3 sp. Fan in next tr. Ch 3, sk next ch-3 sp, tr, and ch-3 sp. Sc in next tr. Repeat from * to * 2 more times. The last sc goes in the top of the turning ch-4.
Fasten off. (4 sc, 3 Fans = 15 tr and 12 ch-2 sps, 6 ch-3 connector sps)
Check the placement: sc in tr 1, 5, 9 and 13, and Fans in tr 3, 7 and 11. That uses all 13 tr symmetrically.
Wings
Both wings are worked off the belly edge. St 29 stays plain between them.
Front wing: With the RS facing, join with a sl st in st 25.
Row 1: Ch 6 (counts as tr + ch 2), (tr in next st, ch 2) 2 times, tr in next st (st 28). Turn. (4 tr, 3 ch-2 sps)
Row 2: Ch 6 (counts as tr + ch 2), [tr in next ch-2 sp, ch 2, tr in next tr, ch 2] 2 times, tr in next ch-2 sp, ch 2, tr in 4th ch of turning ch-6. Fasten off. (7 tr, 6 ch-2 sps)
Back wing: Join in st 30. Work Rows 1–2 exactly as for the front wing, over sts 30–33. Fasten off. (7 tr, 6 ch-2 sps)
Checkpoint: the piece should now measure 3.25 in x 3.75 in (8.3 cm x 9.5 cm).
Border
Border gauge: the border uses the same 7 sc per 1 in (2.5 cm) as the body.
– Each tr row-end is about 0.43 in (1.1 cm) tall, which takes 3 sc.
– Each dc row-end is about 0.29 in (0.7 cm) tall, which takes 2 sc.
These amounts keep the edges flat without ruffling or cupping.
With the RS facing, join with a sl st in Rnd 4 st 9. Ch 1 and work the border segments below in order.
A. Top edge: Sc in sts 9–12. (4 sc)
B. Head:
– Sc in st 13 and st 14.
– 2 sc in each of sts 15–18.
– Sc in st 19.
– (Sc, ch 2, sc) in the beak ch-3 sp.
– Sc in sts 20–24.
(18 sc plus 1 ch-2 beak tip)
The doubled sc on the tr crown let the curve lie flat.
C. Front wing:
– Going down: 3 sc in the Row 1 row-end, then 3 sc in the Row 2 row-end.
– Across the bottom: Shell in each of the 6 ch-2 sps.
– Going up: 3 sc in the Row 2 row-end, then 3 sc in the Row 1 row-end.
(12 sc + 6 Shells = 42 sts)
D. Between the wings: Sc in st 29. (1 sc)
E. Back wing: Work as for the front wing. (42 sts)
F. Lower back end: Sc in sts 34–39 and st 1. (7 sc)
G. Tail:
– Going up: 2 sc in the Row 1 dc row-end, then 3 sc in the Row 2 tr row-end.
– Across the top: Sc in first sc of Row 3. 3 sc in next ch-3 sp, Shell in each of next 4 ch-2 sps, 3 sc in next ch-3 sp, sc in next sc. Repeat from * to * 2 more times.
– Going down: 3 sc in the Row 2 row-end, then 2 sc in the Row 1 row-end.
(5 + 82 + 5 = 92 sts, including 12 Shells)
Join with a sl st in the first sc. Fasten off.
Border total: 4 + 18 + 42 + 1 + 42 + 7 + 92 = 206 sts. That is 24 Shells (120 sts) plus 86 plain sc.
Why the math works:
– The body segments use exactly 1 sc per Rnd 4 st. The only exceptions are the 4 crown tr, which take 2 sc each.
– The row-ends follow the border gauge above.
– Every ch-2 sp in the wings and tail gets exactly 1 Shell: 6 + 6 + 12 = 24 Shells.
– Nothing is counted twice. Wing bases (sts 25–28 and 30–33) and tail bases (sts 2–8) are covered by their own rows, so the border skips them.
Hanging loop: Join in the sp between the 2nd and 3rd Shells of the center tail Fan. Ch 40, which is about 5.5 in (14.0 cm). Sl st in the same sp and fasten off. The finished loop hangs about 2.75 in (7.0 cm) above the dove.
Optional eye: Use brown floss to work a French knot in the head, about 1/4 in (0.6 cm) behind the beak.
Final Blocking
- Weave in all ends through solid sc areas, never through the open spokes.
- Soak the dove in cool water for 5 minutes. Roll it in a towel to remove excess water.
- Lay it RS up on the blocking mat. Shape the body into a smooth oval and lift the crown of the head.
- Pin the tail center Fan straight up. Angle the outer Fans out to the sides so all 3 open evenly.
- Pin the tip of every tail Shell so each spoke is straight.
- Pin each wing so it fans downward, with 1/4 in (0.6 cm) of space between the wings at st 29.
- Check the size: 3.5 in x 4 in (8.9 cm x 10.2 cm).
- If you like, apply stiffener or starch. Let the dove dry completely before unpinning.
Final Quality-Control Checklist
- [ ] Rnd 4 has 39 sts plus the beak sp.
- [ ] The tail has 3 Fans of 5 tr each, with 12 ch-2 sps in total.
- [ ] Each wing has 7 tr and 6 ch-2 sps.
- [ ] The border has 206 sts and 24 Shells.
- [ ] The beak tip is sharp, and the head crown is rounded.
- [ ] The body lies flat with no cupping.
- [ ] The ornament measures 3.5 in x 4 in (8.9 cm x 10.2 cm).
- [ ] The dove hangs level from its loop.
- [ ] All ends are hidden in solid areas.
Troubleshooting
Body cups like a bowl: You are working too tightly at the ends, or you missed an increase. Recount Rnd 3 (36 sts).
Body ruffles: You have extra increases. Recount each rnd.
Head looks flat: Make sure both 2-tr groups are in sts 15 and 16. Pull the tr loops up to full height.
Tail spokes curl: This is a tension issue in Row 2. Block firmly with starch.
Wings overlap: Leave st 29 plain, and re-pin the wings angled outward.
Border waves on row-ends: Use 3 sc per tr row-end, not 4.
Dove tips nose-down: Move the hanging loop one Shell toward the head.
Care
Hand wash in cool water, then reshape and dry flat. Store flat in tissue so the fans keep their shape.
Final Notes
The measurement chain builds in order:
– Body: a 36-st oval, 2.25 in x 1 in (5.7 cm x 2.5 cm), after Rnd 3.
– Head: Rnd 4 shapes it within 39 sts.
– Tail: grows from 7 dc to 13 tr to 3 Fans.
– Wings: spread from 4 tr to 7 tr each.
– Size before border: 3.25 in x 3.75 in (8.3 cm x 9.5 cm).
– Border: a 206-st shell border adds 1/8 in (0.3 cm) per edge, for a finished dove of 3.5 in x 4 in (8.9 cm x 10.2 cm).
Optional: once you have made one, a few in cream look lovely hanging together on the tree.
Happy crocheting!