

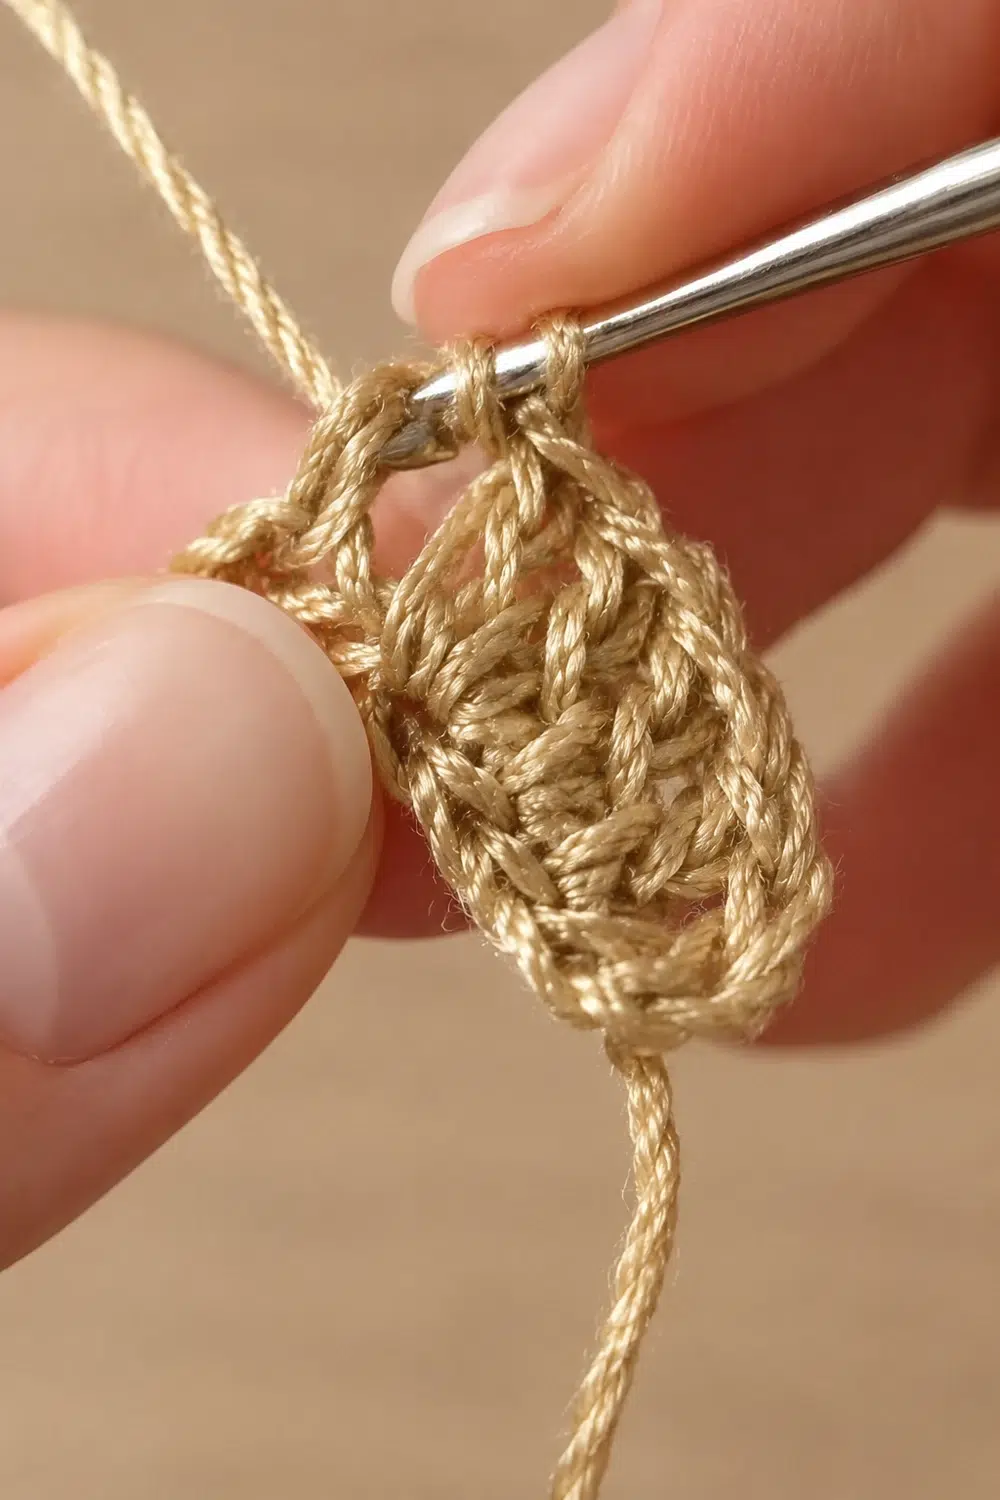
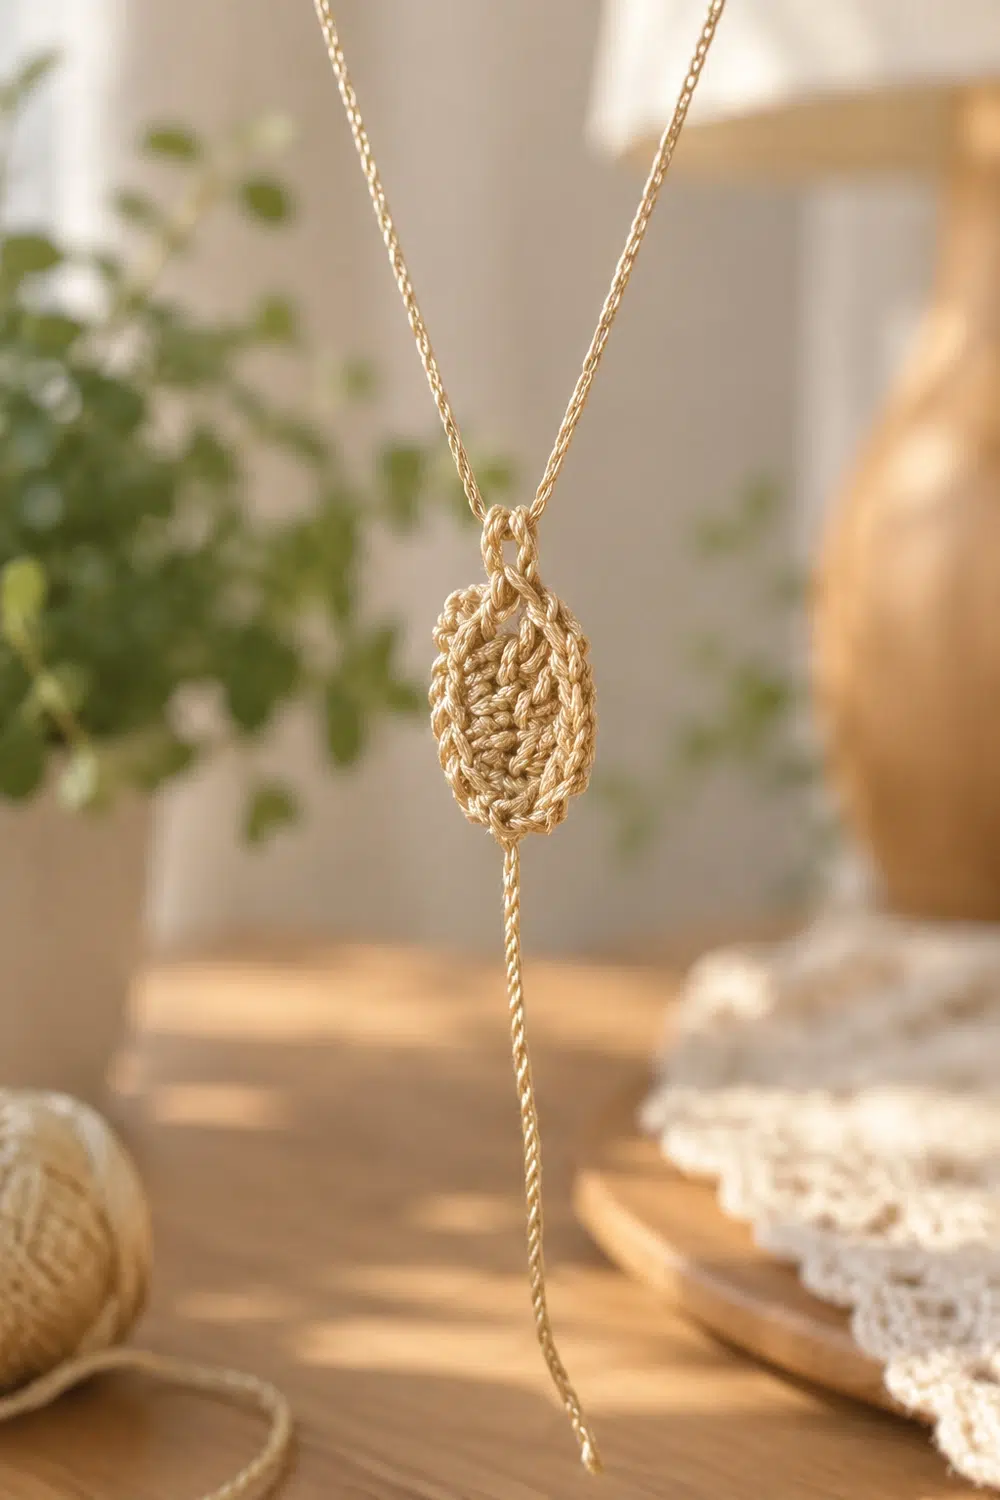
This little charm is a single crocheted oval about 1.25 in (3.2 cm) long, worked in a light tan, cream-toned thread. The surface is dense and nubby, a moss-like texture made by alternating short and slightly taller stitches. The sides draw in gently, giving the piece a soft, egg-like silhouette.
Two thread tails are left on purpose, one at the top and one at the bottom, so the oval can hang as a pendant or charm from a chain or cord. It is the kind of piece you see mid-work in the photo, hook resting at the edge, small enough to finish in one sitting.
All instructions use US crochet terms. The finished charm measures about 1.25 in (3.2 cm) long by 0.85 in (2.2 cm) wide.
Construction is simple. You crochet around both sides of a short foundation chain to make a flat oval. Two plain rounds set the shape, two alternating-stitch rounds build the texture, and a final border round adds smooth single crochet at the ends and slip stitches along the sides to cinch them slightly.
Finished Size and Construction
- Finished size: about 1.25 in (3.2 cm) long × 0.85 in (2.2 cm) wide, not counting tails
- Skill level: Easy to Intermediate. The stitches are basic, but the thread is fine.
- Terminology: US crochet terms
- Yarn weight: Size 10 crochet thread (Lace, 0)
- Hook: 1.5 mm steel hook
- Number of pieces: 1
- Layout: single oval motif, worked in joined rounds around a foundation chain
- Piece size: about 1.25 in × 0.85 in (3.2 cm × 2.2 cm)
- Size before border (after Round 4): about 1.1 in × 0.7 in (2.8 cm × 1.8 cm)
- Border depth: 1 round, about 0.08 in (0.2 cm) per edge
Materials
Yarn advice: Choose a mercerized cotton crochet thread in size 10. Mercerized cotton holds stitch definition, which keeps the nubby texture crisp. A thread with a slight sheen gives the warm, honey-gold look shown. Avoid fuzzy or very soft yarns, because they blur the texture.
Color:
– Light Tan (cream-gold): 1 g, about 5 m (5.5 yd)
Tools:
– 1.5 mm steel crochet hook
– Fine tapestry needle (only if you choose to secure tails)
– Small scissors
– 1 locking stitch marker
– Ruler marked in inches and cm
– Rustproof pins and a small foam board for blocking
– Optional: spray starch, plus a chain, cord, or jump ring for hanging
The quantity includes a margin for the two 6 in (15.2 cm) tails and one practice attempt.
Abbreviations (US Terms)
- ch: chain
- sc: single crochet
- hdc: half double crochet
- sl st: slip stitch
- st(s): stitch(es)
- inc: increase. Work 2 sts in the same st.
- rnd: round
Special stitch: Alternating Stitch (alt st)
In Rounds 3 and 4, “1 alt st” means work either one sc or one hdc, whichever is the opposite of the stitch you just made. The stitch types strictly alternate around the round: sc, hdc, sc, hdc, and so on.
An increase in these rounds is 2 alt sts in the same stitch, and those 2 stitches also continue the alternation. The shorter sc and taller hdc sitting side by side create the nubby, moss-like bumps.
Gauge and Checkpoints
Gauge: 12 sc and 12 rnds = 1 in (2.5 cm) in plain sc.
Because this is a single small piece, your test piece is the charm itself. Work Rounds 1–2, measure, and only continue once those numbers match.
Checkpoints (measure flat, without stretching):
– After Round 1: about 0.6 in (1.5 cm) long × 0.2 in (0.5 cm) wide
– After Round 2: about 0.75 in (1.9 cm) long × 1/3 in (0.8 cm) wide
– After Round 3: about 0.9 in (2.3 cm) long × 0.5 in (1.3 cm) wide
– After Round 4: about 1.1 in (2.8 cm) long × 0.7 in (1.8 cm) wide
– After Round 5 (border): about 1.25 in (3.2 cm) long × 0.85 in (2.2 cm) wide
If your oval is too big: go down to a 1.25 mm hook and restart.
If your oval is too small: go up to a 1.75 mm hook.
If the measurements are right but the piece cups or ruffles: that is a tension issue, not a gauge issue. See Troubleshooting.
Pattern
General notes:
– Leave a 6 in (15.2 cm) tail on the slip knot. Do not weave it in, because it becomes the bottom hanging tail.
– Join each round with a sl st to the first st, then ch 1. The ch 1 does not count as a stitch.
– Begin each new round in the same st as the join. Place a marker in the first st of each round.
– Rounds start at the “top” end of the oval (End A). The 3-sc end of Round 1 is the “bottom” (End B).
Foundation
Ch 6.
Round 1 (base oval)
- Sc in 2nd ch from hook, then sc in next 3 ch.
- Work 3 sc in last ch.
- Rotate the work and continue along the opposite side of the chain: sc in next 3 ch, then 2 sc in the same ch as the first sc.
- Join.
Count: 12 sc.
Stitch map: st 1 plus sts 11–12 form End A (3 sts), sts 2–4 are Side 1, sts 5–7 form End B, and sts 8–10 are Side 2. The slip-knot tail now sits at End B.
Round 2 (shaping)
- Inc in first st, then sc in next 3 sts.
- Inc in each of next 3 sts.
- Sc in next 3 sts.
- Inc in each of last 2 sts.
- Join.
Count: 18 sc (12 sts worked into + 6 increases).
Each end now has 6 sts and each side has 3.
Round 3 (texture begins)
Ch 1. Start with an sc and alternate stitch types throughout.
- Inc in first st, then 1 alt st in each of next 4 sts.
- [Inc in next st, 1 alt st in next st] 3 times.
- 1 alt st in each of next 3 sts.
- [Inc in next st, 1 alt st in next st] twice.
- Join to the first sc.
Count: 24 sts (12 sc, 12 hdc). The round has 6 increases, 3 at each end. Each end now has 9 sts and each side has 3. Because 24 is even, the round starts with sc and ends with hdc, and the alternation closes cleanly.
Round 4 (texture, offset)
Ch 1. Start with an hdc so the bumps shift over the previous round’s stitches. This offset is what creates the moss look.
- Inc in first st, then 1 alt st in each of next 5 sts.
- [Inc in next st, 1 alt st in each of next 2 sts] 3 times.
- 1 alt st in each of next 3 sts.
- [Inc in next st, 1 alt st in each of next 2 sts] twice.
- Join to the first hdc.
Count: 30 sts (15 hdc, 15 sc), with 6 increases. Each end now has 12 sts and each side has 3.
The increases interrupt a perfect checkerboard at the ends. That is intentional, because the slight irregularity reads as natural moss texture.
Checkpoint: about 1.1 in × 0.7 in (2.8 cm × 1.8 cm). Do not continue until this matches.
Border
Border gauge: the ends are worked at the same 12 sc per in (2.5 cm) as the body. The sides use slip stitches, which are shorter and firmer than sc. They pull the long edges in slightly, about 1/16 in (0.2 cm), and create the gathered, cinched sides.
Round 5 (border)
Ch 1.
- Inc in first st, then sc in next 3 sts.
- Sl st in each of next 3 sts. This is Side 1.
- [Inc in next st, sc in next 3 sts] 3 times. This is End B.
- Sl st in each of next 3 sts. This is Side 2.
- [Inc in next st, sc in next 3 sts] twice.
- Join to the first sc.
Count: 36 sts
| Section | Stitches |
|---|---|
| End A (top) | 15 sc (5 at the round start + 10 at the round end) |
| Side 1 | 3 sl st |
| End B (bottom) | 15 sc |
| Side 2 | 3 sl st |
| Total | 36 (30 sts worked into + 6 increases) |
Keep the slip stitches snug but not tight. Each one should still accept a hook tip.
Fasten off, leaving a 6 in (15.2 cm) tail. The join sits at End A, so this tail exits at the top. The slip-knot tail exits at the bottom.
Why the math works: each round adds about 1/12 in (0.2 cm) of height on all edges. At 12 sc per in, an oval’s outline grows by roughly 6 stitches per round, which is why every round adds exactly 6 increases (12 → 18 → 24 → 30 → 36). All increases fall at the curved ends, so the 3-stitch sides stay straight and narrow. The border’s slip stitches then cinch those sides.
Each end gains 3 sts per round: 3 → 6 → 9 → 12 → 15. Adding up the border sections gives 15 + 3 + 15 + 3 = 36, matching the round total.
Final Blocking
- Dampen the charm in cool water and press it gently in a towel. Do not wring it.
- Lay it right side up on the foam board and shape it into a smooth oval.
- Pin it to about 1.25 in × 0.85 in (3.2 cm × 2.2 cm). Use 2 pins at each end and 1 at the center of each side.
- Leave the side pins loose so the cinched slip-stitch edges keep their gentle inward curve. Do not stretch them straight.
- Lay both tails straight out from the top and bottom so they dry without kinks.
- Optional: mist lightly with spray starch for a firmer charm.
- Let it dry completely before unpinning.
Final Quality-Control Checklist
- [ ] Round counts are 12, 18, 24, 30, and 36
- [ ] The oval lies flat, with no cupping or ruffling
- [ ] Rounds 3–4 alternate sc and hdc, and the bumps are offset between rounds
- [ ] Each end of the border has 15 sc and each side has 3 sl sts
- [ ] The sides curve inward slightly
- [ ] Finished size is about 1.25 in × 0.85 in (3.2 cm × 2.2 cm)
- [ ] One 6 in (15.2 cm) tail exits the top and one exits the bottom
- [ ] Join seams line up neatly at End A
- [ ] There is no gap at the center of the foundation chain
Troubleshooting
The oval cups into a bowl. You have too few stitches or the tension is too tight. Recount the increases, which should be 6 per round, and relax your grip in Rounds 3–4.
The edges ruffle. You have extra increases or loose hdc. Recount the round, and pull each hdc’s loops snug before you finish it.
The texture looks flat. You may have worked two of the same stitch in a row. Check that every stitch alternates, and that Round 4 starts with hdc.
The sides don’t cinch. The slip stitches are too loose. Work them a bit firmer, or block with the side pins set slightly inward.
The sides pucker sharply. The slip stitches are too tight. Redo them with a looser hand.
Both tails come out at the same end. You started a round in the wrong place. Rounds must begin at End A, opposite the 3-sc end from Round 1.
There is a hole along the center line. Work Round 1 under 2 loops of each chain rather than 1.
The piece twists. Steam it lightly, pin it flat, and let it dry fully.
Care
Hand wash in cool water with mild soap, press it dry in a towel, and reshape it flat. If you used starch, re-block after washing.
Final Notes
The measurement chain is short and easy to verify:
- Gauge is 12 sc per 1 in (2.5 cm).
- Round 1 measures about 0.6 in × 0.2 in (1.5 cm × 0.5 cm).
- Round 2 measures about 0.75 in × 1/3 in (1.9 cm × 0.8 cm).
- Round 3 measures about 0.9 in × 0.5 in (2.3 cm × 1.3 cm).
- Round 4 measures about 1.1 in × 0.7 in (2.8 cm × 1.8 cm).
- Round 5 finishes at about 1.25 in × 0.85 in (3.2 cm × 2.2 cm).
The counts move from 12 to 36 in steady steps of 6, and the border’s 15 + 3 + 15 + 3 sections confirm the total.
Use the top tail to tie the charm to a chain or cord, and the bottom tail to add a tiny bead or knot, or trim it short.
Optional: if you would like a matching set, simply repeat the pattern. Each charm is complete on its own.
Happy crocheting!