

This little bell is pure vintage Christmas. It is worked in soft cream cotton, and its open, lacy texture lets the tree lights and garland glow right through it. A rounded dome sits at the top and tapers slightly into a flared body. The bottom ends in three wide, scalloped shells, and a small round clapper hangs from the center.
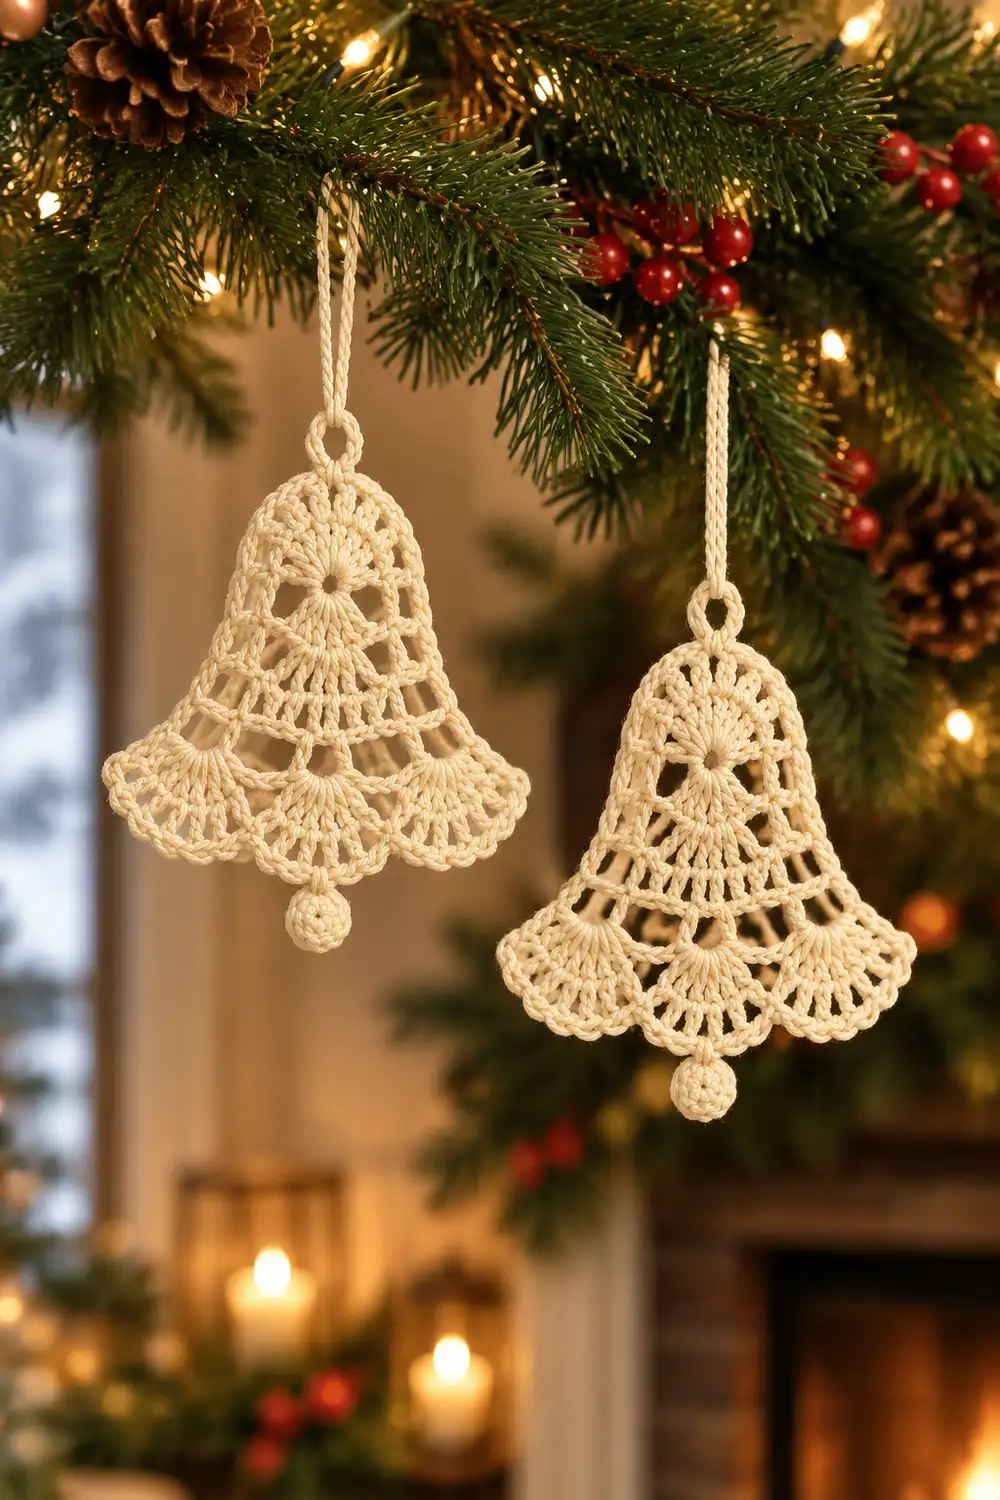
The photo shows two identical bells hanging side by side. This pattern makes one bell, so simply repeat it for a matching pair. The yarn amounts below cover two bells.
The pattern uses US crochet terms throughout. Each finished bell measures about 3.1 in (7.9 cm) tall and 3.5 in (8.9 cm) wide at the scallops. With the clapper, the total height is about 3.75 in (9.5 cm).
Construction is simple and flat. You crochet a lacy half-circle dome from a magic ring, then rotate and work the flared body downward from the dome’s straight edge. The last body row forms the shell scallops. A single border round outlines the dome and sides. Finally, you add a tiny stuffed ball as the clapper and a chain hanging loop.
Finished Size and Construction
- Finished size: 3.1 in (7.9 cm) tall x 3.5 in (8.9 cm) wide; 3.75 in (9.5 cm) tall including the clapper
- Skill level: Easy-Intermediate
- Terminology: US crochet terms
- Yarn weight: Super fine (#1) fingering-weight mercerized cotton
- Hook: 2.75 mm (US C-2)
- Number of pieces: 2 per ornament (bell body and clapper ball); make 2 ornaments to match the photo
- Layout: Single flat ornament, no joining
- Piece size: 3.1 in (7.9 cm) x 3.5 in (8.9 cm)
- Size before border: 3 in (7.6 cm) tall x 3.25 in (8.3 cm) wide
- Border depth: about 1/8 in (0.3 cm) along the dome and sides
Materials
Yarn: Choose a smooth, mercerized cotton in fingering weight. Mercerized cotton shows lace clearly and holds its shape well after stiffening. Avoid fuzzy or loosely plied yarns, because they blur the open spaces.
- Cream / off-white: 15 g (about 50 m / 55 yd). This is enough for two bells. One bell uses roughly 4 g.
Tools:
- 2.75 mm (US C-2) crochet hook
- Tapestry needle
- Scissors
- 1 stitch marker
- A pinch of fiberfill or matching cotton scraps for the clapper
- Blocking mat and rust-proof pins
- Fabric stiffener or spray starch (recommended for ornaments)
The quantities include a margin for your gauge swatch, the tails, and the hanging loops.
Abbreviations (US Terms)
- ch – chain
- sl st – slip stitch
- sc – single crochet
- dc – double crochet
- sc2tog – single crochet 2 together
- MR – magic ring
- sk – skip
- sp – space
- st(s) – stitch(es)
- rep – repeat
Special stitches:
- Fan: 5 dc worked in the same space.
- Shell: 9 dc worked in the same stitch. The shells form the scalloped bottom edge.
- Row-end: the side edge of a row. Work stitches around the post of the end stitch or into its turning chain.
Gauge and Checkpoints
Gauge: 7 dc = 1 in (2.5 cm). One dc row is about 0.35 in (0.9 cm) tall.
The dome (Rows 1–3) doubles as your gauge swatch. Work it first, lay it flat, and measure before you continue.
Checkpoints:
- After Dome Row 3: 2.4 in (6.1 cm) across the straight edge, 1.2 in (3.0 cm) tall
- After Body Row 1: about 1.5 in (3.8 cm) tall; Row 1 is 2.1 in (5.3 cm) wide
- After Body Row 3: 2.25 in (5.7 cm) tall, 2.75 in (7.0 cm) wide
- After Body Row 4: 2.6 in (6.6 cm) tall, 3 in (7.6 cm) wide
- After Body Row 5: 3 in (7.6 cm) tall, 3.25 in (8.3 cm) wide
- After border: 3.1 in (7.9 cm) tall, 3.5 in (8.9 cm) wide
If the dome is too big: If it is more than 1/8 in (0.3 cm) wider than 2.4 in (6.1 cm), go down a hook size (2.5 mm or 2.25 mm).
If it is too small: Go up to 3 mm or 3.25 mm (US D-3).
Check again after Body Row 3. Small differences are fine for an ornament, but both bells in a pair should match each other.
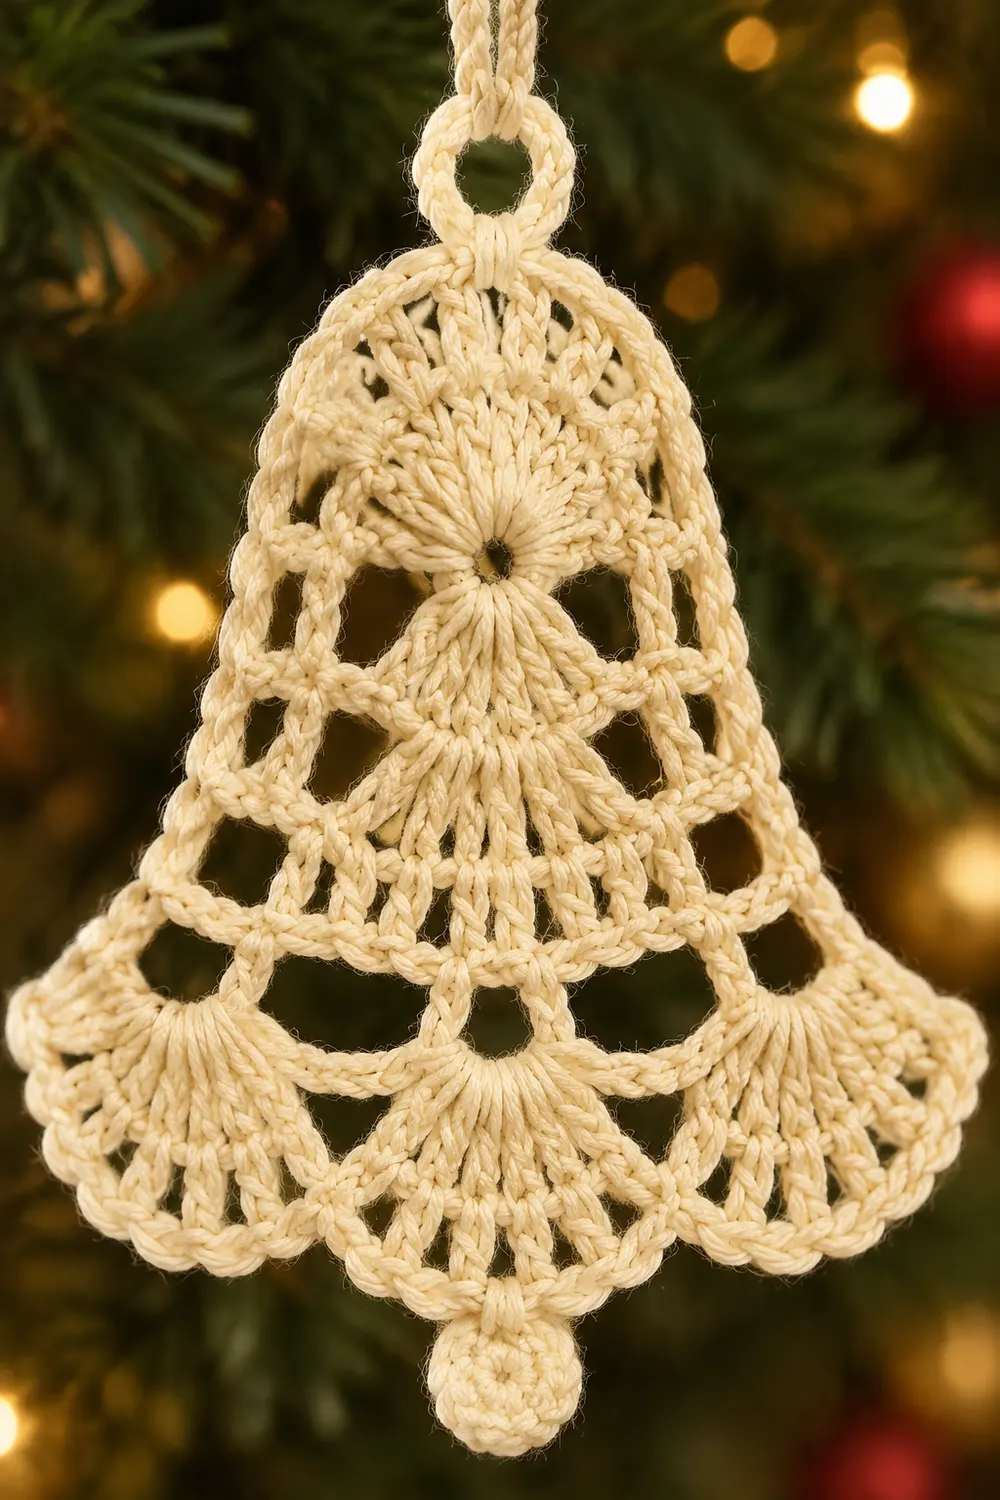
Pattern: Bell Body
The Dome
Row 1: MR. Ch 3 (counts as dc), work 6 dc in ring. Pull the ring snug, but leave a small center hole. Turn. (7 dc)
Row 2: Ch 3 (counts as dc). Dc in the first st, then work 2 dc in each st across. Turn. (14 dc)
Row 3: Ch 4 (counts as dc + ch 1). Dc in next dc, ch 1; rep from * across, working the last dc in the top of the turning ch. Do not turn. (14 dc, 13 ch-1 sps)
You now have a lacy half-circle. The dc posts radiate from the ring like rays. The curved edge is the top of the bell.
The Body
Rotate the piece so that the straight edge faces up. You will work along it, then continue the following rows downward, away from the dome.
Row 1 (worked into the dome’s straight edge):
- Ch 3 (counts as dc). Dc in the same row-end (Row 3).
- Work 2 dc in the Row 2 row-end, then 2 dc in the Row 1 row-end.
- Work 3 dc into the magic ring, inserting the hook through the center hole.
- Work 2 dc in each of the Row 1, Row 2, and Row 3 row-ends on the other side.
- Turn.
This row is worked into existing edges, not grown from a previous row. The count is 2 dc x 6 row-ends = 12, plus 3 dc in the ring. (15 dc)
The row measures 2.1 in (5.3 cm), slightly narrower than the 2.4 in (6.1 cm) dome edge. That gentle gather creates the slight taper below the dome.
Row 2:
- Ch 4 (counts as dc + ch 1). Dc in the same st.
- Ch 1, sk next dc, dc in next dc; rep from * 6 times.
- Ch 1, sk next dc. Work (dc, ch 1, dc) in the top of the turning ch.
- Turn.
(10 dc, 9 ch-1 sps)
Row 3:
- Ch 4 (counts as dc + ch 1). Dc in the first dc.
- Ch 1, dc in next dc; rep from * 8 times.
- Ch 1. Work (dc, ch 1, dc) in the 3rd ch of the turning ch-4.
- Turn.
(12 dc, 11 ch-1 sps)
Row 4 (fan row): Count the ch-1 spaces as Sp 1 through Sp 11. Sp 6 is the center.
- Ch 3 (counts as dc). Dc in the first dc. Ch 1, then sk Sp 1 and the next dc.
- Fan in Sp 2. Ch 2, sk next dc, Sp 3, and next dc. Sc in Sp 4.
- Ch 2, sk next dc, Sp 5, and next dc. Fan in Sp 6.
- Ch 2, sk next dc, Sp 7, and next dc. Sc in Sp 8.
- Ch 2, sk next dc, Sp 9, and next dc. Fan in Sp 10.
- Ch 1, sk next dc and Sp 11. Work 2 dc in the 3rd ch of the turning ch-4.
- Turn.
(19 dc, 2 sc, 4 ch-2 sps, 2 ch-1 sps)
The row is symmetrical: 2 edge dc, three 5-dc fans, and 2 edge dc.
Row 5 (scallop row):
- Ch 1. Sc in the first 2 dc.
- Sk the ch-1 sp and the first 2 dc of the fan. Shell in the center (3rd) dc of the fan. Sk the next 2 dc.
- Sc in the ch-2 sp, sc in the sc, sc in the next ch-2 sp.
- Sk 2 dc. Shell in the center dc. Sk 2 dc.
- Sc in the ch-2 sp, sc in the sc, sc in the next ch-2 sp.
- Sk 2 dc. Shell in the center dc. Sk 2 dc and the ch-1 sp.
- Sc in the last 2 dc, working the last sc in the top of the turning ch-3.
- Do not fasten off.
(3 shells x 9 dc = 27 dc; 2 + 3 + 3 + 2 = 10 sc; 37 sts total)
Each 9-dc shell fans out over a 5-dc base, which produces the wide, rounded scallops.
Pattern: Clapper Ball
Work in a continuous spiral without joining. Use a marker to track the first stitch of each round.
Rnd 1: MR, 6 sc in ring. (6 sc)
Rnd 2: 2 sc in each st around. (12 sc)
Rnd 3: Sc in each st around. (12 sc)
Rnd 4: Sc2tog 6 times. Stuff firmly. (6 sc)
Fasten off, leaving a 6 in (15.2 cm) tail. Thread the tail through the front loops of the last 6 sts and pull tight to close.
The finished ball measures about 0.5 in (1.3 cm) across.
Border
Border gauge: 7 sc = 1 in (2.5 cm), the same as the body’s dc stitch gauge. The border runs up one side, over the dome, and down the other side. It skips the scallops so they stay crisp.
Border round: Continue from the last sc of Row 5. Do not turn.
- First side, 11 sc: Work into the row-ends, moving up toward the dome:
- 1 sc in the Row 5 row-end
- 3 sc in the Row 4 row-end
- 2 sc in the Row 3 row-end
- 3 sc in the Row 2 row-end
- 2 sc in the Row 1 row-end
- Dome arc, 27 sc: Work 1 sc in each of the 14 dc and each of the 13 ch-1 sps of Dome Row 3. The first and last of these sc sit at the dome corners. They are counted once here and nowhere else.
- Second side, 11 sc: Work down the other side, mirroring the first side: 2, 3, 2, 3, then 1 sc.
Sl st in the first sc of Row 5 and fasten off. (11 + 27 + 11 = 49 sc)
Why the math works:
- Sides: Each side spans four dc rows plus one sc row-end, about 1.55 in (3.9 cm). Eleven sc at 7 sc per inch is about 1.57 in (4.0 cm), so the edge lies flat.
- Dome: The arc is half a circle with a 1.2 in (3.0 cm) radius, about 3.77 in (9.6 cm) long. Twenty-seven sc at 7 sc per inch is about 3.86 in (9.8 cm). That is close enough to stay smooth without ruffling.
Hanging loop: Join yarn in the 14th sc of the dome arc (the 25th border st, at the top center). Ch 18, sl st in the same st, and fasten off. The loop hangs about 1.25 in (3.2 cm) above the bell and is not included in the finished size.
Attach the clapper: Join yarn in the 5th (center) dc of the middle shell. Ch 2, sl st into the closed top of the ball, and fasten off. The ball hangs about 1/8 in (0.3 cm) below the scallop tip, which brings the total height to 3.75 in (9.5 cm).
Make the second bell: Repeat the bell body, clapper, border, and loop. Measure it against the first bell at each checkpoint.
Final Blocking
- Weave in all ends along solid dc posts, never through the open spaces.
- Soak the bell in cool water and press out the excess in a towel.
- Pin the dome into a smooth half-circle, 2.4 in (6.1 cm) across the base.
- Pin the sides straight, keeping the flare symmetrical.
- Pin each shell into a rounded scallop, placing one pin at the tip of each center dc. The bottom width should be 3.5 in (8.9 cm).
- Open every ch-1 space with a pin tip.
- Apply stiffener or spray starch and let the bell dry completely, preferably overnight.
- Unpin and check the measurements. Block the second bell the same way.
Final Quality-Control Checklist
- The dome is a smooth half-circle with even rays and a closed center ring.
- The stitch counts match: 15 / 10 / 12 / 19 dc in the body rows, 37 sts in Row 5, and 49 sc in the border.
- There are three even scallops, with the center shell directly under the dome center.
- The border lies flat, with no ruffling or puckering.
- The bell measures 3.1 in (7.9 cm) x 3.5 in (8.9 cm).
- The clapper is centered and firmly attached.
- The hanging loop is centered at the top.
- Both bells match in size and shape.
Troubleshooting
- Dome ruffles: The ring was left too loose, or your tension is loose. Tighten the ring or go down a hook size.
- Dome cups: Your Row 2 increases are too tight. Relax your tension or go up a hook size.
- Scallops look flat: Make sure all 9 dc of each shell go into the single center dc. Pin the shells firmly during blocking.
- Bell leans to one side: Recount Row 4. The fans must sit in Sp 2, Sp 6, and Sp 10.
- Border puckers: Add 1 sc to the Row 4 row-end on both sides, so you have 12 sc per side.
- Border waves: Use 2 sc in every dc row-end, so you have 9 sc per side.
- Clapper twists or tilts: Attach it exactly at the center dc of the middle shell, and keep the ch-2 snug.
Care
Hand wash in cool water, press out the water, and reshape while damp. Re-stiffen if needed, and store flat in tissue between seasons.
Final Notes
Here is the full measurement chain:
- The dome’s straight edge is 2.4 in (6.1 cm).
- Body Row 1 tapers it to 2.1 in (5.3 cm).
- The mesh rows widen the bell to 2.75 in (7.0 cm).
- The fan row brings it to 3 in (7.6 cm).
- The shell scallops reach 3.25 in (8.3 cm).
- The 49-sc border finishes the bell at 3.1 in (7.9 cm) x 3.5 in (8.9 cm).
- The ball clapper brings the total height to 3.75 in (9.5 cm).
Make two bells and hang them side by side, just like the photo.
Happy crocheting!