

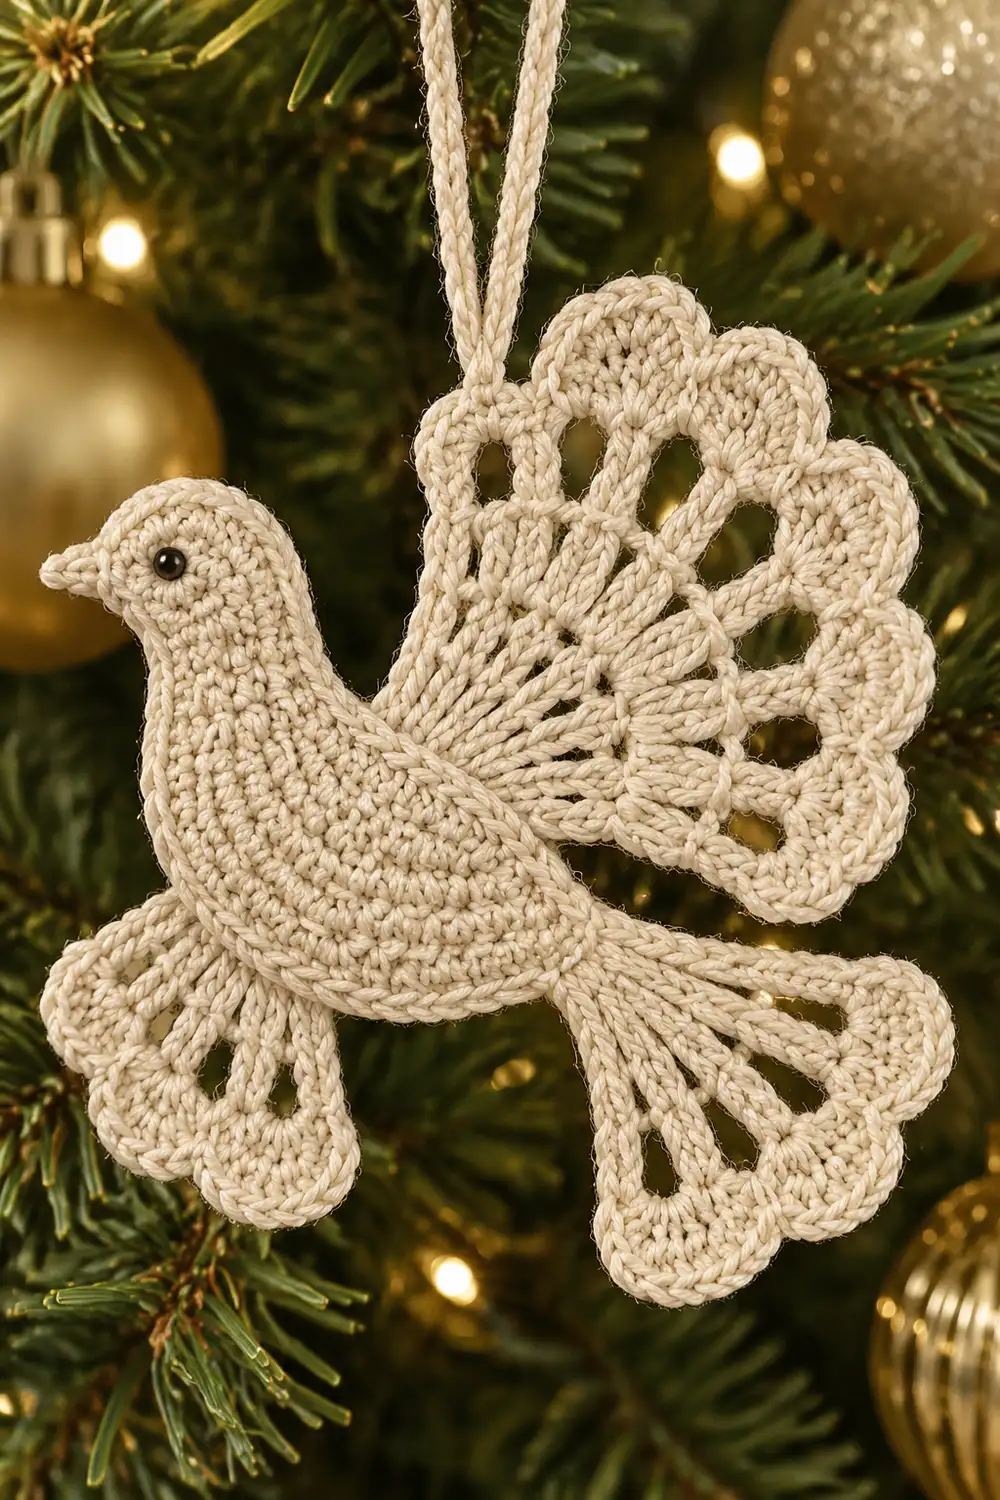
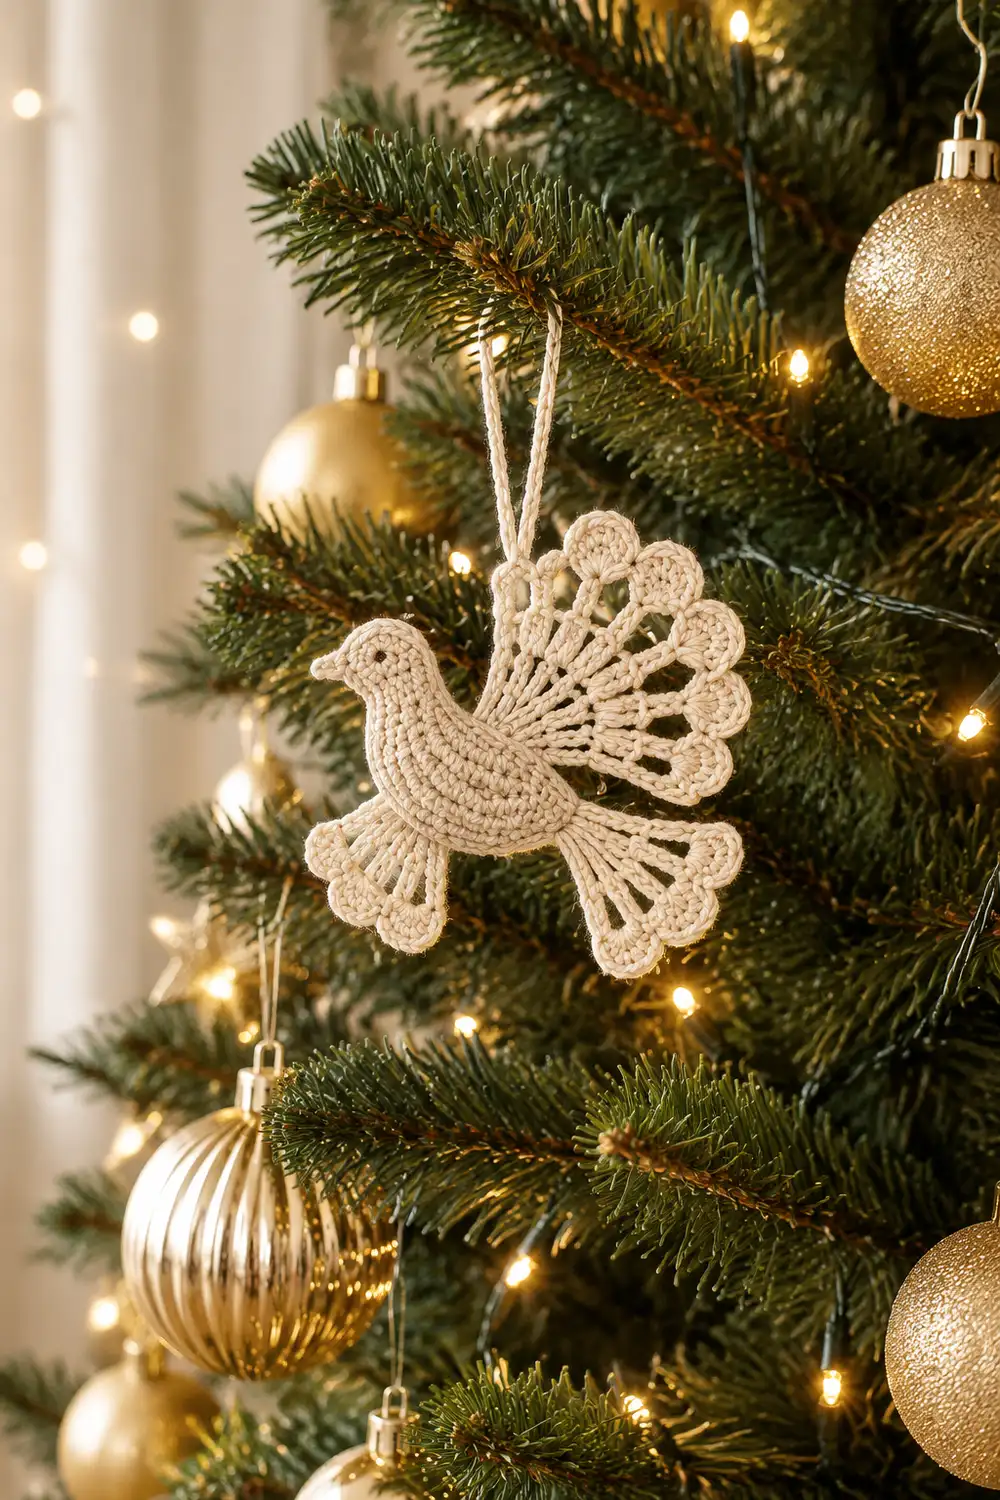
This lacy dove ornament has a plump, rounded body, a small neat head, and fanned wings and tail with radiating spokes and scalloped edges. The effect is part dove, part peacock. It looks delicate but is built from basic stitches.
The sample is worked in cream mercerized cotton. Against gold and champagne baubles and warm lights, a soft off-white reads as elegant and timeless. Any light neutral works well.
The pattern uses US crochet terms. The finished dove measures about 4.5 in (11.4 cm) wide and 3.5 in (8.9 cm) tall, not including the hanging loop.
Construction is simple. You crochet an oval body in rounds. Then you add the head, wing fan, and tail fan directly onto the body’s edge, so the motif stays one piece. A final outline round and a hanging loop finish it.
Finished Size and Construction
- Finished size: 4.5 in (11.4 cm) wide x 3.5 in (8.9 cm) tall
- Skill level: Easy-intermediate
- Terminology: US crochet terms
- Yarn weight: Fingering weight (size 3) mercerized cotton
- Hook: 2.25 mm (US B-1)
- Number of pieces: 1 (head, wing, and tail are worked onto the body)
- Layout: Single motif, head facing forward, wing fanning up from the back, tail fanning down from the rear
- Body size: 2.25 in (5.7 cm) x 1.25 in (3.2 cm)
- Size before border: about 4.25 in (10.8 cm) x 3.25 in (8.3 cm)
- Border depth: about 0.125 in (0.3 cm) per edge
- Hanging loop: about 2.5 in (6.4 cm) long when folded
Materials
Yarn advice: Choose a smooth, mercerized cotton in fingering weight. It gives crisp stitch definition, holds scallops after blocking, and takes starch well. Avoid fuzzy or very stretchy yarns. The spokes and shells will blur and droop.
- Cream (one color): 7 g, about 21 m
Tools:
- 2.25 mm (US B-1) crochet hook
- Tapestry needle
- 4 locking stitch markers
- Rust-proof pins and a foam blocking board
- Spray bottle
- Optional: fabric stiffener or spray starch
The quantity includes a margin for your gauge swatch, the hanging loop, and weaving in ends.
Abbreviations (US Terms)
- ch – chain
- sl st – slip stitch
- sc – single crochet
- dc – double crochet
- tr – treble crochet
- st(s) – stitch(es)
- sp – space
- sc2tog – single crochet 2 together: (insert hook in next st, yarn over, pull up a loop) twice, yarn over, pull through all 3 loops
- RS / WS – right side / wrong side
Special stitch – beak picot: ch 3, sl st in 3rd ch from hook.
Shell: a group of dc worked into the same ch-sp. The wing uses 5-dc shells and the tail uses 4-dc shells.
Gauge and Checkpoints
Gauge: 7 sc and 8 rows = 1 in (2.5 cm) in sc, worked flat.
This is a single ornament, so the body is your swatch. Work Rounds 1 to 4 and measure before adding anything else.
Checkpoints:
- After Rnd 1: about 1.5 in (3.8 cm) long
- After Rnd 4: 2.25 in (5.7 cm) x 1.25 in (3.2 cm)
- Head: about 1.1 in (2.8 cm) at its widest
- Wing: extends about 1.25 in (3.2 cm) from the body edge
- Tail: extends about 1 in (2.5 cm) from the body edge
- Finished, blocked: 4.5 in (11.4 cm) x 3.5 in (8.9 cm)
Body too big? Go down 0.25 mm in hook size, or tighten your tension.
Body too small? Go up 0.25 mm in hook size.
A difference of 0.25 in (0.6 cm) or less at Rnd 4 is fine. Blocking will even it out.
Body
The body is an oval worked in joined rounds with RS facing. Do not turn.
Rnd 1: Ch 11. Sc in 2nd ch from hook and next 8 ch (9 sc). Work 3 sc in last ch. Rotate and work along the opposite side of the foundation. Sc in next 8 ch, then 2 sc in the last ch (the same ch as the first sc). Join with sl st to first sc. (22 sc)
Rnd 2: Ch 1. 2 sc in first st, sc in next 8 sts, 2 sc in each of next 3 sts, sc in next 8 sts, 2 sc in each of next 2 sts. Join. (28 sc)
Rnd 3: Ch 1.
– (2 sc in next st, sc in next st) once.
– Sc in next 8 sts.
– (2 sc in next st, sc in next st) 3 times.
– Sc in next 8 sts.
– (2 sc in next st, sc in next st) 2 times.
– Join. (34 sc)
Rnd 4: Ch 1.
– (Sc in next 2 sts, 2 sc in next st) once.
– Sc in next 8 sts.
– (Sc in next 2 sts, 2 sc in next st) 3 times.
– Sc in next 8 sts.
– (Sc in next 2 sts, 2 sc in next st) 2 times.
– Join and fasten off. (40 sc)
Each round adds 6 sts: 1 + 3 + 2 increases at the two ends. The 8-st sides stay straight, which keeps the body a smooth, rounded oval.
Stitch map for Rnd 4. Number the stitches 1 to 40, with st 1 being the first sc of the round.
- Sts 5–12: belly
- Sts 13–24: front curve (chest and neck)
- Sts 25–32: back
- Sts 33–40 and 1–4: rear curve
Place markers in sts 19, 26, 35, and 39. Working right-handed, the bird faces left. Left-handed, it faces right. Both are correct.
Head
The head is worked in rows on the upper front curve.
Row 1 (RS): Join yarn with sl st in st 19. Ch 1, sc in same st and next 5 sts (sts 19–24). (6 sc)
Row 2: Ch 1, turn. 2 sc in first st, sc in next 4 sts, 2 sc in last st. (8 sc)
Row 3: Ch 1, turn. Sc in each st across. (8 sc)
Row 4: Ch 1, turn. Sc2tog, sc in next 4 sts, sc2tog. (6 sc)
Row 5: Ch 1, turn. Sc2tog, sc in next 2 sts, sc2tog. (4 sc)
Fasten off. The increases and decreases round the head on both sides, so it stays small and domed rather than square. Checkpoint: about 1.1 in (2.8 cm) wide at Row 3.
Wing Fan
The wing is a fan of radiating spokes topped with scallops.
Row 1 (RS): Join yarn with sl st in st 26. Ch 1, sc in same st and next 8 sts (sts 26–34). (9 sc)
Row 2: Ch 5 (counts as dc + ch 2), turn. Dc in next sc, then (ch 2, dc in next sc) 7 times. (9 dc, 8 ch-2 sps)
Row 3: Ch 7 (counts as tr + ch 3), turn. Tr in next dc, then (ch 3, tr in next dc) 6 times. Ch 3, tr in 3rd ch of beginning ch-5. (9 tr, 8 ch-3 sps)
Row 4: Ch 1, turn. Sc in first tr, then (5 dc in next ch-3 sp, sc in next tr) 8 times. Work the last sc in the 4th ch of the turning ch-7. Fasten off. (8 shells; 40 dc + 9 sc = 49 sts)
The tr spokes are taller than the dc row below them, and the spaces widen from ch-2 to ch-3. This makes the fan spread naturally. The shells form the scalloped, feathered edge. Checkpoint: about 1.25 in (3.2 cm) from the body edge.
Tail Fan
The tail is a smaller version of the wing, worked on the lower rear.
Row 1 (RS): Join yarn with sl st in st 39. Ch 1, sc in same st and next 6 sts (sts 39, 40, 1, 2, 3, 4, 5). (7 sc)
Row 2: Ch 5 (counts as dc + ch 2), turn. Dc in next sc, then (ch 2, dc in next sc) 5 times. (7 dc, 6 ch-2 sps)
Row 3: Ch 6 (counts as tr + ch 2), turn. Tr in next dc, then (ch 2, tr in next dc) 4 times. Ch 2, tr in 3rd ch of beginning ch-5. (7 tr, 6 ch-2 sps)
Row 4: Ch 1, turn. Sc in first tr, then (4 dc in next ch-2 sp, sc in next tr) 6 times. Work the last sc in the 4th ch of the turning ch-6. Fasten off. (6 shells; 24 dc + 7 sc = 31 sts)
Checkpoint: about 1 in (2.5 cm) from the body edge, splayed slightly downward.
Border
Border gauge: The border is worked at the body gauge of 7 sc per 1 in (2.5 cm). It is one outline round worked with RS facing, in the same direction as the body rounds. It uses sc on smooth edges and sl st over the scallops so the shells keep their shape.
Border round: Join with sl st in st 6, then ch 1. Work the segments below in order.
- Belly and chest: Sc in sts 6–18. (13 sc)
- Head:
- Sc in each of the 5 row ends up the front edge.
- In the first st of Row 5, work (sc, beak picot, sc).
- Sc in next 2 sts, then 2 sc in last st.
- Sc in each of the 5 row ends down the back edge.
- (16 sc + 1 picot)
- Neck gap: Sc in st 25. (1 sc)
- Wing:
- Sc up the row ends: 1 sc in the Row 1 end, 2 sc in the Row 2 end, 3 sc in the Row 3 end (6 sc).
- Sl st loosely in each of the 49 sts of Row 4.
- Sc down the row ends: 3 sc in the Row 3 end, 2 in the Row 2 end, 1 in the Row 1 end (6 sc).
- (12 sc + 49 sl st)
- Rump: Sc in sts 35–38. (4 sc)
- Tail:
- Sc up the row ends: 1 + 2 + 3 sc (6 sc).
- Sl st loosely in each of the 31 sts of Row 4.
- Sc down the row ends: 3 + 2 + 1 sc (6 sc).
- (12 sc + 31 sl st)
- Join with sl st to the first sc.
Totals: 58 sc + 80 sl st + 1 picot.
Why the math works:
- Body edge: Every Rnd 4 stitch not covered by a feature gets exactly 1 sc: 13 + 1 + 4 = 18 sts. The features cover the other 22 sts: head 6 + wing 9 + tail 7. Together that is 18 + 22 = 40, the full Rnd 4 count.
- Row ends: Each row end gets sc to match its height at 8 rows per 1 in (2.5 cm). An sc row gets 1, a dc row (about 2 sc rows tall) gets 2, and a tr row (about 3 sc rows tall) gets 3.
- Head top: This is a conversion round. The 4 sts get 1 sc each, plus 2 extra sc at the corners (one beside the beak, one at the last st), for 6 sc. With 5 + 5 row-end sc, the head totals 16.
The border adds about 0.125 in (0.3 cm) per edge. That brings the piece from 4.25 in (10.8 cm) x 3.25 in (8.3 cm) to 4.5 in (11.4 cm) x 3.5 in (8.9 cm).
Hanging loop:
1. Join yarn with sl st in the 5th sc of wing Row 4 (the center sc between shells 4 and 5).
2. Ch 35, which is about 5 in (12.7 cm).
3. Sl st in the same st and fasten off.
The loop folds to about 2.5 in (6.4 cm).
Final Blocking
- Weave in all ends along stitches of the same color, through the body where possible.
- Mist the dove thoroughly, or soak it briefly and press out the water in a towel.
- Lay it RS up on the blocking board.
- Pin the body to 2.25 in (5.7 cm) x 1.25 in (3.2 cm).
- Pin each wing spoke straight so the spokes radiate evenly. Pin the tip of each of the 8 scallops into a smooth arc.
- Repeat for the tail spokes and its 6 scallops.
- Pin the beak picot to a point.
- Check the overall size: 4.5 in (11.4 cm) x 3.5 in (8.9 cm).
- If you like, apply stiffener or starch for a crisper ornament.
- Let it dry completely, at least 12 hours, before unpinning.
Final Quality-Control Checklist
- Body Rnd 4 has 40 sts and measures 2.25 in (5.7 cm) x 1.25 in (3.2 cm).
- Head has 4 sts in Row 5 and is rounded on both sides.
- Wing has 9 spokes and 8 even scallops (49 sts in Row 4).
- Tail has 7 spokes and 6 even scallops (31 sts in Row 4).
- Border has 58 sc, 80 sl st, and 1 beak picot, with no puckering.
- Hanging loop is centered over the wing, and the dove hangs level.
- All ends are woven in securely.
- Finished size is 4.5 in (11.4 cm) x 3.5 in (8.9 cm).
Troubleshooting
Body curls or cups: Your tension is too tight on the increases. Loosen up, or go up 0.25 mm in hook size.
Wing ruffles: The chains are too loose. Work Row 3 with tighter chains, or use ch-2 spaces instead of ch-3.
Wing cups upward: The chains are too tight. Relax your chain tension, then block firmly.
Scallops look flat: Make sure each shell sits in its own space. Pin each scallop tip during blocking, and starch if needed.
Border puckers over the shells: The sl sts are too tight. Work them loosely, or use a hook 0.25 mm larger for that segment only.
Dove tilts when hung: Move the loop one sc toward the heavier side.
Head looks lumpy: Check that the sc2tog decreases sit at both edges of Rows 4 and 5.
Care
Hand wash in cool water and lay flat to dry, reshaping the scallops. Store flat between sheets of tissue to protect the wings.
Final Notes
The measurement chain is short:
- Body: 2.25 in (5.7 cm) x 1.25 in (3.2 cm) after Rnd 4
- Head: about 1.1 in (2.8 cm) wide
- Wing: about 1.25 in (3.2 cm) from the body edge
- Tail: about 1 in (2.5 cm) from the body edge
- Before border: 4.25 in (10.8 cm) x 3.25 in (8.3 cm)
- Finished, after border and blocking: 4.5 in (11.4 cm) x 3.5 in (8.9 cm)
Check each stage as you go and the dove will come out true to size. Optional: once you have the rhythm, a few doves make a lovely matching set for the tree.
Happy crocheting!