

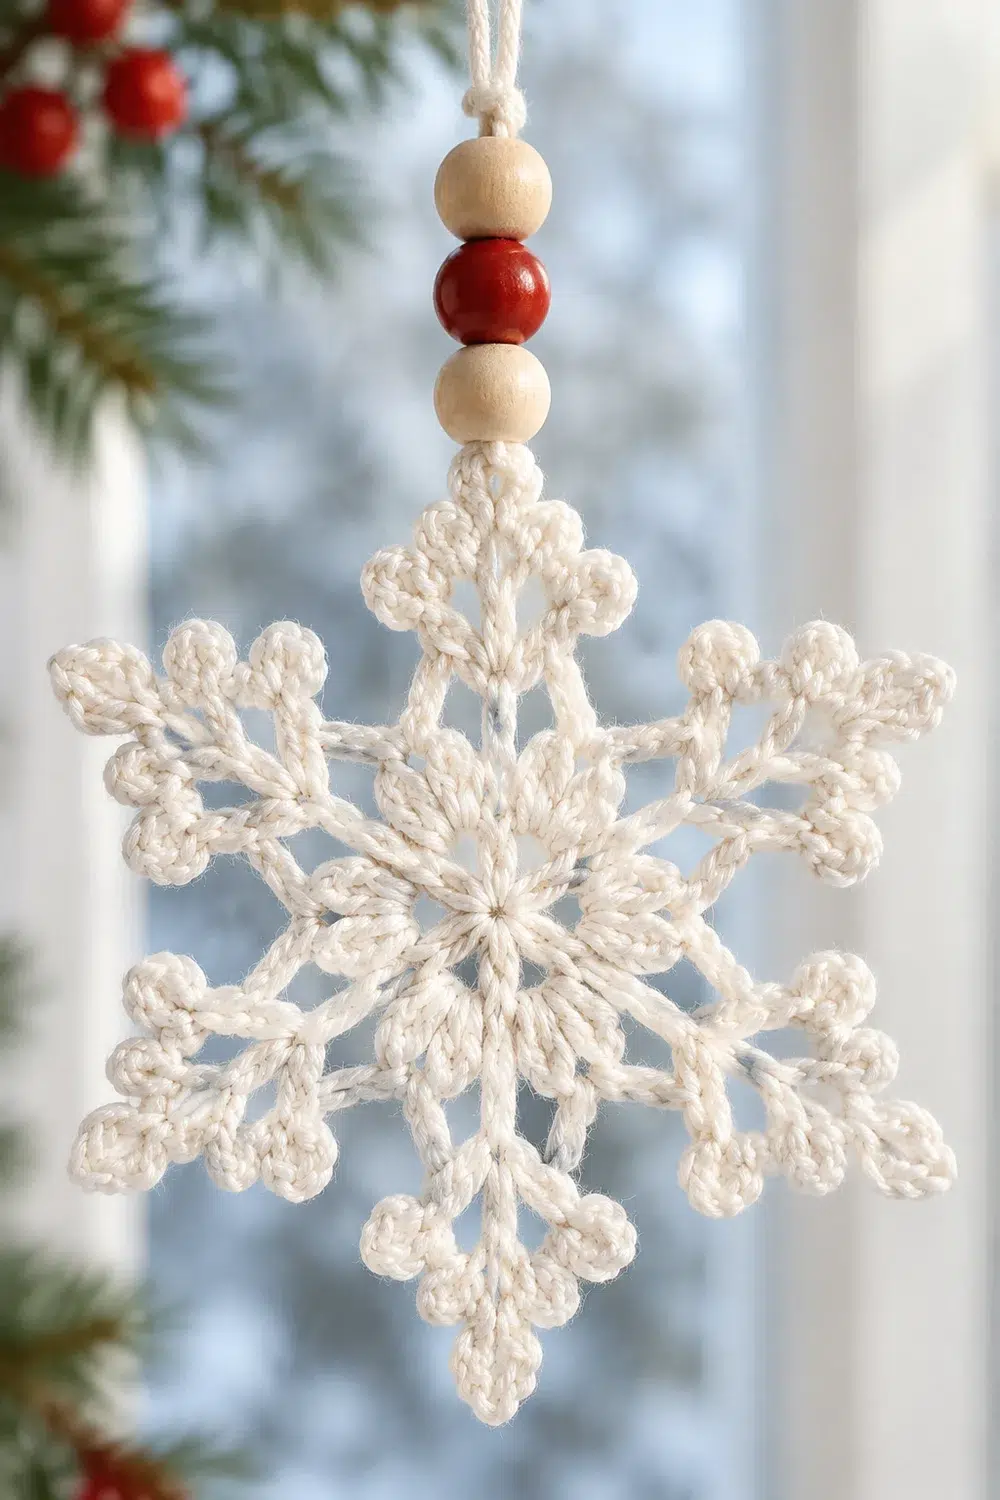
This little snowflake is made to hang in a bright winter window. It is one lacy, six-pointed motif in cream cotton with an open, filigree look. Each point ends in a pointed chain tip with two small side branches, like a real ice crystal.
The ornament hangs from a natural cotton cord threaded through the top point. Above the snowflake, the cord carries three round beads: a natural wooden bead, a red bead, and a second wooden bead. The cream, wood, and red palette suits evergreen branches, red berries, and soft winter light.
The pattern uses US crochet terms. The finished snowflake measures 3.5 in (8.9 cm) from point to opposite point after blocking, which sits in the 3–4 in (7.6–10.2 cm) range.
It is worked as one piece in five rounds from a magic ring. Rounds 1–4 build the center and the six arm bases. Round 5 is the edging round that forms the points, side branches, and small valley picots. You then starch, block, and add the beaded hanger.
Finished Size and Construction
- Finished size: 3.5 in (8.9 cm) point to point, blocked
- Skill level: Easy (advanced beginner)
- Terminology: US crochet terms
- Yarn weight: Fingering weight (Super Fine, #1) cotton or size 3 crochet thread
- Hook: 2.5 mm (US B/1 or C/2, depending on brand)
- Number of pieces: 1
- Layout: Single motif worked in the round, 6-fold symmetry
- Piece size: 3.5 in (8.9 cm) point to point
- Size before border (after Round 4): 2.5 in (6.4 cm) point to point
- Border depth: 0.5 in (1.3 cm) added at each point, so 2.5 in + 0.5 in + 0.5 in = 3.5 in (8.9 cm)
Materials
Yarn: Use a smooth, mercerized cotton in fingering weight or size 3 crochet thread. Cotton holds starch well and keeps the points crisp. Avoid fuzzy or very stretchy yarns because they blur the lace.
- Cream / off-white: about 5 g (about 17 m)
One snowflake uses roughly 3 g (about 10 m). The quantity above includes a margin for your gauge swatch, weaving in, and any ripping back.
Hanger and beads:
– Natural cotton or linen cord, 14 in (35.6 cm) long
– 2 round natural wooden beads, 10 mm, with holes wide enough for two strands of cord
– 1 round red bead, 10 mm, with a matching hole size
Tools:
– 2.5 mm crochet hook
– Tapestry needle
– Scissors
– Fabric stiffener or starch (spray or liquid)
– Blocking board or foam mat
– Rustproof pins
– Ruler or tape measure
Abbreviations (US Terms)
- MR – magic ring
- ch – chain
- sl st – slip stitch
- sc – single crochet
- dc – double crochet
- sp – space
- st(s) – stitch(es)
- rep – repeat
Special stitch – Picot: Ch 3, then sl st into the top of the sc just made. Insert the hook under the front loop and the left vertical bar of that sc. This makes a small closed bump.
Note: At the start of a round, ch 3 counts as 1 dc. Ch 1 does not count as a stitch.
Gauge and Checkpoints
Gauge for a snowflake is measured round by round. Make one test snowflake through Round 4 before committing to a batch.
Measure across the center, from a point or edge to the one directly opposite. Measure flat and unstretched:
- After Round 1: 0.75 in (1.9 cm) across
- After Round 2: 1.25 in (3.2 cm) across
- After Round 3: 2 in (5.1 cm) across, measured at the ch-2 tips
- After Round 4: 2.5 in (6.4 cm) across, measured at the ch-5 loops
- After Round 5, unblocked: about 3.25 in (8.3 cm)
- After Round 5, blocked: 3.5 in (8.9 cm)
If your piece is too big (more than 0.25 in / 0.6 cm over at Round 2), switch to a 2.25 mm hook, or tighten your chains.
If your piece is too small, switch to a 2.75 mm hook. Also check that your chains are not tighter than your stitches. Tight chains shrink the open spaces and cause cupping.
Small differences of 0.25 in (0.6 cm) are fine for an ornament. If you plan to hang a set together, match all snowflakes to your first one.
Pattern
Round 1 – Center
Make a MR. Ch 3 (counts as dc), work 11 dc into the ring. Pull the ring closed. Sl st to the top of the beginning ch-3.
Count: 12 dc.
Checkpoint: 0.75 in (1.9 cm) across. The center should be a flat, closed disc.
Round 2 – Spoke Spaces
Ch 3 (counts as dc), dc in the next st, ch 3.
Dc in each of the next 2 sts, ch 3. Rep from * 4 more times.
Sl st to the top of the beginning ch-3.
Count: 12 dc (6 pairs) and 6 ch-3 sps.
The stitch total stays at 12. This round opens spaces between pairs rather than adding stitches. Each ch-3 sp marks where an arm will grow.
Checkpoint: 1.25 in (3.2 cm) across.
Round 3 – Arm Shells
Sl st in the next dc, then sl st into the next ch-3 sp.
Ch 3 (counts as dc). Work (dc, ch 2, 2 dc) in the same sp, then ch 1.
In the next ch-3 sp work (2 dc, ch 2, 2 dc), ch 1. Rep from * 4 more times.
Sl st to the top of the beginning ch-3.
The ch-1 sits above each dc pair from Round 2. Do not work into those dc.
Count: 24 dc (6 shells of 4 dc), 6 ch-2 tip sps, and 6 ch-1 sps.
This is a growth round. Each shell holds 4 dc, so 6 shells × 4 dc = 24 dc.
Checkpoint: 2 in (5.1 cm) across at the ch-2 tips. The piece should look like a small six-sided flower.
Round 4 – Arm Extensions
Sl st in the next dc, then sl st into the ch-2 tip sp.
Ch 1. Work (sc, ch 5, sc) in the same ch-2 sp. Ch 4, then sc in the next ch-1 sp. Ch 4.
In the next ch-2 sp work (sc, ch 5, sc). Ch 4, sc in the next ch-1 sp, ch 4. Rep from * 4 more times.
Sl st to the first sc.
Count: 18 sc, 6 ch-5 tip loops, and 12 ch-4 sps.
Per arm, there are 2 sc at the tip and 1 sc in the valley, for 3 sc. Then 3 sc × 6 = 18 sc. Each arm has 2 ch-4 sps, so 2 × 6 = 12.
The sc placed in each ch-1 sp is the valley sc. It sits between two arms.
Checkpoint: 2.5 in (6.4 cm) across at the ch-5 loops. This is your size before the border.
Border (Round 5 – Snowflake Points)
Round 5 is the edging that turns six loops into true snowflake arms. It is a trim round. You fill each space with sc and add chain loops and picots on top. You do not repeat the growth pattern of Round 3.
Border gauge: Work 4 sc into each ch-4 sp and 6 sc around each ch-5 tip loop. This density covers the chains completely without ruffling. If the edge waves, work 3 sc per ch-4 sp instead.
Round 5:
Sl st into the first ch-5 tip loop. Ch 1.
- Arm tip: In the ch-5 loop work (2 sc, ch 3, sc, ch 6, sc, ch 3, 2 sc).
- First side: Skip the tip sc from Round 4. Work 4 sc in the next ch-4 sp.
- Valley: Sc in the valley sc, then work a picot.
- Second side: Work 4 sc in the next ch-4 sp. Skip the next tip sc from Round 4.
Rep steps 1–4 five more times, working step 1 into each remaining ch-5 loop. Sl st to the first sc. Fasten off.
Exact counts per arm (one “side” of the snowflake):
- Tip loop: 6 sc, 2 ch-3 side branches, 1 ch-6 point
- Ch-4 sps: 4 sc + 4 sc = 8 sc
- Valley: 1 sc + 1 picot
- Total per arm: 15 sc, 2 ch-3 loops, 1 ch-6 loop, 1 picot
Round total: 90 sc, 6 ch-6 points, 12 ch-3 side branches, and 6 picots.
Why the math works: Every round repeats exactly 6 times, so the snowflake keeps true 6-fold symmetry.
In Round 5, the 15 sc per arm break down as 6 sc in the tip loop, 8 sc across the two ch-4 sps, and 1 sc in the valley sc. That gives 6 + 8 + 1 = 15, and 15 × 6 = 90 sc.
The 2 tip sc of each Round 4 arm are skipped rather than worked. They are not counted in Round 5.
The ch-6 point adds about 0.5 in (1.3 cm) beyond each Round 4 tip. Two opposite points give 2.5 + 0.5 + 0.5 = 3.5 in (8.9 cm).
Final Blocking
- Weave in ends. Weave the ends into the sc of Round 5 and the dc of Round 1. Trim close.
- Wet and starch. Soak the snowflake in fabric stiffener, or saturate it with spray starch. Gently squeeze out the excess. Do not wring.
- Pin the center. Place the snowflake on the blocking mat. Pin through the Round 1 center so it lies flat.
- Pin the six points. Pin each ch-6 point straight out from the center. Check that opposite points are 3.5 in (8.9 cm) apart, and that all six arms are evenly spaced at 60°.
- Pin the side branches. Pin each ch-3 loop into a small open point angled toward its own arm tip.
- Pin the valley picots. Pin each picot straight outward between the arms.
- Open the spaces. Use a pin tip to open the ch-3 spaces of Round 2 and the shell tips of Round 3.
- Dry fully. Let it dry flat for at least 12 hours, then remove the pins.
- Add the hanger.
- Fold the 14 in (35.6 cm) cord in half.
- Push the fold through the ch-6 loop of the top point, then pull both tails through the fold to make a lark’s head knot.
- Tie an overhand knot with both strands right above the lark’s head, so the beads cannot slide down onto the snowflake.
- Thread both strands through a wooden bead, then the red bead, then the second wooden bead.
- Tie a second overhand knot snugly above the top wooden bead.
- Knot the tails together about 3 in (7.6 cm) above the beads to make the hanging loop.
- Trim the ends.
Final Quality-Control Checklist
- Round 1 has 12 dc and the ring is pulled fully closed.
- Round 2 has 6 pairs of dc separated by 6 ch-3 sps.
- Round 3 has 6 shells of (2 dc, ch 2, 2 dc), 24 dc total.
- Round 4 has 18 sc, 6 ch-5 loops, and 12 ch-4 sps.
- Round 5 has 90 sc, 6 ch-6 points, 12 ch-3 branches, and 6 picots.
- Unblocked size is about 3.25 in (8.3 cm). Blocked size is 3.5 in (8.9 cm).
- All six arms match in length and angle.
- The snowflake is stiff, flat, and fully dry.
- Bead order from the snowflake upward is wooden, red, wooden.
- The cord passes through the top ch-6 point, so the snowflake hangs straight.
Troubleshooting
Center cups or domes. Your chains are too tight. Loosen the ch-3 sps in Round 2, or go up 0.25 mm in hook size.
Edges ruffle in Round 5. Work 3 sc instead of 4 into each ch-4 sp. Use the same count on every arm.
Points look floppy. Use more stiffener, then re-block. Pin the ch-6 loop into a sharp V while it is wet.
One arm is shorter than the others. Count that arm’s stitches. You probably missed an sc in the tip loop or a chain in a ch-6 or ch-3 loop.
Count is off at the end of a round. Check that you skipped the 2 tip sc of Round 4 in each arm. Working into them adds 2 sc per arm, or 12 extra in total.
Beads slide onto the snowflake. Tighten the overhand knot above the lark’s head, or tie a double knot.
Snowflake hangs crooked. Move the cord so it is centered in the ch-6 loop of one point. Do not thread it through a side branch.
Care
Dust gently with a soft dry brush. If the snowflake softens over time, rinse it, re-starch it, and re-block it flat. Store it flat between tissue paper.
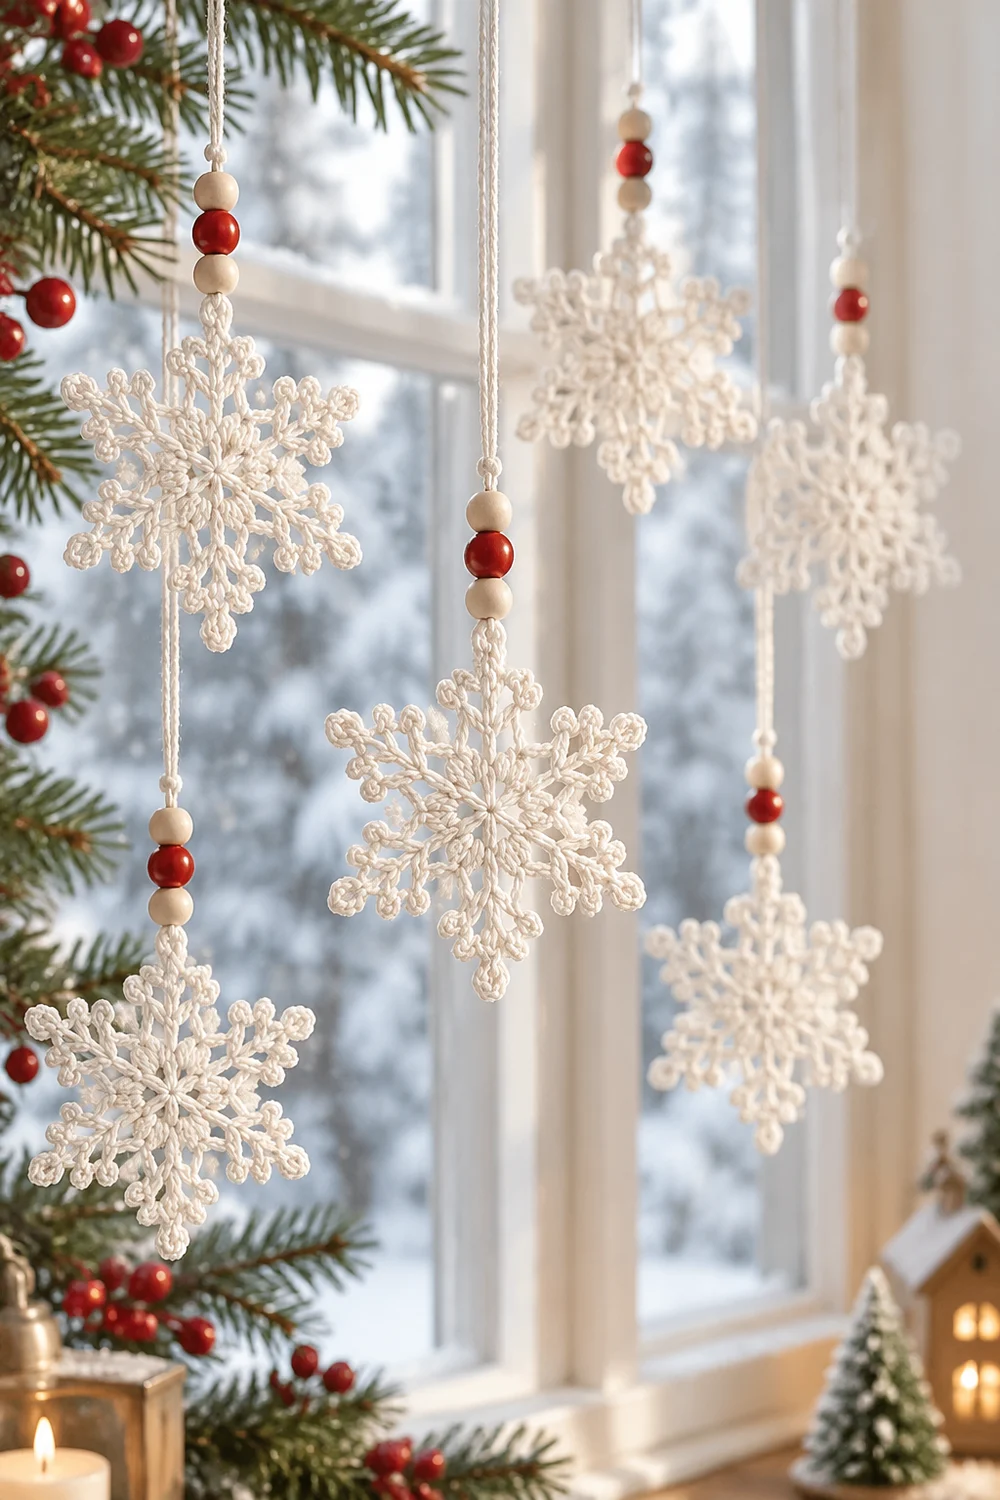
Optional: A set of five or six matching snowflakes on cords of different lengths makes a window display like the one shown. Each snowflake is still made exactly as written above.
Final Notes
The measurement chain is simple:
| Stage | Size |
|---|---|
| Round 1 | 0.75 in (1.9 cm) |
| Round 2 | 1.25 in (3.2 cm) |
| Round 3 | 2 in (5.1 cm) |
| Round 4 | 2.5 in (6.4 cm) |
| Round 5, unblocked | about 3.25 in (8.3 cm) |
| Round 5, blocked | 3.5 in (8.9 cm) |
Every round repeats 6 times, and Round 5 adds 15 sc per arm for 90 sc total. Check your size at each stage, and every snowflake will match.
Happy crocheting!