

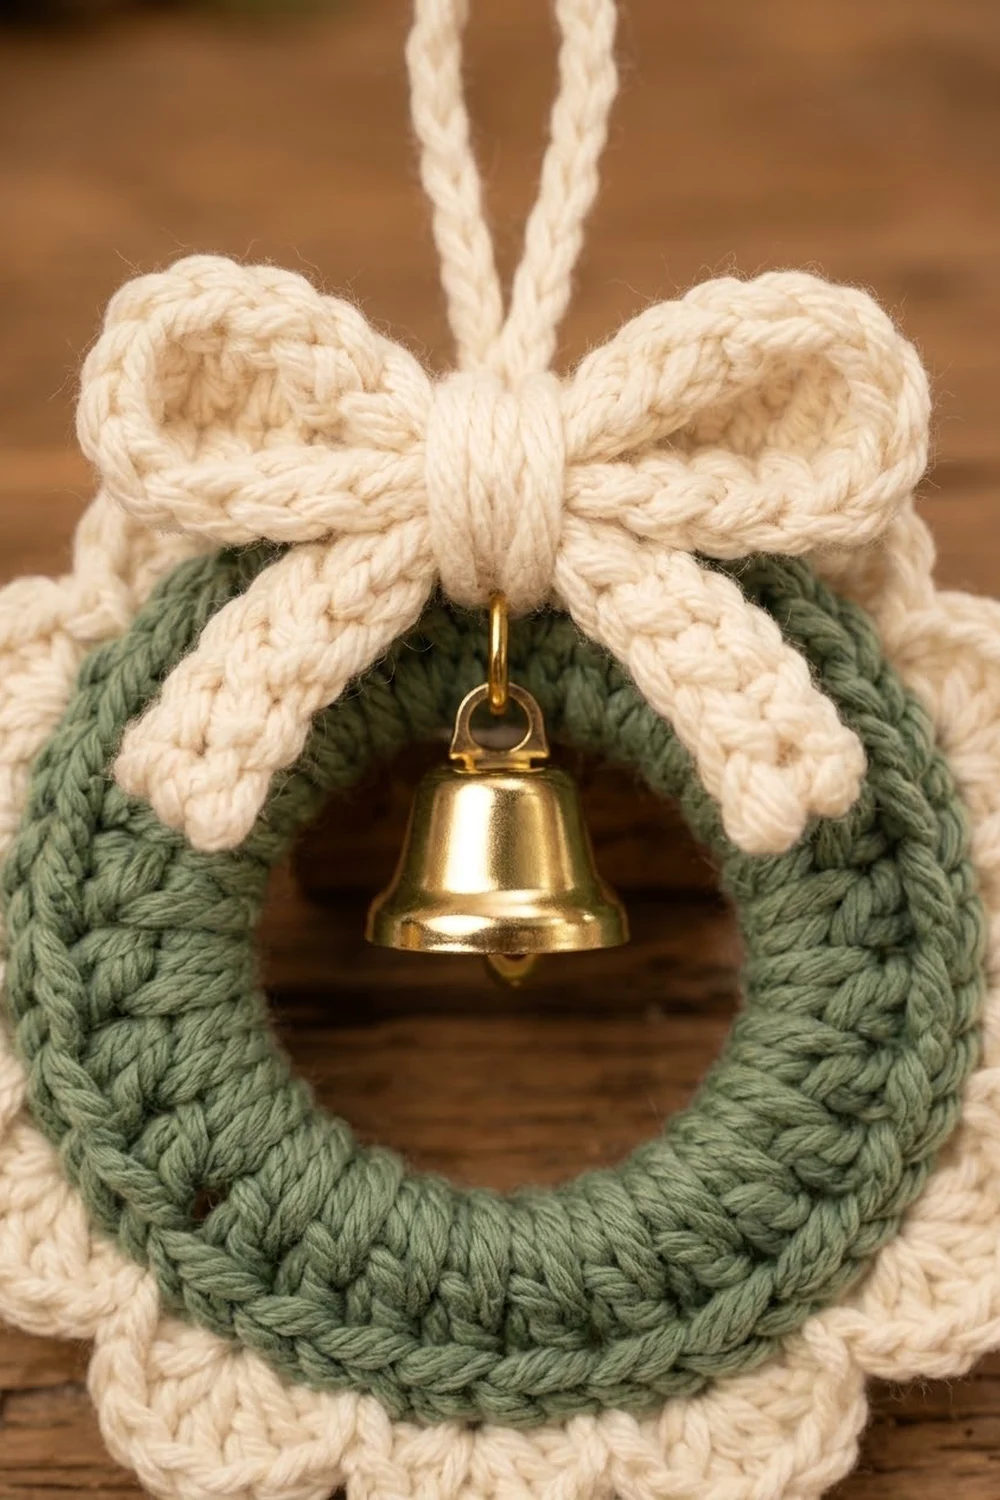
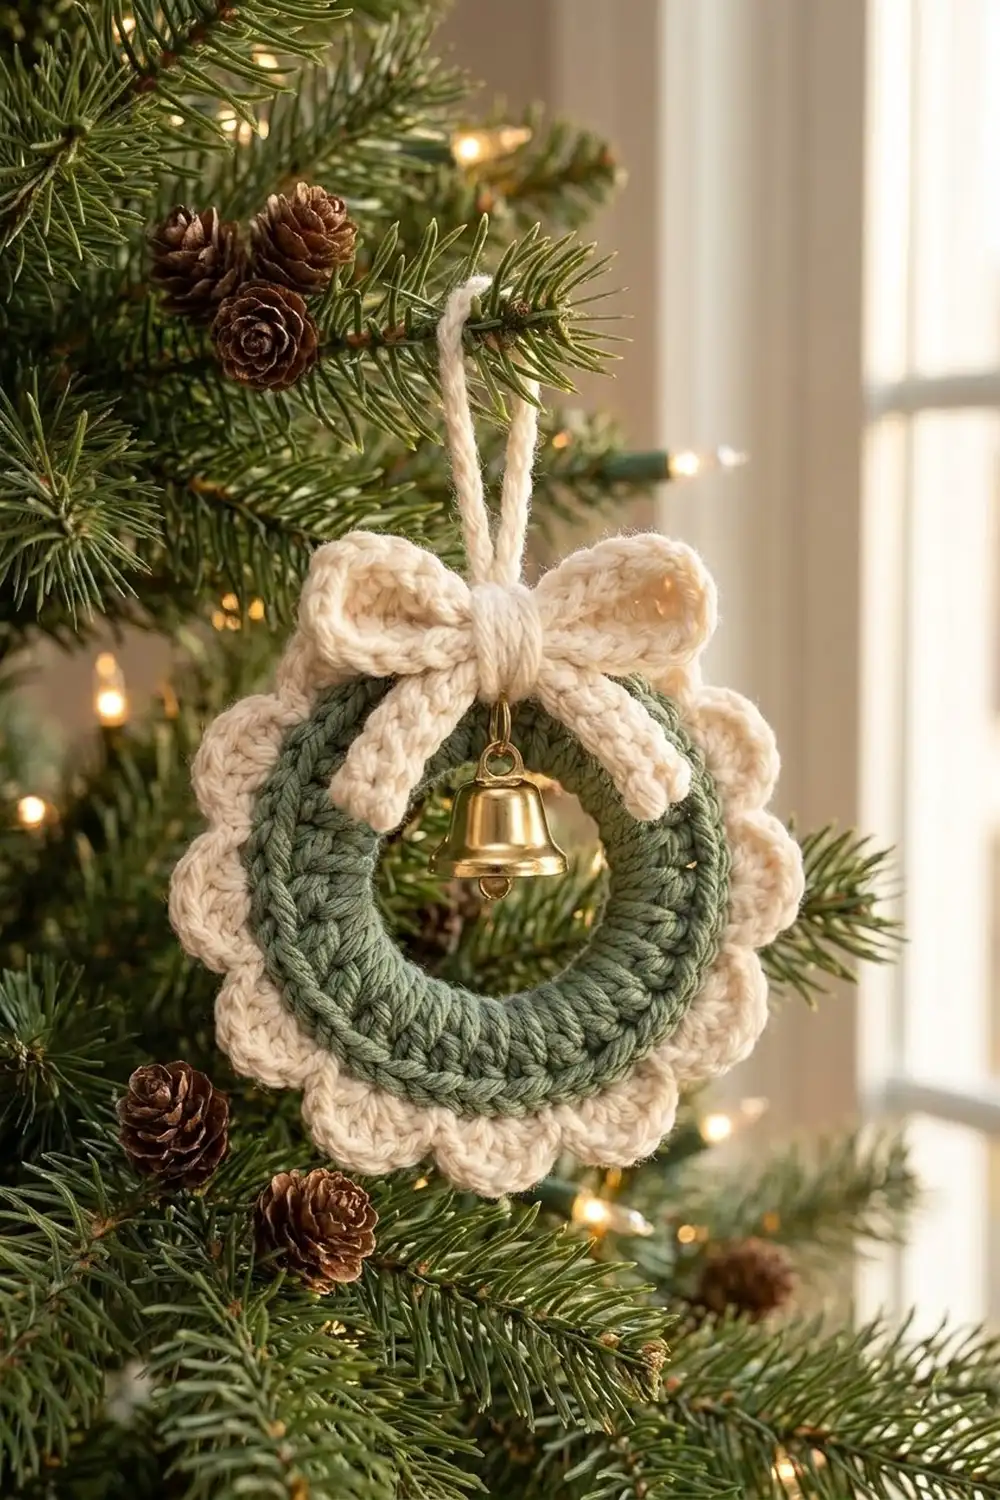
This little wreath ornament pairs a soft sage green core with a cream scalloped border, a looped cream bow, and a gold-tone bell that swings in the center opening. It has a cozy farmhouse look and hangs neatly on a tree, a door knob, or a gift.
The palette is just two colors: sage green for the wreath core and cream for the scallops, bow, and hanging loop. The cotton stitches show clearly, and the small bell adds shine.
This pattern uses US crochet terms. The finished ornament measures about 3.75 in (9.5 cm) across, edge to edge of the scallops, with a center opening of about 1.5 in (3.8 cm).
You crochet the wreath as one continuous piece. A green ring is worked in the round from a chain, then the cream border is joined directly onto its outer edge, forming two concentric circles. A small bow and a hanging loop are made separately and sewn on at the top, and the bell hangs from the bow’s center into the opening.
Finished Size and Construction
- Finished size: 3.75 in (9.5 cm) diameter
- Skill level: Easy
- Terminology: US crochet terms
- Yarn weight: Worsted (#4), cotton or cotton blend
- Hook: 4.0 mm (G-6)
- Number of pieces: 1 ornament (wreath worked in one continuous piece, plus bow and hanging loop sewn on)
- Layout: Two concentric circles: sage green core inside, cream scalloped border outside
- Center opening: 1.5 in (3.8 cm)
- Size before border: 2.75 in (7.0 cm) diameter
- Border depth: 0.5 in (1.3 cm) per side
Materials
Choose a smooth worsted cotton with clear stitch definition. Cotton holds the scallops crisply and blocks flat. Acrylic works but may curl more, so block it firmly.
Yarn:
– Sage green: 8 g, about 16 m
– Cream: 10 g, about 20 m
Quantities include a generous margin for swatching and weaving in ends.
Tools:
– 4.0 mm (G-6) crochet hook
– Tapestry needle
– Scissors
– 1 stitch marker
– 1 gold-tone metal bell, about 0.75 in (1.9 cm) tall
– Blocking mat, rust-proof pins, and a spray bottle
Abbreviations (US Terms)
- ch – chain
- sl st – slip stitch
- sc – single crochet
- hdc – half double crochet
- dc – double crochet
- st(s) – stitch(es)
- sk – skip
- rnd – round
- RS – right side
Special stitch – Shell: Work 5 dc into the same stitch.
Gauge and Checkpoints
Gauge: 18 sc and 20 rows = 4 in (10.2 cm) in a flat sc swatch.
Gauge on a piece this small is easiest to judge by working the ornament itself. Make the green ring first and measure before adding the border.
Checkpoints:
– After Rnd 1: center opening about 1.5 in (3.8 cm) across.
– After Rnd 3 (green complete): outer diameter 2.75 in (7.0 cm).
– After Rnd 4 (first cream rnd): outer diameter about 3.1 in (7.9 cm).
– After Rnd 5 (scallops): outer diameter 3.75 in (9.5 cm).
A tolerance of 0.25 in (0.6 cm) either way is fine.
If your ring is too big: go down one hook size, to 3.5 mm. If it is too small: go up one size, to 4.5 mm. Changing tension by hook size keeps every stitch count the same.
Part 1: Green Wreath Core
Work in joined rounds with the RS facing you throughout. Do not turn. The beginning ch does not count as a stitch.
Foundation: With sage green, ch 24. Join with a sl st to the first ch to form a ring, taking care not to twist the chain.
Rnd 1: Ch 1, sc in each ch around, join with sl st to first sc. (24 sc)
Rnd 2: Ch 2, [hdc in next 2 sts, 2 hdc in next st] 8 times, join with sl st to first hdc. (32 hdc)
Rnd 3: Ch 1, [sc in next 3 sts, 2 sc in next st] 8 times, join with sl st to first sc. (40 sc)
Fasten off green and weave in the ends.
Each green round is a growth round, adding 8 stitches. That matches the steady outward growth a flat ring needs, so the core lies flat.
Checkpoint: Measure the outer diameter. It should be 2.75 in (7.0 cm). Adjust your hook now if needed, before adding cream.
Part 2: Bow
The bow is a flat strip folded into two side loops and cinched at the center.
Foundation: With cream, ch 23.
Row 1: Sc in 2nd ch from hook and in each ch across, turn. (22 sc)
Rows 2–3: Ch 1, sc in each st across, turn. (22 sc)
Fasten off, leaving a 12 in (30.5 cm) tail.
The strip measures about 4.9 in (12.4 cm) long and 0.6 in (1.5 cm) wide.
Shape the bow: Lay the strip flat. Fold both short ends in to meet at the center back, overlapping them by about 0.25 in (0.6 cm). This creates two equal side loops. Pinch the center so it gathers.
Wrap the long tail tightly around the center 8 to 10 times to form the knot. Secure it with a few stitches through the back and leave the remaining tail for attaching.
The finished bow is about 2.4 in (6.1 cm) wide.
Part 3: Hanging Loop
Foundation: With cream, ch 17.
Row 1: Sl st in back bump of 2nd ch from hook and in each ch across. (16 sl sts)
Fasten off, leaving a 6 in (15.2 cm) tail.
The cord measures about 3.5 in (8.9 cm). Folded in half, it forms a loop about 1.75 in (4.4 cm) tall.
Set the bow and hanging loop aside. You attach them after blocking.
Border
The cream border is worked directly onto the outer edge of the green ring, joining the two circles into one piece.
Border gauge: The border uses the same hook and tension as the core, 18 sc = 4 in (10.2 cm) on a flat swatch. On the curve, Rnd 4’s outer edge has a circumference of about 9.7 in (24.6 cm) carrying 48 sc, roughly 5 sts per inch. That slightly fuller edge gives the shells room to fan without cupping.
Because the ornament is round, the counts below are given per quarter as well as in total. The “quarters” are equal sections of the circle.
Join: With the RS facing, join cream with a sl st in the stitch at the top center of the ring. The bow will hide this join.
Rnd 4: Ch 1, [sc in next 4 sts, 2 sc in next st] 8 times, join with sl st to first sc. (48 sc)
– Per quarter: 2 repeats = 12 sc.
– This is a growth round. The 40 green stitches are each worked once, and 8 increase stitches are added, giving 40 + 8 = 48.
Rnd 5 (Scallops): Ch 1, sc in first st, [sk 1 st, shell in next st, sk 1 st, sc in next st] 11 times, sk 1 st, shell in next st, sk 1 st, join with sl st to first sc. (12 shells: 60 dc + 12 sc = 72 sts)
– Per quarter: 3 shells and 3 sc = 18 sts.
Fasten off and weave in the ends.
Why the math works: Each scallop uses 4 stitches of Rnd 4: skip, shell, skip, sc. The first sc uses 1 stitch. The 11 bracketed repeats use 11 × 4 = 44 stitches. The final skip, shell, skip uses 3 more. That totals 1 + 44 + 3 = 48, exactly the Rnd 4 count. Since 48 ÷ 4 = 12, you get 12 even scallops, 3 per quarter, with no leftover stitches.
Checkpoint: The outer diameter should now be 3.75 in (9.5 cm). The border adds 0.5 in (1.3 cm) on each side of the 2.75 in (7.0 cm) core: 2.75 + 0.5 + 0.5 = 3.75.
Final Blocking
Block the wreath before attaching the bow and bell. A flat ring is easier to pin.
- Dampen: Mist the wreath evenly until it is damp, not dripping.
- Pin the opening: Place it RS up on the mat. Pin the inner edge into a smooth circle 1.5 in (3.8 cm) across.
- Pin the scallops: Place one pin at the tip of each of the 12 shells. Ease the outer diameter to 3.75 in (9.5 cm), keeping the scallops evenly spaced.
- Flatten the bow: Mist the bow lightly and shape the loops so they are round and even. Let them dry flat.
- Dry fully: Let everything dry completely, usually several hours.
- Attach the hanging loop: Fold the cord in half. Sew both ends to the back of the wreath at the top center, over the cream join.
- Attach the bow: Center the bow over the base of the hanging loop at the top of the wreath. Use the bow’s tail to sew the knot securely through the wreath, catching the loop ends so the bow covers them.
- Hang the bell: Thread a 3 in (7.6 cm) strand of cream yarn through the bell’s top loop. Tie it to the underside of the bow knot so the bell drops about 0.5 in (1.3 cm) below the knot and hangs freely in the opening. Knot firmly and trim.
Final Quality-Control Checklist
- Center opening is about 1.5 in (3.8 cm) and round.
- Green core measures 2.75 in (7.0 cm) across.
- Finished ornament measures 3.75 in (9.5 cm) across.
- There are exactly 12 scallops, each with 5 dc.
- The wreath lies flat with no cupping or ruffling.
- The cream join is hidden behind the bow.
- Both bow loops are the same size.
- The hanging loop is secure and centered.
- The bell hangs freely in the opening without touching the green core.
- All ends are woven in and invisible from the front.
Troubleshooting
The chain ring twisted. Undo and restart. Lay the chain flat with all the V’s facing up before you join.
The wreath cups (curves into a bowl). Your tension is too tight on the increase rounds. Go up a hook size, or block more firmly.
The wreath ruffles. Your tension is too loose, or a round has extra stitches. Recount each round and try a smaller hook.
The scallops are uneven. Check that each repeat skips exactly 1 stitch before and after each shell. Blocking evens out small variations.
Rnd 5 ends with stitches left over or short. Recount Rnd 4. It must be exactly 48 sc for the 12-shell repeat to close neatly.
The bow is floppy. Wrap the center more tightly, and add a few stitches through all layers at the back.
The bell tips the ornament forward. Shorten the bell strand so the bell sits closer to the knot, or use a lighter bell.
Visible gaps at round joins. Join each round with a snug sl st and pull the beginning ch firm.
Care
Spot clean with cool water and mild soap, then reshape and dry flat. Store flat or loosely wrapped so the bow and scallops keep their shape.
Final Notes
The measurements build in a simple chain. The 24-ch foundation creates a 1.5 in (3.8 cm) opening. Three green rounds grow it 24 → 32 → 40 stitches to a 2.75 in (7.0 cm) core. Rnd 4 adds the first cream round at 48 sc, about 3.1 in (7.9 cm). Rnd 5 turns those 48 stitches into 12 even shells for a 0.5 in (1.3 cm) border, reaching 3.75 in (9.5 cm) across.
Check your size after the green core, and the rest falls into place. Then add the bow, the hanging loop, and the bell for a finished ornament ready for the tree.
Optional: make several in different green shades for a matching set of tree ornaments, each worked exactly as written.
Happy crocheting!