

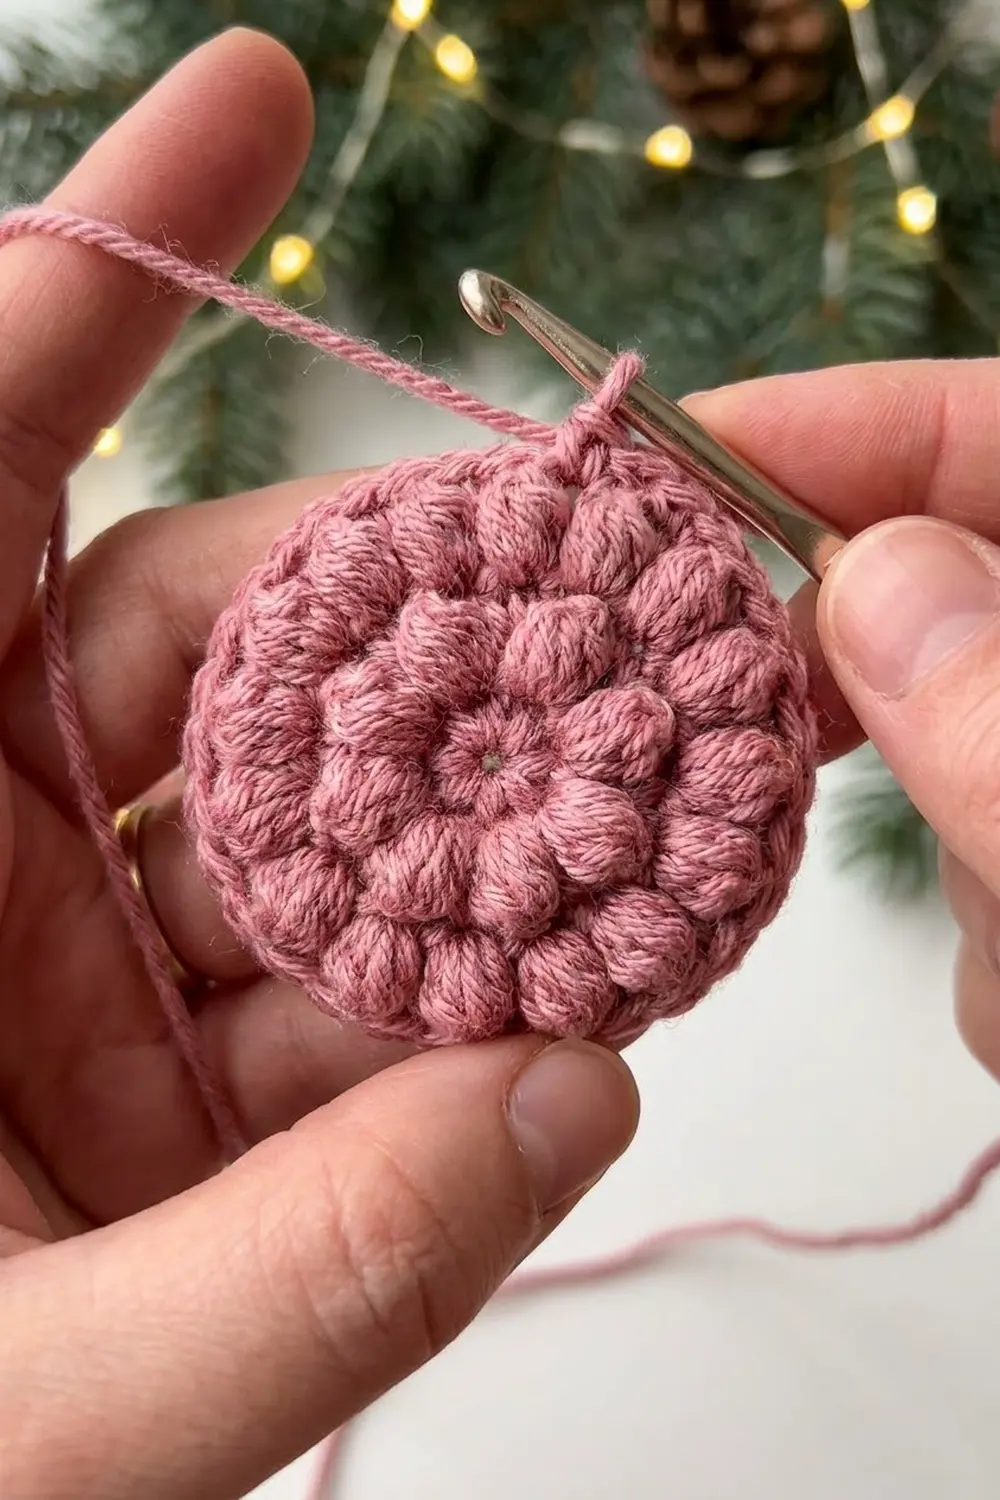
The Rosy Popcorn Ring is a tiny, round crochet motif with a soft, bubbly texture. Eight plump popcorn stitches sit in a ring around a smooth single-crochet center. The result is a small, dimensional circle that looks far more detailed than its size suggests.
This version is worked in a dusty rose (mauve pink) cotton. The muted color shows off the popcorn texture without looking busy. It is a cozy, quiet design that suits holiday crafting, gift wrapping, and small decorative projects.
The pattern is written in US crochet terms. The finished motif measures 1.5 in (3.8 cm) in diameter after the final edging round and light blocking.
Construction is simple. You start with a magic ring and work 4 joined rounds: two single-crochet rounds for the center, one popcorn round, and one single-crochet edging round. You make one piece only. There is no sewing and no assembly.
Finished Size and Construction
- Finished size: 1.5 in (3.8 cm) diameter
- Skill level: Easy (advanced beginner)
- Terminology: US crochet terms
- Yarn weight: DK / light worsted (weight 3), cotton or cotton blend
- Hook: 3.5 mm (US E-4)
- Number of pieces: 1
- Layout: Single flat, round motif
- Piece size: 1.5 in (3.8 cm) diameter
- Size before border (after Round 3): 1.25 in (3.2 cm) diameter
- Border depth: about 0.125 in (0.3 cm) on each side, one round of sc
Materials
Yarn advice: Choose a smooth, tightly plied DK cotton or cotton blend. Cotton gives popcorns crisp, rounded edges and keeps the motif flat. Fuzzy or very soft acrylics will still work, but the bumps will look less defined. Avoid splitty yarn. You will be pushing the hook through tight popcorn clusters.
Yarn:
- Dusty rose / mauve pink, DK weight (3): 3 g, about 7 m (7.7 yd)
The quantity includes a generous margin for the magic ring, a test swatch, and weaving in ends. The motif itself uses about 2 g.
Tools:
- 3.5 mm (US E-4) crochet hook
- Tapestry needle
- Small scissors
- 1 stitch marker (optional, for the first stitch of each round)
- Rust-proof pins and a foam blocking mat
- Spray bottle with clean water
- Ruler or tape measure with inches and cm
Abbreviations (US Terms)
- ch – chain
- sc – single crochet
- dc – double crochet
- sl st – slip stitch
- st(s) – stitch(es)
- sk – skip
- sp – space
- beg – beginning
- RS – right side
Special stitches
Popcorn (pc): Work 4 dc in the same stitch. Remove your hook from the working loop. Insert the hook from front to back into the top of the first dc of the group. Pick up the dropped loop and pull it through. Ch 1 to lock the popcorn closed. The closing ch 1 is the top of the popcorn. It does not count as a separate stitch.
Beginning popcorn (beg pc): Ch 3. This counts as the first dc. Work 3 dc in the same stitch. Remove your hook from the working loop. Insert the hook from front to back into the top of the ch-3. Pick up the dropped loop and pull it through. Ch 1 to lock.
Always close popcorns from front to back. This pushes each bump toward the RS, which faces you as you work.
Gauge and Checkpoints
Gauge matters on a piece this small. A few millimeters of difference shows clearly at 1.5 in (3.8 cm).
Test one motif first. Work Rounds 1–4 completely and measure before you make more or attach the motif to anything. Measure across the center, edge to edge, with the motif lying flat. Do not stretch it.
Measurement checkpoints:
- After Round 1 (8 sc): 0.5 in (1.3 cm) diameter
- After Round 2 (16 sc): 0.75 in (1.9 cm) diameter
- After Round 3 (8 popcorns): 1.25 in (3.2 cm) diameter
- After Round 4 (24 sc): 1.5 in (3.8 cm) diameter
A tolerance of about 0.125 in (0.3 cm) either way is fine at any stage.
Edging gauge: Round 4 works out to about 5 sc per inch (about 2 sc per cm) around the outer edge.
If your motif is too big: Go down one hook size to 3.25 mm (US D-3). Also check that your magic ring is pulled fully closed and that your popcorn dc are not loose and loopy.
If your motif is too small: Go up one hook size to 3.75 mm (US F-5). Tight popcorns often cause cupping, so loosen your yarn-overs slightly on the dc.
Fix the size at the earliest checkpoint where it goes wrong. Round 2 is the easiest place to catch a problem before the popcorns.
Pattern
Every round is joined with a sl st and starts with a new ch. Work with the RS facing you throughout. Do not turn.
Round 1: Center
Make a magic ring.
Ch 1 (does not count as a st). Work 8 sc into the ring. Pull the tail firmly to close the center. Sl st to the first sc to join.
Stitch count: 8 sc.
Checkpoint: 0.5 in (1.3 cm) diameter.
Leave a tail of at least 6 in (15.2 cm) at the start. Pull the ring closed again after Round 2. Cotton tends to relax.
Round 2: Increase Round
Ch 1 (does not count as a st). Work 2 sc in each st around. Sl st to the first sc to join.
This is a growth round. Each of the 8 stitches from Round 1 becomes 2 stitches.
Stitch count: 16 sc.
Checkpoint: 0.75 in (1.9 cm) diameter. The circle should lie completely flat.
Round 3: Popcorn Ring
Work a beg pc in the same st as the join. Ch 2. Sk the next st.
Pc in the next st, ch 2, sk the next st. Repeat from * 6 more times.
Sl st to the top of the beg pc to join.
Stitch count: 8 popcorns and 8 ch-2 spaces.
Check the math. Round 2 has 16 sts. Each repeat uses 2 of them: 1 worked and 1 skipped. That gives 8 repeats × 2 sts = 16 sts, so the round closes exactly where it began. Every popcorn is evenly spaced around the ring.
As you finish each popcorn, use a fingertip to nudge the bump toward the RS. This gives the bubble-textured look from the front.
Checkpoint: 1.25 in (3.2 cm) diameter, measured across opposite popcorns.
Round 4: Edging
This round is the border. Full details and the reasoning behind the count are in the Border section below.
Ch 1 (does not count as a st). Sc in the top of the same popcorn as the join. Work 2 sc in the next ch-2 sp.
Sc in the top of the next popcorn, 2 sc in the next ch-2 sp. Repeat from * 6 more times.
Sl st to the first sc to join. Fasten off, leaving a 6 in (15.2 cm) tail.
Stitch count: 24 sc.
Checkpoint: 1.5 in (3.8 cm) diameter.
Border
The border is the single round of sc in Round 4. It frames the popcorns, smooths the outline into a true circle, and gives the motif a clean edge for sewing or gluing.
Border gauge: about 5 sc per inch (about 2 sc per cm), measured along the outer edge.
How the count is built: Round 4 is a conversion round, not a growth round. It does not continue the increase pattern from Round 2. Instead, it places single crochet into the structure that Round 3 created:
- 1 sc into the top of each popcorn: 8 popcorns × 1 sc = 8 sc
- 2 sc into each ch-2 space: 8 spaces × 2 sc = 16 sc
- Total: 8 + 16 = 24 sc
Per section: Each popcorn plus the ch-2 space after it forms one section. Each section holds 3 sc: 1 on top of the popcorn and 2 in the space. 8 sections × 3 sc = 24 sc.
Why the math works: A 1.5 in (3.8 cm) circle has a circumference of about 4.7 in (11.9 cm). At 5 sc per inch, 24 sc covers about 4.8 in (12.2 cm). That is close enough that the edge lies flat without ruffling or pulling in.
The count also divides evenly by 8. Every popcorn section gets the same number of edging stitches, so the ring stays symmetrical.
If you used fewer stitches, such as 1 sc per ch-2 space, the edge would total only 16 sc. It would pull tight and cup the motif. With 3 sc per space, the total would be 32 sc and the edge would ruffle.
Final Blocking
Cotton blocks well with light moisture. Popcorns keep their shape best if you avoid heavy steam directly on them.
- Weave in ends first. Thread the starting tail through the back of Round 1 and Round 2. Before trimming, pull it once more to close the center. Weave the final tail through the back of Round 4.
- Shape the popcorns. From the wrong side, gently push each popcorn toward the RS with a fingertip so all 8 bumps are evenly raised.
- Dampen. Lightly mist the motif with water until it is damp but not dripping.
- Pin to size. Place the motif RS up on the blocking mat. Draw or imagine a 1.5 in (3.8 cm) circle. Pin through the edge at the top of each popcorn section, 8 pins in total. Keep the circle round.
- Check the measurement. Measure across the center in two directions. Both should read 1.5 in (3.8 cm).
- Let it dry fully. Leave it pinned until completely dry, usually 2–4 hours for a piece this small.
- Unpin and re-check. Measure once more and plump the popcorns with your fingers if needed.
Final Quality-Control Checklist
- [ ] Round 1 has exactly 8 sc, and the center hole is fully closed.
- [ ] Round 2 has exactly 16 sc and lies flat.
- [ ] Round 3 has 8 popcorns and 8 ch-2 spaces, evenly spaced.
- [ ] All popcorns are closed front to back and bulge toward the RS.
- [ ] Round 4 has exactly 24 sc: 8 on popcorn tops and 16 in spaces.
- [ ] Each popcorn section holds 3 edging sc.
- [ ] The finished diameter is 1.5 in (3.8 cm), within 0.125 in (0.3 cm).
- [ ] The motif lies flat with no cupping or ruffling.
- [ ] All ends are woven in securely and are invisible from the RS.
- [ ] Join seams line up neatly and are not twisted.
Troubleshooting
Center hole won’t stay closed.
Pull the magic ring tail firmly, then weave it in a circle around the back of Round 1 before working in any other direction. This locks the ring closed.
Popcorns pop out the back.
You are closing them from back to front. Remove the hook and insert it from the front, through the first dc, then pull the loop through.
Motif cups like a bowl.
Your popcorns or edging are too tight. Loosen the dc in Round 3. Also confirm you placed 2 sc in each ch-2 space in Round 4, not 1.
Motif ruffles at the edge.
You probably worked extra sc in Round 4. Recount for 24 sc in total. Going down a hook size for Round 4 only can also help.
Popcorns look flat or thin.
Make sure each popcorn has 4 dc, or the ch-3 plus 3 dc for the beg pc. A tighter, rounder yarn will also give fuller bumps.
Round 3 doesn’t close evenly.
Your Round 2 count is off. You need exactly 16 sc so the “work 1, skip 1” repeat comes out to 8 even sections.
Can’t find the top of the popcorn in Round 4.
Work into the closing ch 1. It sits just above the cluster and slightly toward the back. Placing a marker in it as you make each popcorn makes it easy to find later.
Visible join seam.
Sl st into the true first stitch of each round, not the turning ch. Start each new round in the same stitch as the join.
Care
Hand wash in cool water with mild soap and press out the water gently in a towel. Lay flat to dry, reshaping the popcorns while the motif is damp.
Final Notes
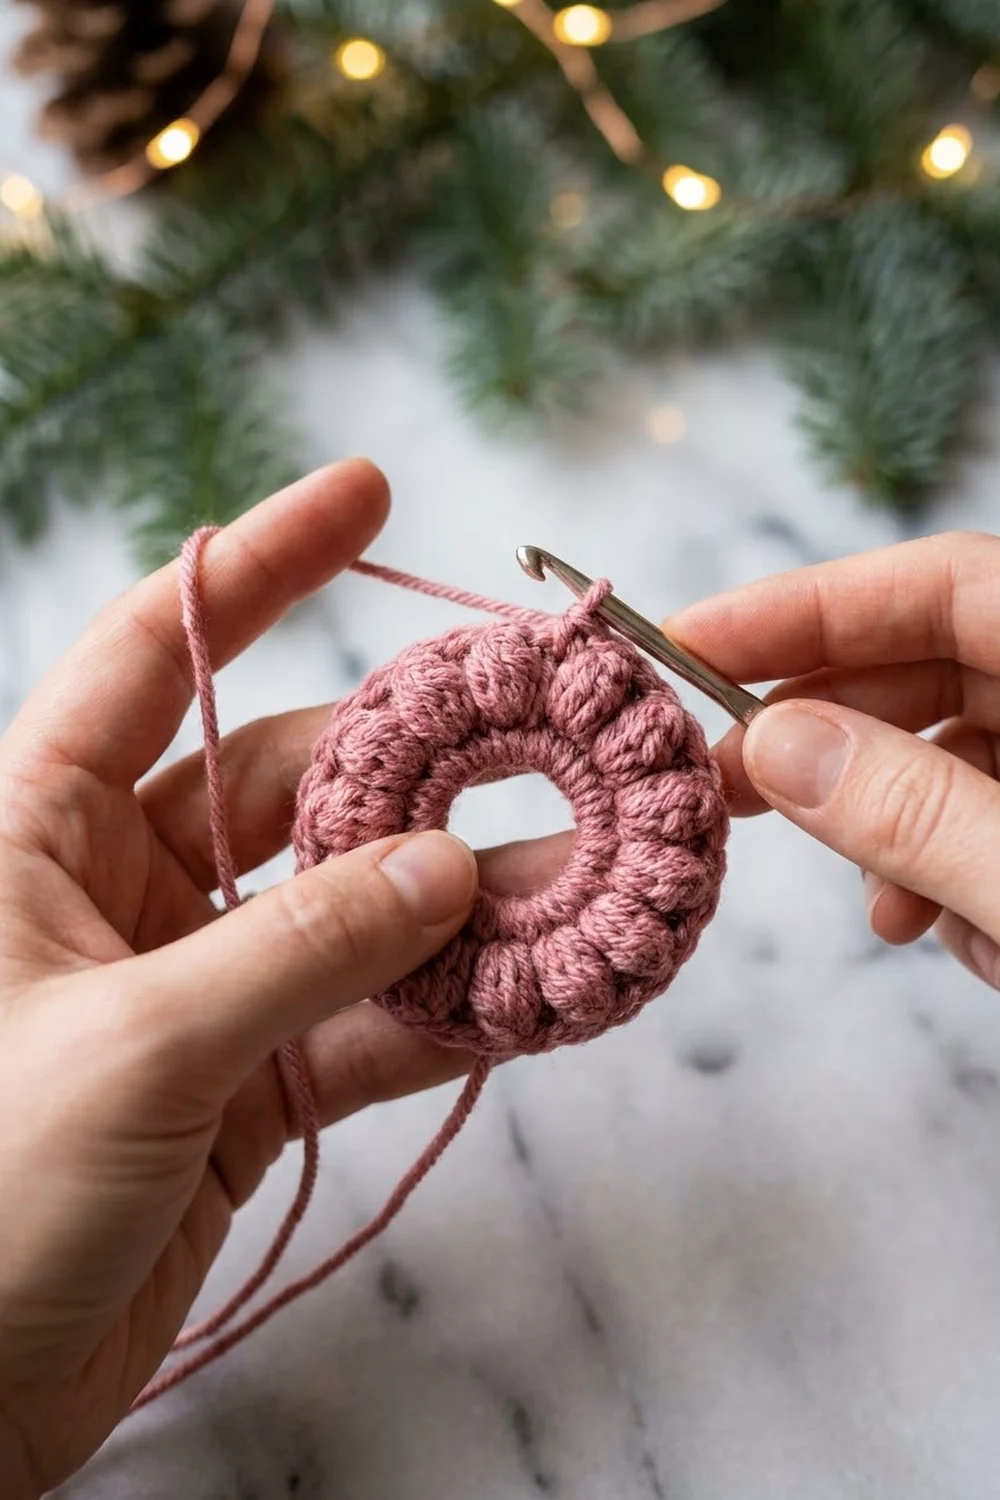
The Rosy Popcorn Ring is all about a short, reliable measurement chain:
- 8 sc at 0.5 in (1.3 cm)
- 16 sc at 0.75 in (1.9 cm)
- 8 popcorns at 1.25 in (3.2 cm)
- 24 sc edging at 1.5 in (3.8 cm)
Each round depends on the one before it. If you hit every checkpoint, the finished motif will lie flat, keep its bubbly texture, and come out round and even.
The 24-stitch edging works for two reasons. It is built directly from the popcorn round, with 3 sc per section across 8 sections. It also matches the circle’s circumference at about 5 sc per inch, so the edge lies flat.
Optional: If you would like more than one, simply repeat the same 4 rounds for each motif. This pattern itself covers a single piece.
Make one, check your size, and enjoy how quickly this little ring comes together. It works beautifully as a gift topper, a tiny ornament center, or an appliqué for holiday crafts.
Happy crocheting!