

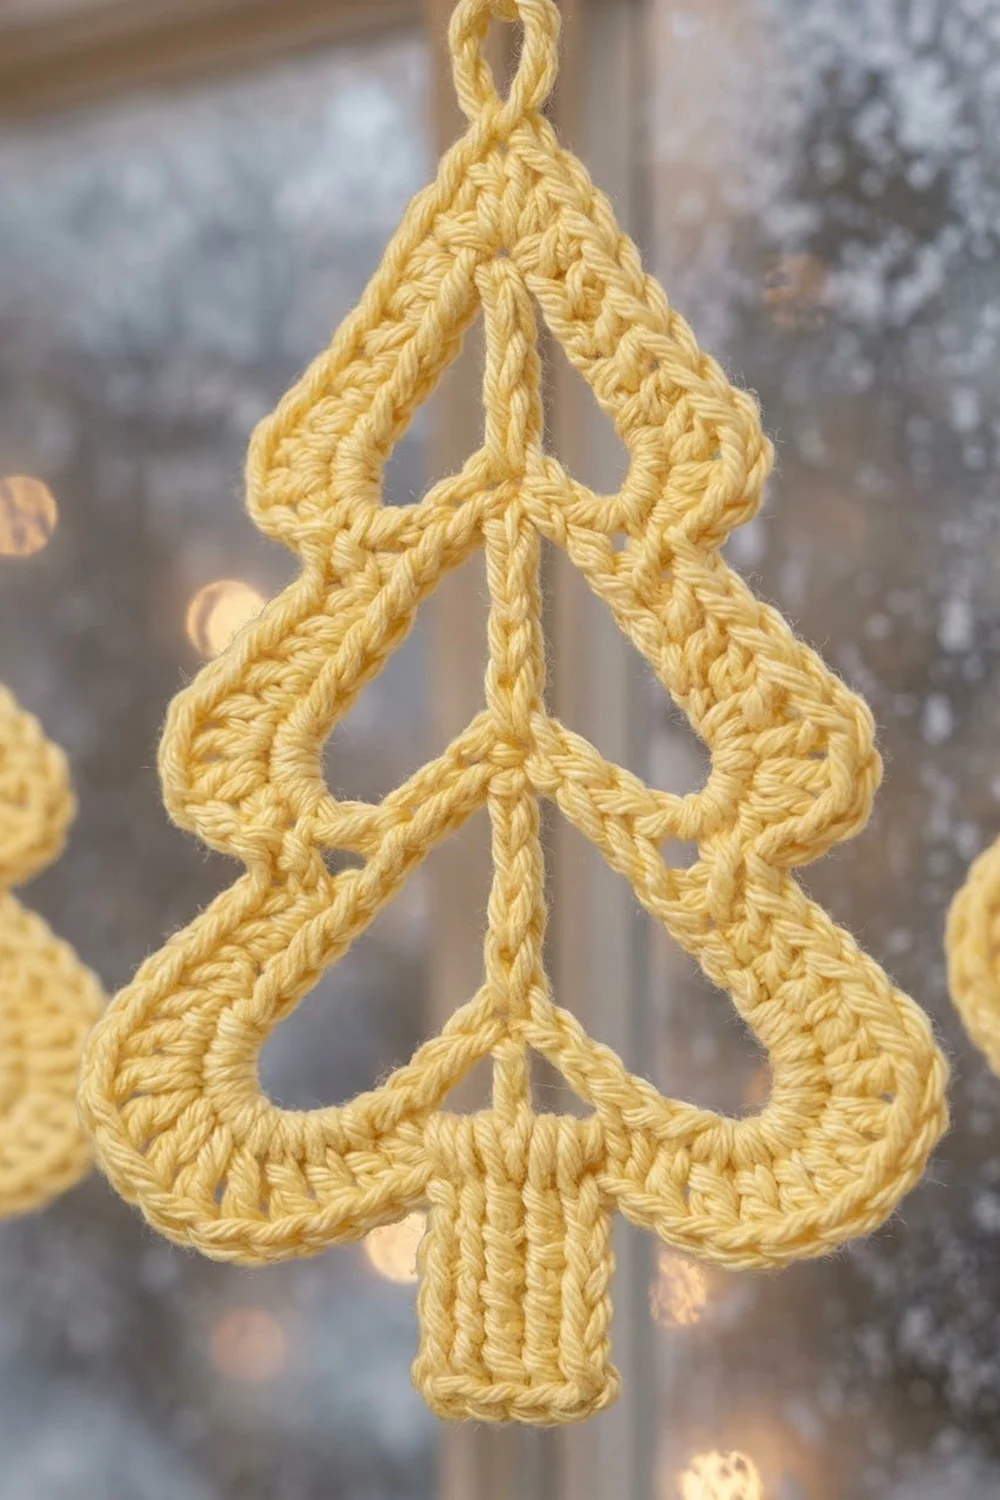
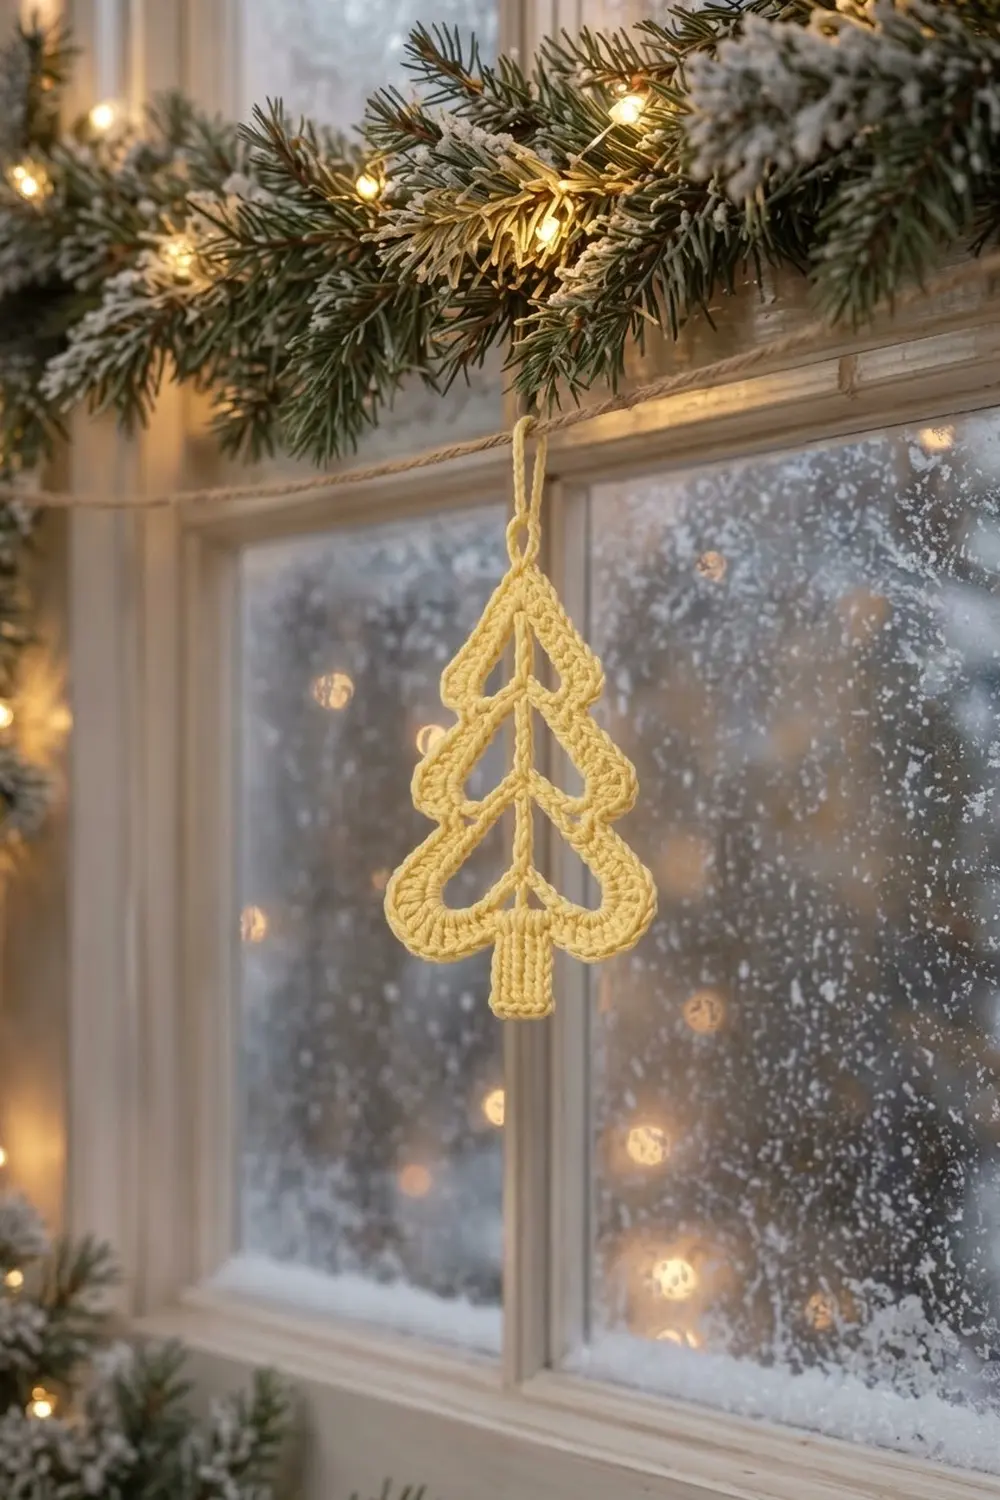
This little tree is all outline and air. Three stacked tiers, each smaller than the one below, step up to a pointed tip. Open windows sit inside every tier, so light passes straight through, and a shell-stitch scallop runs along the outline. A short solid trunk anchors the base, and a matching yarn loop lets it hang from a garland, a branch, or a window latch.
The sample is worked in pale buttercream yellow cotton, which gives it a soft, frosted look and good stitch definition. Any light, solid color works. White, cream, and gold all show off the filigree well. Variegated yarn tends to hide the windows.
This pattern uses US crochet terms. The finished ornament measures about 3.1 in (7.9 cm) wide and 3.75 in (9.5 cm) tall, not counting the hanging loop.
The ornament is one flat piece. You crochet the tree top-down in rows, starting at the tip. Each tier grows by 2 stitches per row, with chain spaces forming the windows. Slip stitches step in to start the next tier, and the trunk is worked last. One border round adds the shell scallops and a smooth edge on the trunk. A sc-covered hanging loop finishes it.
Finished Size and Construction
- Finished size: 3.1 in (7.9 cm) wide x 3.75 in (9.5 cm) tall, plus loop
- Skill level: Easy-intermediate
- Terminology: US
- Yarn weight: DK (weight 3) cotton
- Hook: 3.5 mm (E-4)
- Number of pieces: 1
- Layout: Single flat piece, no assembly
- Piece size before border: 2.6 in (6.6 cm) wide x 3.25 in (8.3 cm) tall
- Border depth: about 0.25 in (0.6 cm)
- Hanging loop: about 1.6 in (4.1 cm) long
Materials
Yarn: Use a smooth DK-weight cotton or cotton blend. Mercerized cotton gives the crispest shells and holds its shape after blocking. Avoid fuzzy or very stretchy yarns, because they blur the windows.
- Pale yellow (buttercream): 10 g, about 24 m
These quantities include a margin for your gauge swatch and weaving in ends.
Tools:
- 3.5 mm (E-4) crochet hook
- Tapestry needle
- Scissors
- 1 stitch marker
- Blocking mat and rust-proof pins
- Spray bottle
- Optional: fabric stiffener or spray starch
Abbreviations (US Terms)
- ch: chain
- sl st: slip stitch
- sc: single crochet
- dc: double crochet
- st(s): stitch(es)
- sp: space
- row-end: the side edge of a row
Special stitches:
- Shell: 3 dc worked into the same stitch or row-end.
- Tip shell: 5 dc worked into the same stitch.
Counting notes: The ch 1 at the start of each row does not count as a stitch. In window rows, each chain counts as 1 stitch.
Gauge and Checkpoints
Gauge: 20 sc and 22 rows = 4 in (10.2 cm) in sc rows. A quick swatch of 10 sc x 11 rows should measure 2 in (5.1 cm) square.
Gauge matters because every tier width comes from stitch count. You can also test with the ornament itself. Work Tier 1, measure it, and only continue once it matches the first checkpoint.
Checkpoints (measured flat, unblocked):
- After Row 5 (end of Tier 1): 9 sts wide = 1.8 in (4.6 cm); height about 0.9 in (2.3 cm)
- After Row 10 (end of Tier 2): 11 sts wide = 2.2 in (5.6 cm); total height about 1.8 in (4.6 cm)
- After Row 15 (end of Tier 3): 13 sts wide = 2.6 in (6.6 cm); total height about 2.7 in (6.9 cm)
- After Row 18 (trunk done): trunk 0.6 in (1.5 cm) wide; total height about 3.25 in (8.3 cm)
- After border: 3.1 in (7.9 cm) wide x 3.75 in (9.5 cm) tall
Too big? Go down 0.5 mm in hook size. Too small? Go up 0.5 mm. A small size difference is fine for an ornament. Watch the windows, though. If they look stretched or saggy, your tension is too loose for the chain spaces.
Pattern
Every row begins with ch 1 and a turn, unless the row says otherwise. Every tier follows the same five-row logic:
- Row a: solid
- Row b: grows by 2
- Row c: opens the windows
- Row d: widens the windows
- Row e: closes them with solid sc
Tier 1 (Top)
Row 1: Ch 2, sc in 2nd ch from hook. (1 st)
Row 2: Ch 1, turn, 3 sc in sc. (3 sts)
Row 3: Ch 1, turn, 2 sc in first st, ch 1, skip center st, 2 sc in last st. (5 sts: 4 sc + 1 ch)
Row 4: Ch 1, turn, 2 sc in first st, ch 3, skip next 3 sts (sc, ch, sc), 2 sc in last st. (7 sts: 4 sc + 3 ch)
Row 5: Ch 1, turn, 2 sc in first st, sc in next st, sc in each of 3 ch, sc in next st, 2 sc in last st. (9 sc)
Tier 1 has one triangular window under the tip, with no center spine. Check the first checkpoint now.
Tier 2 (Middle)
Row 6 (step-in): Turn without a ch. Sl st in first 3 sts, ch 1, sc in next 3 sts, leave last 3 sts unworked. (3 sc)
This centers Tier 2 on sts 4–6 of Row 5 and leaves a 3-stitch ledge on each side.
Row 7: Ch 1, turn, 2 sc in first st, sc in next st, 2 sc in last st. (5 sc)
Row 8: Ch 1, turn, 2 sc in first st, ch 1, skip 1, sc in center st, ch 1, skip 1, 2 sc in last st. (7 sts: 5 sc + 2 ch)
Row 9: Ch 1, turn. Work 2 sc in first sc. Ch 2, skip next sc and ch-1 sp. Sc in center sc. Ch 2, skip ch-1 sp and next sc. Work 2 sc in last sc. (9 sts: 5 sc + 4 ch)
Row 10: Ch 1, turn. Work 2 sc in first st and sc in next st. Sc in each of 2 ch, then sc in center sc. Sc in each of 2 ch, then sc in next st. Work 2 sc in last st. (11 sc)
The center sc in Rows 8–9 stacks into a spine, splitting Tier 2 into two windows.
Tier 3 (Bottom)
Row 11 (step-in): Turn without a ch. Sl st in first 3 sts, ch 1, sc in next 5 sts, leave last 3 sts unworked. (5 sc)
Row 12: Ch 1, turn, 2 sc in first st, sc in next 3 sts, 2 sc in last st. (7 sc)
Row 13: Ch 1, turn. Work 2 sc in first st. Ch 2, skip 2. Sc in center (4th) st. Ch 2, skip 2. Work 2 sc in last st. (9 sts: 5 sc + 4 ch)
Row 14: Ch 1, turn. Work 2 sc in first sc. Ch 3, skip next sc and ch-2 sp. Sc in center sc. Ch 3, skip ch-2 sp and next sc. Work 2 sc in last sc. (11 sts: 5 sc + 6 ch)
Row 15: Ch 1, turn. Work 2 sc in first st and sc in next st. Sc in each of 3 ch, then sc in center sc. Sc in each of 3 ch, then sc in next st. Work 2 sc in last st. (13 sc)
Trunk
Row 16 (step-in): Turn without a ch. Sl st in first 5 sts, ch 1, sc in next 3 sts, leave last 5 sts unworked. (3 sc)
Rows 17–18: Ch 1, turn, sc in each st across. (3 sc)
Do not fasten off. Check the trunk checkpoint before moving on.
Row totals: Tier 1 has 25 sts, Tier 2 has 35, Tier 3 has 45, and the trunk has 9. That makes 114 sts in the body, with chains counted.
Border
Border gauge: Work 1 border element into every row-end and every exposed ledge stitch. An element is either 1 sc or 1 shell. Nothing is skipped. Work over the slip stitches on the ledges as if they were ordinary stitches.
The shells create the scalloped tier edges. The trunk stays smooth plain sc so it reads as solid.
Border Round: Continue from Row 18 and work around the whole piece in this order.
Trunk bottom: Ch 1, turn. Work 3 sc in first st, sc in next st, and 3 sc in last st. (7 sc)
Side A, working up:
- Trunk row-ends (Rows 18–16): sc in each. (3 sc)
- Tier 3 ledge (5 sts, inner to outer): sc in next 2 sts, shell in next st, sc in next st, shell in outer corner st. (3 sc + 2 shells)
- Tier 3 row-ends (Rows 15–11): sc, shell, sc, shell, sc. (3 sc + 2 shells)
- Tier 2 ledge (3 sts, inner to outer): sc, sc, shell. (2 sc + 1 shell)
- Tier 2 row-ends (Rows 10–6): sc, shell, sc, shell, sc. (3 sc + 2 shells)
- Tier 1 ledge (3 sts, inner to outer): sc, sc, shell. (2 sc + 1 shell)
- Tier 1 row-ends (Rows 5–1): sc, shell, sc, shell, sc. (3 sc + 2 shells)
Tip: Work a tip shell (5 dc) into the free loop of the foundation ch at the base of Row 1. Place a marker in the 3rd (center) dc.
Side B, working down: This side mirrors Side A.
- Tier 1 row-ends (Rows 1–5): sc, shell, sc, shell, sc.
- Tier 1 ledge (outer to inner): shell, sc, sc.
- Tier 2 row-ends (Rows 6–10): sc, shell, sc, shell, sc.
- Tier 2 ledge: shell, sc, sc.
- Tier 3 row-ends (Rows 11–15): sc, shell, sc, shell, sc.
- Tier 3 ledge (outer to inner): shell, sc, shell, sc, sc.
- Trunk row-ends (Rows 16–18): sc in each.
Join with sl st to the first sc of the round.
Counts per side:
- Tier 1: 5 sc + 3 shells
- Tier 2: 5 sc + 3 shells
- Tier 3: 6 sc + 4 shells
- Trunk: 3 sc
- Each side total: 19 sc + 10 shells (30 dc) = 49 sts
Round total: 7 (trunk bottom) + 49 (Side A) + 5 (tip shell) + 49 (Side B) = 110 sts.
Why the math works:
- Each tier side has 5 row-ends, an odd number. The sc–shell–sc–shell–sc sequence fits exactly and starts and ends with sc. Every tier edge is symmetrical, and sc sits at the inner corners where tiers meet.
- The 3-stitch ledges take one shell at the outer corner, which flares the tier point.
- The 5-stitch Tier 3 ledge takes two shells, so the widest tier gets the fullest scallop.
- The trunk corners use 3 sc each. That adds 2 extra sts per corner, which is exactly enough to turn a square corner flat.
Hanging Loop
Fasten off the border. Join yarn with sl st in the marked center dc of the tip shell. Ch 16, then sl st in the same dc. Work 20 sc over the ch-16 loop, packing them firmly, and sl st in the same dc. Fasten off.
The loop hangs about 1.6 in (4.1 cm) above the tip.
Final Blocking
- Weave in all ends along the solid sc rows, not through the windows.
- Spritz the ornament until it is evenly damp, or dip it and gently press out the water in a towel.
- Lay it flat on the blocking mat, with the right side up.
- Pin the tip, the six outer tier corners, and the four trunk corners first. Aim for 3.1 in (7.9 cm) wide x 3.75 in (9.5 cm) tall.
- Pin the center of each shell outward so every scallop opens evenly.
- Use a pin or a toothpick to nudge each window open and square.
- Optional: brush on fabric stiffener or spray starch for a crisp, hanging-ready finish.
- Let it dry completely before unpinning.
Final Quality-Control Checklist
- Ornament measures 3.1 in (7.9 cm) x 3.75 in (9.5 cm), loop excluded
- Tier widths step up 9, 11, 13 sts, and each step-in is centered
- Tier 1 has one window; Tiers 2 and 3 each have two windows with a center spine
- Each tier side shows 2 shells, plus corner shells on the ledges
- Trunk edge is smooth sc with square corners
- Border round totals 110 sts
- Loop is firm, centered on the tip, and fully covered in sc
- All ends are hidden in solid areas
Troubleshooting
Tier is off-center. Recount the step-in row. Slip over exactly 3 sts (or 5 for the trunk) and leave the same number unworked on the far side.
Windows close up or pucker. Your chains are too tight. Chain a little looser, or go up 0.5 mm for the chain spaces only.
Shells ruffle. Your dc are too loose for sc row-ends. Try a 3.25 mm hook for the border round only.
Border pulls the tree inward. Check that no row-ends were skipped. Each tier side needs all 5 elements.
Ornament curls. This is normal before blocking. Wet block it, pin firmly, and use stiffener if it still curls.
Loop stretches. Pack the sc more tightly, or reduce to ch 14 with 18 sc.
Care
Hand wash in cool water with mild soap, press out the water in a towel, and dry flat. Re-block or re-stiffen as needed before storing flat in tissue.
Final Notes
The measurement chain is simple. A gauge of 5 sc per 1 in (2.5 cm) produces tiers of 1.8 in (4.6 cm), 2.2 in (5.6 cm), and 2.6 in (6.6 cm). The body measures 2.6 in (6.6 cm) x 3.25 in (8.3 cm). A 0.25 in (0.6 cm) shell border brings it to 3.1 in (7.9 cm) x 3.75 in (9.5 cm).
Check each tier against its checkpoint, count your 110 border stitches, and block the scallops open.
Happy crocheting!