

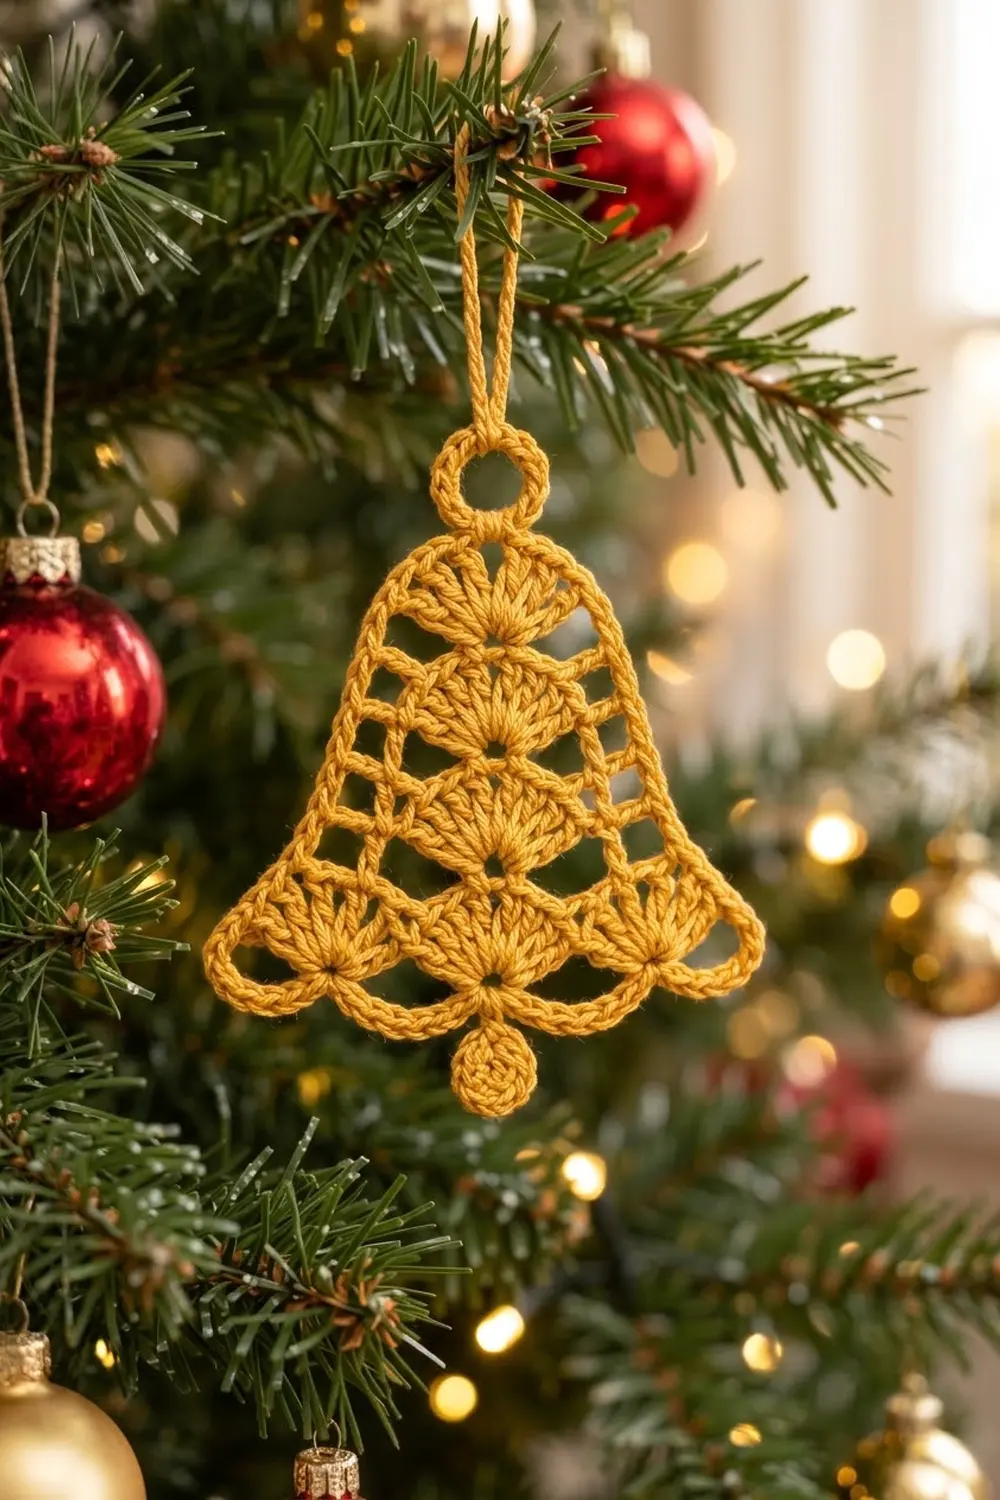
This little bell is made for the tree. It is a single flat, lacy ornament in warm golden yellow, with an airy filigree look that catches the light between the branches.
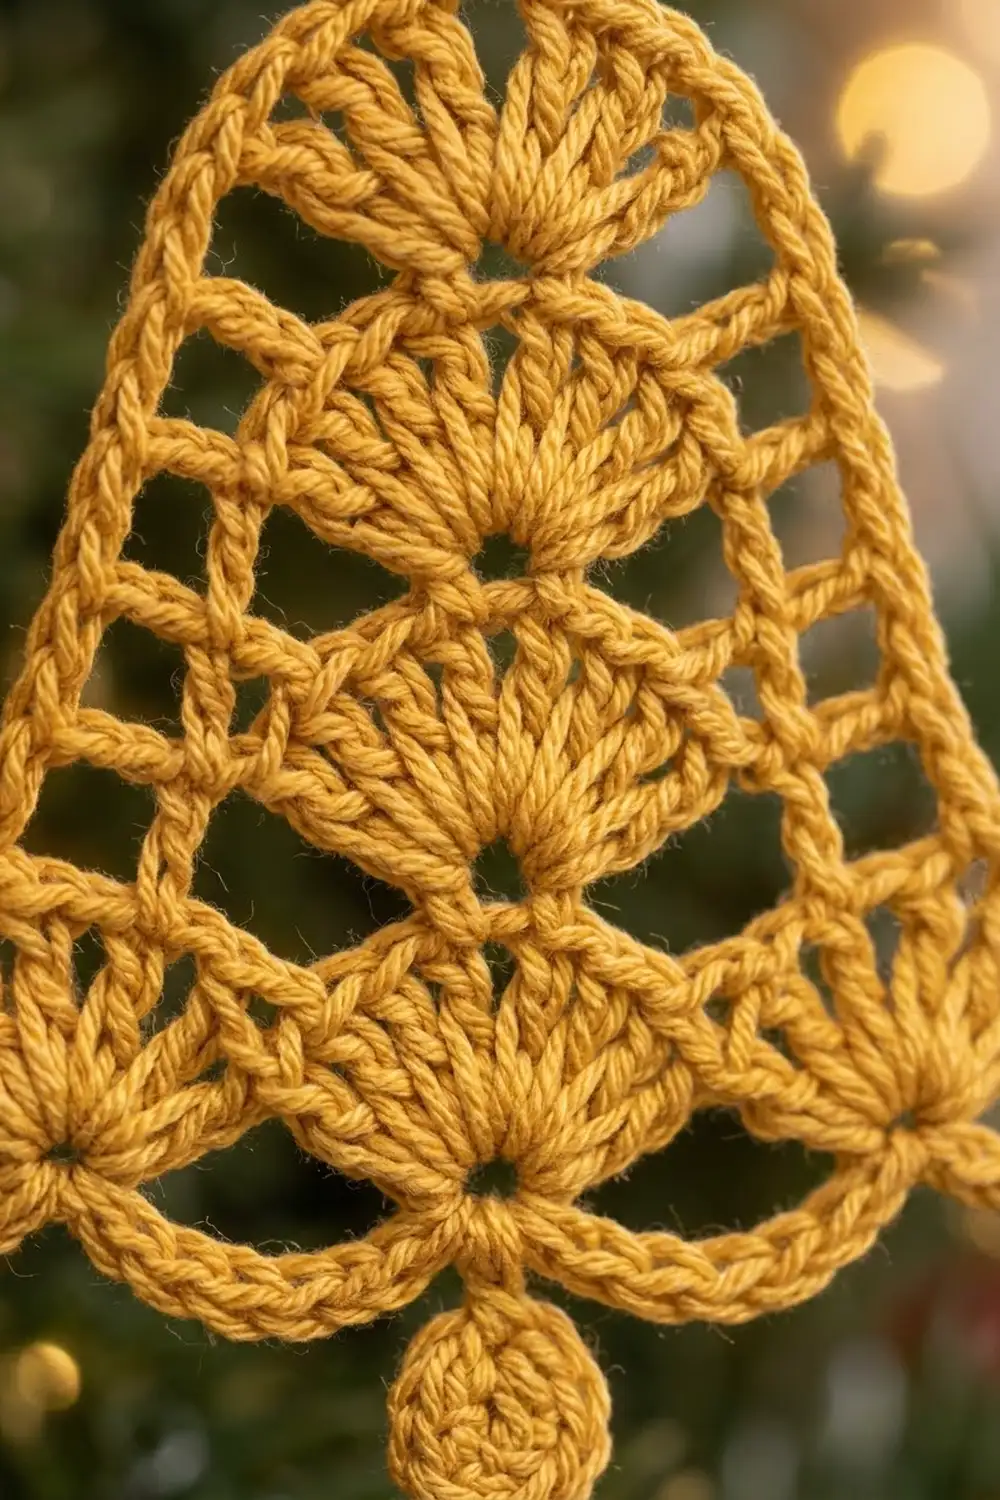
The body has three stacked tiers of shell-stitch fans: three fans across the bottom, two in the middle, and one at the crown. Open chain windows sit between the tiers. A scalloped picot rim runs along the bottom, its outer tips curl upward, and a small bobble dangles from the bottom center. A twisted cord loop hangs it from the tree.
The pattern uses US crochet terms. The finished bell measures 2.75 in (7.0 cm) tall from the top of the hanging ring to the bottom of the rim, and 3 in (7.6 cm) wide at the flared rim. The bobble drop adds about 0.25 in (0.6 cm).
You work the body flat in five rows from the bottom up, and each shell tier is narrower than the one below. Then you work a two-round edging around the whole piece. It forms the hanging ring, the side outline, the scalloped rim, the upturned corner flares and the bobble drop. A twisted cord finishes it.
Finished Size and Construction
- Finished size: 2.75 in (7.0 cm) tall x 3 in (7.6 cm) wide, plus 0.25 in (0.6 cm) bobble drop
- Skill level: Easy-Intermediate
- Terminology: US crochet terms
- Yarn weight: Fingering (#1), mercerized cotton
- Hook: 2.75 mm (US C-2)
- Number of pieces: 1 bell, plus 1 twisted cord hanger
- Layout: Single flat motif, worked bottom-up in rows, then edged in rounds
- Piece size: 2.75 in x 3 in (7.0 cm x 7.6 cm)
- Size before border (Rows 1–5): 2.25 in (5.7 cm) wide x 1.6 in (4.1 cm) tall
- Border depth: about 0.45 in (1.1 cm) at the rim, 0.15 in (0.4 cm) at the crown, plus a 0.55 in (1.4 cm) hanging ring. The corner flares add about 0.375 in (1.0 cm) on each side.
Materials
Yarn: Use a smooth, mercerized fingering-weight cotton. It shows stitch definition, holds the lace open and takes starch well. Fuzzy or very soft yarns blur the fans and let the scallops droop.
- Golden yellow: 8 g (about 27 m). The bell itself uses roughly 5 g (17 m), and the cord uses about 1 g (3.5 m).
Tools:
- 2.75 mm (US C-2) crochet hook
- Tapestry needle
- Scissors
- Ruler or tape measure
- Blocking mat or foam and rust-proof pins
- Spray starch or a fabric stiffener (optional but recommended)
Quantities include a margin for a gauge swatch and tails.
Abbreviations (US Terms)
- ch – chain
- sl st – slip stitch
- sc – single crochet
- hdc – half double crochet
- dc – double crochet
- st(s) – stitch(es)
- sp – space
- yo – yarn over
Special stitches:
- Shell: 7 dc in the same stitch. The 4th dc is the center dc.
- Picot: ch 3, sl st in 3rd ch from hook.
- 5-dc bobble: (yo, insert hook in st, yo and pull up a loop, yo and draw through 2 loops) 5 times, then yo and draw through all 6 loops on hook.
- Bobble drop: ch 4, 5-dc bobble in 3rd ch from hook, ch 1 to close, sl st in the remaining ch. The bobble now hangs on a short stem.
Gauge and Checkpoints
Gauge matters less than for a garment, but it controls the final size. Work Rows 1–2 as a test first.
Gauge: About 8.5 ch = 1 in (2.5 cm).
Checkpoints:
- After Row 1: the foundation edge measures 2.25 in (5.7 cm) across.
- After Row 2: the piece is 0.6 in (1.5 cm) tall.
- After Row 4: the piece is 1.2 in (3.0 cm) tall, and Row 3 spans about 1.5 in (3.8 cm).
- After Row 5: the piece is 1.6 in (4.1 cm) tall, and the top shell spans about 0.75 in (1.9 cm).
- After the edging and blocking: the bell is 2.75 in x 3 in (7.0 cm x 7.6 cm).
Too big? Go down to a 2.5 mm hook. Too small? Go up to a 3.0 mm hook. A difference of 0.25 in (0.6 cm) at Row 1 becomes roughly 0.3 in (0.8 cm) in the finished width, so correct it early.
Bell Body
The body is worked flat, from the rim upward. Each tier has a shell row followed by an openwork row that narrows the piece. Do not work into the ch-3 spaces on the shell rows. They stay open and form the lacy windows.
Row 1 (RS): Ch 20. Sc in 2nd ch from hook. Skip 2 ch, shell in next ch, skip 2 ch, sc in next ch. Repeat from * 2 more times. Turn.
(4 sc + 21 dc = 25 sts; 3 shells. 19 foundation ch are worked; the 20th was the turning ch.)
Row 2 (WS): Sl st in first 4 sts. Ch 1 (does not count as a st). Sc in next dc, which is the center dc of shell 1. Ch 3, dc in next sc. Ch 3, sc in center dc of next shell. Ch 3, dc in next sc. Ch 3, sc in center dc of last shell. Leave the remaining sts unworked. Turn.
(3 sc + 2 dc = 5 sts; 4 ch-3 sps.)
This row starts and ends at the centers of the outer shells. The bottom tier therefore sticks out beyond the middle tier, which gives the bell its flare.
Row 3 (RS): Ch 1. Sc in first sc, shell in next dc, sc in next sc, shell in next dc, sc in last sc. Turn.
(3 sc + 14 dc = 17 sts; 2 shells.)
Row 4 (WS): Sl st in first 4 sts. Ch 1. Sc in next dc (center dc of shell 1). Ch 3, dc in next sc. Ch 3, sc in center dc of shell 2. Leave the remaining sts unworked. Turn.
(2 sc + 1 dc = 3 sts; 2 ch-3 sps.)
Row 5 (RS): Ch 1. Sc in first sc, shell in next dc, sc in last sc.
(2 sc + 7 dc = 9 sts; 1 shell.)
Fasten off and weave in the tails. Check the size before the border: 2.25 in (5.7 cm) wide x 1.6 in (4.1 cm) tall.
Border
The edging is two rounds worked around the whole bell. Round 1 builds a chain framework. Round 2 fills it with stitches.
Border gauge: The side spaces are filled at 1 sc per chain, so they lie flat. The rim and corner loops are deliberately overfilled so they dome into scallops and flares.
Round 1: Framework
With the RS facing, join yarn with a sl st in the center (4th) dc of the Row 5 shell.
Hanging ring: Ch 12, sl st in the same dc.
Side A, down:
- Sc in each of the next 3 dc and in the end sc of Row 5 (4 sc).
- Ch 5, sc in the end sc of Row 3.
- Ch 5, sc in the end sc of Row 1. This is the corner.
Corner A: Ch 7, sc in the free loop of the foundation ch directly below the corner sc.
Bottom: Ch 7, skip 5 foundation ch, sc in the next ch. Repeat from * 2 more times. The last sc lands below the first sc of Row 1. Each ch-7 arc sits under one bottom shell.
Corner B: Ch 7, sc in the first sc of Row 1.
Side B, up:
- Ch 5, sc in the end sc of Row 3.
- Ch 5, sc in the first sc of Row 5.
- Sc in each of the next 3 dc.
Sl st in the center dc at the base of the ring.
Round 1 count: 16 sc in total.
- 8 sc at the crown (4 on each side)
- 2 sc at the Row 3 ends
- 2 sc at the Row 1 ends
- 4 sc in the foundation
It also has 10 chain loops: 1 ch-12 ring, 4 ch-5 side spaces, 2 ch-7 corner loops and 3 ch-7 rim arcs.
Round 2: Ring, Scallops, Flares and Bobble
Ch 1 (does not count).
Ring: Work 18 sc in the ch-12 ring.
Side A:
- Sc in each of the next 4 sc.
- 5 sc in the ch-5 sp.
- Sc in the next sc.
- 5 sc in the next ch-5 sp.
(15 sc.)
Corner A:
- Sc in the corner sc.
- In the corner ch-7 loop: 2 sc, hdc, 3 dc, picot, 3 dc, hdc, 2 sc.
- Sc in the next foundation sc.
(14 sts + 1 picot.)
Bottom rim:
- Arc 1: (2 sc, hdc, 2 dc, picot, 2 dc, hdc, 2 sc) in the ch-7 arc. Sc in the next sc.
- Arc 2: (2 sc, hdc, 2 dc, bobble drop, 2 dc, hdc, 2 sc) in the ch-7 arc. Sc in the next sc.
- Arc 3: (2 sc, hdc, 2 dc, picot, 2 dc, hdc, 2 sc) in the ch-7 arc.
(30 arc sts + 2 sc between arcs = 32 sts, plus 2 picots and 1 bobble drop.)
Corner B:
- Sc in the foundation sc.
- In the corner ch-7 loop: 2 sc, hdc, 3 dc, picot, 3 dc, hdc, 2 sc.
- Sc in the corner sc.
(14 sts + 1 picot.)
Side B:
- 5 sc in the ch-5 sp.
- Sc in the next sc.
- 5 sc in the next ch-5 sp.
- Sc in each of the next 4 sc.
(15 sc.)
Sl st in the first sc of the ring. Fasten off and weave in the ends.
Round 2 total: 18 + 15 + 14 + 32 + 14 + 15 = 108 sts, plus 3 picots and 1 bobble drop.
Why the Math Works
- Ring: 18 sc in a ch-12 loop is 1.5 sts per chain. This packs the ring firmly so it stays round and holds its shape under the cord.
- Sides: 5 sc in each ch-5 space is exactly 1 per chain, so the outline lies flat. The windows beneath stay open.
- Rim arcs: 10 sts on 7 chains, or about 1.4 per chain, crowd each arc just enough to make a rounded scallop.
- Corners: 12 sts on 7 chains, or about 1.7 per chain, overfill the loop more. This extra fullness makes the outer tips flare and curl upward.
- Symmetry: Both sides and both corners have matching counts, so the bell hangs straight. The bobble drop sits at the exact center of the middle arc, so it hangs at the bottom center point.
Hanging Cord
- Cut a 16 in (40.6 cm) strand of yarn.
- Anchor one end and twist the other until the strand kinks back on itself.
- Fold it in half and let it twist into a cord about 7 in (17.8 cm) long.
- Thread the cord through the ring and knot the ends together. You now have a twine-like loop about 3 in (7.6 cm) tall.
Final Blocking
- Soak the bell in cool water for a few minutes. Press the water out gently in a towel. Do not wring it.
- Lay it RS up on the blocking mat. Pin the crown, then pin the ring into a circle.
- Ease the sides into a smooth bell curve. The width at Row 3 should be about 1.5 in (3.8 cm).
- Pin the rim to 3 in (7.6 cm) across at the corner flare tips. Angle each corner tip slightly upward.
- Pin the tip of each scallop and each picot. Let the bobble hang free at the bottom center.
- Open each fan and window with a pin tip.
- Mist with spray starch, or brush on a diluted stiffener.
- Let it dry completely, usually several hours, before unpinning.
- Check the final size: 2.75 in (7.0 cm) tall x 3 in (7.6 cm) wide.
Final Quality-Control Checklist
- [ ] Row stitch counts are 25, 5, 17, 3 and 9.
- [ ] There are 3, 2 and 1 shells from the bottom to the top.
- [ ] Round 1 has 16 sc and 10 chain loops.
- [ ] Round 2 has 108 sts, plus 3 picots and 1 bobble drop.
- [ ] Both sides have 15 sc, and both corners have 14 sts plus a picot.
- [ ] The bobble hangs at the exact bottom center.
- [ ] The corner flares curve upward evenly.
- [ ] The ring is round and the cord is secure.
- [ ] The bell measures 2.75 in x 3 in (7.0 cm x 7.6 cm).
- [ ] All tails are woven in and trimmed.
Troubleshooting
- Shells cup or ruffle: Your dc tension is too loose. Go down a hook size, or work the dc a little tighter.
- Windows close up: You may be working into the ch-3 spaces. On Rows 3 and 5, skip them completely.
- Bell leans to one side: Compare the side counts in Round 2. Both sides must be 15 sc.
- Scallops are flat: Check that each arc has 10 sts. Make sure the Round 1 arcs are ch 7, not shorter.
- Corners won’t curl up: Re-wet the corners, pin the tips angled upward, and starch more firmly.
- Bobble twists or flops: Close it with the ch 1 before the stem sl st. Pin it straight while blocking.
- Ring stretches out of shape: Pack all 18 sc into the ring, and starch the ring well.
Care
Hand wash in cool water, press dry in a towel, and re-block. Re-starch if needed. Store flat in tissue between seasons.
Final Notes
The measurement chain is simple:
- Row 1 sets the width at 2.25 in (5.7 cm).
- Rows 1–5 reach 1.6 in (4.1 cm) tall.
- The edging adds the ring, the scallops and the flares.
- Blocking sets the bell at 2.75 in x 3 in (7.0 cm x 7.6 cm).
Check each stage, and your bell will hang straight and lacy on the tree. Optional: make several in different thread colors for a set of matching ornaments.
Happy crocheting!