

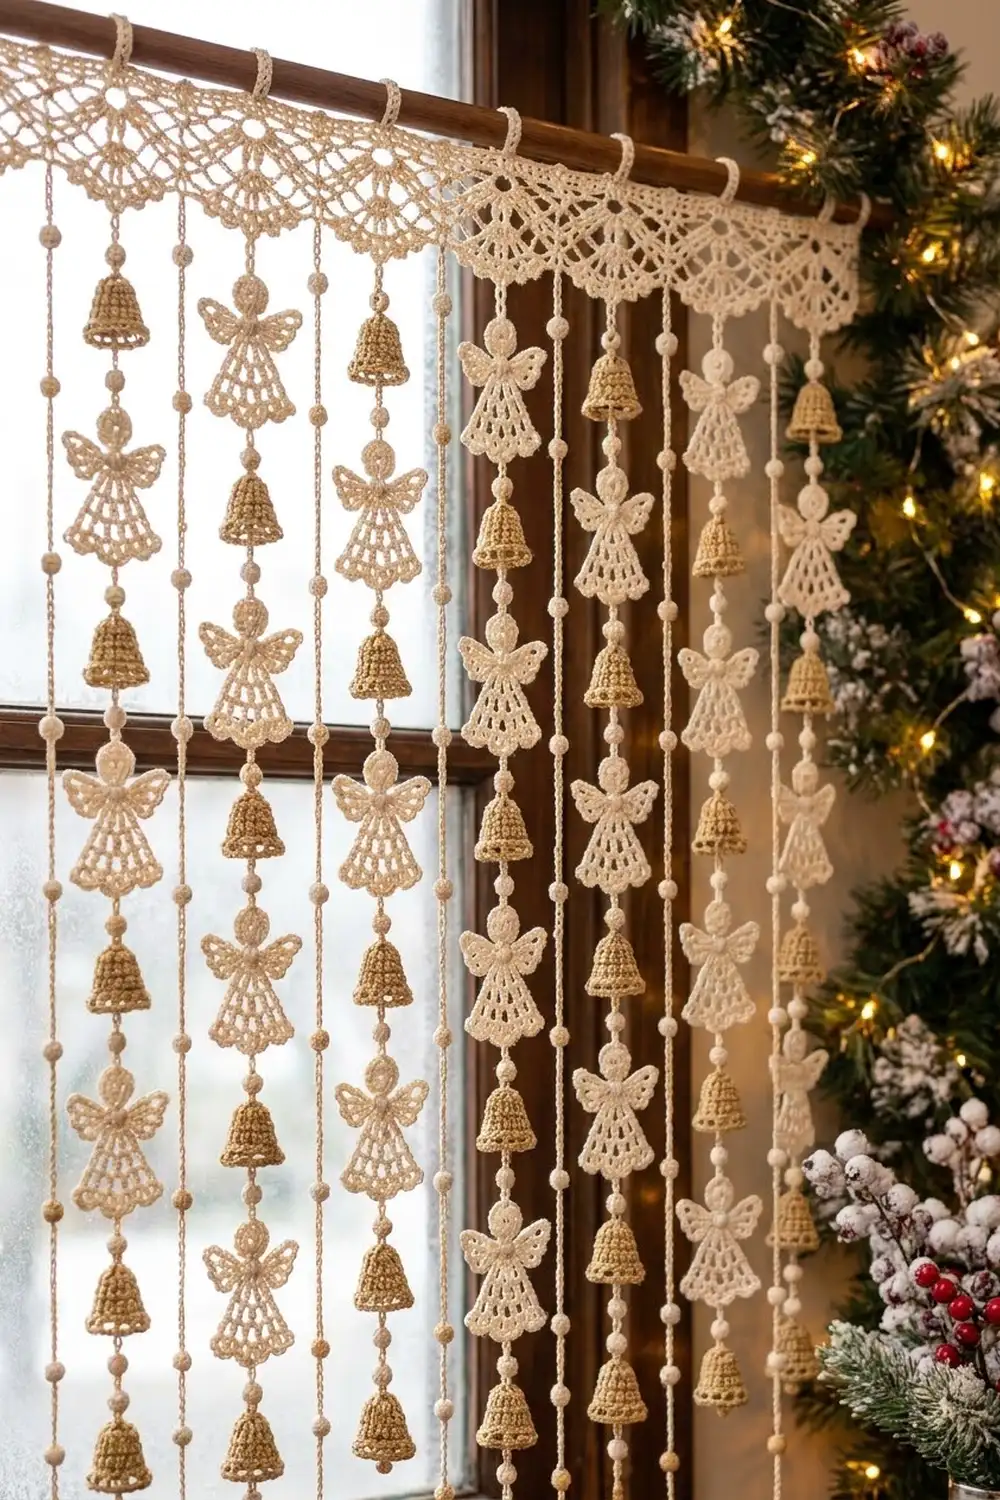
This lacy holiday garland hangs as a single vertical strand. A scalloped shell-fan header sits at the top. Below it, ribbed bells and open-lace angels alternate along a cream cord, with small round beads between each motif.
The look is soft and vintage. Everything is worked in cream and off-white cotton, so the texture does the work: open fans, vertical bell ribs, and tall shells on each angel skirt. Each ornament is 2.5 in (6.4 cm) long.
The pattern uses US crochet terms. The finished strand is about 39 in (99.1 cm) long and 3.5 in (8.9 cm) wide at the header.
You will make 4 bells, 4 angels, and 1 fan header separately. Then you link them top to bottom with short beaded cord segments. The header and the top cord segment go on last.
Finished Size and Construction
- Finished size: about 39 in (99.1 cm) long x 3.5 in (8.9 cm) wide at the header
- Skill level: Intermediate
- Terminology: US
- Yarn weight: Super fine (#1) fingering-weight mercerized cotton
- Hook: 2.25 mm (B-1)
- Number of pieces: 9 motifs (1 header, 4 bells, 4 angels), plus 4 clappers and 8 wings
- Layout: single vertical strand: header, then bell and angel alternating, 4 of each
- Piece size: bell 2 in (5.1 cm) body, 2.5 in (6.4 cm) with clapper; angel 2.5 in (6.4 cm) tall x 2.5 in (6.4 cm) across wings; header 3.5 in (8.9 cm) x 1.25 in (3.2 cm)
- Size before border: 35.7 in (90.7 cm), from the first bell to the end of the tail
- Border depth: 3.35 in (8.5 cm): header 1.25 in (3.2 cm) plus top cord gap 2.1 in (5.3 cm)
Materials
Choose a smooth, mercerized cotton. It gives crisp stitch definition and holds its shape after blocking. Avoid fuzzy or acrylic blends, which blur the lace.
- Color A, Cream (header, angels, cord): about 15 g (56 m)
- Color B, Off-White (bells, clappers): about 10 g (37 m)
These quantities include a margin of roughly 40%.
Tools:
- 2.25 mm (B-1) hook
- 17 cream round beads, 8 mm, with holes large enough for the yarn (buy 20)
- Tapestry needle
- Beading needle or dental floss threader for stringing beads
- Scissors
- Rust-proof pins and a foam blocking mat
- Spray bottle
- Optional: fabric stiffener or spray starch
Abbreviations (US Terms)
- ch: chain
- sl st: slip stitch
- sc: single crochet
- hdc: half double crochet
- dc: double crochet
- tr: treble crochet
- fpdc: front post double crochet
- st(s): stitch(es)
- sp(s): space(s)
- rnd: round
- tch: turning chain
- MR: magic ring
- BLO: back loop only
- WS: wrong side
Special stitches
- fpdc: Yo, insert hook from front to back to front around the post of the stitch, yo, pull up a loop, and complete as a dc.
- V-st: (dc, ch 1, dc) in the same st or sp.
- Shell: 3 dc in the same sp.
- Tall shell: 5 tr in the same sp.
- Fan: (tr, ch 1) 6 times, tr, all in the same st. This makes 7 tr and 6 ch-1 sps.
- PB (place bead): Slide a pre-strung bead up to the hook, yo, and pull through to lock the bead inside a chain. This chain is not counted.
Gauge and Checkpoints
The gauge is:
- 7 sc = 1 in (2.5 cm)
- 7 dc and 3 dc rows = 1 in (2.5 cm)
- Cord: 8 ch = 1 in (2.5 cm)
Make one bell first. It is your gauge swatch.
Checkpoints
- Bell after Rnd 3: 0.9 in (2.3 cm) across, flattened
- Bell after Rnd 8: 1.7 in (4.3 cm) across, flattened
- Finished bell: body 2 in (5.1 cm) tall, rim 2 in (5.1 cm) across
- Angel head: 0.6 in (1.5 cm) across
- Angel after Row 4: about 2 in (5.1 cm) across when laid flat
- Finished angel: 2.5 in (6.4 cm) tall
- Cord gap: 12 ch = 1.5 in (3.8 cm), or about 2.1 in (5.3 cm) with 2 beads
If pieces are too big, go down 0.25 mm in hook size. If they are too small, go up 0.25 mm. Re-check with a new bell before continuing.
Bell (Make 4)
Use Color B. Work in joined rounds from the top down. Do not turn.
Rnd 1: MR, ch 1, 6 sc in ring, join with sl st to first sc. (6)
Rnd 2: Ch 1, 2 sc in each st around, join. (12)
Rnd 3: Ch 1, sc in BLO of each st around, join. (12) The free front loops form a ridge around the dome crown.
Rnd 4: Ch 2 (does not count), dc in each st around, join to first dc. (12)
Rnd 5: Ch 2, fpdc around next st, dc in next st 6 times, join. (12: 6 fpdc, 6 dc)
Rnd 6: Ch 2, fpdc around next fpdc, 2 dc in next dc 6 times, join. (18: 6 fpdc, 12 dc)
Rnd 7: Ch 2, fpdc around next fpdc, dc in next 2 dc 6 times, join. (18)
Rnd 8: Ch 2, fpdc around next fpdc, dc in next dc, 2 dc in next dc 6 times, join. (24: 6 fpdc, 18 dc)
The fpdc stacks form 6 vertical ribs. The increases between them shape the cone.
Rnd 9 (rim, conversion round): Ch 1, sc in next fpdc, sc in next 2 dc, 2 sc in next dc 6 times, join. (24 sts worked 1 per st + 6 extra = 30)
Fasten off and weave in the ends.
Hanging loop: With the crown facing you, join Color B with a sl st at the center of Rnd 1. Ch 8, then sl st in the same place. Fasten off.
Clapper:
- MR, ch 1, 8 sc in ring, join. (8)
- Ch 10 for the stem.
- Fasten off, leaving an 8 in (20.3 cm) tail.
- Thread the tail up through the inside of the bell and out at the crown center.
- Adjust so the bottom of the clapper hangs 0.5 in (1.3 cm) below the rim.
- Secure the tail under the hanging loop.
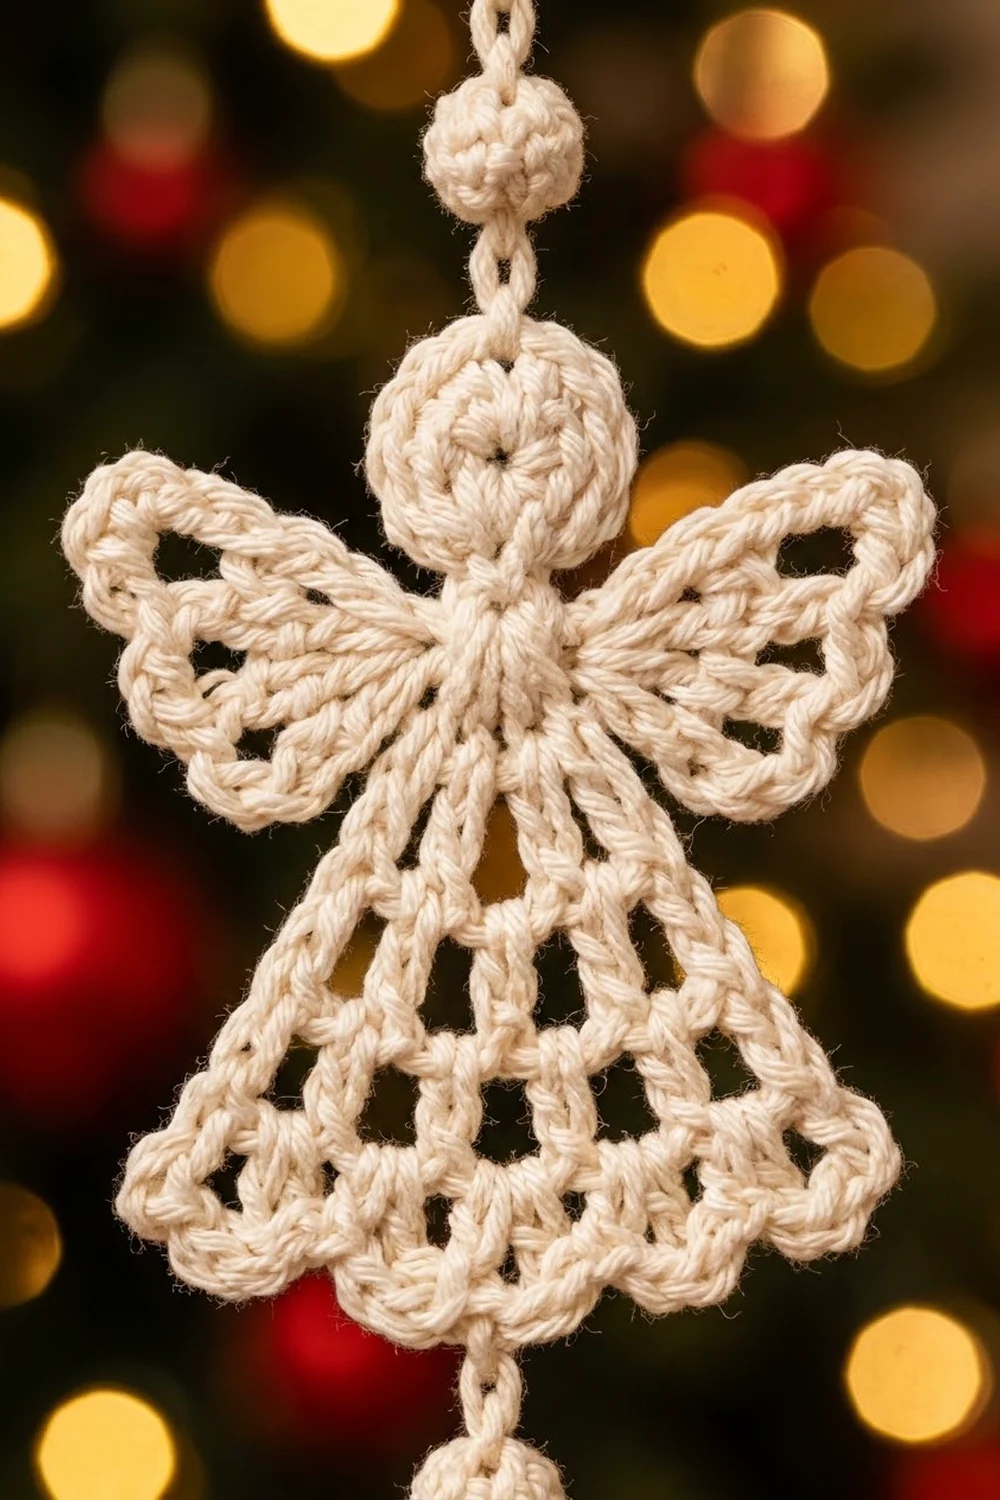
Angel (Make 4)
Use Color A.
Head: MR, ch 3 (counts as dc), 13 dc in ring, join to top of ch-3. (14 dc)
This join marks the bottom of the head. Do not fasten off.
The skirt is worked in turned rows into the join st.
Row 1: Ch 4 (counts as dc + ch 1), dc in same st, ch 1, dc in same st. Turn. (3 dc, 2 ch-1 sps)
Row 2: Ch 4 (counts as dc + ch 1), dc in same st (first V-st made), ch 1, V-st in next dc, ch 1, V-st in 3rd ch of tch. Turn. (3 V-sts = 6 dc)
Row 3: Ch 3 (counts as dc), [shell in ch-1 sp of next V-st, ch 1] 2 times, shell in ch-1 sp of last V-st, dc in 3rd ch of tch. Turn. (3 shells + 2 edge dc = 11 dc, 2 ch-1 sps)
Row 4: Ch 4 (counts as dc + ch 1), [V-st in center dc of next shell, ch 1, V-st in next ch-1 sp, ch 1] 2 times, V-st in center dc of last shell, ch 1, dc in top of tch. Turn. (5 V-sts + 2 edge dc = 12 dc)
Row 5 (tall-shell hem): Ch 1, sc in first dc, [tall shell in ch-1 sp of next V-st, sc in next ch-1 sp] 4 times, tall shell in ch-1 sp of last V-st, sc in 3rd ch of tch. (5 tall shells = 25 tr, plus 6 sc)
Fasten off. The body is flat and open, made from chains and tall shells.
Hanging loop: Join Color A in the st directly opposite the head join (the 8th st, counting the ch-3 as st 1). Ch 8, then sl st in the same st. Fasten off.
Wing (make 2 per angel):
Row 1: MR, ch 5 (counts as tr + ch 1), [tr, ch 1] 3 times, tr in ring, pull the ring snug. Turn. (5 tr, 4 ch-1 sps)
Row 2: Ch 1, sc in first tr, [(hdc, dc, hdc) in next ch-1 sp, sc in next tr] 4 times, working the last sc in the 4th ch of the tch. (5 sc + 4 scallops = 17 sts)
Each wing is about 0.65 in (1.7 cm) deep.
Attach the wings: Sew the ring base of each wing to the WS of the body at the ends of Row 2. Angle the fans up and outward so they flank the body. The span across both wings should be 2.5 in (6.4 cm).
Make All Pieces
Color A (Cream):
- 4 angels (4 head-and-body pieces, 8 wings)
- 1 header (see Border)
- 8 cord gaps and 1 tail
Color B (Off-White):
- 4 bells
- 4 clappers
Layout, top to bottom:
TOP:    HEADER (CREAM)
ROW 1:  BELL (OFF-WHITE)
ROW 2:  ANGEL (CREAM)
ROW 3:  BELL (OFF-WHITE)
ROW 4:  ANGEL (CREAM)
ROW 5:  BELL (OFF-WHITE)
ROW 6:  ANGEL (CREAM)
ROW 7:  BELL (OFF-WHITE)
ROW 8:  ANGEL (CREAM)
END:    BEADED TAIL
Joining
Each motif connects through two attachment points:
- Top: its hanging loop
- Bottom: the clapper on a bell, or the center tr of the 3rd tall shell on an angel. For the clapper, use the sc opposite the stem.
Each cord segment links the bottom of one motif to the top of the next.
Gap segment (make 7):
- String 2 beads onto Color A.
- Join with a sl st into the bottom attachment point of the upper motif.
- Ch 4, PB, ch 4, PB, ch 4. (12 counted ch)
- Sl st through the hanging loop of the next motif.
- Ch 1 and fasten off.
Work the gaps in order: Bell 1 to Angel 1, Angel 1 to Bell 2, and so on down to Angel 4.
Tail:
- String 1 bead.
- Join at the bottom of Angel 4.
- Ch 4, PB, ch 2.
- Fasten off.
Stitch-to-stitch logic: Every gap is exactly 12 counted chains, so every motif hangs at the same spacing.
Tension: Keep the chains relaxed and even at 8 ch per 1 in (2.5 cm). Tight chains twist the cord and tilt the motifs.
Size checkpoint: Hang the strand by Bell 1’s loop. It should measure 35.7 in (90.7 cm), within 1 in (2.5 cm):
- 4 bells at 2.5 in (6.4 cm) = 10 in (25.4 cm)
- 4 angels at 2.5 in (6.4 cm) = 10 in (25.4 cm)
- 7 gaps at 2.1 in (5.3 cm) = 14.7 in (37.3 cm)
- Tail = 1 in (2.5 cm)
Border: Scalloped Fan Header
The header is the strand’s border. It is worked at the same gauge as the motifs: 7 sc = 1 in (2.5 cm). Use Color A.
Foundation: Ch 26.
Row 1: Sc in 2nd ch from hook and each ch across. Turn. (25 sc on the top edge)
Row 2 (conversion row): Ch 3 (counts as dc), dc in each remaining st. Turn. (25 sts worked 1 per st + 0 extra = 25 dc)
Row 3: Ch 1, sc in first dc, skip 3 dc, fan in next dc, skip 3 dc, sc in next dc 3 times. Turn. (3 fans = 21 tr and 18 ch-1 sps, plus 4 sc)
Row 4: Ch 1, sc in first sc, [ch 3, sc in next ch-1 sp] 6 times, ch 3, sc in next sc 3 times. (21 ch-3 loops, 22 sc)
Fasten off.
Why the math works: Each fan uses 8 base sts: 3 skipped, 1 fan, 3 skipped, 1 sc. Three fans use 24 sts. Add 1 for the opening sc, and you get 1 + 3 x 8 = 25, which matches Rows 1 and 2 exactly. Each fan has 6 ch-1 sps, so Row 4 gives each fan 7 loops. That is 21 loops in total.
Hanging loop: Join Color A at the 13th st of the foundation edge (the center). Ch 12, then sl st in the same st. This makes a 0.75 in (1.9 cm) loop.
Top gap:
- String 2 beads.
- Join at the 4th loop of the middle fan (11th loop overall). This loop sits over the fan’s center tr.
- Ch 4, PB, ch 4, PB, ch 4.
- Sl st through Bell 1’s hanging loop.
- Fasten off.
The header and top gap add 3.35 in (8.5 cm). This brings the strand to about 39 in (99.1 cm).
Final Blocking
- Weave in all ends securely.
- Pin the header flat on foam. Place a pin at each ch-3 loop so the fans open evenly to 3.5 in (8.9 cm).
- Pin each angel flat. Spread the wings to 2.5 in (6.4 cm) and pin each tall shell point on the hem.
- Fill each bell with a small cone of rolled paper or plastic wrap. Align the ribs vertically and flare the rim to 2 in (5.1 cm).
- Spray all pieces until damp. If you want firmer shapes, apply stiffener or starch.
- Let everything dry completely before unpinning.
- Hang the strand and let it settle overnight.
Final Quality-Control Checklist
- [ ] All 4 bells show 6 straight vertical ribs and measure 2 in (5.1 cm)
- [ ] All clappers hang 0.5 in (1.3 cm) below the rim
- [ ] All 4 angels measure 2.5 in (6.4 cm) tall, with 5 tall shells each
- [ ] Wings sit symmetrically on every angel
- [ ] Each gap has 12 chains and 2 beads
- [ ] The header has 3 even fans and 21 loops
- [ ] The strand measures about 39 in (99.1 cm)
- [ ] All ends are hidden and secure
Troubleshooting
- Bell ribs spiral or lean: Make sure each fpdc goes around the previous round’s fpdc, not around a neighboring dc.
- Bell flares too early: Your dc rounds are loose. Go down a hook size.
- Angel skirt ruffles: Check that Row 4 has exactly 5 V-sts.
- Angel skirt cups: Loosen the V-st chains.
- Wings droop: Re-sew them higher on Row 2, or starch them.
- Cord twists: Relax your chain tension and steam the cord lightly.
- Beads slide: Each PB must be locked in its own chain.
- Header fans ruffle: Recount the 3 skipped sts on each side of every fan.
Care
Hand wash in cool water. Press out the water gently, then reshape and dry flat. Store wrapped in tissue to protect the bells’ shape.
Final Notes
The measurement chain runs from your gauge to the finished strand:
- Gauge: 7 sc = 1 in (2.5 cm)
- Bells: 2.5 in (6.4 cm) each
- Angels: 2.5 in (6.4 cm) each
- Cord gaps: 2.1 in (5.3 cm) each
- Strand before border: 35.7 in (90.7 cm)
- Header and top gap: 3.35 in (8.5 cm)
- Finished garland: about 39 in (99.1 cm)
Check each stage and the final length takes care of itself.
Optional: For a longer strand, add bell-and-angel pairs. Each pair adds about 9.2 in (23.4 cm), including two gaps.
Happy crocheting!