

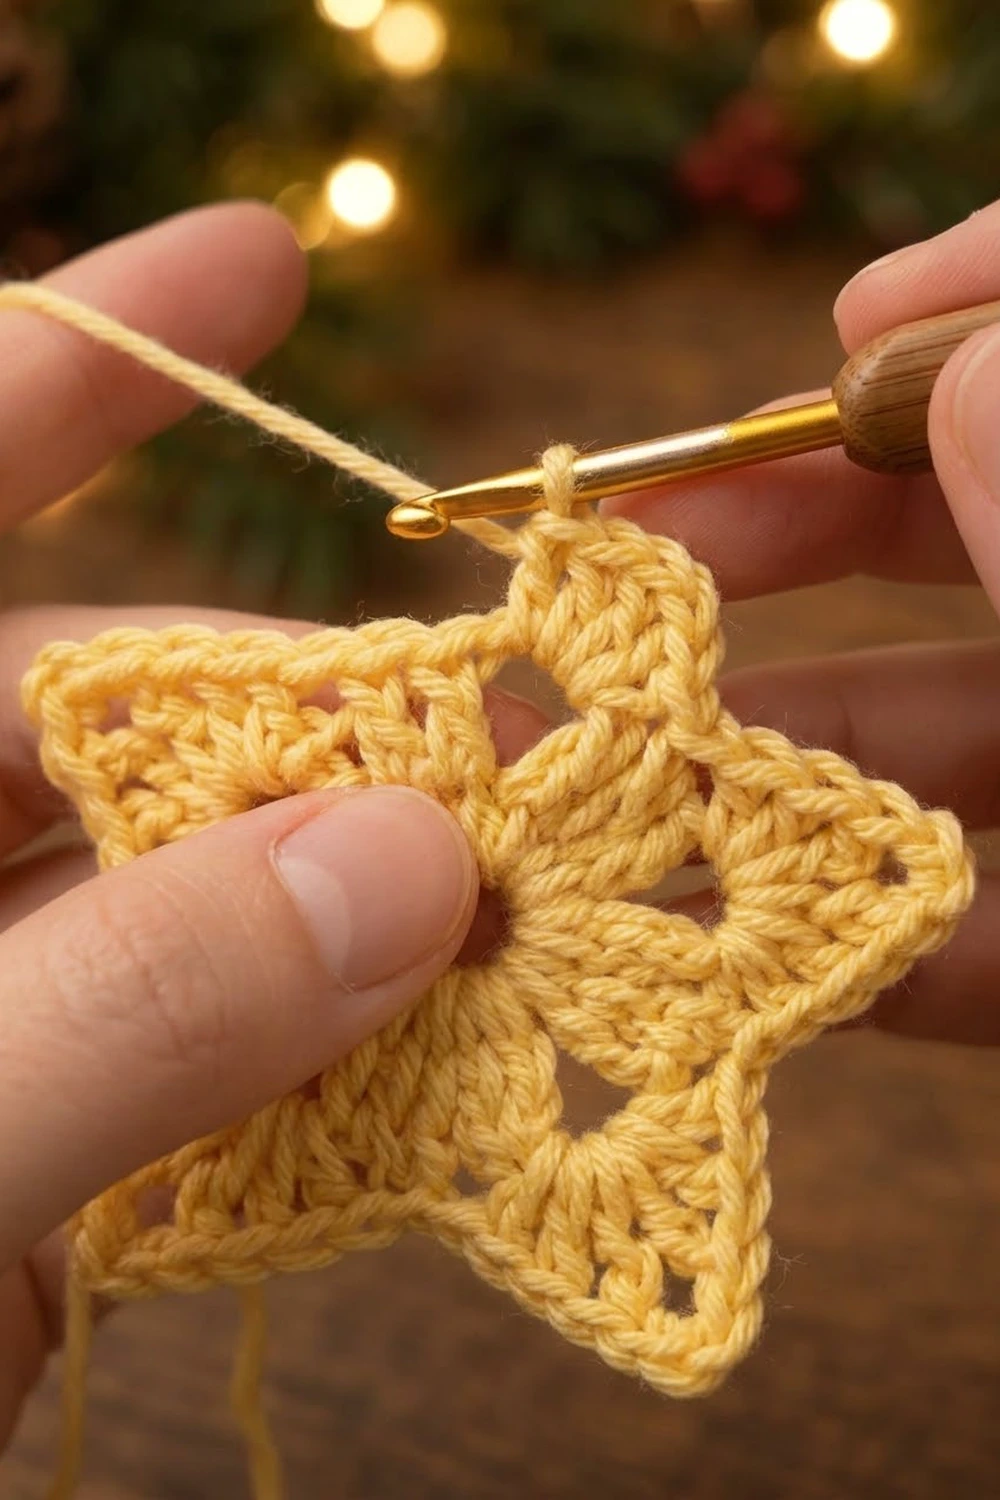
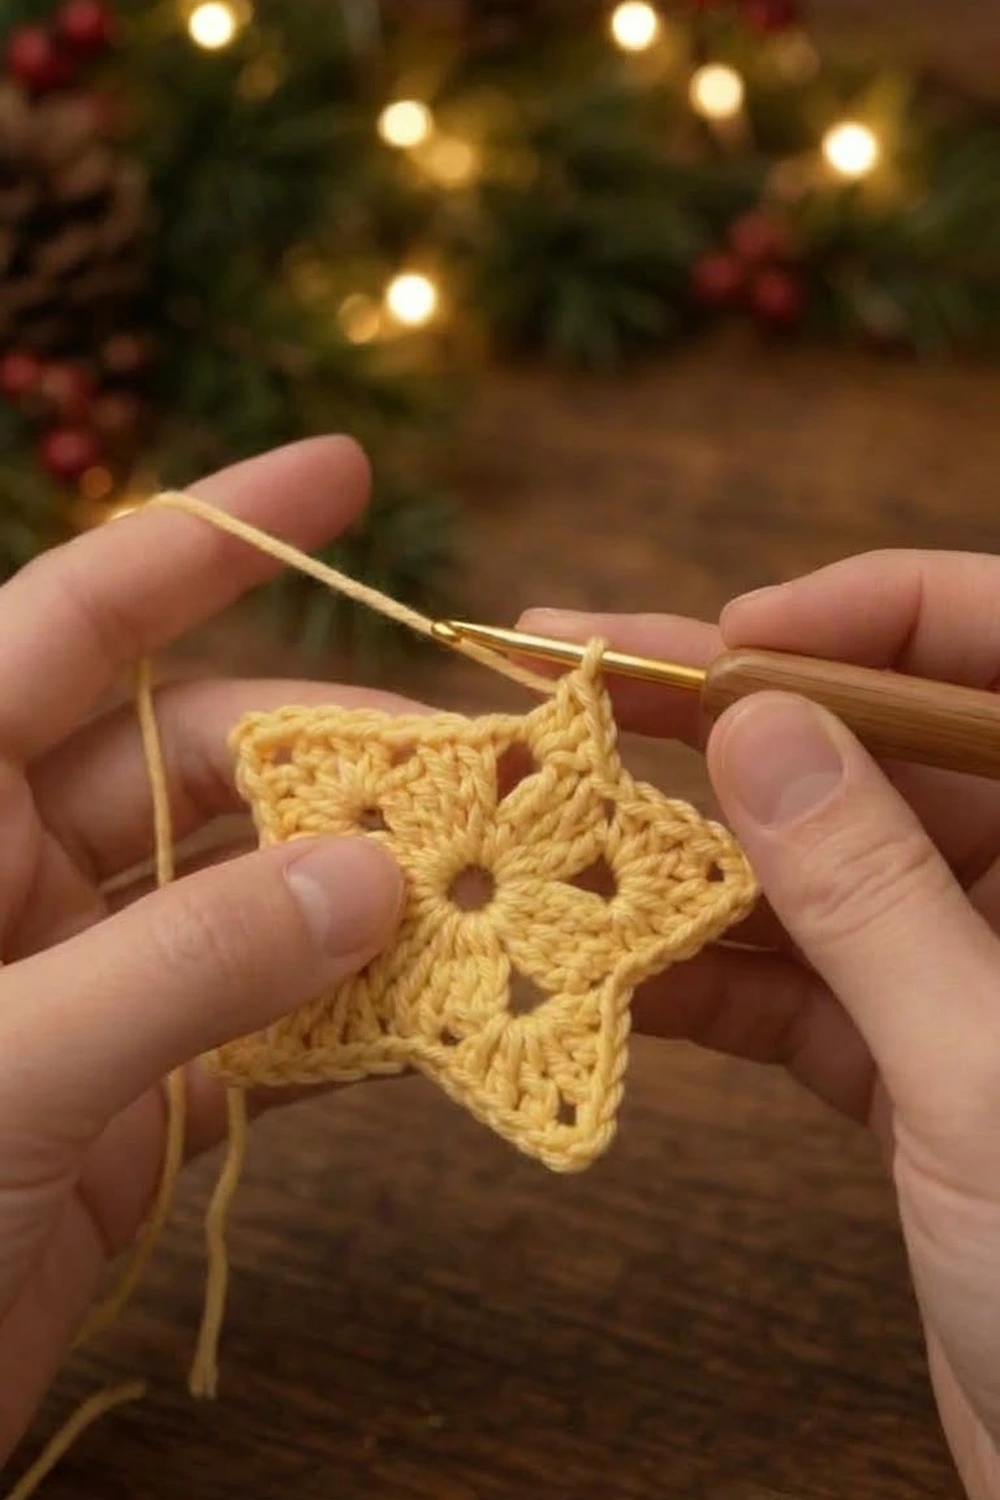
The Golden Twinkle Star is a small, lacy, four-pointed star motif worked in golden yellow yarn. It has four triangular points that grow from a small open center. Chain spaces and double crochet stitches create a visible mesh through each point, so the finished star looks airy and delicate.
The style is simple and geometric. Clean double crochet clusters frame the open center. Shallow valleys between the points make the star shape. A smooth single crochet edge outlines everything and ends in a neat chain tip at each point. It works well as a tree ornament, a gift tag topper, or a festive appliqué.
This pattern uses US crochet terms. The finished star measures approximately 3 in (7.6 cm) from tip to opposite tip after blocking.
The motif is one single piece, worked in 4 joined rounds from a magic ring without turning. Round 1 makes a small granny-style center. Round 2 builds the base of the four points. Round 3 opens the mesh and shapes the valleys. Round 4 is a single crochet border that sharpens the tips and pulls the valleys inward.
Finished Size and Construction
- Finished size: approximately 3 in (7.6 cm) tip to opposite tip; about 2.25 in (5.7 cm) valley to opposite valley
- Skill level: Easy (confident beginner)
- Terminology: US crochet terms
- Yarn weight: DK (light, #3) cotton or cotton blend
- Hook: 3.5 mm (US E-4)
- Number of pieces: 1
- Layout: single motif, no assembly
- Piece size: 3 in (7.6 cm) tip to tip
- Size before border (after Round 3): 2.5 in (6.4 cm) tip to tip
- Border depth: about 0.25 in (0.6 cm)
Materials
Yarn advice: Choose a smooth DK cotton or cotton blend with good stitch definition. Cotton holds the points crisply and blocks well. Fuzzy or very soft acrylic will blur the mesh and give rounder tips.
- Golden yellow (main color): 8 g / 18 m
Tools:
- 3.5 mm (US E-4) crochet hook
- Tapestry needle
- Scissors
- 1 stitch marker
- Rust-proof pins and a small blocking mat or foam board
- Spray bottle with clean water
- Optional: fabric stiffener for a firm ornament
- Optional: 6 in (15.2 cm) of yarn or thin cord for hanging
Note: The yarn quantity includes a margin of about 30% for your gauge swatch, weaving in ends, and a hanging loop.
Abbreviations (US Terms)
- ch – chain
- sl st – slip stitch
- sc – single crochet
- hdc – half double crochet
- dc – double crochet
- sc2tog – single crochet 2 together
- sp – space
- sk – skip
- MR – magic ring
- st(s) – stitch(es)
- rep – repeat
- beg – beginning
Special stitch: valley sc2tog. Insert your hook into the next ch-1 sp, yarn over, and pull up a loop. Skip the sc. Insert your hook into the following ch-1 sp, yarn over, and pull up a loop. Yarn over and pull through all 3 loops on the hook. This counts as 1 stitch. It pulls the valley between two points inward and deepens the star shape.
Gauge and Checkpoints
Gauge matters less for an ornament than for a garment, but it controls the final size. Work Rounds 1 and 2 as a test first, then measure diagonally from one point to the opposite point.
Checkpoints (measured tip to opposite tip, lying flat, unstretched):
- After Round 1: 1.25 in (3.2 cm)
- After Round 2: 2 in (5.1 cm)
- After Round 3: 2.5 in (6.4 cm)
- After Round 4: 3 in (7.6 cm)
Border gauge: about 5 sc per 1 in (2.5 cm) along the edges in Round 4.
A tolerance of 0.25 in (0.6 cm) at any checkpoint is fine.
If your piece is too big: Change to a 3.0 mm hook and restart. Also check that your beginning ch-3 stitches are not loose.
If your piece is too small: Change to a 4.0 mm hook and restart. Tight chain spaces are the most common cause, so keep each chain relaxed.
Pattern
The rounds are joined, and you do not turn. The right side faces you throughout. Place a stitch marker in the first stitch of each round if that helps you count.
Round 1: Granny-Style Center
MR, ch 3 (counts as dc), 2 dc in ring, ch 3. *3 dc in ring, ch 3; rep from * 2 more times. Sl st to the top of the beg ch-3.
Pull the tail until the ring closes to a small center opening of about 0.25 in (0.6 cm).
Count: 12 dc (4 groups of 3) and 4 ch-3 sps.
Each ch-3 sp marks where one star point will grow.
Round 2: Point Bases
Sl st in each of the next 2 dc, then sl st into the ch-3 sp.
Ch 3 (counts as dc). Work (2 dc, ch 3, 3 dc) in the same sp. Ch 1, sk the next dc, sc in the next dc (the middle dc of the group), ch 1, sk the next dc.
*Work (3 dc, ch 3, 3 dc) in the next ch-3 sp. Ch 1, sk the next dc, sc in the next dc, ch 1, sk the next dc. Rep from * 2 more times.
Sl st to the top of the beg ch-3.
Count: 24 dc (6 per point), 4 sc, 4 ch-3 sps, and 8 ch-1 sps.
This is a growth round. It goes from 12 dc to 24 dc because each point now holds 6 dc instead of 3. The sc in the middle of each side starts the low valley between the points.
Round 3: Mesh and Valleys
Sl st in each of the next 2 dc, then sl st into the ch-3 sp.
Ch 3 (counts as dc). Work (dc, ch 3, 2 dc) in the same sp.
*Ch 2, sk the next 2 dc, dc in the next dc. Ch 1, sk the ch-1 sp, sc in the next sc. Ch 1, sk the ch-1 sp, dc in the next dc. Ch 2, sk the next 2 dc. Work (2 dc, ch 3, 2 dc) in the next ch-3 sp. Rep from * 2 more times.
For the last side, ch 2, sk the next 2 dc, and dc in the next dc. Ch 1, sc in the next sc, ch 1, and dc in the next st (the beg ch-3 of Round 2). Ch 2, sk the last 2 sts, and sl st to the top of the beg ch-3.
Count: 24 dc (16 at the tips and 8 along the sides), 4 sc, 4 ch-3 sps, 8 ch-2 sps, and 8 ch-1 sps.
This is a reshaping round, not a growth round. The dc total stays at 24, but the stitches move. Each point now narrows to a ch-3 tip, and the ch-2 and ch-1 spaces open the lacy mesh along both sides of every point.
Checkpoint: 2.5 in (6.4 cm) tip to tip. Four clear points should now show, with a shallow dip at each sc.
Border
Round 4 is the border. It is a trim round worked into the stitches and spaces of Round 3, at about 5 sc per 1 in (2.5 cm). It adds about 0.25 in (0.6 cm) of depth.
Layout of each side in Round 3: Each side runs from one ch-3 tip to the next. In order, it contains 2 dc, a ch-2 sp, 1 dc, a ch-1 sp, 1 sc, a ch-1 sp, 1 dc, a ch-2 sp, and 2 dc.
Round 4: Smooth Edge and Sharp Tips
Sl st in the next dc, then sl st into the ch-3 sp. Ch 1 (does not count as a st).
Work (hdc, dc, ch 2, dc, hdc) in the same ch-3 sp. This makes the first tip.
*Sc in each of the next 2 dc. Work 2 sc in the ch-2 sp. Sc in the next dc. Work a valley sc2tog. Sc in the next dc. Work 2 sc in the ch-2 sp. Sc in each of the next 2 dc. Work (hdc, dc, ch 2, dc, hdc) in the next ch-3 sp. Rep from * 2 more times.
For the last side, sc in each of the next 2 dc and work 2 sc in the ch-2 sp. Sc in the next dc, work a valley sc2tog, and sc in the next dc. Work 2 sc in the ch-2 sp. Sc in the last 2 sts (the top of the beg ch-3 and the next dc of Round 3).
Sl st to the first hdc. Fasten off and leave a 4 in (10.2 cm) tail.
Count per side: 11 sts.
Count per tip: 4 sts (hdc, dc, dc, hdc) plus a ch-2 tip.
Total: (4 sides × 11) + (4 tips × 4) = 44 + 16 = 60 sts, plus 4 ch-2 tip sps.
Why the math works: Each side of Round 3 has 6 dc. Each of those gets 1 sc, which gives 6 sts. The two ch-2 sps get 2 sc each, which adds 4 sts. The ch-1 sp, the sc, and the second ch-1 sp in the valley combine into one valley sc2tog, which adds 1 st.
That gives 6 + 4 + 1 = 11 sts per side.
The tip stitches are worked only into the ch-3 sps. They are never counted as part of a side, so no stitch is counted twice. The decrease at each valley pulls the edge inward, and the taller dc stitches at each tip push the point outward. Together, these create the star outline.
Optional hanging loop: Before you fasten off, ch 10 from any tip, about 1.5 in (3.8 cm), and sl st back into the ch-2 tip sp. You can also thread the 6 in (15.2 cm) cord through a tip instead.
Optional idea: If you like, you can make several stars and string them together later. The pattern itself is a single motif.
Final Blocking
- Weave in both tails along the back of the stitches. Weave the center tail around the magic ring to keep the opening small.
- Mist the star with clean water until it is evenly damp but not dripping.
- Lay it right side up on the blocking mat.
- Pin each ch-2 tip outward so that opposite tips measure 3 in (7.6 cm) apart.
- Pin each valley gently inward so that opposite valleys measure about 2.25 in (5.7 cm) apart.
- Check that all four points are the same length and evenly spaced at right angles.
- Optional: brush or spray fabric stiffener over the star while it is pinned.
- Let it dry completely before you unpin it. This usually takes several hours.
Final Quality-Control Checklist
- The star measures 3 in (7.6 cm) tip to tip, within 0.25 in (0.6 cm).
- All four points are equal in length and shape.
- Round 4 has 11 sts on each side and 4 sts plus a ch-2 at each tip.
- Each valley sits clearly lower than the tips.
- The mesh spaces are open and even on both sides of every point.
- The center opening is small and neat.
- The ends are woven in securely with no tails showing on the front.
- The hanging loop, if added, is centered on a tip.
Troubleshooting
The star cups or ruffles: Your tension is uneven in the corners. Redo Round 3 and keep the ch-3 tips relaxed, not tight.
The points look round, not sharp: Make sure the ch-2 is worked at each tip in Round 4. Pin the tips firmly during blocking.
The valleys are not dipping: Check that you worked the valley sc2tog and skipped the sc. A plain sc in each space will flatten the valley.
The stitch count is off in Round 3: Recount the dc skipped before and after each tip. You skip exactly 2 dc on each side of every corner group.
The center hole is too large: Pull the magic ring tail tighter before you weave it in, and secure it with one extra pass.
The star ends up smaller than 3 in (7.6 cm): Block it slightly larger, or rework it with a 4.0 mm hook.
Care
Hand wash in cool water and lay the star flat to dry, re-pinning the tips if needed. Stiffened ornaments should be spot cleaned only.
Final Notes
The measurement chain is simple. Round 1 measures 1.25 in (3.2 cm), Round 2 measures 2 in (5.1 cm), Round 3 measures 2.5 in (6.4 cm), and the border brings the star to 3 in (7.6 cm) tip to tip.
The stitch counts follow the same steady logic. The center starts with 12 dc. The point bases grow to 24 dc. The mesh round reshapes those same 24 dc. The border finishes with 60 sts plus four ch-2 tips.
If every checkpoint matches, your golden star will block out crisp, lacy, and ready to hang.
Happy crocheting!