

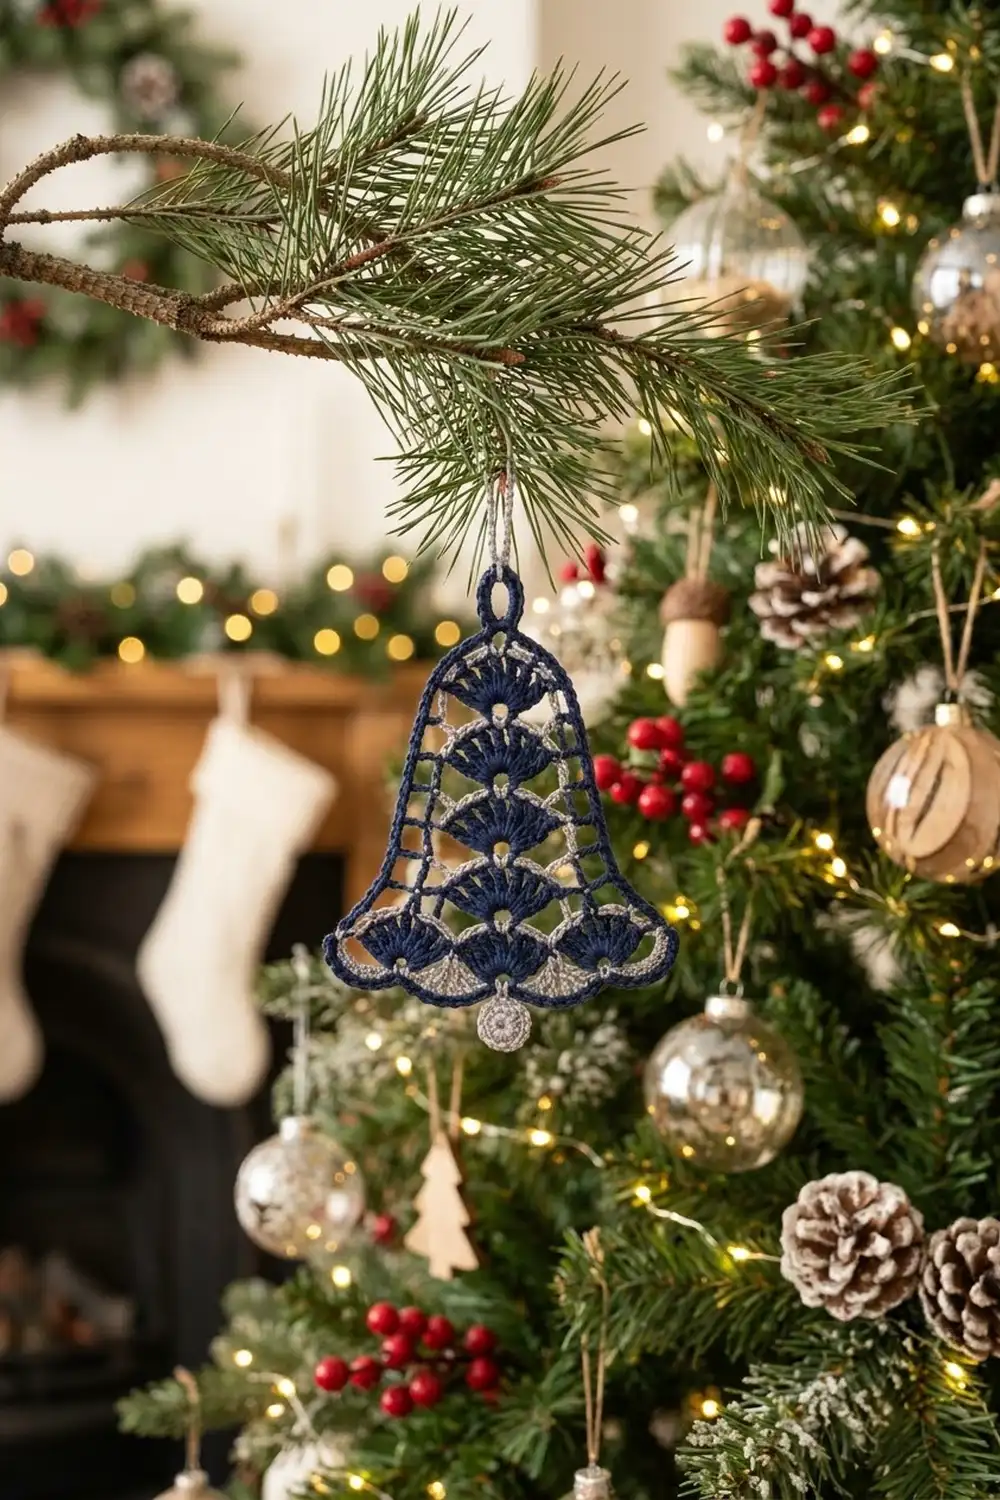
This bell ornament has a classic bell silhouette with a rounded dome top that tapers slightly toward the bottom. Three tiers of fan motifs run down the front, a hanging loop sits at the crown, and a small crocheted ball dangles from the bottom point. It is one flat piece, ready to hang on a tree, a gift, or a window.
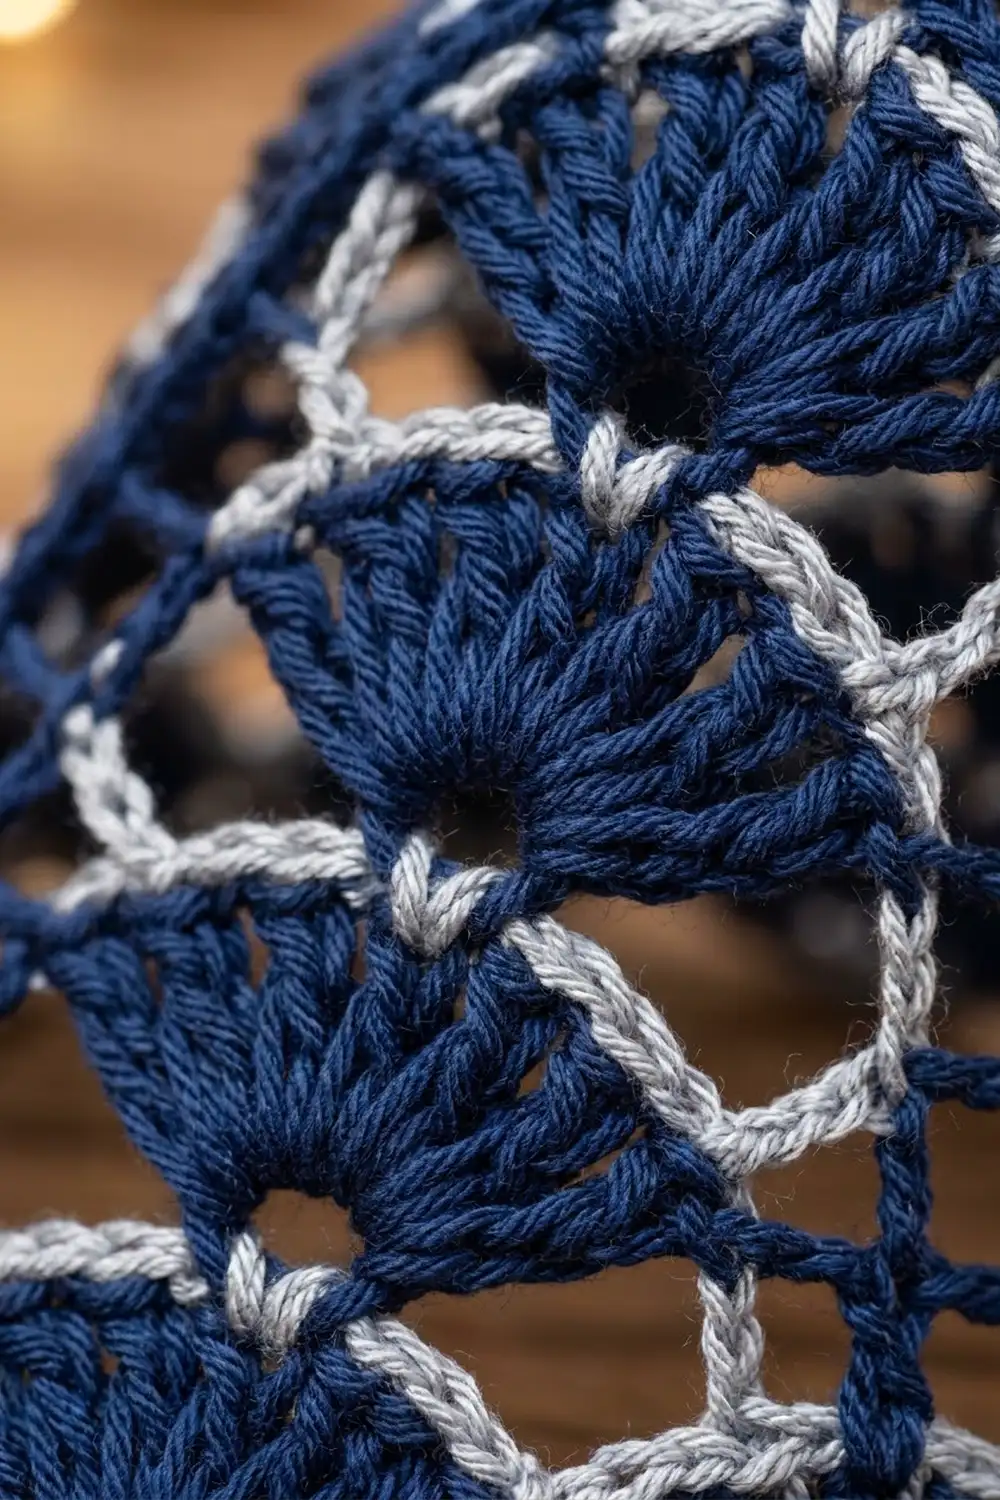
The main color is dark navy blue. Light gray accent rows separate the fan tiers and outline the hem. Each fan has 7 double crochets packed into one stitch, so it cups forward slightly and gives the front a layered, dimensional look.
The pattern uses US crochet terms. The finished bell body measures about 3 in (7.6 cm) tall and 3 in (7.6 cm) wide. With the hanging loop it is about 3.5 in (8.9 cm) tall, and about 4 in (10.2 cm) including the dangling ball.
The bell is worked flat in rows from the crown down. Increase rows widen it from 1 fan to 2 fans to 3 fans, and gray accent rows divide the tiers. A single navy border round finishes and rounds the edge. You then add the hanging loop and attach a small stuffed gray ball at the bottom point.
Finished Size and Construction
- Finished size: about 3 in (7.6 cm) tall x 3 in (7.6 cm) wide (bell body); 3.5 in (8.9 cm) with loop; 4 in (10.2 cm) with ball
- Skill level: Easy-intermediate
- Terminology: US crochet terms
- Yarn weight: Fingering / #1 super fine cotton
- Hook: 2.25 mm (US B-1)
- Number of pieces: 1 bell body plus 1 small ball accent
- Layout: Single ornament, worked flat in rows
- Piece size: 3 in x 3 in (7.6 cm x 7.6 cm) after border
- Size before border: about 2.75 in x 2.75 in (7.0 cm x 7.0 cm)
- Border depth: 1 round of sc, about 0.125 in (0.3 cm) per edge
Materials
Yarn: Use a smooth mercerized cotton in fingering weight. Cotton gives crisp fan definition and holds its shape after blocking. Avoid fuzzy or very stretchy yarns, because they blur the fans.
- Navy (main color): about 6 g, roughly 20 m
- Light gray or white (accent): about 3 g, roughly 10 m
These quantities include a margin for swatching and tails.
Tools:
- 2.25 mm (US B-1) crochet hook
- Tapestry needle
- Small scissors
- A pinch of polyester fiberfill or matching yarn scraps (for the ball)
- Rust-proof pins and a foam blocking mat
- Spray bottle; optional fabric starch
Abbreviations (US Terms)
- ch – chain
- sc – single crochet
- dc – double crochet
- sl st – slip stitch
- sk – skip
- st(s) – stitch(es)
- sc2tog – single crochet 2 together
- MR – magic ring
- yo – yarn over
Special stitch – Fan: Work 7 dc into the same stitch.
Color change: Work the last stitch of the row until 2 loops remain on the hook. Pull the new color through to finish the stitch. Cut the old color, leaving a 4 in (10.2 cm) tail. You will crochet over these tails in the border.
Gauge and Checkpoints
Gauge: 7 sc and 8 sc rows = 1 in (2.5 cm) with the 2.25 mm hook.
Make a quick swatch of 14 sc x 16 rows. It should measure 2 in x 2 in (5.1 cm x 5.1 cm). Then test the bell itself by working Rows 1–4 and checking the first checkpoint below.
Checkpoints:
- After Row 4: width about 1 in (2.5 cm) (7 sts)
- After Row 7: width about 1.9 in (4.8 cm) (13 sts)
- After Row 10: width about 2.7 in (6.9 cm) (19 sts)
- After Row 12: about 2.75 in x 2.75 in (7.0 cm x 7.0 cm)
- After border: about 3 in x 3 in (7.6 cm x 7.6 cm)
Too big? Go down to a 2.0 mm hook.
Too small? Go up to a 2.5 mm hook.
Fix the gauge at Row 4, not at the end.
Bell Pattern
Work in rows and turn at the end of each row. The turning ch-1 does not count as a stitch. The turning ch-3 in Rows 6 and 9 counts as 1 dc.
Dome Crown
The fast early increases followed by a straight row create the rounded dome.
Row 1 (navy): Ch 4. Sc in 2nd ch from hook and in each of the next 2 ch. Turn. (3 sc)
Row 2 (navy): Ch 1. 2 sc in first st, sc in next st, 2 sc in last st. Turn. (5 sc)
Row 3 (navy): Ch 1. 2 sc in first st, sc in next 3 sts, 2 sc in last st. Change to gray. Turn. (7 sc)
Row 4 (gray): Ch 1. Sc in each st across. Change to navy. Turn. (7 sc)
Tier 1 – One Fan
Row 5 (navy, Fan Row 1): Ch 1. Sc in first st, sk 2 sts, Fan in next st, sk 2 sts, sc in last st. Turn. (9 sts: 2 sc + 7 dc; 1 fan)
Row 6 (navy, leveling row): Ch 3 (counts as dc), dc in first sc. Sc in each of the 7 dc. 2 dc in last sc. Change to gray. Turn. (11 sts)
The dc at each edge fill the low spots beside the fan, so the top of the row stays level.
Row 7 (gray): Ch 1. 2 sc in first st, sc in next 9 sts, 2 sc in last st (top of turning ch). Change to navy. Turn. (13 sc)
Tier 2 – Two Fans
Row 8 (navy, Fan Row 2): Ch 1. Sc in first st, sk 2, Fan in next st, sk 2, sc in next st. Repeat from * to * once more. Turn. (17 sts: 3 sc + 14 dc; 2 fans)
Row 9 (navy, leveling row): Ch 3 (counts as dc), dc in first sc. Sc in each of the next 7 dc. Dc in the center sc. Sc in each of the next 7 dc. 2 dc in last sc. Change to gray. Turn. (19 sts)
Row 10 (gray): Ch 1. Sc in each st across. Change to navy. Turn. (19 sc)
Tier 3 – Three Fans
Row 11 (navy, Fan Row 3): Ch 1. Sc in first st, sk 2, Fan in next st, sk 2, sc in next st. Repeat from * to * 2 more times. Change to gray. Turn. (25 sts: 4 sc + 21 dc; 3 fans)
The fan repeat is a multiple of 6 + 1: 7 sts for 1 fan, 13 for 2, and 19 for 3. The base row before each fan row always lands on one of these numbers.
Row 12 (gray, hem outline): Ch 1. Sc in each st across, following the curve of the fans. Fasten off. (25 sc)
This row outlines the three scallops in gray. Check that the piece measures about 2.75 in x 2.75 in (7.0 cm x 7.0 cm).
Ball Accent (gray)
Rnd 1: 6 sc in MR. (6)
Rnd 2: 2 sc in each st. (12)
Rnd 3: Sc in each st. (12)
Stuff firmly with fiberfill or yarn scraps.
Rnd 4: Sc2tog 6 times. (6)
Fasten off, leaving a 6 in (15.2 cm) tail. Weave the tail through the front loops of the remaining sts and pull tight. Keep the tail for attaching. The ball measures about 0.5 in (1.3 cm) across.
Border
Border gauge: The border matches the body gauge of 7 sc/in. It is worked 1 sc per stitch along the top and bottom. Along the sides it is worked 1 sc per sc-height row end and 2 sc per dc-height row end.
Rnd 1 (navy): With the right side facing, join navy in the first st of Row 12 at a bottom corner. Crochet over the color-change tails as you go.
- Bottom edge: Ch 1. 3 sc in first st, sc in next 23 sts, 3 sc in last st. (25 existing sts + 4 extra corner sts = 29 sc)
- First side: Working into row ends, place 1 sc in each row end of Rows 12 to 1. Place 2 sc in the dc-height ends of Rows 9 and 6. (10 rows x 1 + 2 rows x 2 = 14 sc)
- Top edge: Working into the underside of the foundation ch, place 2 sc in first ch, sc in next ch, 2 sc in last ch. (3 existing ch + 2 extra = 5 sc)
- Second side: Work as for the first side, Rows 1 to 12. (14 sc)
- Sl st to first sc.
Round total: 29 + 14 + 5 + 14 = 62 sc
The bottom count of 29 already includes both 3-sc corners. The side counts of 14 contain no corner stitches, so nothing is counted twice. Fasten off.
Why the math works:
- One sc per existing stitch keeps the top and bottom edges flat.
- An sc row end is about 1 sc tall and a dc row end is about 2 sc tall, so the sides lie smooth.
- The 3-sc bottom corners turn the hem neatly.
- The 2-sc top corners round off the dome instead of squaring it.
Hanging Loop
Join navy in the center sc of the top edge (the 3rd of the 5 top sc). Ch 10, then sl st in the same st. Work 16 sc into the ch-10 loop, then sl st into the base st. Fasten off. The loop stands about 0.5 in (1.3 cm) tall.
Attach the Ball
Find the center sc of the bottom edge, which is the 15th of the 29 bottom sc. Using the ball’s gray tail, ch 3. Pass the tail through the center sc and secure it with two small knots on the back. The ball should hang about 0.25 in (0.6 cm) below the hem. Weave in all ends.
Final Blocking
- Lightly mist the bell with water until it is damp, not soaked.
- Place it face up on the blocking mat.
- Pin the top of the loop. Then pin the dome so it measures about 1 in (2.5 cm) wide at Row 4.
- Pin the two bottom corners so the hem measures 3 in (7.6 cm) wide.
- Pin the bottom center so the body measures 3 in (7.6 cm) tall.
- Pin the lowest point of each scallop so the three fans curve evenly.
- Gently push each fan’s center up with your fingertip to keep its cupped, dimensional shape.
- Optional: spray lightly with fabric starch for a crisper ornament.
- Let it dry completely before unpinning. Leave the ball unpinned.
Final Quality-Control Checklist
- Row 12 has 25 sc and all 3 fans are complete.
- The border has 62 sc: 29 bottom, 14 per side, and 5 top.
- The body measures 3 in x 3 in (7.6 cm x 7.6 cm).
- The total height with the loop is about 3.5 in (8.9 cm).
- Gray accent rows sit evenly between the tiers.
- Each fan has 7 dc and is centered over its base.
- The loop is firmly anchored at the top center.
- The ball is about 0.5 in (1.3 cm) across and hangs at the bottom center.
- No tails show on the front.
Troubleshooting
Fan is off-center: Recount the base row. It must be 7, 13, or 19 sts, and each fan must have exactly 2 skipped sts on each side.
Sides look wavy: You probably placed only 1 sc in the dc row ends (Rows 6 and 9) or too many in the sc row ends. Recount for 14 sc per side.
Hem ruffles: Your Row 12 or border is too loose. Go down a hook size for the border only.
Hem curls upward: Your border is too tight. Go up a hook size for the border only.
Dome looks pointed: Make sure you worked 2 sc in each of the top corner chains.
Ball looks lumpy: Add more stuffing before Rnd 4, then roll it between your palms.
Fans lie flat: Re-block and push the fan centers up as they dry. Light starch helps them hold the shape.
Care
Hand wash in cool water, press out excess water in a towel, and dry flat, reshaping the fans. If you used starch, re-stiffen after washing.
Final Notes
The measurement chain is simple:
- Gauge of 7 sc/in
- Row 4 at about 1 in (2.5 cm)
- Row 7 at about 1.9 in (4.8 cm)
- Row 10 at about 2.7 in (6.9 cm)
- Row 12 at about 2.75 in (7.0 cm)
- After the 62-sc border, 3 in x 3 in (7.6 cm x 7.6 cm)
- With the loop, about 3.5 in (8.9 cm) tall
If you check each step, the finished bell will match. Optional: make several in different accent colors to hang as a set.
Happy crocheting!