

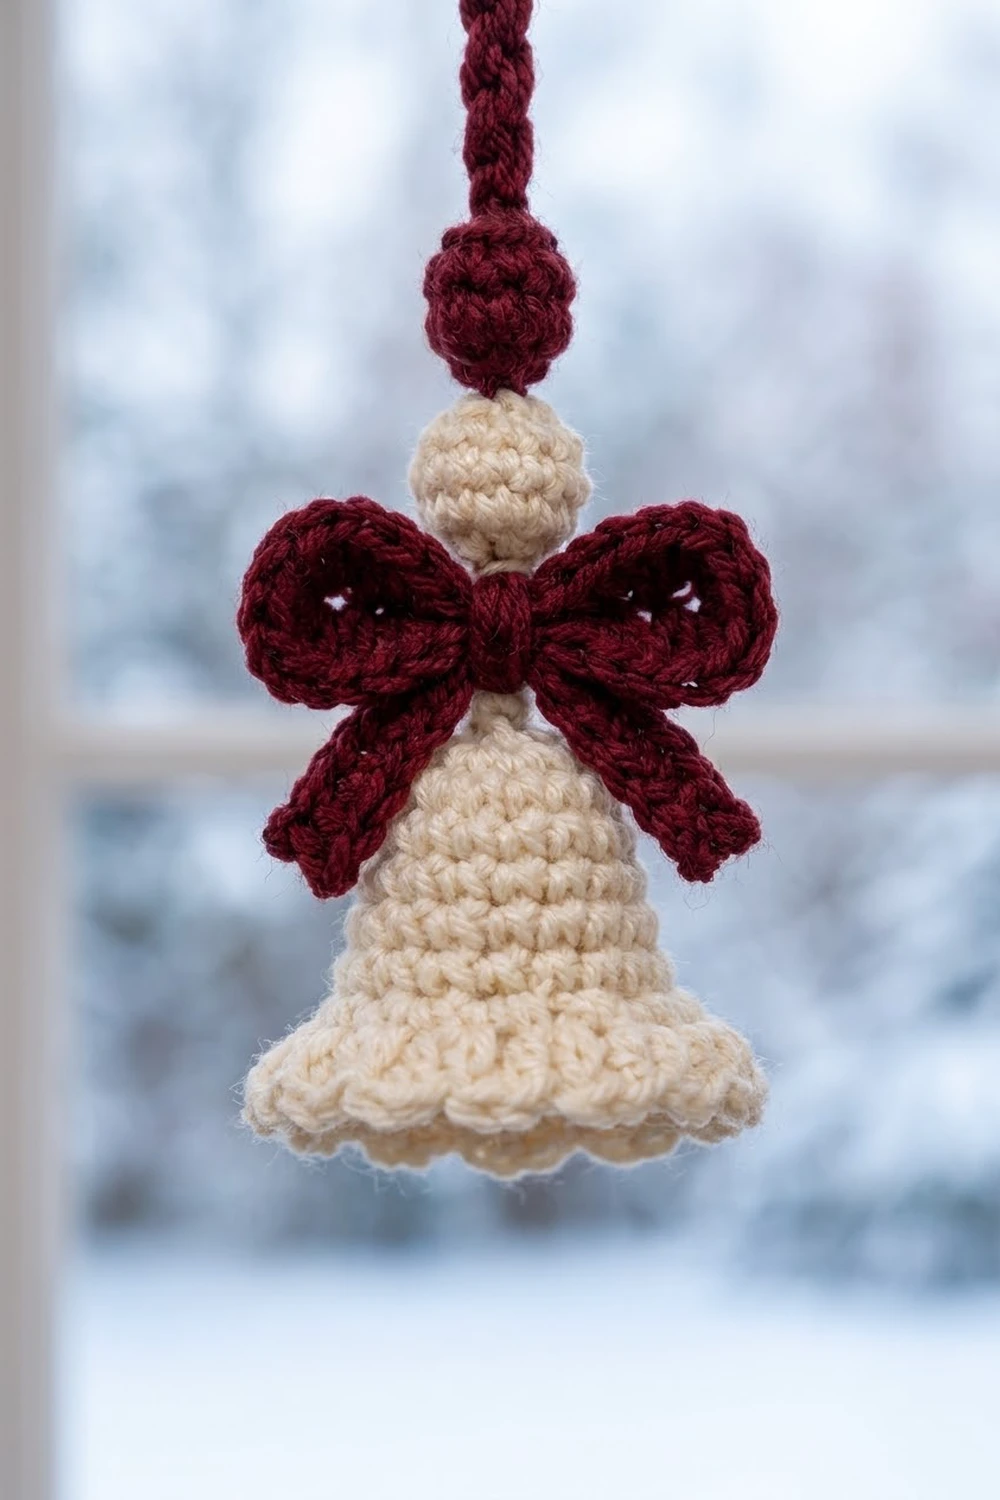
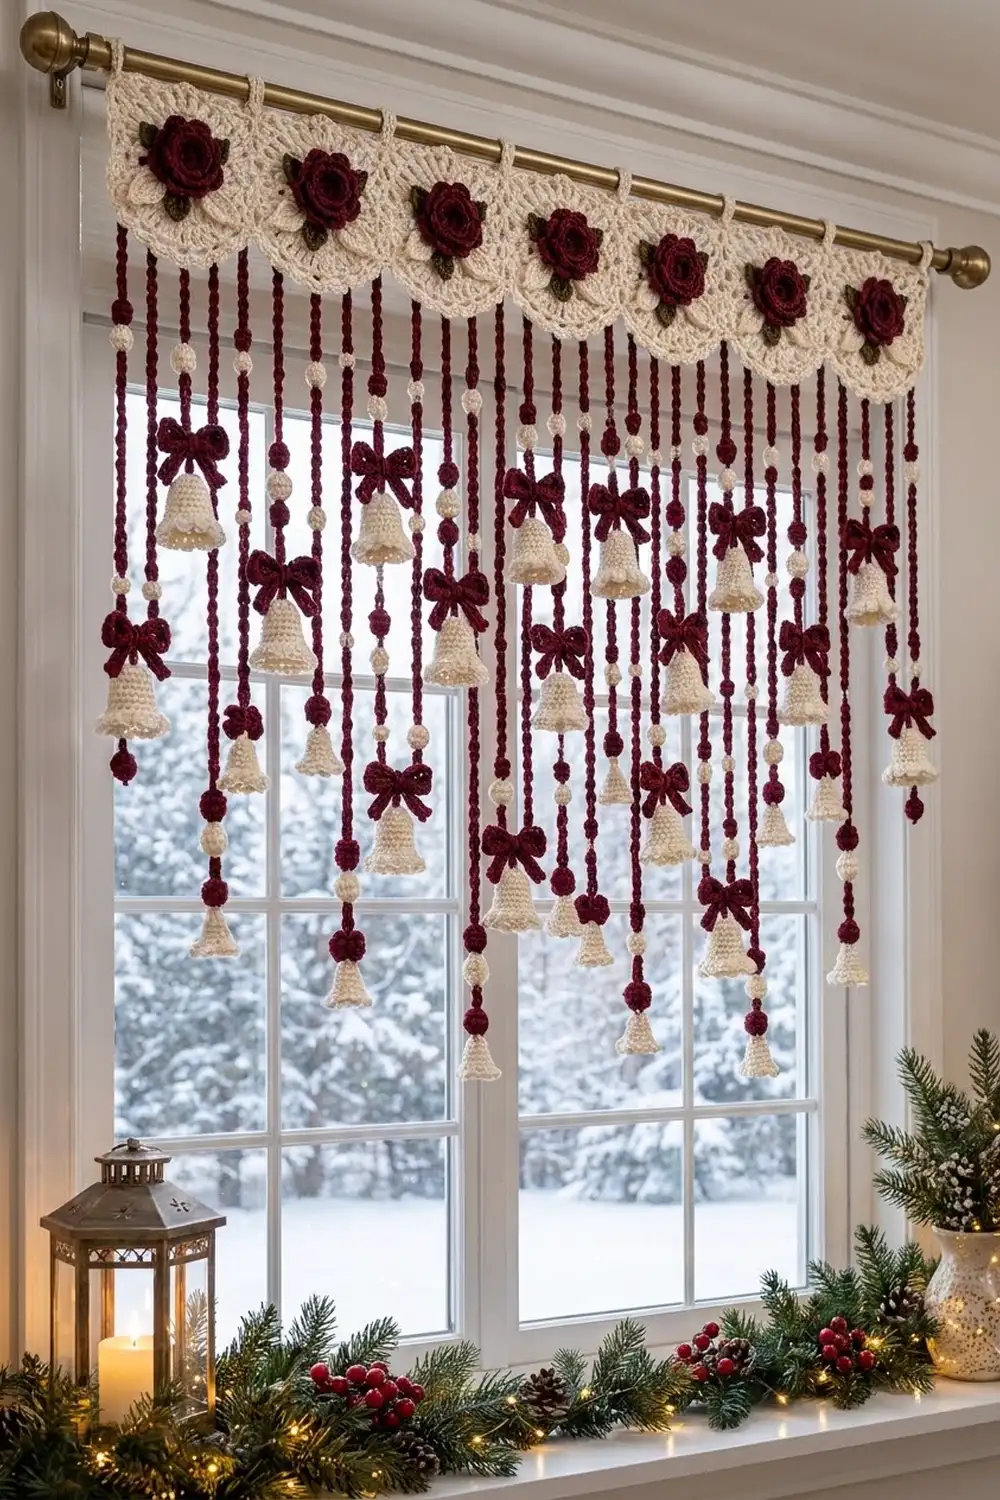
This valance hangs from a curtain rod across a window. A cream band of eight lace fan scallops runs along the top, and each scallop carries a burgundy rolled rose framed by cream and olive leaves. Below the band, seventeen burgundy cords hang down. Each cord holds cream and burgundy balls and ends in a cream bell with a burgundy bow.
The palette is cream, deep burgundy and olive green, so it looks Christmassy without shouting. It looks good against a snowy window, but it is just as nice with plain winter light behind it.
The pattern uses US crochet terms. The finished valance is 36 in (91.4 cm) wide. The band is 4 in (10.2 cm) deep, and the longest strands reach 28.25 in (71.8 cm) from the top edge.
You make eight semicircle fan motifs in rows and tack them together corner to corner. Then you work a five-row header straight across all eight flat edges, which joins them into one band. Roses and leaves are sewn on. Last, you make seventeen slip-stitch cords with their balls, bows and bells and sew them to the bottom edge of the band.
Finished Size and Construction
- Finished size: 36 in (91.4 cm) wide × 28.25 in (71.8 cm) at the longest strand
- Skill level: Intermediate
- Terminology: US crochet terms
- Yarn weight: DK / light worsted (weight 3) cotton
- Hooks: 4.0 mm (G-6) for the band and appliqués, 3.5 mm (E-4) for bells and balls
- Number of pieces: 8 fan motifs, plus appliqués and 17 strands
- Layout: 8 motifs in a single row
- Piece size: 4.5 in (11.4 cm) wide × 2.25 in (5.7 cm) deep
- Size before header: 36 in (91.4 cm) wide × 2.25 in (5.7 cm) deep
- Header (border) depth: 1.75 in (4.4 cm)
Materials
Pick a smooth mercerized or combed cotton, about 115 m per 50 g. Cotton gives crisp stitches and a bell that keeps its shape.
- Cream: 200 g / 460 m (motifs, header, large leaves, bells, cream balls)
- Burgundy: 150 g / 345 m (roses, cords, bows, burgundy balls)
- Olive green: 25 g / 58 m (small leaves)
These amounts include a margin of roughly 20%.
Tools:
- 4.0 mm (G-6) and 3.5 mm (E-4) hooks
- Tapestry needle
- 4 stitch markers
- Polyester fiberfill (a small handful)
- Rust-proof pins and a blocking mat
- Spray starch (optional, for the bells)
- 9 curtain clip rings
- Tape measure
Abbreviations (US Terms)
- ch – chain
- sl st – slip stitch
- sc – single crochet
- hdc – half double crochet
- dc – double crochet
- sc2tog – single crochet 2 together
- sp – space
- MR – magic ring
- RS – right side
Special stitch – Shell: 5 dc in the same stitch.
Slip-stitch cord: Chain the stated number. Then sl st in the back bump of the 2nd ch from the hook and in the back bump of every ch after that. This makes a firm, round cord that does not stretch.
Gauge and Checkpoints
Gauge (4.0 mm hook): 20 sc and 10 dc rows = 4.5 in (11.4 cm).
Cord gauge: 5 sl sts = 1 in (2.5 cm).
Make one fan motif before anything else and check it against these:
- After Row 2: 1.9 in (4.8 cm) across the flat edge
- After Row 4: 3.7 in (9.4 cm) wide, 1.85 in (4.7 cm) deep
- After Row 5: 4.5 in (11.4 cm) wide, 2.25 in (5.7 cm) deep
If your motif is bigger, go down 0.5 mm in hook size. If it is smaller, go up 0.5 mm. Each motif should be within 1/8 in (0.3 cm) of the target, because eight motifs multiply the error. Checkpoints for the band and strands are given in their own sections.
Fan Motif (make 8, cream, 4.0 mm hook)
Work in rows, turning at the end of each row. The flat edge is made of row ends and the ring. The curved edge becomes the scallop.
Row 1: MR, ch 3 (counts as dc), 6 dc in ring. Pull the ring snug but not closed. Turn. (7 dc)
Row 2: Ch 3 (counts as dc). Work 2 dc in each of the next 6 sts. Turn. (13 dc)
Row 3 (lace row): Ch 4 (counts as dc + ch 1). Dc in next st, ch 1, repeat from * 10 more times, then dc in the last st. Turn. (13 dc + 12 ch-1 sps = 25 sts)
The chains open up the lace and give this row its width, so you do not need any increases here.
Row 4: Ch 3 (counts as dc). Dc in each ch-1 sp and each dc across. Turn. (25 dc: 1 st per existing st + 0 added)
Row 5 (shell edge): Ch 1. Sc in the first st. Skip 1, shell in next st, skip 1, sc in next st, repeat from * 5 more times. (6 shells + 7 sc = 37 sts)
Check the math: 1 + (6 × 4) = 25 stitches used, which matches Row 4. Fasten off and weave in the ends.
The 4th sc of Row 5 is the lowest point of the curve. Mark it, because a strand hangs from it later.
Rose (make 8, burgundy, 4.0 mm hook)
Row 1: Ch 33. Work (dc, ch 2, dc) in the 6th ch from the hook. Skip 2 ch, (dc, ch 2, dc) in next ch, repeat from * 8 more times. Turn. (10 V-sts)
Row 2: Ch 3. Work 6 dc in the first ch-2 sp. Sc between V-sts, 7 dc in next ch-2 sp, repeat from * 8 more times. (10 petals of 7 dc, 9 sc)
Fasten off and leave a 12 in (30.5 cm) tail. Roll the strip from the starting end. Keep the first three petals tight for the center and let the outer petals open. Stitch through the base to hold the roll. The rose is about 2 in (5.1 cm) across.
Leaves (4.0 mm hook)
Large leaf (make 16, cream): Ch 9. Starting in the 2nd ch from the hook: sc, hdc, dc, dc, dc, hdc, sc. Work 3 sc in the last ch. Working along the other side of the chain: sc, hdc, dc, dc, dc, hdc, sc. Sl st to the first sc. (17 sts) The leaf is 1.75 in (4.4 cm) long.
Small leaf (make 16, olive): Ch 7. Starting in the 2nd ch from the hook: sc, hdc, dc, hdc, sc. Work 3 sc in the last ch. Working along the other side: sc, hdc, dc, hdc, sc. Sl st to the first sc. (13 sts) The leaf is 1.25 in (3.2 cm) long.
Assembling the Appliqués
The appliqués go on in three layers.
- Layer 1: Pin two large cream leaves pointing to 8 o’clock and 4 o’clock. Their bases should meet at the motif center, 1.1 in (2.8 cm) below the flat edge.
- Layer 2: Add two olive leaves on top, pointing to 10 o’clock and 6 o’clock.
- Layer 3: Center the rose over all the leaf bases.
Sew each layer down through the leaf bases and the rose base, keeping your stitches on the wrong side of the motif.
Bell (make 17, cream, 3.5 mm hook)
Work in continuous rounds.
- Rnd 1: MR, 6 sc. (6)
- Rnd 2: 2 sc in each st. (12)
- Rnd 3: Sc in each st. (12)
- Rnd 4: Sc, 2 sc in next, repeat 6 times. (18)
- Rnd 5: Sc in each st. (18)
- Rnd 6: Sc in next 2, 2 sc in next, repeat 6 times. (24)
- Rnd 7: Sc in each st. (24)
- Rnd 8: Sc in next 3, 2 sc in next, repeat 6 times. (30)
- Rnd 9: Sc in each st. (30)
- Rnd 10 (flare): Sc in next 2, 2 sc in next, repeat 10 times. (40)
- Rnd 11 (scallop rim): Sc in next, skip 1, 3 hdc in next, skip 1, repeat 10 times. Sl st to the first sc. (10 sc + 30 hdc = 40 sts, 10 scallops)
The bell is 2.25 in (5.7 cm) tall and 2.4 in (6.1 cm) across the rim.
Ball (3.5 mm hook; make 34 cream, 25 burgundy)
- Rnd 1: MR, 6 sc. (6)
- Rnd 2: 2 sc in each st. (12)
- Rnd 3: Sc in each st. (12)
- Rnd 4: Sc2tog 6 times. (6)
Stuff the ball firmly and close the hole. Each ball is 0.75 in (1.9 cm) across.
Bow (make 17, burgundy, 4.0 mm hook)
Loop band: Ch 20 and sl st to the first ch to form a ring, taking care not to twist the chain.
- Rnd 1: Ch 1, sc in each ch, then sl st to the first sc. (20 sc)
- Rnd 2: Ch 1, sc in each st, then sl st to the first sc. (20 sc)
Flatten the band so the join sits at the center back. That gives you two loops.
Tail strip: Ch 14. Hdc in the 3rd ch from the hook and in each ch across. (12 hdc)
Fold the strip into a V and place it behind the loops. Wrap the center 8 times with burgundy yarn and knot at the back. The bow is 2.25 in (5.7 cm) wide.
Strands (burgundy cord, 4.0 mm hook)
- Strand A (make 8): Ch 111, then work a slip-stitch cord. (110 sl sts = 22 in / 55.9 cm)
- Strand B (make 9): Ch 101, then work a slip-stitch cord. (100 sl sts = 20 in / 50.8 cm)
Leave a 10 in (25.4 cm) tail at both ends of each cord.
Each ball sits on the cord at a measured point, counted from the top of the cord. Sew it in place with burgundy thread stitched through the center of the ball and around the cord, so the cord looks like it passes straight through.
Strand A positions:
- Cream ball at 3 in (7.6 cm)
- Burgundy ball at 7 in (17.8 cm)
- Cream ball at 11 in (27.9 cm)
- Burgundy ball at 15 in (38.1 cm)
- Bell at 22 in (55.9 cm)
Strand B positions:
- Cream ball at 3 in (7.6 cm)
- Burgundy ball at 8 in (20.3 cm)
- Cream ball at 13 in (33.0 cm)
- Bell at 20 in (50.8 cm)
To attach each bell: Thread the bottom tail of the cord through the Rnd 1 ring of the bell. Knot it twice inside the crown and weave in the tail. Sew a bow onto the cord just above the bell.
Make All Pieces
- Cream: 8 fan motifs, 16 large leaves, 17 bells, 34 balls (16 on A strands + 18 on B strands)
- Burgundy: 8 roses, 17 bows, 25 balls (16 on A strands + 9 on B strands), 8 Strand A cords, 9 Strand B cords
- Olive: 16 small leaves
Layout grid (left to right):
HEADER:  160 sts straight across
MOTIFS:  M1  M2  M3  M4  M5  M6  M7  M8
STRANDS: B A B A B A B A B A B A B A B A B
Joining
Lay the motifs in a row, RS up, with the flat edges at the top. Where two motifs meet, the Row 5 end sc of one touches the Row 5 end sc of the next. Tack each pair of touching sc with 2 whipstitches in cream. That makes 7 tacks.
The header’s first row then joins the motifs for good. Every motif gives exactly 20 sc along its flat edge:
- 1 sc in the Row 5 end
- 2 sc in each of the Row 4, 3, 2 and 1 ends (8 sc)
- 2 sc over the bare ring strand at the center
- 2 sc in each of the Row 1, 2, 3 and 4 ends on the other side (8 sc)
- 1 sc in the Row 5 end
That is 1 + 8 + 2 + 8 + 1 = 20. Nothing is added at the seams. Go straight from the last sc of one motif into the first sc of the next.
Keep your tension even. If you pull tight over the tacks, the band will pinch there.
Checkpoint: After header Row 1, the band should measure 36 in (91.4 cm) wide.
Header (Border)
Border gauge: 20 sc = 4.5 in (11.4 cm). An sc row is 0.2 in (0.5 cm) deep and a dc row is 0.45 in (1.1 cm) deep.
Join cream at one outer top corner, with the RS facing you.
- Row 1: Ch 1. Work 20 sc across each motif as described above. Turn. (8 × 20 = 160 sc)
- Row 2: Ch 3 (counts as dc). Dc in each st across. Turn. (160 dc)
- Row 3: Ch 3 (counts as dc). Dc in each st across. Turn. (160 dc)
- Row 4: Ch 3 (counts as dc). Dc in each st across. Turn. (160 dc)
- Row 5: Ch 1. Sc in each st across. (160 sc)
Fasten off.
Depth: 0.2 + (3 × 0.45) + 0.2 = 1.75 in (4.4 cm).
Why the math works: 160 sc at 20 sc per 4.5 in (11.4 cm) gives 8 × 4.5 = 36 in (91.4 cm). The motif edges add no extra stitches, so the band stays flat. Because 160 ÷ 20 = 8, the clip ring spots (stitch 1, then every 20th st, and the last st) line up exactly with the 9 join points.
Attaching the Strands
Sew a Strand A to the marked bottom sc of each motif.
Sew a Strand B to each of the 9 corner points along the bottom of header Row 1: the two outer corners and the 7 tacked joins.
This spaces all 17 strands 2.25 in (5.7 cm) apart. The A strands start 2.25 in (5.7 cm) lower than the B strands and their cords are 2 in (5.1 cm) longer, so their bells hang 4.25 in (10.8 cm) lower.
Final Blocking
- Spray the band with water until it is damp, not wet.
- Pin the header straight to 36 in (91.4 cm) × 1.75 in (4.4 cm).
- Pin each motif to 2.25 in (5.7 cm) deep, putting one pin in each shell tip.
- Let the roses stand up. Do not flatten them.
- Stiffen the bells with starch, stand each one on a narrow bottle, and let it dry.
- Hang the strands while they are slightly damp so the cords straighten.
- Once everything is dry, clip on the 9 rings.
Final Quality-Control Checklist
- 8 motifs, each 4.5 in (11.4 cm) × 2.25 in (5.7 cm), with 6 shells
- Header rows 1–5 all have 160 sts
- Band is 36 in (91.4 cm) wide and 4 in (10.2 cm) deep
- Each rose sits 1.1 in (2.8 cm) below the flat edge, on two cream leaves and two olive leaves
- 17 strands, 2.25 in (5.7 cm) apart, in the order B A B … B
- Bells have 10 scallops and hang straight
- Every ball and bow is sewn through, not just tacked on the surface
- All ends are woven in
Troubleshooting
- Motif curls into a cone: Your tension in Row 2 is too tight. Loosen up, or go up a hook size for Rows 1–2.
- Motif ruffles: Make sure you used ch 1 in Row 3, not ch 2.
- Header waves or pinches: Count to exactly 20 sc per motif.
- Rose looks flat: Roll it tighter and stitch through the base more times.
- Bell is floppy: Use the 3.5 mm hook and starch it.
- Strands twist: Hang them damp with a small weight on each bell.
Care
Hand wash cool with mild soap, roll it in a towel, and dry it flat. Re-shape and re-starch the bells as needed.
Final Notes
Here is how the measurements build on each other. The 37-st shell edge on each motif is built on 25 sts. Each motif gives 20 header sts and is 4.5 in (11.4 cm) wide. Eight motifs make 160 sts, which is 36 in (91.4 cm). The header adds 1.75 in (4.4 cm), so the band is 4 in (10.2 cm) deep. Seventeen strands spaced 2.25 in (5.7 cm) apart finish with bells reaching 24 in (61.0 cm) and 28.25 in (71.8 cm) from the top.
Check your work at each stage and the valance will hang straight. Happy crocheting!