

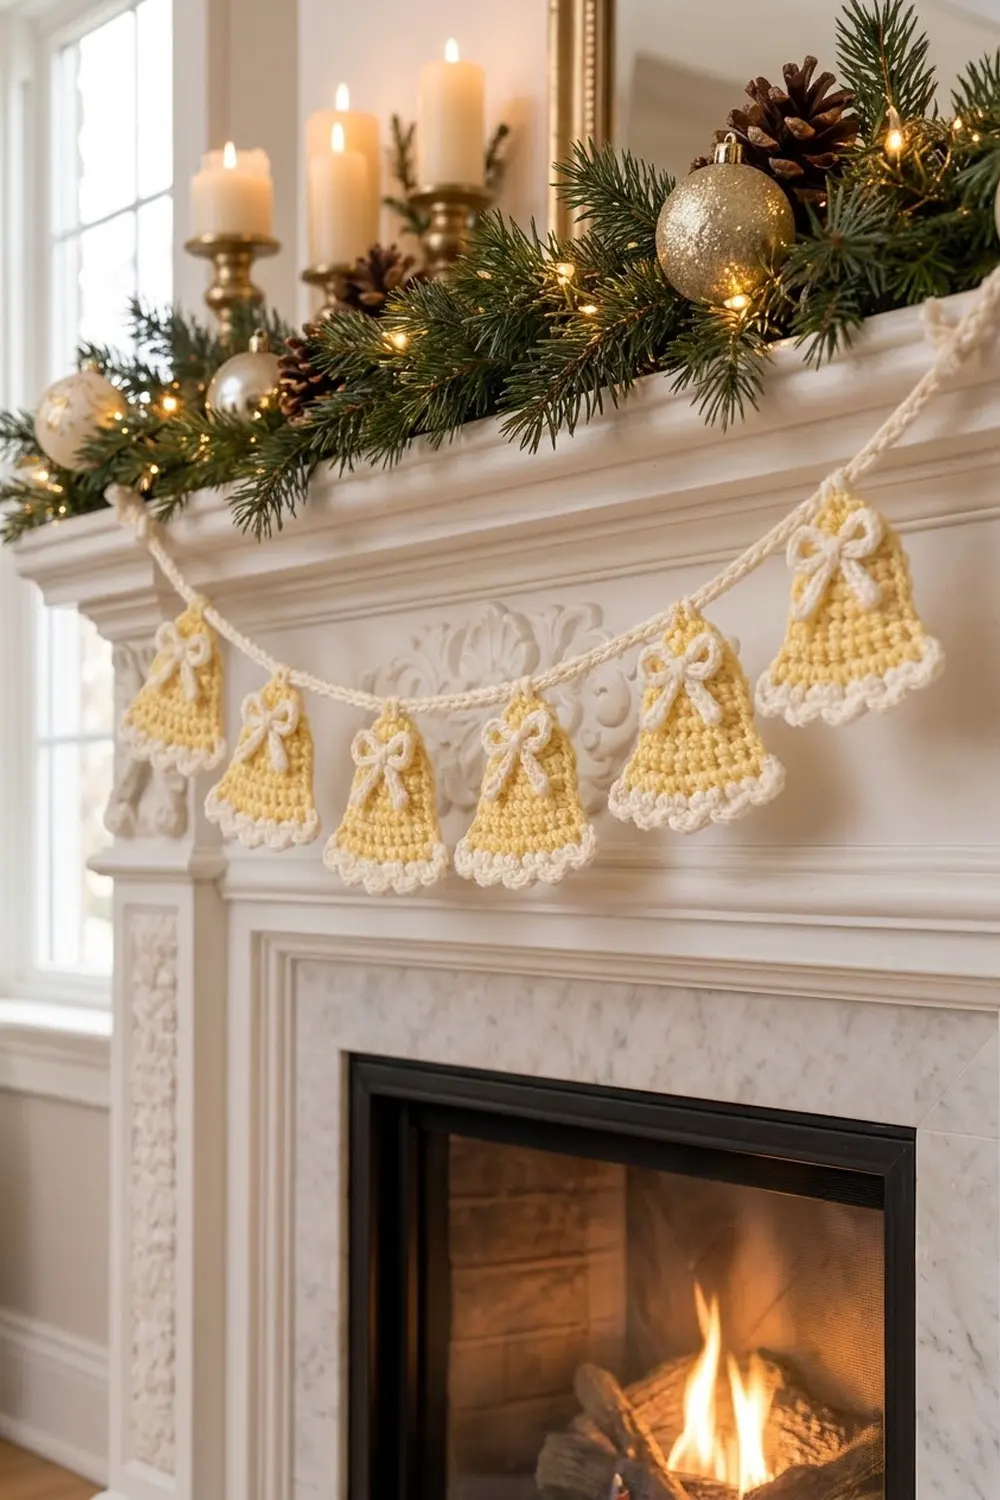
This garland is six soft, butter-yellow bells hanging from a cream cord. Each bell has a rounded dome top, gently flared sides and a cream scalloped hem. A cream chain bow sits just below the top of every bell, so the garland looks festive without being loud.
The palette is only two colors, pale yellow and cream, so it suits white mantels, natural greenery and gold or silver ornaments. The style is vintage and cottage-like, and it is quick to make. The pattern uses US crochet terms throughout.
Each finished bell measures about 3.6 in (9.1 cm) tall and 4.75 in (12.1 cm) across the scalloped hem. The finished garland is about 54.25 in (137.8 cm) long, including 12 in (30.5 cm) tails at each end for tying.
You crochet each bell flat in rows of single crochet from the top down. Then you add a two-row cream scalloped hem, sew on a slip-stitch bow and add a hanging loop. Finally, you crochet the cord and attach the bells as you chain, so there is no separate sewing step for the garland.
Finished Size and Construction
- Finished garland: 54.25 in (137.8 cm) long
- Bell size (finished): 3.6 in (9.1 cm) tall × 4.75 in (12.1 cm) wide at hem
- Skill level: Easy
- Terminology: US
- Yarn weight: Worsted (#4)
- Hook: 4.5 mm (US 7)
- Number of pieces: 6 bells, 6 bows, 1 cord
- Layout: 1 row of 6 bells, 6 in (15.2 cm) apart center to center
- Bell body before border: 4.25 in (10.8 cm) wide × 2.9 in (7.4 cm) tall
- Border depth: 0.7 in (1.8 cm)
Materials
Yarn: Use a smooth worsted-weight cotton or cotton blend. It gives crisp stitch definition and scallops that hold their shape. Acrylic also works but stays softer and fuzzier.
- Butter Yellow: 30 g, about 60 m
- Cream: 35 g, about 70 m
These amounts include a margin of roughly 25%, so you won’t run short if you need a gauge swatch or have to rip back a row.
Tools:
– 4.5 mm (US 7) crochet hook
– 5 mm (US H-8) hook (optional, for the cord’s slip-stitch row)
– Tapestry needle
– Scissors
– Rust-proof pins and a blocking mat or folded towel
– Spray bottle
– Ruler or tape measure
Abbreviations (US Terms)
- ch – chain
- sc – single crochet
- dc – double crochet
- sl st – slip stitch
- sk – skip
- st(s) – stitch(es)
- inc – 2 sc in the same stitch
- RS / WS – right side / wrong side
Special stitch – Shell: 5 dc in the same stitch.
Back-bump slip stitch: Turn the chain over and insert your hook under the small bump on the back of each chain, then slip stitch. This makes a firm, rounded cord.
Gauge and Checkpoints
Gauge: 16 sc and 18 rows = 4 in (10.2 cm) in rows of sc with the 4.5 mm hook.
Cord gauge: 20 ch = 5 in (12.7 cm).
Make one complete bell before you make the rest. Measure it at each checkpoint:
- After Row 3: 9 sts, 2.25 in (5.7 cm) wide
- After Row 9: 11 sts, 2.75 in (7.0 cm) wide, 2 in (5.1 cm) tall
- After Row 13: 17 sts, 4.25 in (10.8 cm) wide, 2.9 in (7.4 cm) tall
- After border: 3.6 in (9.1 cm) tall, 4.75 in (12.1 cm) across the hem
If the bell is too big, go down to a 4 mm hook. If it is too small, go up to a 5 mm hook. A difference of 0.25 in (0.6 cm) in width doesn’t matter for a garland. It only matters that all six bells match.
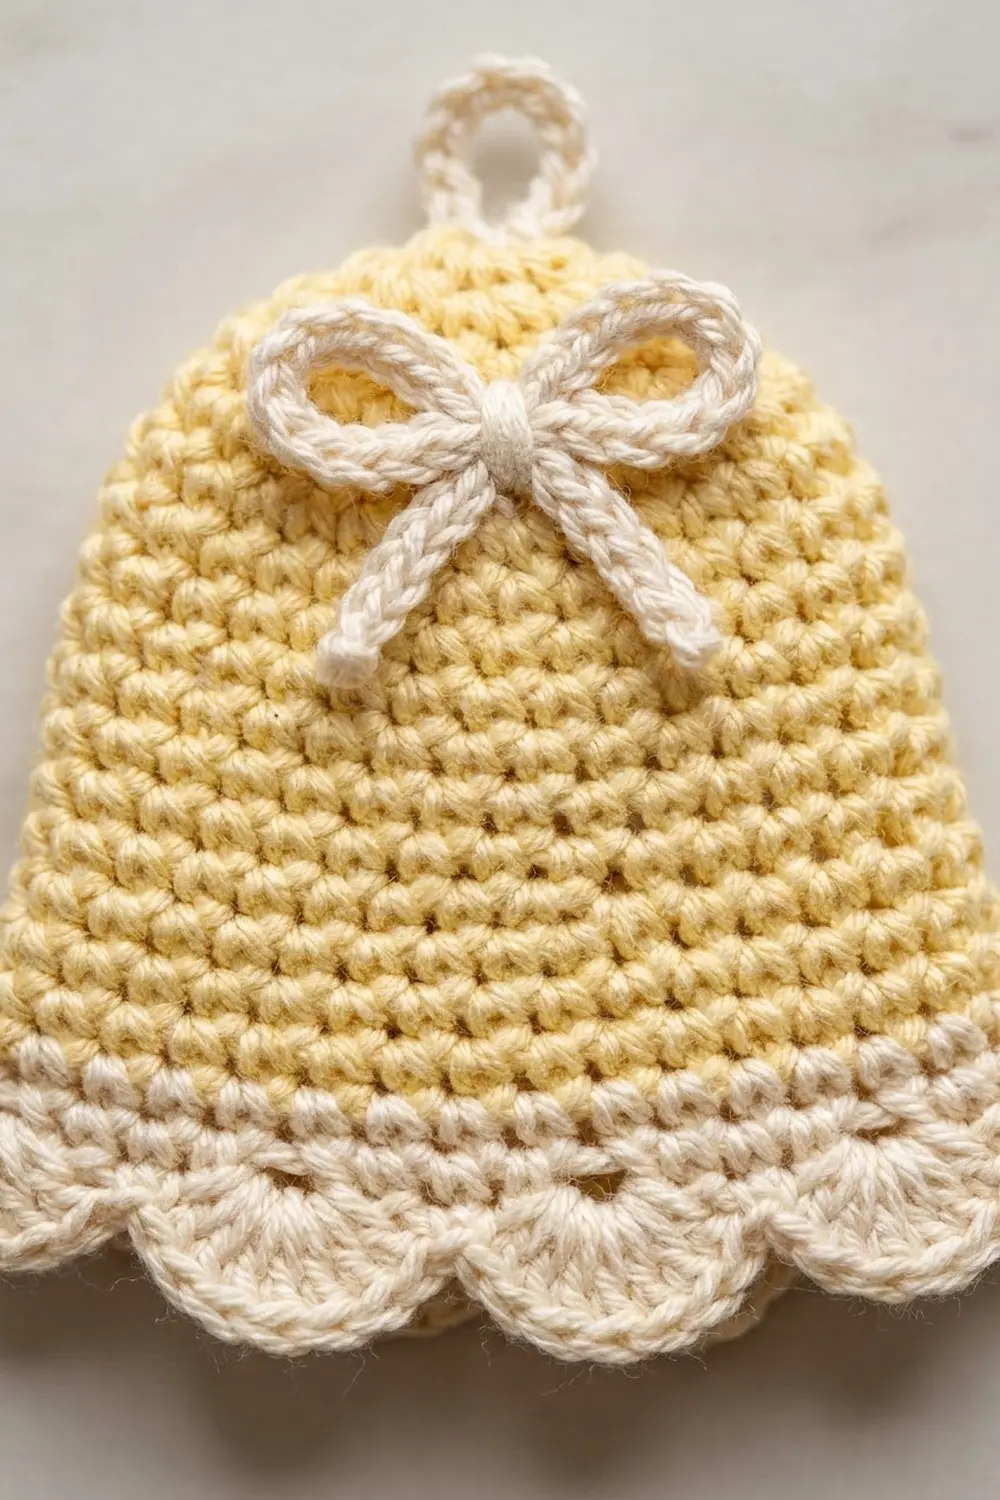
Bell Body (Make 6)
Use Butter Yellow. You work in rows and turn at the end of each row. The ch 1 at the start of a row doesn’t count as a stitch. Row 1 is the RS, so every odd row is a RS row.
Row 1 (RS): Ch 6. Sc in 2nd ch from hook and in each ch across. Turn. (5 sc)
Row 2: Ch 1, inc in first st, sc in next 3 sts, inc in last st. Turn. (7 sc)
Row 3: Ch 1, inc in first st, sc in next 5 sts, inc in last st. Turn. (9 sc)
These quick increases make the rounded dome top.
Rows 4–6: Ch 1, sc in each st across. Turn. (9 sc each row)
Row 7: Ch 1, inc in first st, sc in next 7 sts, inc in last st. Turn. (11 sc)
Rows 8–9: Ch 1, sc in each st across. Turn. (11 sc each row)
Row 10: Ch 1, inc in first st, sc in next 9 sts, inc in last st. Turn. (13 sc)
Row 11: Ch 1, sc in each st across. Turn. (13 sc)
Row 12: Ch 1, inc in first st, sc in next 11 sts, inc in last st. Turn. (15 sc)
Row 13 (RS): Ch 1, inc in first st, sc in next 13 sts, inc in last st. (17 sc)
Rows 12 and 13 both increase, one after the other. That is what makes the bell’s flared hem.
On the last yarn-over of the final sc, change to Cream. Cut Butter Yellow, leaving a 6 in (15.2 cm) tail. Turn.
The body uses 139 sc in total. Go straight on to the border in Section “Border: Scalloped Hem” below while the cream yarn is attached.
Bow Appliqué (Make 6)
Use Cream.
Cord: Ch 31. Sl st in the back bump of the 2nd ch from hook and in each ch across. (30 sl st)
The cord measures about 7.75 in (19.7 cm). Fasten off, leaving a 10 in (25.4 cm) tail.
Shape the bow:
1. Fold the cord into two loops, each about 0.75 in (1.9 cm) long. Leave two tails of about 0.75 in (1.9 cm) hanging down.
2. Wrap the long tail three times around the center to make the knot.
3. The finished bow is about 1.75 in (4.4 cm) wide × 1.5 in (3.8 cm) tall.
Placement: Center the bow knot over the 5th st of Row 4, which is the middle stitch. The loops should sit across Rows 3–5 and the tails should hang over Rows 6–8.
Sew the knot down firmly. Tack each loop and tail end down with one small stitch so the bow stays flat.
Hanging Loop (Make 6)
With the RS facing, join Cream to the free loop of the 3rd (center) foundation ch of Row 1. Ch 6, then sl st in the same ch.
Fasten off and weave in the ends. The loop is about 0.75 in (1.9 cm) long.
Make All Pieces
Totals:
– Butter Yellow: 6 bell bodies
– Cream: 6 borders, 6 bows, 6 hanging loops, 1 cord
Order for each bell: body → border → weave in the ends → bow → hanging loop. Block the bells (see Final Blocking) before you join them, because a flat bell is much easier to space evenly.
Layout grid (one row, left to right):
TAIL – BELL 1 – BELL 2 – BELL 3 – BELL 4 – BELL 5 – BELL 6 – TAIL
Joining: Cord and Bell Attachment
You crochet the cord and attach the bells to it at the same time. Each bell gets one attach stitch, which is a sl st worked into its hanging loop. The attach stitch counts as one stitch in the cord.
Attach st: Hold the bell with the RS facing you. Insert the hook through the bell’s hanging loop, yarn over, and pull through both the hanging loop and the loop on your hook.
Cord Row 1: With Cream and the 4.5 mm hook, work the cord as follows:
1. Ch 48 for the first tail.
2. Attach st to the next bell, then ch 23. Repeat from * to * 4 more times. This attaches Bells 1–5.
3. Attach st to Bell 6.
4. Ch 48 for the second tail.
Stitch count: 48 + 5 × (1 + 23) + 1 + 48 = 217 sts.
The attach stitches fall on sts 49, 73, 97, 121, 145 and 169. That puts them exactly 24 sts apart, which is 6 in (15.2 cm) at cord gauge.
Cord Row 2: Turn the cord over. Sl st in the back bump of the 2nd st from the hook and in each st across. Treat each attach st just like a ch. (216 sl st)
Fasten off.
Tension: Keep your chains loose and even. Slip stitches tend to shorten a cord. If Row 2 pulls the cord in, switch to the 5 mm hook for that row.
Size checkpoint:
– The full cord measures 54.25 in (137.8 cm).
– Bell 1 to Bell 6, center to center, measures 30 in (76.2 cm).
– The gap between neighboring hems is about 1.25 in (3.2 cm).
Border: Scalloped Hem
You work this border on each bell straight after Row 13, before the bells go on the cord. It covers the bottom edge only and does not go up the sides.
Border gauge: Each finished scallop spans about 0.95 in (2.4 cm). Five scallops make 4.75 in (12.1 cm).
Border Row 1 (WS): Ch 1. Work 2 sc in the first st, sc in next 4 sts, 2 sc in next st, sc in next 5 sts, 2 sc in next st, sc in next 4 sts, 2 sc in last st. Turn.
Count: 17 sts worked 1 per existing st, plus 4 extra = 21 sc. The increases fall on the 1st, 6th, 12th and 17th sts, which are symmetrical around the center (9th) st.
Border Row 2 (RS): Ch 1, sc in first st. Sk 1 st, shell in next st, sk 1 st, sc in next st. Repeat from * to * 4 more times. Fasten off.
Count: 5 shells (25 dc) + 6 sc = 31 sts.
Why the math works: Each scallop repeat uses 4 sts (skip, shell, skip, sc), and the row begins with 1 sc. Five scallops need 5 × 4 + 1 = 21 sts, which is exactly what Border Row 1 gives you. Both ends finish on an sc, so the hem is symmetrical.
The 4 extra stitches in Border Row 1 add the fullness that lets the hem flare past the 4.25 in (10.8 cm) body. Weave in all ends on the WS.
Final Blocking
- Lightly spray each bell with water until it is damp but not soaked.
- Pin the bell RS up to 3.6 in (9.1 cm) tall and 4.75 in (12.1 cm) across the hem.
- Pin each shell into a rounded arc, and make all five scallops the same size.
- Smooth the bow flat and pin the two loops open.
- Let the bells dry completely, which usually takes 2–4 hours.
- After joining, lay the cord out straight, mist it, pin it at 54.25 in (137.8 cm), and let it dry.
Final Quality-Control Checklist
- [ ] All 6 bells measure 3.6 in (9.1 cm) × 4.75 in (12.1 cm), within 0.25 in (0.6 cm)
- [ ] Each body has 17 sts in Row 13 and 13 rows in total
- [ ] Each hem has exactly 5 scallops, with an sc at both ends
- [ ] Bows are centered on Row 4 and match from bell to bell
- [ ] Hanging loops sit at the top center
- [ ] All bells face RS forward on the cord
- [ ] The bells are 6 in (15.2 cm) apart center to center
- [ ] The cord measures 54.25 in (137.8 cm) and has equal 12 in (30.5 cm) tails
- [ ] All ends are woven in securely
Troubleshooting
The bell leans to one side. You missed an increase at one end of a row. Count each row against the pattern. Every increase row adds exactly 2 sts.
The scallops are uneven or don’t fit. Border Row 1 must have 21 sc. Recount it before you start Row 2.
The hem cups instead of flaring. Your border tension is tighter than your body tension. Work the border with a 5 mm hook.
The hem ruffles. Your border is too loose. Work Border Row 2 with a 4 mm hook.
The cord is short. The sl st row has tightened it. Remake Row 2 with the 5 mm hook.
A bell hangs backward. Undo the attach st, turn the bell so the RS faces you, and work the attach st again.
The bow is floppy. Add tacking stitches at each loop tip and at each tail end.
Care
Spot-clean with mild soap and cool water, then lay flat to dry. Store the garland coiled loosely in a box so the bells stay flat.
Final Notes
The measurement chain is simple:
1. Gauge of 16 sc and 18 rows = 4 in (10.2 cm) gives a bell body of 4.25 in (10.8 cm) × 2.9 in (7.4 cm).
2. The 0.7 in (1.8 cm) scalloped border brings each bell to 3.6 in (9.1 cm) × 4.75 in (12.1 cm).
3. A cord gauge of 4 ch per inch puts the bells 6 in (15.2 cm) apart.
4. The 217-stitch cord finishes at 54.25 in (137.8 cm).
Check one bell first, keep all six matching, and the garland will hang evenly.
Happy crocheting!