

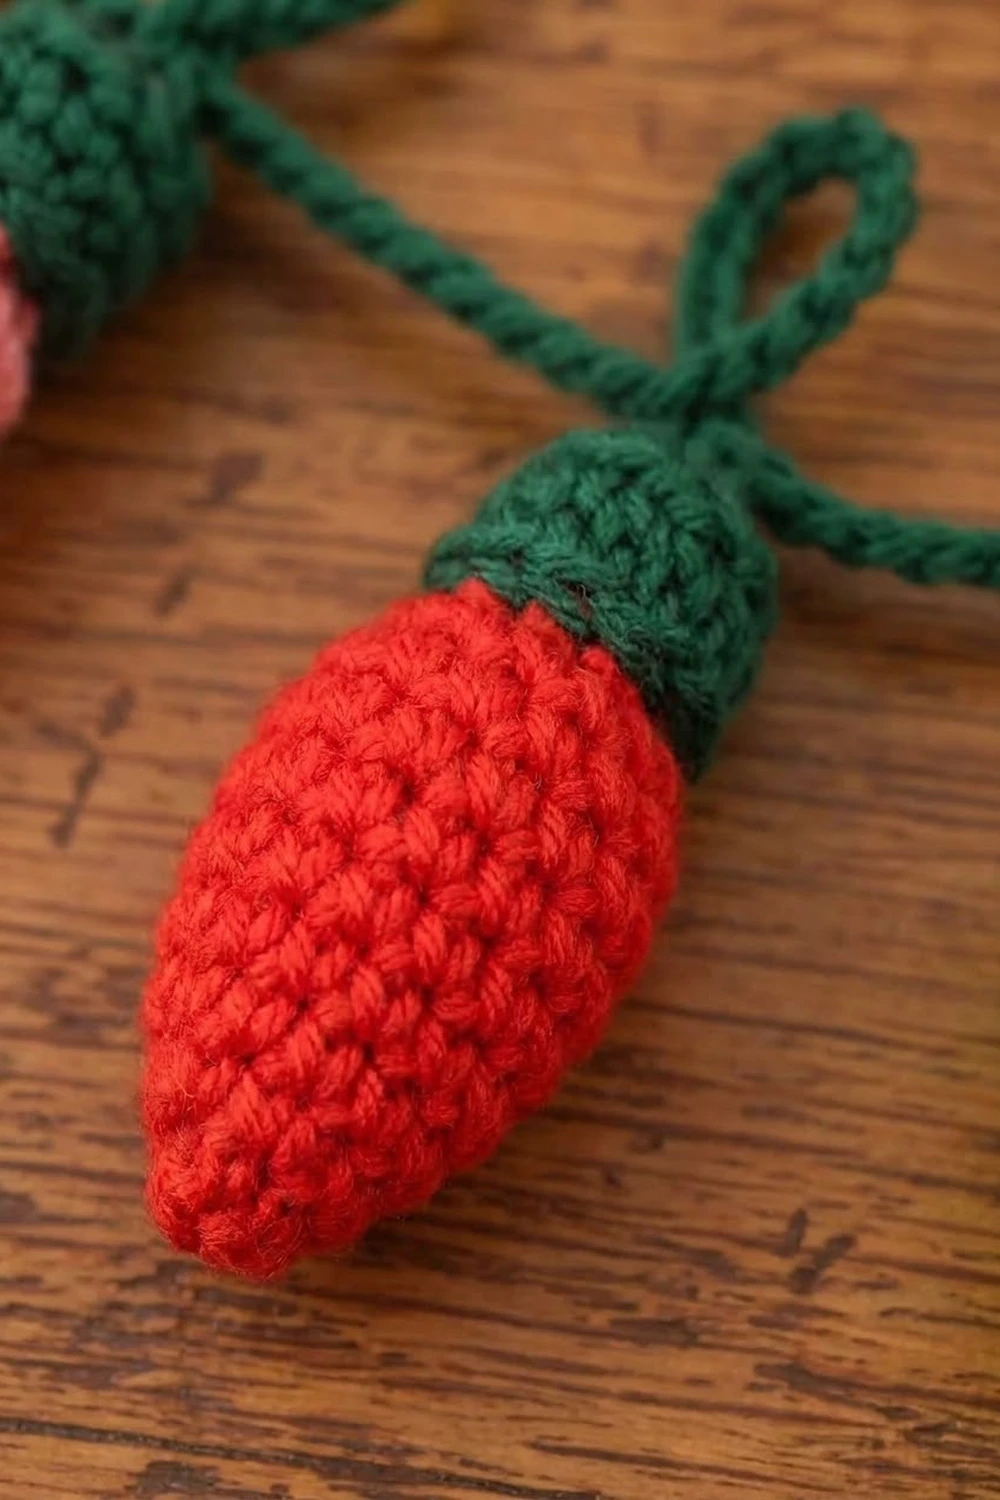
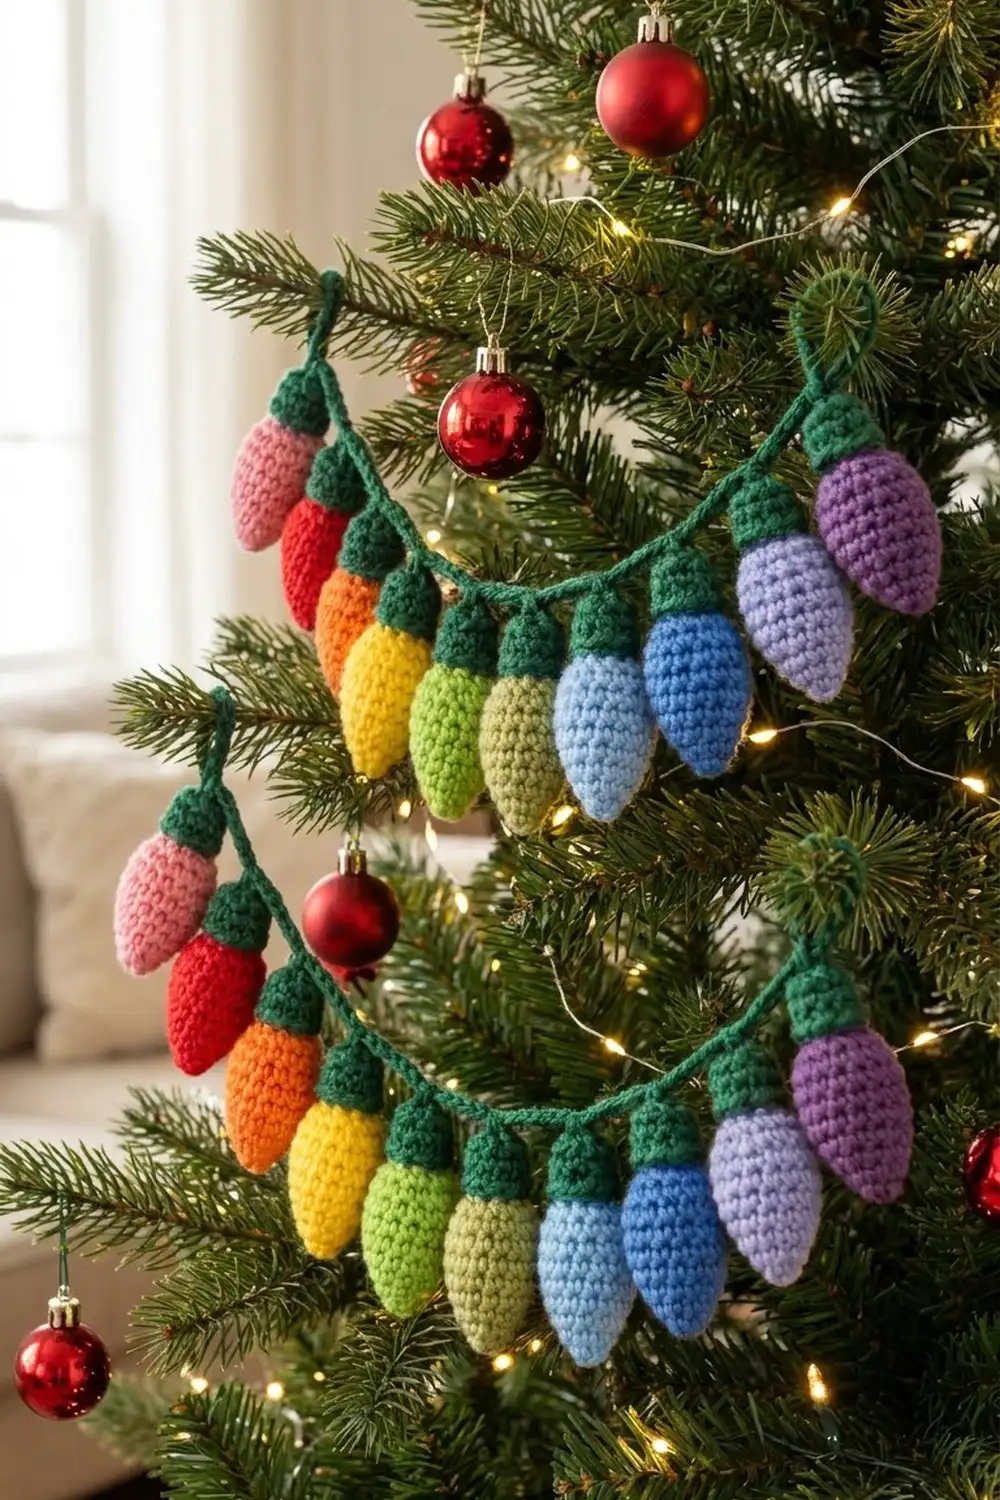
This garland is a single strand of ten small crochet light bulbs in a rainbow progression. Each bulb is stuffed and has a rounded, egg-like shape. A dark green cord with decorative loops connects them, like an old-fashioned string of holiday lights.
The bulbs run pink, red, orange, yellow, lime green, green, light blue, medium blue, periwinkle, and purple. Every bulb has a short dark green cap and a small hanging loop at the top. The green cord attaches through that loop. The bulbs are worked in tight single crochet, so the surface is smooth and the stuffing stays hidden.
The pattern uses US crochet terms. Each bulb measures about 3 in (7.6 cm) long and 1.5 in (3.8 cm) wide. The finished cord is 38 in (96.5 cm) long, including 8 in (20.3 cm) tie ends on both sides.
Each bulb is worked in the round from the pointed tip upward, using amigurumi-style increases and decreases. You change to green for the cap, close the top, and add a hanging loop. The cord is chained in one pass, and the bulbs are attached as you go. A slip-stitch edging pass then firms up the cord.
Finished Size and Construction
- Finished size: 38 in (96.5 cm) cord with 10 bulbs
- Skill level: Advanced beginner
- Terminology: US crochet terms
- Yarn weight: Worsted (#4)
- Hook: 3.5 mm (E-4). An optional 4.0 mm (G-6) is used for the edging pass.
- Number of pieces: 10 bulbs + 1 cord
- Layout: Single strand, 10 bulbs in a row
- Piece size: Each bulb is 3 in (7.6 cm) long × 1.5 in (3.8 cm) wide, not counting the loop
- Size before border: 38 in (96.5 cm) cord, 190 main-line stitches
- Border depth: The edging adds no length. It thickens the cord to about 0.25 in (0.6 cm).
Materials
Use smooth worsted-weight cotton or acrylic. Cotton gives crisp stitch definition. Acrylic is softer and a little more forgiving. All amounts below assume about 200 m per 100 g (2 m per gram).
Bulb colors (one bulb each):
- Pink: 5 g / 10 m
- Red: 5 g / 10 m
- Orange: 5 g / 10 m
- Yellow: 5 g / 10 m
- Lime Green: 5 g / 10 m
- Green (soft sage): 5 g / 10 m
- Light Blue: 5 g / 10 m
- Medium Blue: 5 g / 10 m
- Periwinkle: 5 g / 10 m
- Purple: 5 g / 10 m
Caps and cord:
- Dark Green: 20 g / 40 m
Tools:
- 3.5 mm (E-4) crochet hook
- 4.0 mm (G-6) hook (optional, for the edging pass)
- Polyester fiberfill, about 20 g
- Stitch marker
- Tapestry needle
- Scissors
All quantities include a margin of about 25% for gauge swatches and tails.
Abbreviations (US Terms)
- ch: chain
- sc: single crochet
- inc: 2 sc in the same stitch
- dec: invisible decrease (see below)
- sl st: slip stitch
- MR: magic ring
- BLO: back loop only
- st(s): stitch(es)
- rnd(s): round(s)
- yo: yarn over
Invisible decrease (dec): Insert the hook into the front loop of the next st. Then insert it into the front loop of the following st. Yo and pull through both front loops (2 loops on hook). Yo and pull through both loops. This makes 1 st from 2 and leaves no visible gap.
Work in continuous spiral rounds. Do not join or chain at the start of a round. Move your marker up every round.
Gauge and Checkpoints
Gauge: 5 sc and 5 rnds = 1 in (2.5 cm) in tight spiral sc with the 3.5 mm hook. For the cord, 5 ch = 1 in (2.5 cm).
Make one complete bulb before anything else. It is your gauge swatch. Check it at these points:
- After Rnd 6 (24 sts): The tip should be a firm cone with no holes.
- After Rnd 11: The tube circumference should be 4.8 in (12.2 cm). The length from the tip should be about 2.2 in (5.6 cm).
- Finished and stuffed: The bulb should be 3 in (7.6 cm) long and 1.5 in (3.8 cm) wide.
If the bulb is too big or stuffing shows through, go down to a 3.25 mm hook. If it is too small and stiff, go up to a 3.75 mm hook.
Matching the stitch count matters more than matching the exact size. The garland will still look right if every bulb matches the others.
Bulb Pattern (Make 10)
Start with the bulb color.
Rnd 1: 6 sc in MR. (6)
Rnd 2: [sc, inc] 3 times. (9)
Rnd 3: [2 sc, inc] 3 times. (12)
Rnd 4: [3 sc, inc] 3 times. (15)
Rnd 5: [4 sc, inc] 3 times. (18)
Rounds 2–5 add only 3 sts each. This slow growth creates the gently pointed tip.
Rnd 6: [2 sc, inc] 6 times. (24)
Rnds 7–11: sc in each st around. (24)
This is 5 rounds total and forms the widest part of the bulb.
Rnd 12: [2 sc, dec] 6 times. (18)
Stuff the bulb firmly now. Push the fiberfill down into the tip, and shape it with your fingers into a smooth egg.
Rnd 13: [sc, dec] 6 times. (12)
On the final yo of the last st, change to Dark Green. Cut the bulb color, leaving a 4 in (10.2 cm) tail.
Cap (Dark Green)
Rnd 14: In BLO, sc in each st around. (12)
Working in the back loop leaves a small ridge where the cap meets the bulb.
Rnds 15–16: sc in each st around. (12)
Top up the stuffing lightly. The cap should feel firm but not bulging.
Rnd 17: dec 6 times. (6)
Hanging Loop
Rnd 18: sl st in next st, ch 8, sl st in the same st. This makes one 8-ch loop.
Fasten off, leaving an 8 in (20.3 cm) tail. Thread the tail through the front loops of the remaining 6 sts. Pull tight around the base of the loop and knot.
Weave all tails into the bulb. Bury them inside the stuffing so they don’t show.
The finished hanging loop stands about 0.75 in (1.9 cm) tall.
Make All Pieces
Make 1 bulb in each color, for 10 bulbs total. All caps and loops are Dark Green.
- Bulbs per color: 1 each of Pink, Red, Orange, Yellow, Lime Green, Green, Light Blue, Medium Blue, Periwinkle, Purple
- Caps: 10 in Dark Green
- Cord: 1 in Dark Green
Layout grid (single strand, left to right):
STRAND: PINK  RED  ORANGE  YELLOW  LIME GREEN  GREEN  LIGHT BLUE  MEDIUM BLUE  PERIWINKLE  PURPLE
POSITION: 1    2     3       4         5          6        7           8           9         10
Before you join anything, line the bulbs up in this order. Compare their lengths, and remake any bulb that is more than 0.25 in (0.6 cm) off from the others.
Joining
The bulbs join to the cord as you chain it. Nothing is sewn.
Start: With Dark Green, leave a 6 in (15.2 cm) tail and ch 40. This is the first tie end, 8 in (20.3 cm) long.
Bulb unit (repeat for each bulb):
- Attach: Insert the hook through the bulb’s hanging loop. Yo, then pull through the hanging loop and the loop on your hook. This is 1 sl st.
- Decorative loop: ch 10, then sl st into the attach st. This is 1 sl st. It forms a 10-ch loop about 1 in (2.5 cm) tall above the bulb.
- Spacer: ch 10. Skip the spacer after bulb 10.
Work bulbs 1–10 in the layout order.
End: After bulb 10’s decorative loop, ch 40 for the second tie end. Do not fasten off yet.
Stitch-to-stitch logic: Only the main-line sts count toward the cord length. The decorative loop chains stand off the cord, so they are not counted.
- Each bulb unit puts 2 sl sts in the main line (attach + close).
- Bulb section: 10 units × 2 sl sts = 20 sl sts, plus 9 spacers × 10 ch = 90 ch. That is 110 sts = 22 in (55.9 cm).
- Tie ends: 2 × 40 ch = 80 ch = 16 in (40.6 cm).
- Main-line total: 110 + 80 = 190 sts = 38 in (96.5 cm).
Tension advice: Chain at an even, relaxed tension. Keep the attach sl st snug so the bulb doesn’t slide along the cord. If your chains run tight, use the 4.0 mm hook for the cord.
Size checkpoint: Lay the cord flat without stretching it. Bulb centers should be about 2.4 in (6.1 cm) apart, which is 12 main-line sts. The full cord should measure 38 in (96.5 cm).
Border: Cord Edging Pass
Border gauge: 5 sl st = 1 in (2.5 cm). This matches the chain gauge, so the cord does not shorten. Slip stitches naturally pull tight, so switch to the 4.0 mm hook if needed to hold this gauge.
Edging row: ch 1 and turn. This ch 1 is not counted. Work back along the main line toward the starting tail. Keep the bulbs and decorative loops on the same side as you go.
- Second tie end: sl st in the back bump of each of the 40 ch. (40)
- Each bulb unit: sl st in the closing sl st, then sl st in the attach sl st. (2 per unit, 20 total)
- Each spacer: sl st in the back bump of each of the 10 ch. (10 per spacer, 90 total)
- First tie end: sl st in the back bump of each of the 40 ch. (40)
Total: 40 + 20 + 90 + 40 = 190 sl sts.
Fasten off and weave the end into the tie for 1 in (2.5 cm). Knot each tie end 0.5 in (1.3 cm) from its tip, and trim the tails to 1 in (2.5 cm).
Why the math works: The edging places exactly 1 sl st into each of the 190 main-line sts. It skips the decorative loops completely. Since the edging gauge equals the chain gauge, the cord stays at 38 in (96.5 cm). The pass makes the cord rounder and stops it from stretching or twisting.
Final Blocking
- Lay the garland flat, with all bulbs hanging on the same side.
- Roll each bulb gently between your palms to even out the stuffing.
- Pinch each tip into a soft point.
- Mist the cord and decorative loops lightly with water. Do not soak the bulbs.
- Straighten the cord to 38 in (96.5 cm), with bulb centers 2.4 in (6.1 cm) apart.
- Shape each decorative loop into an open round loop about 1 in (2.5 cm) tall.
- Let it dry flat. Acrylic can be steamed lightly from above, without touching the iron to the yarn.
Final Quality-Control Checklist
- Every bulb ends at 24 sts in Rnds 7–11 and 12 sts in the cap.
- Each bulb measures 3 in (7.6 cm) × 1.5 in (3.8 cm).
- No stuffing shows through the stitches.
- The BLO ridge sits evenly at the base of every cap.
- Hanging loops are closed tightly at the base.
- The bulbs follow the rainbow layout order.
- Each bulb is attached with a sl st, and each has a 10-ch decorative loop.
- There are 9 spacers of 10 ch each.
- The edging pass has 190 sl sts.
- The cord measures 38 in (96.5 cm), and each tie end is 8 in (20.3 cm).
Troubleshooting
- Stuffing shows through: Go down a hook size. Use the invisible decrease, and stuff with small tufts rather than large clumps.
- Bulbs are lumpy: Roll them between your palms, and add stuffing in thin layers.
- Bulbs lean sideways: This is normal spiral bias. Steam lightly, then re-roll.
- Tips are too blunt: Pull the magic ring tighter, and push stuffing firmly into the tip before Rnd 13.
- The cord is shorter than 38 in (96.5 cm): The edging is too tight. Redo it with the 4.0 mm hook.
- Bulbs slide along the cord: Tighten the attach sl st, or sew one stitch through the hanging loop and the cord.
- Decorative loops flop over: Re-shape them while damp and let them dry flat.
- The cord twists: Make sure every edging sl st goes into the back bump. Then block flat.
Care
Spot clean with mild soap and cool water, and let the garland air dry flat. Do not machine wash, because the stuffing can shift and the cord may stretch.
Final Notes
The measurement chain is simple. The gauge is 5 sc = 1 in (2.5 cm), which gives a 24-st bulb that measures 3 in (7.6 cm) × 1.5 in (3.8 cm). On the cord, 12 main-line sts per bulb position spaces the bulbs 2.4 in (6.1 cm) apart.
The 190 main-line sts make a 38 in (96.5 cm) cord. The 190-st edging pass keeps that length exactly. Check one bulb first, keep your tension consistent, and all ten bulbs will line up neatly on the strand.
Happy crocheting!