

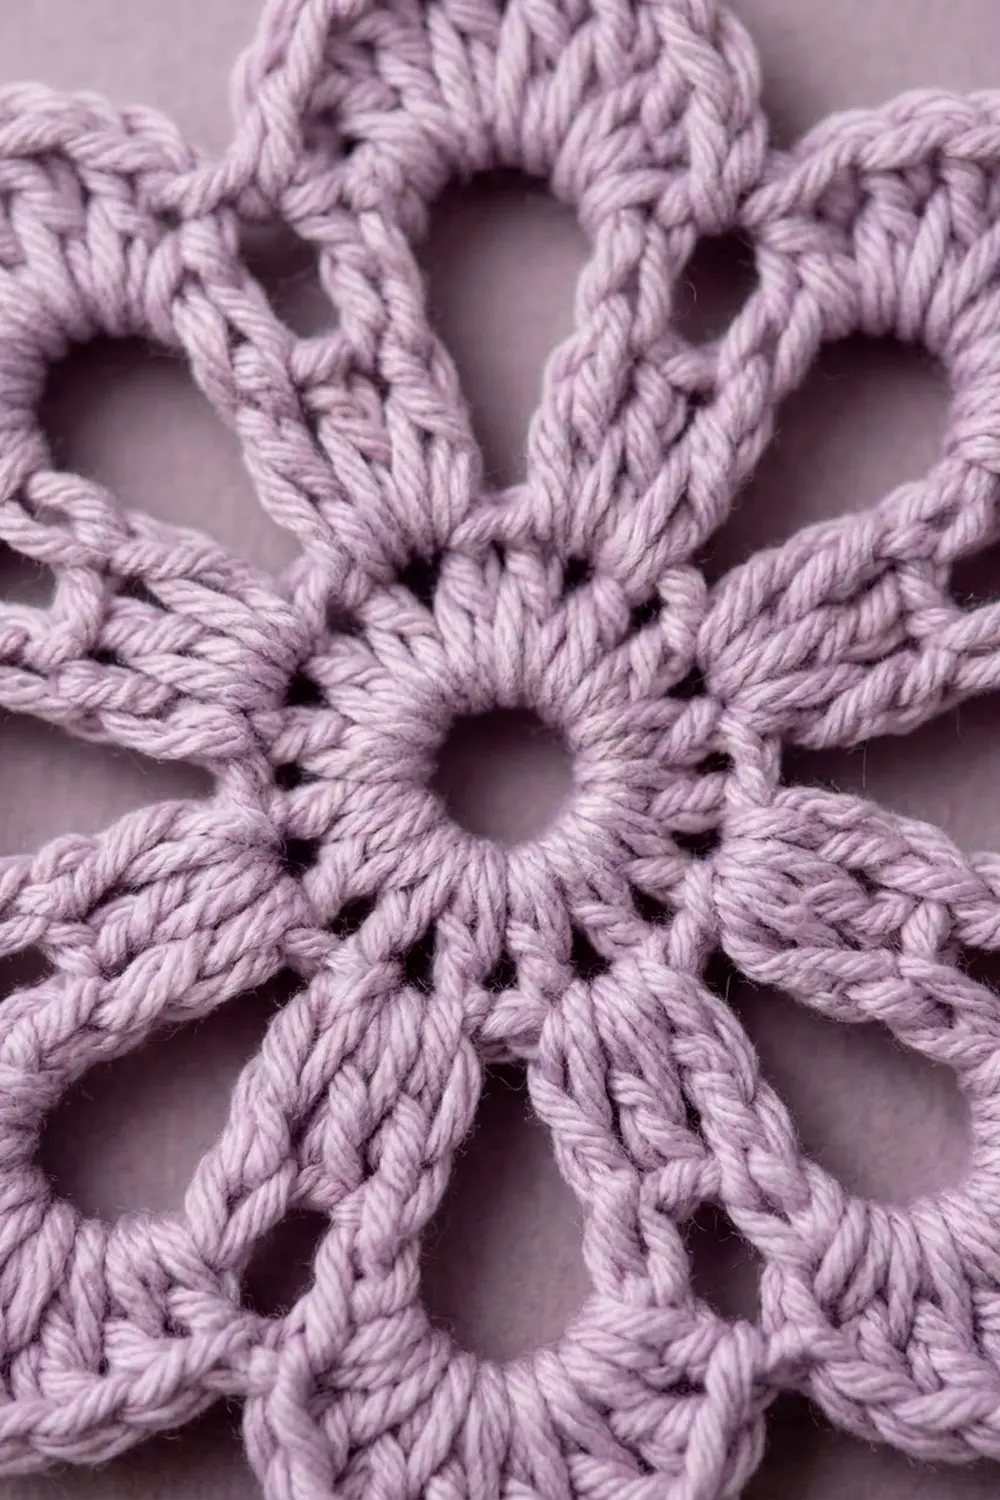
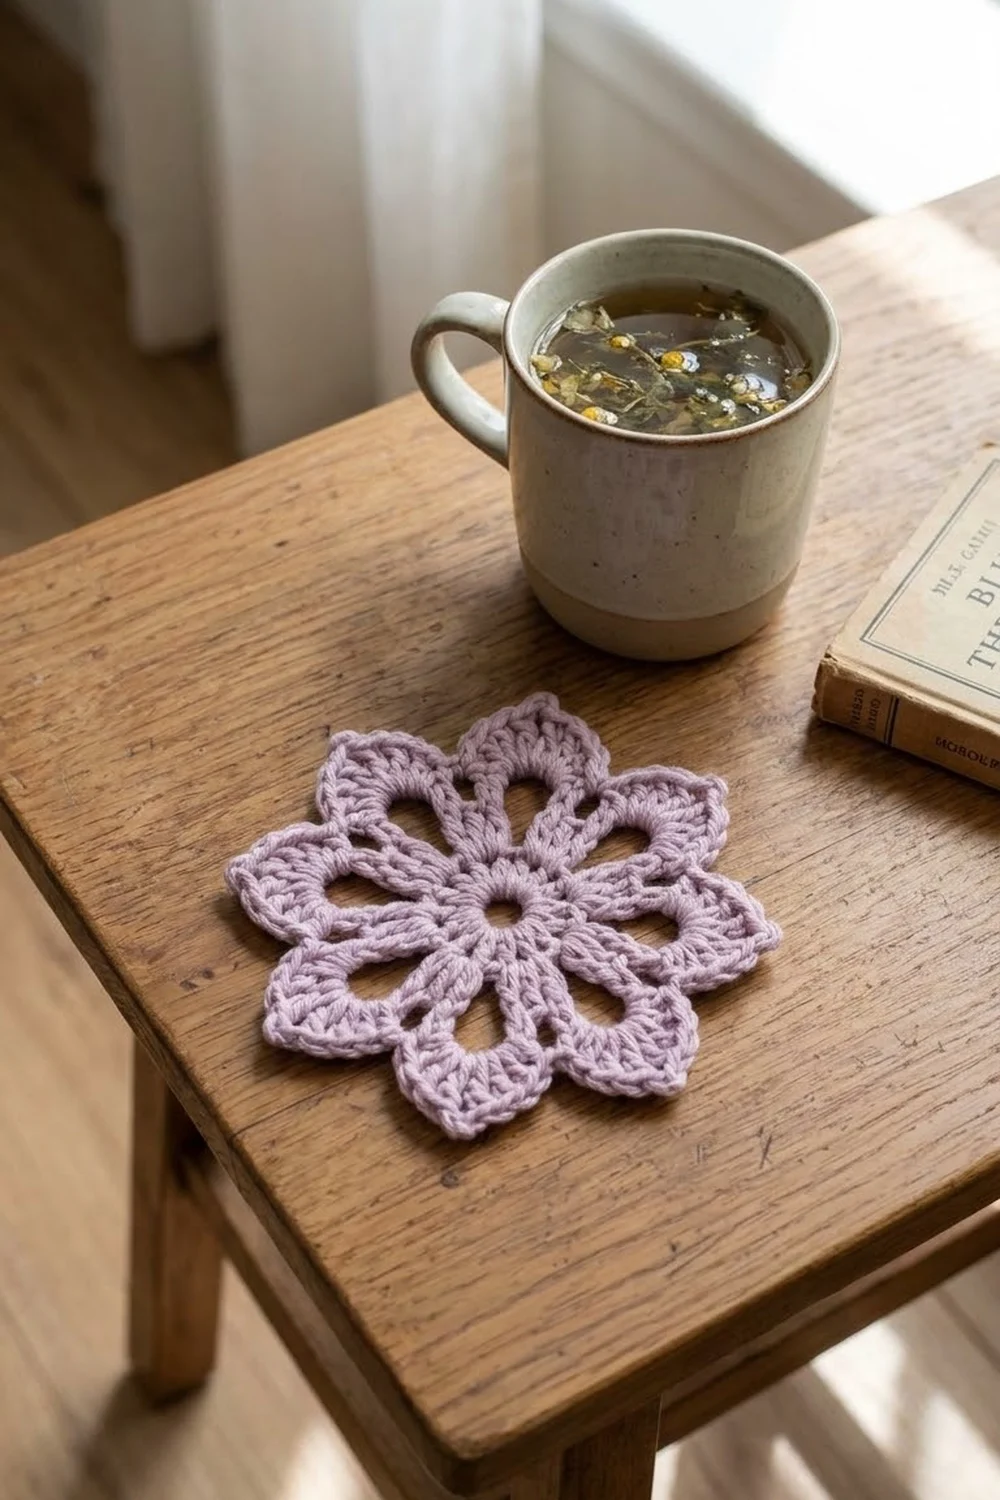
The Lavender Lace Bloom is a single six-petaled flower motif worked in a soft, dusty lavender. A small round center opens into six rounded petals. Each petal has an open eyelet at its heart, and a neat shell sits at every tip to give the flower a crisp, scalloped outline.
The look is delicate and lacy. Visible chain spaces keep the motif airy, and front post stitches act as raised spokes between the petals. A single solid color lets the stitch structure show clearly. It looks especially pretty in a matte cotton that holds its shape.
This pattern uses US crochet terms throughout. The finished motif measures 3.5 in (8.9 cm) from petal tip to opposite petal tip after blocking.
The motif is worked in the round from a magic ring in five rounds. Round 1 builds the center. Round 2 sets up six post-stitch spokes and six chain spaces. Rounds 3 and 4 build the open petals. Round 5 is the shell border that defines each petal. There is no sewing and no assembly. You make one piece and you are done.
Finished Size and Construction
- Finished size: 3.5 in (8.9 cm) tip to tip, after blocking
- Skill level: Advanced beginner
- Terminology: US crochet terms
- Yarn weight: DK (weight 3), cotton or cotton blend
- Hook: 3.5 mm (E-4)
- Number of pieces: 1
- Layout: Single motif, no joining
- Piece size: 3.5 in (8.9 cm) tip to tip
- Size before border (after Round 4): 3 in (7.6 cm) tip to tip
- Border depth: about 0.25 in (0.6 cm) added at each petal tip, so 0.5 in (1.3 cm) across the full diameter
Materials
Yarn: Choose a smooth DK-weight cotton or cotton blend. Cotton gives the best stitch definition and blocks into sharp petal tips. Avoid fuzzy or very splitty yarns, because they blur the eyelets and the post-stitch spokes.
- Dusty lavender (or mauve pink): 10 g, about 23 m (25 yd)
One motif uses roughly 6 g (about 14 m / 15 yd). The quantity above includes a margin for your test motif, the yarn tail, and any frogging.
Tools:
- 3.5 mm (E-4) crochet hook
- Tapestry needle
- Scissors
- Stitch marker (optional, for the first stitch of each round)
- Rust-proof pins and a blocking mat or folded towel
- Spray bottle with cool water
- Ruler or tape measure
Abbreviations (US Terms)
- ch – chain
- sl st – slip stitch
- sc – single crochet
- hdc – half double crochet
- dc – double crochet
- st(s) – stitch(es)
- sp – space
- sk – skip
- FPdc – front post double crochet
- FPsc – front post single crochet
- rep – repeat
Special stitches:
- FPdc (front post double crochet): Yarn over, insert the hook from front to back to front around the post of the indicated stitch, yarn over and pull up a loop, (yarn over and pull through 2 loops) twice.
- FPsc (front post single crochet): Insert the hook from front to back to front around the post of the indicated stitch, yarn over and pull up a loop, yarn over and pull through both loops.
- Shell: (hdc, 2 dc, ch 2, 2 dc, hdc) all worked in the same space.
Gauge and Checkpoints
Gauge is not critical for a single motif, but it controls the final size. Make one test motif first and measure it at each checkpoint below. Measure flat, without stretching.
- After Round 1: 1 in (2.5 cm) across
- After Round 2: 1.5 in (3.8 cm) across
- After Round 3: 2.25 in (5.7 cm) across the petal bases
- After Round 4: 3 in (7.6 cm) tip to tip
- After Round 5 and blocking: 3.5 in (8.9 cm) tip to tip
A tolerance of about 0.25 in (0.6 cm) at the final checkpoint is fine.
If your motif is too big: Change to a 3 mm hook and start again. Large Round 1 centers usually mean loose dc.
If your motif is too small: Change to a 4 mm (G-6) hook. Also check that you are not pulling the ch-3 spaces too tight, because they control how open each petal is.
If Round 1 cups or ruffles: Recheck your count. Exactly 12 dc should lie flat at this gauge.
Pattern
Round 1 (Center)
Make a magic ring.
Ch 3 (counts as first dc), work 11 dc into the ring. Pull the ring closed until a small hole remains, about the width of a pencil. Sl st to the top of the beginning ch-3.
Stitch count: 12 dc (including the beginning ch-3).
Checkpoint: 1 in (2.5 cm) across.
Round 2 (Spokes)
This round creates six raised spokes and six chain spaces. Each chain space becomes the base of one petal.
Ch 2 (does not count as a stitch). FPdc around the next dc (the first true dc after the ch-3). Ch 3, sk next dc.
FPdc around next dc, ch 3, sk next dc. Rep from * 4 more times.
You will place your FPdc around dc 1, 3, 5, 7, 9, and 11 of Round 1. The final ch 3 skips the beginning ch-3 of Round 1. Sl st to the top of the first FPdc.
Stitch count: 6 FPdc and 6 ch-3 spaces.
Checkpoint: 1.5 in (3.8 cm) across. The spokes should sit slightly raised on the front of the work.
Round 3 (Petal Bases)
Each petal base is a V-shaped group with an open ch-3 eyelet in the middle. This eyelet is the airy hole you see at the center of each petal.
Sl st into the next ch-3 sp. Ch 3 (counts as dc), dc in same sp, ch 3, 2 dc in same sp. FPsc around the next FPdc.
(2 dc, ch 3, 2 dc) in next ch-3 sp, FPsc around next FPdc. Rep from * 4 more times.
The last FPsc goes around the first FPdc of Round 2. Sl st to the top of the beginning ch-3.
Stitch count: 24 dc, 6 FPsc, and 6 ch-3 spaces. Each petal base has 2 dc on each side of its ch-3 eyelet.
Checkpoint: 2.25 in (5.7 cm) across the petal bases.
Round 4 (Petal Fill)
This round grows each petal outward and rounds its shape. Each petal side gets 4 dc, and the tip gets a new ch-3 space for the shell.
For reference, each Round 3 petal reads: outer dc, inner dc, ch-3 sp, inner dc, outer dc, then the FPsc between petals.
Sl st in the next dc (the inner dc of the first petal). Ch 3 (counts as dc). (3 dc, ch 3, 3 dc) in the ch-3 sp. Dc in next dc (the inner dc), sk next dc (the outer dc), sc in next FPsc.
Sk next dc (outer), dc in next dc (inner), (3 dc, ch 3, 3 dc) in ch-3 sp, dc in next dc (inner), sk next dc (outer), sc in next FPsc. Rep from * 4 more times.
Sl st to the top of the beginning ch-3.
Stitch count: 48 dc, 6 sc, and 6 ch-3 tip spaces.
Per petal, that is 4 dc per side (1 dc into the inner dc plus 3 dc into the eyelet), so 8 dc per petal. 8 dc × 6 petals = 48 dc.
Checkpoint: 3 in (7.6 cm) tip to tip. The petals should look rounded with a clear eyelet at each base. The sc between petals pulls the petals slightly apart and keeps their outlines distinct.
Border
Border Gauge
The border is worked at about 5 sc per inch (2.5 cm) along the petal sides. The 4 sc on each side span about 0.8 in (2.0 cm). This matches the dc spacing of Round 4, so the sides stay flat.
Round 5 (Shell Border)
This is a trim round, not a growth round. The sides convert 1-to-1: one sc goes into each existing dc. The extra stitches come from the shell added at each petal tip.
Ch 1. Sc in the same st as the join and in each of the next 3 dc (4 sc). Work a shell (hdc, 2 dc, ch 2, 2 dc, hdc) in the ch-3 tip sp. Sc in each of the next 4 dc. Sl st in the next sc (between petals).
Sc in each of next 4 dc, shell in ch-3 tip sp, sc in each of next 4 dc, sl st in next sc. Rep from * 4 more times.
The last sl st lands in the sc between petal 6 and petal 1. Fasten off, leaving a 6 in (15.2 cm) tail. Use an invisible join into the first sc of the round, then weave in the end.
Per petal side: 4 sc + 1 hdc + 2 dc = 7 stitches from the valley to the tip. The two sides meet at the ch-2 tip.
Per petal: 8 sc + 2 hdc + 4 dc = 14 stitches, plus 1 ch-2 tip and 1 sl st in the valley.
Round total: 48 sc (worked 1 per existing dc) + 36 shell stitches added (6 per tip × 6 tips) = 84 stitches, plus 6 sl st into the existing valley sc and 6 ch-2 tips.
Why the Math Works
Round 4 has exactly 4 dc on each petal side. Round 5 places exactly 4 sc on those 4 dc, so the sides neither gather nor ruffle. All extra stitches go into the tip spaces, where the petal needs to widen and come to a point.
The shell is symmetrical: hdc, 2 dc on one side of the ch-2, and 2 dc, hdc on the other. The tip therefore forms a centered point with a soft scallop on each side. The sl st in each valley keeps the valleys low and defined. The border adds about 0.25 in (0.6 cm) at each tip, taking the motif from 3 in (7.6 cm) to 3.5 in (8.9 cm).
Final Blocking
- Weave in all ends before blocking. Hide them along the back of the dc stitches, not through the eyelets.
- Lightly mist the motif with cool water until it is evenly damp, not dripping.
- Lay it face up on a blocking mat or folded towel.
- Pin the center hole so it stays round and centered.
- Pin each ch-2 tip outward, measuring 1.75 in (4.4 cm) from the center to each tip.
- Check that opposite tips are 3.5 in (8.9 cm) apart across all three diameters.
- Gently open each ch-3 eyelet with a fingertip so it forms a rounded teardrop.
- Pin each valley sl st slightly inward if the petals need more separation.
- Let it dry completely, at least several hours, before unpinning.
Final Quality-Control Checklist
- Six petals, evenly spaced around the center
- 12 dc in Round 1 with a small, neat center hole
- Six raised FPdc spokes visible on the front
- An open ch-3 eyelet at the base of every petal
- 4 sc on each petal side in Round 5
- A complete shell with a ch-2 point at every tip
- A sl st sitting in each valley between petals
- Tip-to-tip diameter of 3.5 in (8.9 cm), within 0.25 in (0.6 cm)
- All ends woven in securely and invisible from the front
- Motif lies flat, with no cupping or ruffling
Troubleshooting
Center hole is too big. Pull the magic ring tighter before joining Round 1, then weave the tail around the ring once more to secure it.
Motif cups upward. Your dc may be tight compared to your chains. Go up 0.5 mm in hook size, or loosen the ch-3 spaces in Rounds 2 and 3.
Motif ruffles. Recount Round 4. Extra dc in the eyelets is the most common cause. Each eyelet takes exactly 3 dc on each side of the ch-3.
Spokes do not stand out. Make sure you are working around the post from the front, not into the top of the stitch.
Petals look lopsided. Check that you skipped the outer dc on both sides of each petal in Round 4.
Tips look blunt. Keep the ch-2 at the shell’s point loose, then pin each tip firmly during blocking.
Eyelets close up. Chain loosely. A tight ch-3 pulls the petal base inward.
Care
Hand wash in cool water with mild soap, press out the water in a towel, and lay flat to dry. Re-pin the tips if they soften over time.
Final Notes
The Lavender Lace Bloom grows in a simple, predictable chain of measurements. Round 1 is 1 in (2.5 cm). Round 2 reaches 1.5 in (3.8 cm). Round 3 spans 2.25 in (5.7 cm) across the petal bases. Round 4 reaches 3 in (7.6 cm) tip to tip. The shell border and blocking bring the finished flower to 3.5 in (8.9 cm).
If each checkpoint matches, the final motif will too. The stitch counts are 12, then 6 spokes, then 24 dc, then 48 dc, then 84 border stitches. Each round sets up the next one cleanly.
Optional: if you enjoy this motif, you can make several and use them as appliqués or gift toppers. The pattern itself is one finished flower.
Happy crocheting!