

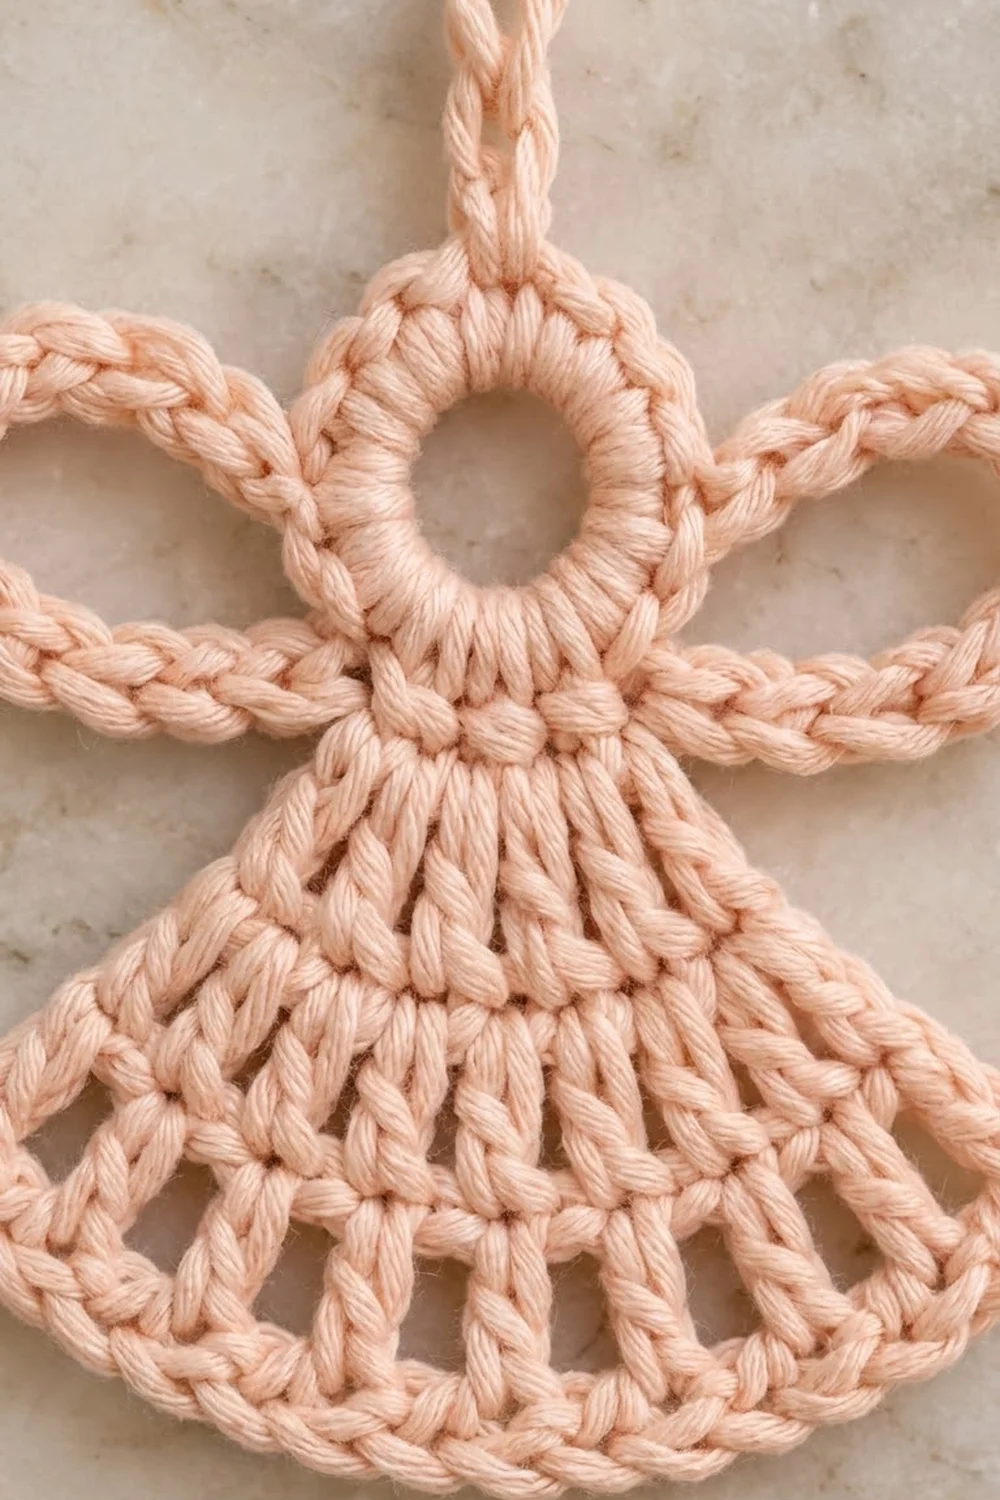
This little angel is a flat ornament made in one piece. It has a round head with an open center, two looped wings, and a bell-shaped skirt that ends in an airy row of tall posts. A corded edge along the hem gives it a crisp, rope-like outline.
The sample uses a single blush-peach shade. With only one soft color, the eye goes to the texture: the solid dc rows, the open gaps, and the plump wing loops. It works on a tree, as a gift tag, in a window, or on a wreath.
The pattern uses US crochet terms. The finished angel is 5 in (12.7 cm) wide and 5.5 in (14.0 cm) tall including the hanging loop. The body alone, from the top of the head to the hem, is 4.25 in (10.8 cm).
Construction is simple. You make a ring for the head, then work the skirt in turned rows off the bottom of the head. Next you add a two-row hem edging. Finally you join new yarn and add both wings and the hanging loop in one pass.
Finished Size and Construction
- Finished size: 5 in (12.7 cm) wide x 5.5 in (14.0 cm) tall including loop
- Skill level: Easy
- Terminology: US crochet terms
- Yarn weight: Worsted (#4), cotton or cotton blend
- Hook: 5.0 mm (US H-8)
- Number of pieces: 1 (single motif, no joining)
- Layout: Head at center top, a wing on each side of the head, skirt below, loop above
- Piece size (body): 4.25 in (10.8 cm) tall x 5 in (12.7 cm) wide at the hem
- Size before border: 3.75 in (9.5 cm) tall x 4.75 in (12.1 cm) wide at the hem
- Border depth: 0.5 in (1.3 cm), worked along the hem only
Materials
Choose a smooth worsted cotton or cotton blend with good stitch definition. Cotton holds the bell shape well after blocking and keeps the open gaps clean. A slightly plump, multi-ply yarn gives the wings their corded look.
Avoid fuzzy or brushed yarns. They blur the openwork row and hide the small hole in the head. Soft acrylic will also work, but it needs firmer blocking or a light stiffener to keep the bell crisp.
- Blush peach: 8 g, about 15 m per angel
This amount includes a margin of about 30% for your gauge swatch, yarn tails, and any ripping back.
Tools:
- 5.0 mm (US H-8) crochet hook
- Tapestry needle
- Scissors
- 4 locking stitch markers
- Blocking mat and rustproof pins
- Spray bottle with clean water
- Optional: fabric stiffener for a firmer ornament
Abbreviations (US Terms)
- ch – chain
- sl st – slip stitch
- sc – single crochet
- dc – double crochet
- tr – treble crochet
- sk – skip
- st(s) – stitch(es)
- sp – space
- rev sc – reverse single crochet
Special stitch – reverse sc (crab stitch): Work from left to right (if you crochet right-handed). Insert the hook into the next sc to the right, yarn over, and pull up a loop. Yarn over again and pull through both loops on the hook. Each stitch twists into a firm, rope-like cord.
Gauge and Checkpoints
Gauge: 14 dc and 8 rows = 4 in (10.2 cm) in a flat dc swatch. One dc row is 0.5 in (1.3 cm) tall. One tr row is about 0.75 in (1.9 cm) tall.
Because this is a single motif, your test piece is the head plus Skirt Row 1. Measure it before you go on. Keep your tension even and relaxed. Tight stitches make the bell cup, and loose stitches make the openwork row sag.
Checkpoints:
- Head (Rnd 1): 1.5 in (3.8 cm) across the outside, with a center hole of about 0.5 in (1.3 cm).
- After Skirt Row 3: the skirt is 1.5 in (3.8 cm) deep below the head and 3.75 in (9.5 cm) straight across the bottom.
- After Skirt Row 4: the skirt is 2.25 in (5.7 cm) deep and the hem is 4.75 in (12.1 cm) wide.
- After the border: the skirt is 2.75 in (7.0 cm) deep and the hem is 5 in (12.7 cm) wide.
- Wings: each loop is 1.75 in (4.4 cm) long and about 1 in (2.5 cm) wide.
If your angel is too big: go down to a 4.5 mm hook. Also check that your dc are not loose and loopy.
If your angel is too small: go up to a 5.5 mm hook. A tight angel often cups at the hem too, so a larger hook fixes both problems.
Small differences of 0.25 in (0.6 cm) can be eased out during blocking.
Pattern
Head
Ch 8, sl st in the first ch to form a ring.
Rnd 1: Ch 1, work 16 sc into the ring, sl st in the first sc to join. (16 sc)
Do not fasten off. Number the stitches 1 to 16, starting with the first sc. Stitches 1 to 5 sit at the bottom and will carry the skirt. Mark st 8, st 11, and st 14. Stitch 11 is at the top, directly opposite st 3. Stitches 8 and 14 are just above the sides of the head.
Checkpoint: the ring should lie flat and measure 1.5 in (3.8 cm) across. If it ruffles, redo it with 15 sc. If it cups, use 17 sc and move your markers so they are spaced evenly.
Skirt
The skirt is worked in turned rows across stitches 1 to 5 only.
Row 1: Ch 3 (counts as dc), dc in the same st, 2 dc in each of the next 4 sts, turn. (10 dc)
This is a growth row: each of the 5 head stitches gets 2 dc.
Row 2: Ch 3 (counts as dc), dc in the first st, dc in the next st, 2 dc in the next st, dc in the next st 4 times, turn. (15 dc)
Check: 1 + 1 + (4 x 2) = 10 stitches used, and 2 + 1 + (4 x 3) = 15 dc made.
Row 3: Ch 3 (counts as dc), dc in the next st, 2 dc in the next st, dc in each of the next 2 sts 4 times, dc in the last st, turn. (19 dc)
Check: 1 + 1 + (4 x 3) + 1 = 15 stitches used, and 1 + 1 + (4 x 4) + 1 = 19 dc made.
Checkpoint: the skirt is 1.5 in (3.8 cm) deep and 3.75 in (9.5 cm) straight across. These three dc rows make the solid upper part of the bell.
Row 4 (openwork): Ch 6 (counts as tr and ch 2), sk the next st, tr in the next st, ch 2, sk the next st 8 times, tr in the last st, turn. (10 tr, 9 ch-2 sps)
Check: the tr go into stitches 1, 3, 5, 7, 9, 11, 13, 15, 17, and 19. That gives 10 posts with 9 open gaps between them and uses all 19 stitches.
Checkpoint: the skirt is 2.25 in (5.7 cm) deep and the hem is 4.75 in (12.1 cm) wide. Do not fasten off; the border starts here.
Border
The border is worked along the hem only, so there is just one edge to count. The side edges of the skirt are left as they are.
Border gauge: 7 sc = 2 in (5.1 cm) along the curve of the hem. This matches the 3.5 stitches per inch of the main gauge.
Border Row 1 (trim row): Ch 1, sc in the first tr, 2 sc in the next ch-2 sp, sc in the next tr 9 times. The last sc goes in the 4th ch of the beginning ch-6. Do not turn. (28 sc)
Count: 10 sc worked 1 per existing tr + 18 sc added in the spaces (9 spaces x 2) = 28 sc.
Border Row 2 (corded edge): Ch 1, then work from left to right with 1 rev sc in each sc across. (28 rev sc)
Fasten off and weave in the end.
Why the math works: Row 4 has 10 posts and 9 spaces. Each post takes 1 sc and each ch-2 space takes 2 sc, so the hem holds 28 sc. At 3.5 sc per inch, 28 sc cover 8 in (20.3 cm) of curved hem, which is the length of the outer curve of the openwork row. That is why the edge lies flat instead of pulling in or ruffling. Border Row 2 puts 1 rev sc into each of those 28 sc, so the count stays at 28.
Checkpoint: the skirt is 2.75 in (7.0 cm) deep, the hem is 5 in (12.7 cm) wide, and the body is 4.25 in (10.8 cm) tall.
Wings and Hanging Loop
You add all three in one pass along the top of the head, using new yarn.
Wing 1: Join yarn with a sl st in st 8. Ch 16, then sl st in the same st 8 to form a loop. Work 16 sc into the ch-16 loop so the chain is fully covered. Sl st in st 8 again. (16 sc)
Covering the chain with sc gives the wing its thick, corded look and keeps the center of the loop open.
Move to the top: Sl st loosely in st 9, st 10, and st 11.
Hanging loop: Ch 12, then sl st in the 8th ch from the hook to form a small ring. Sl st in each of the remaining 4 ch, working back down toward the head. Sl st in st 11. (4-ch stem + small chain ring)
Move to the other side: Sl st loosely in st 12, st 13, and st 14.
Wing 2: Ch 16, then sl st in the same st 14 to form a loop. Work 16 sc into the loop so the chain is fully covered. Sl st in st 14. (16 sc)
Fasten off and weave in all ends.
Checkpoint: each wing is 1.75 in (4.4 cm) long, so the wingspan is 1.75 + 1.5 + 1.75 = 5 in (12.7 cm). The hanging loop adds 1.25 in (3.2 cm), for a total height of 5.5 in (14.0 cm).
Head stitch summary: sts 1 to 5 hold the skirt, st 8 and st 14 hold the wings, and st 11 holds the loop. Every one of the 16 sc has a set job.
Final Blocking
- Weave in every end before you block.
- Spray the angel with clean water until it is damp but not dripping.
- Lay it face up on the blocking mat.
- Pin the top of the head and the center of the hem so the body measures 4.25 in (10.8 cm) tall.
- Pin the two corners of the hem so it measures 5 in (12.7 cm) wide, easing the bell into a smooth curve.
- Pin through each of the 9 openwork gaps so they open evenly.
- Shape each wing into a teardrop 1.75 in (4.4 cm) long and pin the tip.
- Pin the small hanging ring open.
- For a stiff ornament, brush on fabric stiffener now.
- Let it dry completely, at least 12 hours, before you remove the pins.
Final Quality-Control Checklist
- The head has 16 sc and an open center hole of about 0.5 in (1.3 cm).
- The skirt rows have 10, 15, and 19 dc, then 10 tr with 9 spaces.
- The hem edging has 28 sc and 28 rev sc.
- Both wings have 16 sc and are the same length, 1.75 in (4.4 cm).
- The wings sit at st 8 and st 14, level with each other.
- The hanging loop sits at st 11, centered above the skirt.
- The body is 4.25 in (10.8 cm) tall and 5 in (12.7 cm) wide.
- The overall height with the loop is 5.5 in (14.0 cm).
- All ends are woven in and hidden from the front.
Troubleshooting
The head ring cups or ruffles. Change to 15 or 17 sc, or change your hook by 0.5 mm.
The skirt is lopsided. Recount Row 1. It must start in st 1 and end in st 5 so the skirt is centered under st 3.
The hem ruffles. Your sc are loose. Use a 4.5 mm hook for the border rows only.
The hem pulls in or cups. Your sc are tight. Use a 5.5 mm hook for the border rows only.
The openwork gaps are uneven. Make every ch-2 the same size, and pin each gap during blocking.
The wings twist. Check that the ch-16 was not twisted before you joined it, and work every sc from the front.
The wings look thin. Pack the sc closer together, or add 1 or 2 extra sc to each loop.
The hanging loop leans. Pull the sl sts on the stem snug, and block the loop pointing straight up.
The crab stitch edge looks flat. Keep the loops a little loose and make sure you are working to the right, not the left.
Care
Hand wash in cool water with mild soap, press the water out in a towel, and dry flat, reshaping as you go. If the angel has been stiffened, only dust it; do not wash it.
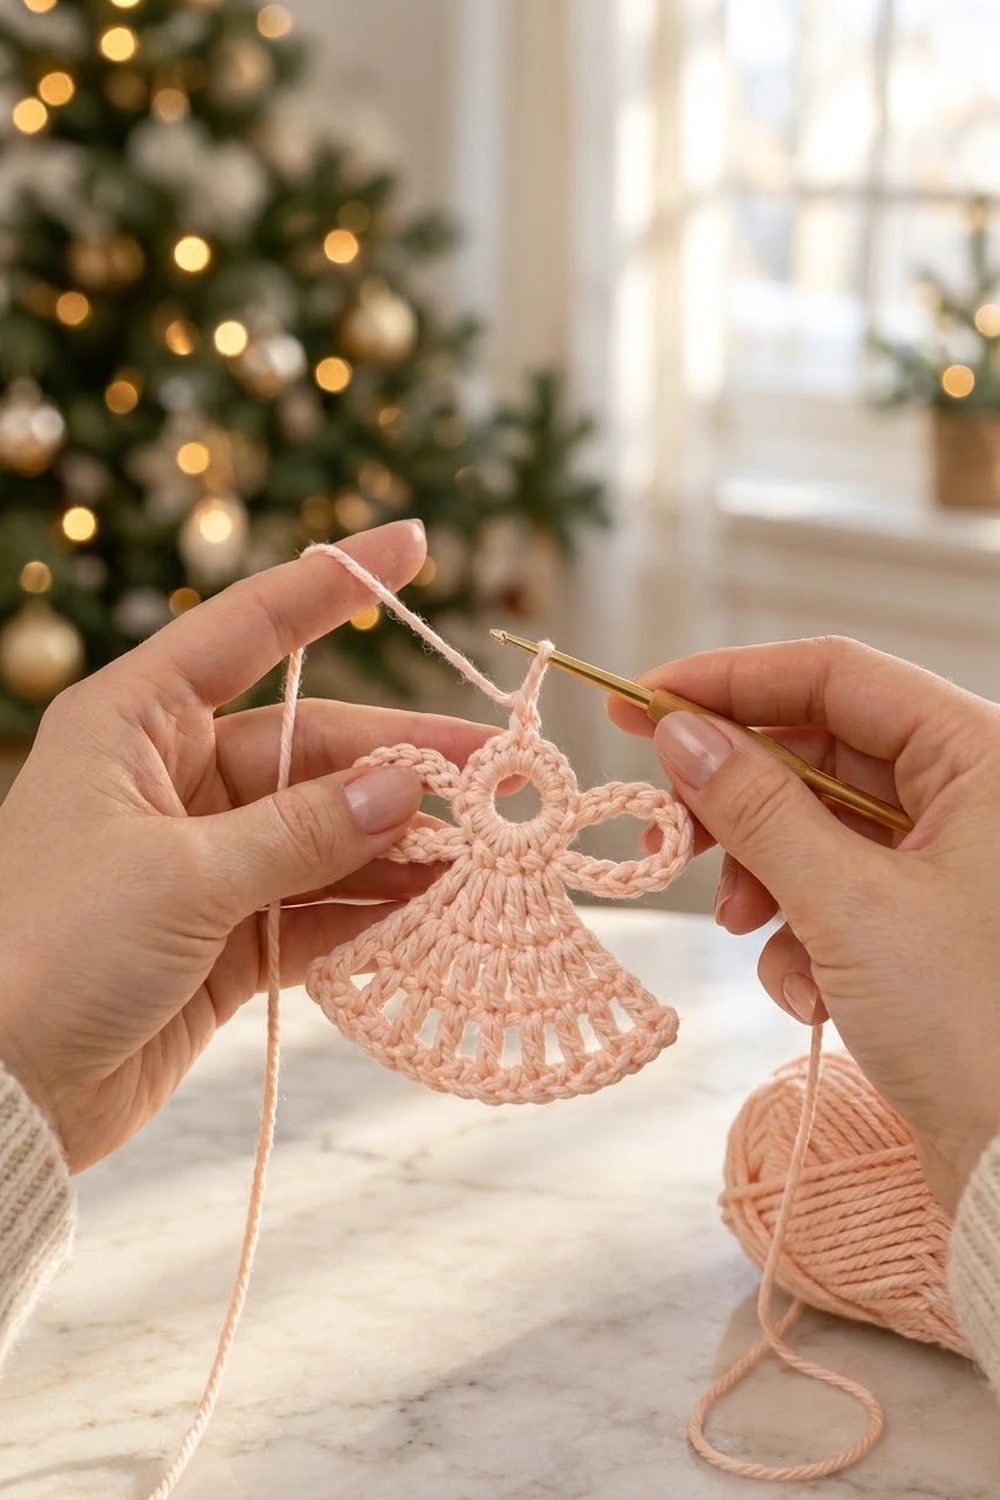
Final Notes
The measurement chain is short and easy to follow. The 16-sc head measures 1.5 in (3.8 cm). Three dc rows make the skirt 1.5 in (3.8 cm) deep, and the openwork row brings it to 2.25 in (5.7 cm). The 28-stitch corded hem finishes it at 2.75 in (7.0 cm). That makes the body 4.25 in (10.8 cm) tall and 5 in (12.7 cm) wide, and the loop brings the angel to 5.5 in (14.0 cm).
When your first angel matches these checkpoints, every angel after it will match too. Matching angels can hang side by side on a tree or be tied in a row along a ribbon. Each one stays a single ornament with its own loop.
Happy crocheting!