

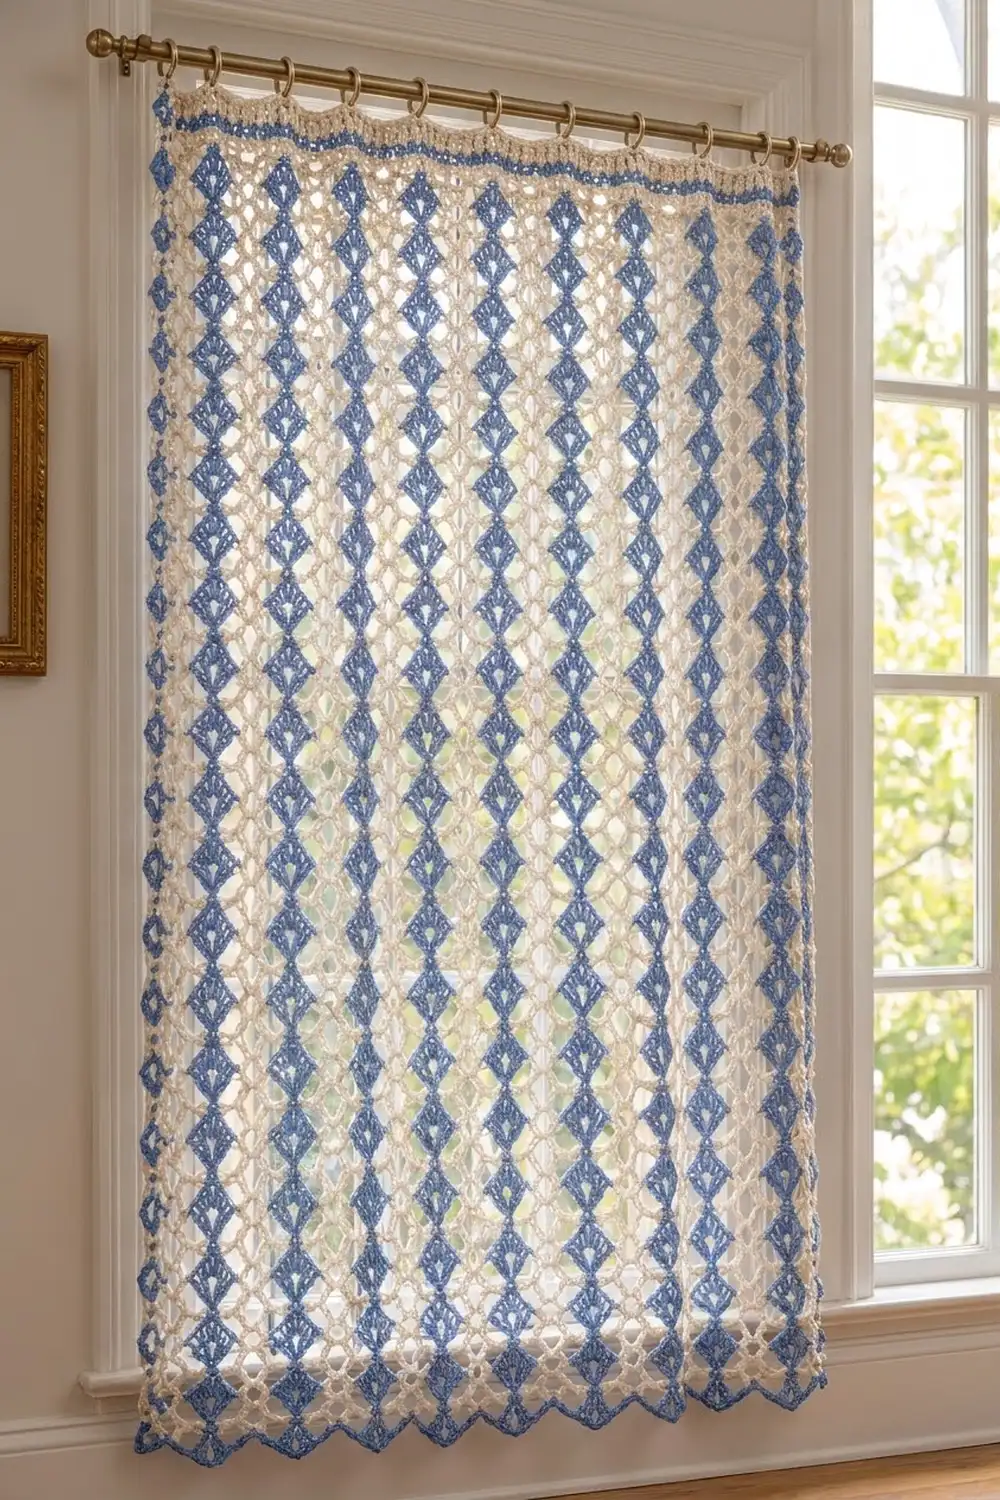
The Delft Diamond curtain panel puts columns of bold blue diamonds on an airy cream mesh. Light passes through the open net, while the solid blue diamonds give the panel a clear vertical rhythm, a bit like hand-painted Delft tiles.
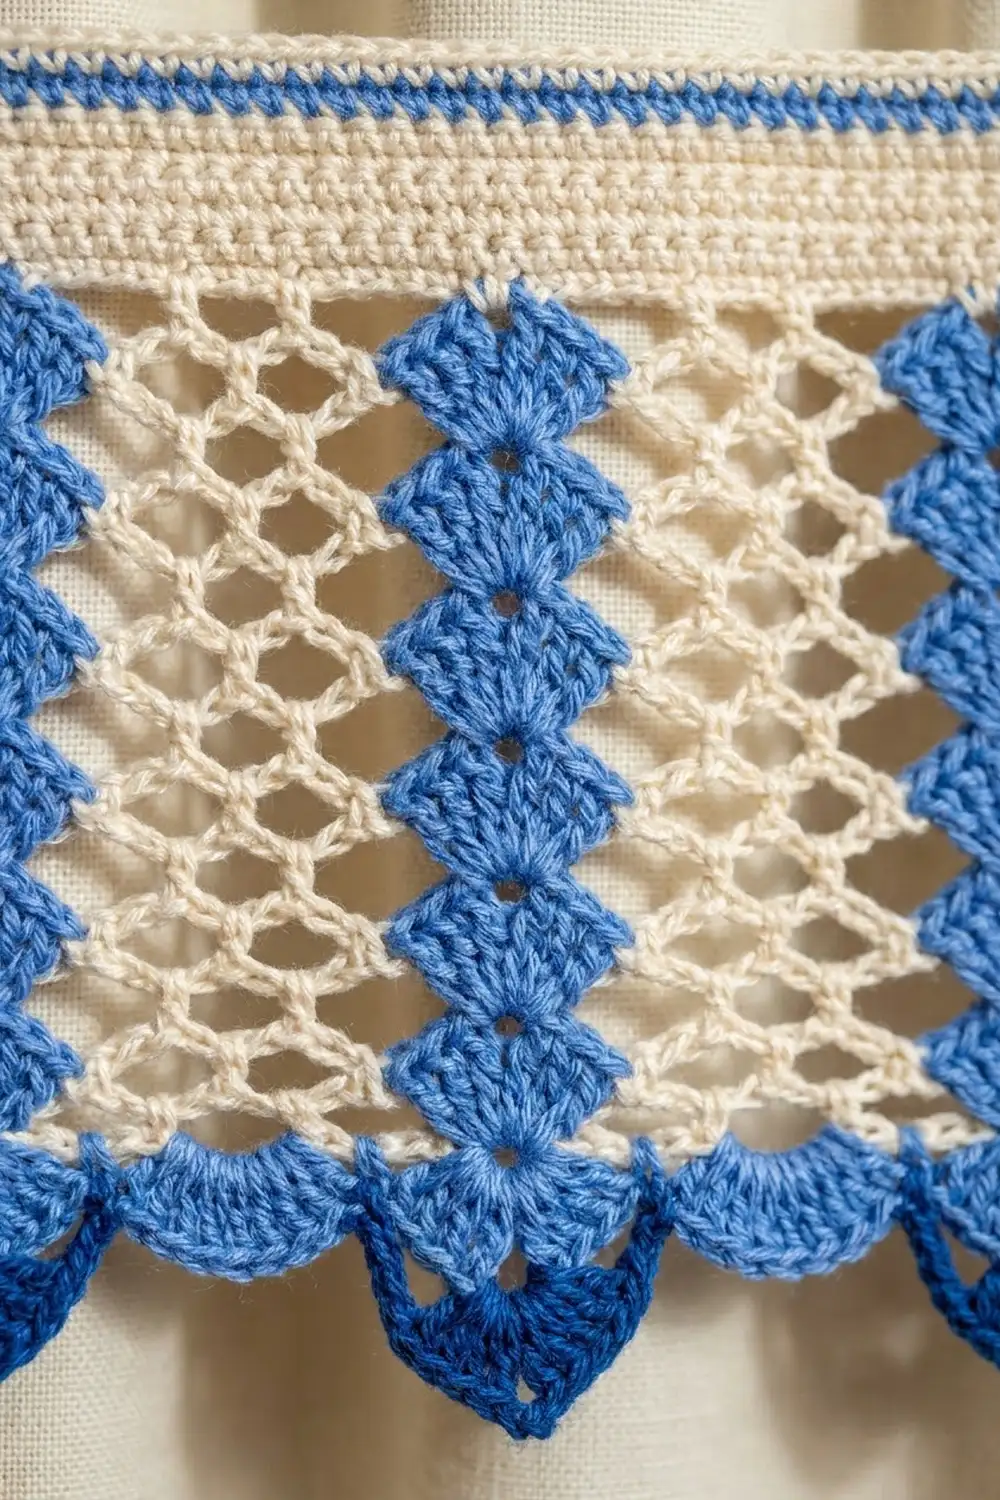
The palette is cream and cornflower blue. The bottom edge has blue scallops with a deeper point under every diamond column. The top is a firm cream heading band with two blue stripes, sized for standard clip-on curtain rings.
The pattern uses US crochet terms. The finished panel measures 28.75 in × 63 in (73.0 cm × 160.0 cm) after blocking.
You make the panel in one piece from the bottom up. First comes a single crochet foundation. Then you work 80 rows of lace, using intarsia bobbins for the blue diamonds. Last, you add a striped heading at the top, a scalloped edge along the bottom, and a single crochet edging on both long sides.
Finished Size and Construction
- Finished size: 28.75 × 63 in (73.0 × 160.0 cm)
- Skill level: Intermediate (intarsia with bobbins)
- Terminology: US
- Yarn weight: #4 medium (worsted) cotton
- Hook: 5.0 mm (H-8)
- Number of pieces: 1
- Layout: 9 vertical columns, 40 stacked diamonds each
- Piece size: 28.75 × 63 in (73.0 × 160.0 cm)
- Size before border: 28.25 × 60.25 in (71.8 × 153.0 cm)
- Border depth: heading 2 in (5.1 cm); bottom scallops 0.75 in (1.9 cm); side edging 0.25 in (0.6 cm) per side
Materials
Choose a smooth, mercerized or combed worsted-weight cotton with about 160 m per 100 g. Cotton holds the mesh open and blocks crisply. Avoid fuzzy yarns, because they blur the diamond edges.
- Cream: 750 g (1,200 m)
- Blue: 475 g (760 m)
These quantities include a margin of about 10%.
Tools:
– 5.0 mm (H-8) crochet hook
– 19 yarn bobbins, or wind butterflies of about 10 m (11 yd) each
– Tapestry needle
– Stitch markers
– Measuring tape
– Blocking mats and rust-proof pins
– 11 clip-on curtain rings
Abbreviations (US Terms)
- ch – chain
- sc – single crochet
- dc – double crochet
- sk – skip
- sp – space
- st(s) – stitch(es)
- rep – repeat
- RS / WS – right side / wrong side
Special stitches:
– Shell: 7 dc in the same stitch.
– Cl (7-dc cluster): *Yarn over, insert hook in next dc, yarn over, pull up a loop, yarn over, pull through 2 loops*. Rep from * to * across all 7 dc of the shell (8 loops on hook). Yarn over and pull through all 8 loops.
– Small scallop: 5 dc in the same stitch.
– Large scallop: (3 dc, ch 2, 3 dc) in the same stitch.
Color changes: All color changes happen at the loop on your hook. Drop the old color to the WS, pick up the new color, and make the next stitch with it. Never carry yarn across the mesh. Each section has its own bobbin: 9 blue for the diamond columns and 10 cream for the mesh sections, including the two edge sections.
Gauge and Checkpoints
Pattern gauge: one 12-stitch repeat (one diamond column plus one mesh section) = 3 in (7.6 cm) wide. Two pattern rows (one diamond) = 1.5 in (3.8 cm) tall.
Single crochet gauge (heading and edging): 16 sc × 18 rows = 4 in (10.2 cm).
Test swatch: Ch 30. Work the Foundation Row (29 sc), then Rows 1–8, using 2 diamond columns in place of 9. In each row, work the part between * and the semicolon 0 times instead of 7 or 8. Pin the swatch out lightly.
- Width: 29 sts = 7.25 in (18.4 cm).
- Height: Rows 1–8 = 6 in (15.2 cm).
If your swatch is too big, go down to a 4.5 mm hook. If it is too small, go up to a 5.5 mm hook. If the mesh puckers next to the diamonds, work every ch-5 as ch-6 throughout; the stitch counts stay the same. If the mesh sags, work ch-4.
Checkpoints for the panel:
– Foundation Row: 113 sc = 28.25 in (71.8 cm)
– After Row 20: 15 in (38.1 cm) of lace
– After Row 40: 30 in (76.2 cm) of lace
– After Row 80: 60 in (152.4 cm) of lace
– Heading Row 81: 115 sc = 28.75 in (73.0 cm)
Main Pattern: Lace Body
Foundation
With cream, ch 114.
Foundation Row (WS): Sc in the 2nd ch from hook and in each ch across. Turn. (113 sc)
Mark the shell stitches now so the columns line up from the start. They are sts 9, 21, 33, 45, 57, 69, 81, 93 and 105. Wind your bobbins. The cream ball you are already using becomes the bobbin for the first edge section.
Row 1 (RS, shell row)
Ch 3 (counts as dc).
- First edge section: ch 5, sk 3 sc, sc in next sc, ch 5, sk 3 sc.
- With blue, work a Shell in the next sc.
- *With a new cream bobbin: ch 5, sk 3 sc, sc in next sc, ch 5, sk 3 sc, sc in next sc, ch 5, sk 3 sc. With a new blue bobbin, work a Shell in the next sc.* Rep from * 7 more times.
- Last edge section, with a new cream bobbin: ch 5, sk 3 sc, sc in next sc, ch 5, sk 3 sc, dc in last sc. Turn.
Count: 9 shells (63 dc), 18 sc, 2 edge dc, 28 ch-5 sps.
Check: 1 + 7 + 1 + (8 × 12) + 7 + 1 = 113 foundation sts, used exactly.
Row 2 (WS, cluster row)
Ch 3 (counts as dc).
- Edge section: ch 5, sc in next ch-5 sp, ch 5, sc in next ch-5 sp, ch 5.
- With blue, work a Cl over the next 7 dc.
- *With cream: ch 5, (sc in next ch-5 sp, ch 5) 3 times. With blue, work a Cl over the next 7 dc.* Rep from * 7 more times.
- With cream: ch 5, sc in next sp, ch 5, sc in next sp, ch 5, dc in top of turning ch. Turn.
Count: 9 Cl, 28 sc, 2 edge dc, 38 ch-5 sps. Each edge section now has 3 loops and each interior section has 4.
The Cl draws the shell back to a single point, which closes the diamond. The blue bobbin ends at the top of the Cl, exactly where the next Shell begins.
Row 3 (RS, shell row)
Ch 3 (counts as dc).
- Edge section: ch 5, sk next ch-5 sp, sc in next sp, ch 5, sk next sp.
- With blue, work a Shell in the top of the next Cl.
- *With cream: ch 5, sk next sp, sc in next sp, ch 5, sc in next sp, ch 5, sk next sp. With blue, work a Shell in the next Cl.* Rep from * 7 more times.
- With cream: ch 5, sk next sp, sc in next sp, ch 5, sk next sp, dc in top of turning ch. Turn.
Count: 9 shells (63 dc), 18 sc, 2 edge dc, 28 ch-5 sps. This matches Row 1.
In the shell rows you skip the loops on each side of a diamond. That lets the mesh pull diagonally toward the wide part of each shell, which forms the cream lattice around every diamond tip.
Rows 4–80
Rep Rows 2–3 until you have finished Row 79 (Rows 4–79 are 38 repeats of the pair). Work Row 80 the same as Row 2.
You now have 40 diamonds in each column. Row 80 is a cluster row, so every column ends on a point. Cut all blue bobbins and all cream bobbins except the one at the start of the next row. Weave in the ends along the WS of the matching color only.
Checkpoint: The lace measures 60 in (152.4 cm) from the top of the Foundation Row and 28.25 in (71.8 cm) wide.
Border
Border gauge: 16 sc = 4 in (10.2 cm); 18 sc rows = 4 in (10.2 cm). At 4 sc per inch, 1 sc = 0.25 in (0.6 cm).
Heading (Rows 81–89)
Row 81 (RS, conversion row, cream): Ch 1. Sc in the first dc.
- (2 sc in next sp, sc in next sc) twice, 2 sc in next sp, sc in next Cl.
- *(2 sc in next sp, sc in next sc) 3 times, 2 sc in next sp, sc in next Cl.* Rep from * 7 more times.
- (2 sc in next sp, sc in next sc) twice, 2 sc in next sp, sc in top of turning ch. Turn.
Count: 39 sc worked 1 per existing st (2 edge dc + 28 sc + 9 Cl) + 76 sc in loops (2 in each of the 38 sps) = 115 sc.
Rows 82–89: Ch 1, sc in each st across, turn. (115 sc per row) Use this stripe order:
- Rows 82–83: blue
- Rows 84–85: cream
- Rows 86–87: blue
- Rows 88–89: cream
Each stripe is 2 rows, so the waiting color is always at the edge where you need it. Carry it loosely up the side edge. Fasten off.
Why the math works: 115 sc at 4 sc per inch = 28.75 in (73.0 cm). That equals the lace width of 28.25 in (71.8 cm) plus 0.25 in (0.6 cm) of side edging on each side. The heading therefore sits flush with the edged body. Nine rows at 4.5 rows per inch = 2 in (5.1 cm).
Bottom Scallops (blue)
With RS facing, join blue in the first free loop of the foundation chain at the right corner. Ch 1.
- Sc in the same loop and in the next 2 loops.
- Sk 1, small scallop in next, sk 1, sc in next.
- *Sk 1, large scallop in next, sk 1, sc in next, (sk 1, small scallop in next, sk 1, sc in next) twice.* Rep from * 7 more times.
- Sk 1, large scallop in next, sk 1, sc in next, sk 1, small scallop in next, sk 1, sc in next, sc in last 2 loops. Fasten off.
Count: 32 sc, 18 small scallops, 9 large scallops.
Why the math works: 3 + 4 + (8 × 12) + 4 + 4 + 2 = 113 loops. That is one position per foundation stitch, so the width stays at 28.25 in (71.8 cm). The large scallops land on loops 9, 21, 33 and so on through 105, directly under the shell columns. The layout is symmetrical, so it lines up whichever end you start from.
Side Edging (cream)
With RS facing, join cream at the bottom corner of one long side. Ch 1.
- 1 sc in the end of the Foundation Row.
- 3 sc around each edge dc or turning ch from Row 1 to Row 80.
- Stop at the heading, which already has a neat sc edge. Fasten off.
Repeat on the other long side.
Count: 1 + (80 × 3) = 241 sc per side.
Why the math works: Each lace row is 0.75 in (1.9 cm) tall, and 3 sc at 4 sc per inch also covers 0.75 in (1.9 cm). The edge lies flat without ruffling or pulling in.
Final Blocking
- Weave in all ends before blocking. Keep each end inside stitches of its own color.
- Soak the panel in cool water for 20 minutes. Gently press out the water; do not wring.
- Roll it in towels to remove more water.
- Lay it flat on mats and pin the corners to 28.75 × 63 in (73.0 × 160.0 cm).
- Pin along the heading first. Keep it straight and 28.75 in (73.0 cm) wide.
- Pin each blue column straight, checking with a long ruler or tape.
- Open the mesh evenly so each cream diamond is the same size.
- Pin out each large scallop point at the bottom.
- Let it dry completely, at least 24 hours, before you unpin.
Final Quality-Control Checklist
- 9 columns of 40 diamonds each, all perfectly vertical
- Every diamond ends in a Cl point, and every Shell sits in the top of a Cl
- 113 sc in the Foundation Row and 115 sc in every heading row
- 9 large scallops, each centered under a column
- 241 sc on each side edge
- No cream strands showing across blue diamonds, and no blue strands across the mesh
- Finished size 28.75 × 63 in (73.0 × 160.0 cm)
Troubleshooting
- Columns drift sideways: You probably put a Shell in a ch-5 sp instead of the Cl. Every Shell must go into the top of a Cl.
- The mesh looks uneven: Count sc per section. Shell rows have 1 sc per edge section and 2 per interior section. Cluster rows have 2 and 3.
- Bobbins tangle: Turn clockwise after one row and counterclockwise after the next, then untwist the bobbins every few rows.
- Holes at color changes: Tug the new color snug on its first stitch, then pull the dropped strand gently from the WS.
- The bottom edge flares: Make sure you skipped 1 loop on each side of every scallop.
- The heading is wider than the body: Use a smaller hook for the heading rows only.
Care
Hand wash cool or machine wash on a gentle cycle in a mesh bag. Lay flat to dry and re-pin lightly to restore the mesh shape.
Final Notes
The measurement chain runs like this:
- The 113-stitch foundation sets a lace width of 28.25 in (71.8 cm).
- Eighty rows build 40 diamonds and 60 in (152.4 cm) of lace.
- The 115-stitch heading adds 2 in (5.1 cm) and matches the edged width of 28.75 in (73.0 cm).
- The scallops add 0.75 in (1.9 cm) to the bottom.
- Altogether you get a 28.75 × 63 in (73.0 × 160.0 cm) panel ready for clip rings: place one at each corner and one above each of the 9 columns.
Happy crocheting!