

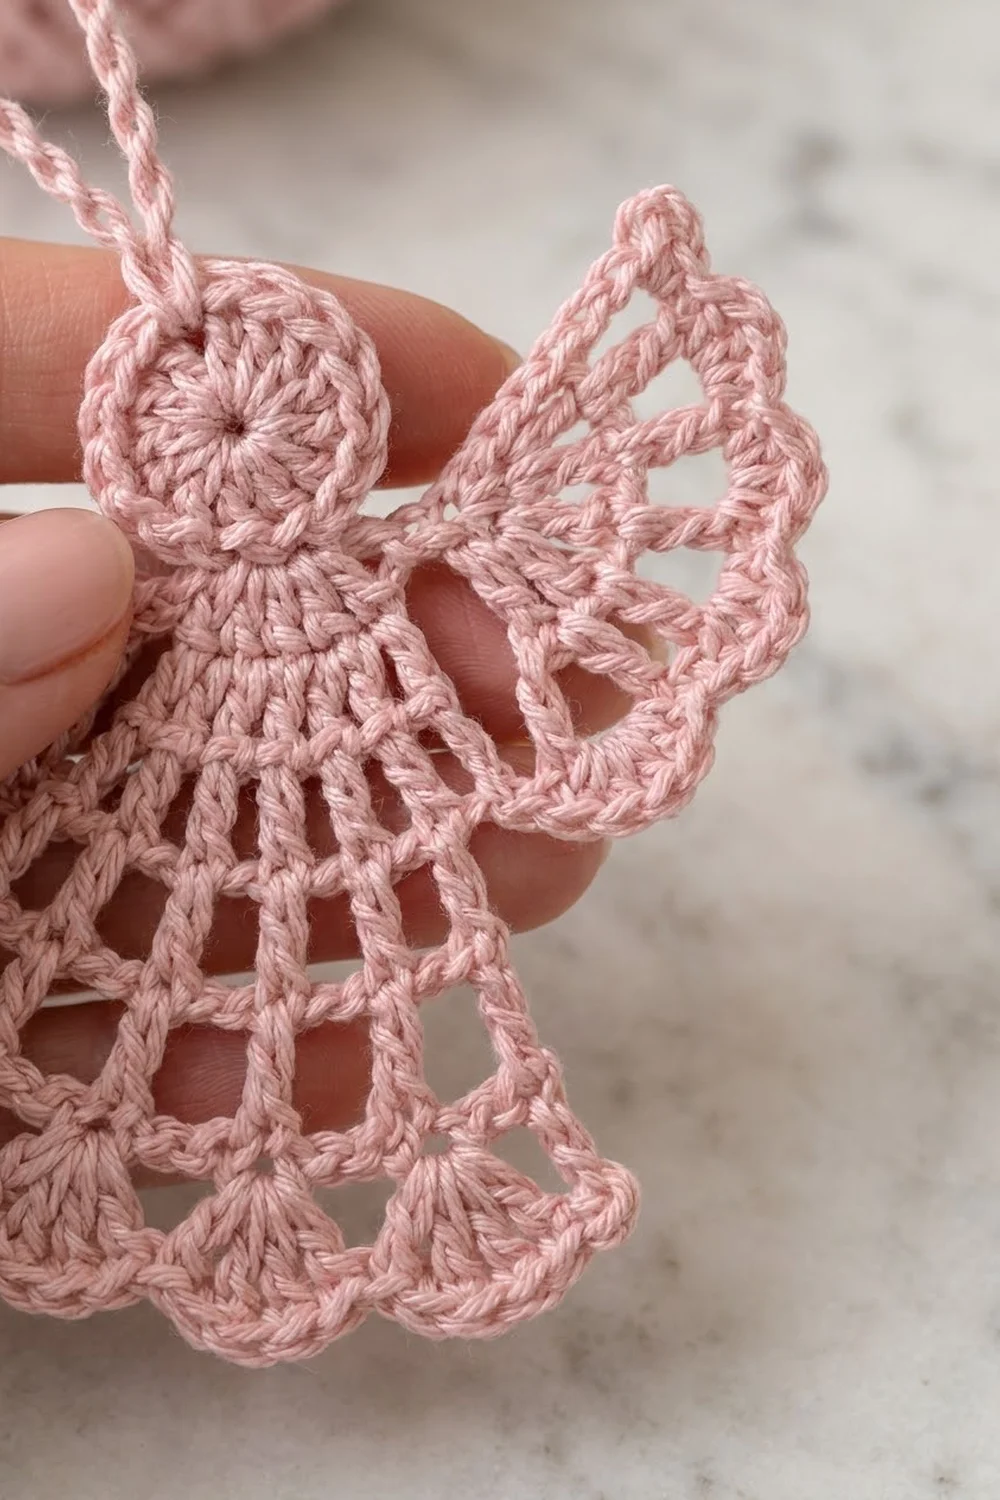
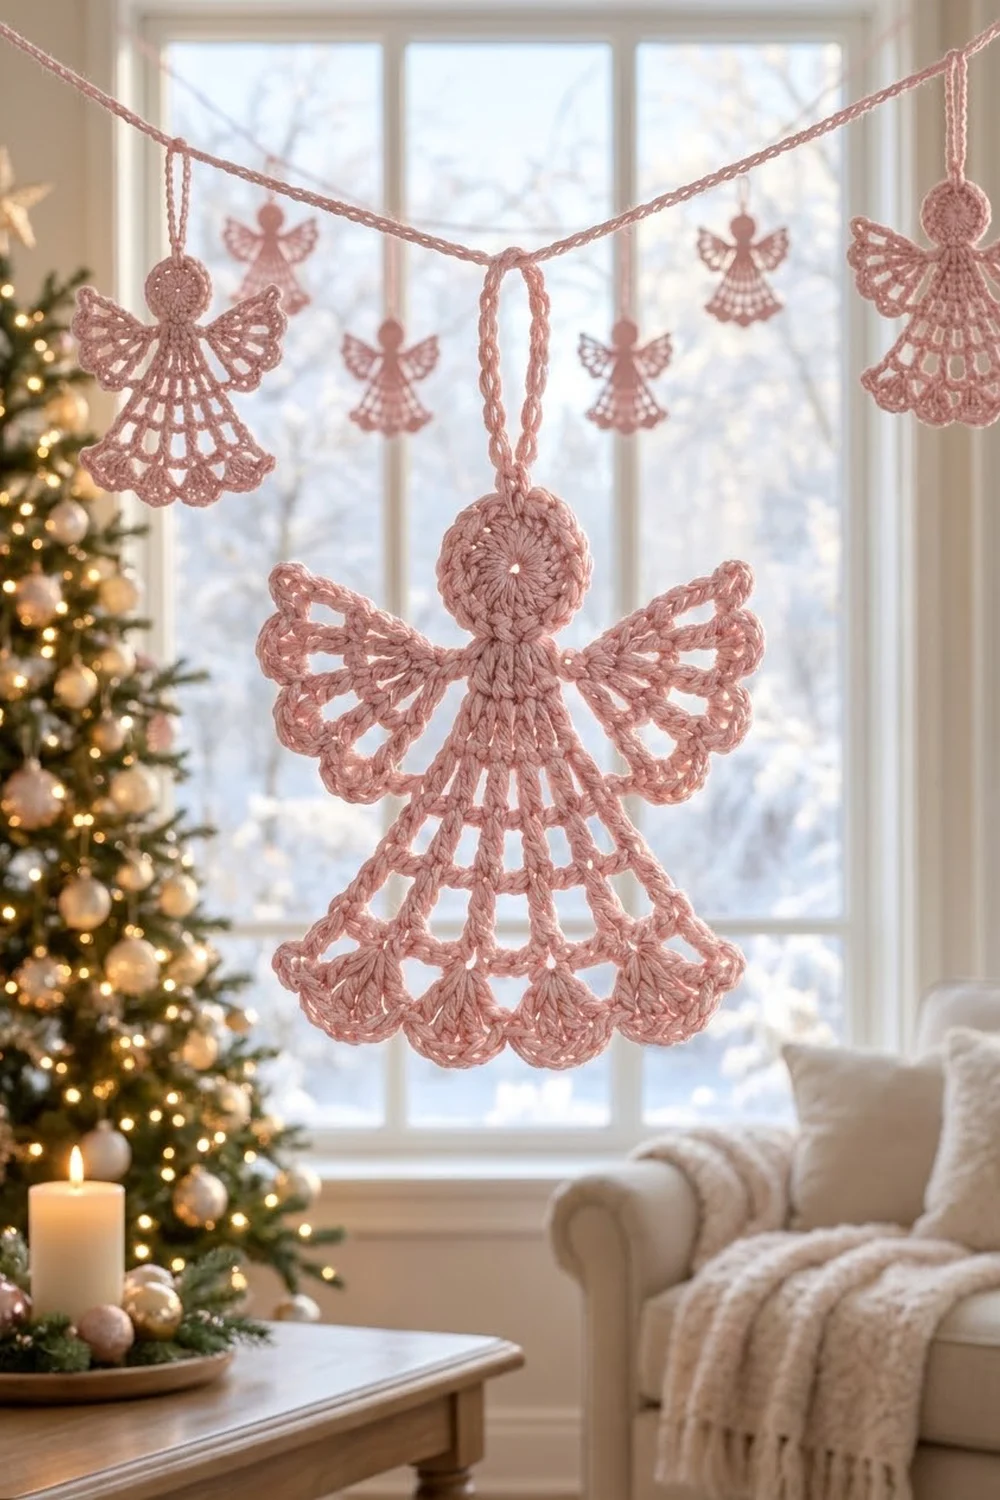
This little angel is a light, open-lace ornament in soft blush pink. She has a round solid head, two fan-shaped wings with looped edges, and a flared skirt. The skirt is made of straight double crochet spokes joined by chain bars, so it looks like a lattice. A row of plump shells makes the scalloped hem, and a simple chain loop at the top of the head lets her hang.
The look is delicate and vintage, like a lace tree ornament or a window charm. One color carries the whole design, so the stitch pattern does all the work. A smooth, slightly shiny cotton shows each spoke and scallop clearly.
The pattern uses US crochet terms throughout. The finished angel is about 3.75 in (9.5 cm) across the wings and 3.25 in (8.3 cm) tall from the top of the head to the hem. The hanging loop adds 1.25 in (3.2 cm), for a total hanging length of 4.5 in (11.4 cm).
Construction is simple. You work the head in the round and make the hanging loop as part of the second round. Then you work the skirt in rows straight down from the bottom of the head and finish it with a scalloped hem. Last, you join the yarn at each side of the head and work a small fan wing. The whole angel is one piece.
Finished Size and Construction
- Finished size: 3.75 in (9.5 cm) wide across the wings, 3.25 in (8.3 cm) tall without the loop
- Skill level: Easy (confident beginner)
- Terminology: US crochet terms
- Yarn weight: #2 fine / sport weight cotton
- Hook: 2.75 mm (US C-2)
- Number of pieces: 1 (the wings are worked straight onto the head, not sewn on)
- Layout: single standalone ornament, with the head at the top, wings at the sides and the skirt below
- Piece size: head 1.25 in (3.2 cm) across; skirt 3.5 in (8.9 cm) wide at the hem
- Size before border: 3 in (7.6 cm) wide at Skirt Row 4; 2.75 in (7.0 cm) tall from the top of the head to Row 4
- Border depth: 0.5 in (1.3 cm) scalloped hem
Materials
Choose a smooth mercerized or combed cotton in sport weight. Cotton holds its shape after blocking and takes starch well, which matters for a hanging ornament. Avoid fuzzy or very stretchy yarns: the lattice spaces will blur and the wings will droop.
A pale blush or dusty rose matches the original look. Any light color works, though, and white, ivory, or pale gold make classic tree angels. Darker colors hide the lace detail, so keep the shade light.
- Blush pink: about 5 g, approx. 15 m (16 yd)
These amounts include a generous margin for the test head and for weaving in ends. One 50 g ball makes about ten angels.
Tools:
- 2.75 mm (US C-2) crochet hook
- Tapestry needle
- Scissors
- 2 stitch markers
- Blocking board or foam mat
- Rustproof pins
- Spray starch or fabric stiffener
- Ruler or tape measure
Abbreviations (US Terms)
- ch – chain
- sl st – slip stitch
- sc – single crochet
- dc – double crochet
- sp(s) – space(s)
- st(s) – stitch(es)
- [ ] – repeat the instructions inside the brackets as many times as stated
Special stitch – Shell: 7 dc worked into the same chain space. The 4th dc is the center of the shell and forms the tip of each scallop.
Turning chains: In the skirt and wings, a ch 3 at the start of a row counts as 1 dc. A ch 4, ch 5, or ch 6 at the start of a row counts as 1 dc plus a ch-1, ch-2, or ch-3 space.
Gauge and Checkpoints
Exact gauge matters less here than for a garment, but it still controls the final size. Work the head first and use it as your test piece.
Head gauge: after Head Round 2, the circle measures 1.25 in (3.2 cm) across.
Checkpoints:
- After Head Round 1: 0.75 in (1.9 cm) across.
- After Head Round 2: 1.25 in (3.2 cm) across.
- After Skirt Row 4: the skirt is 1.5 in (3.8 cm) long from the bottom of the head and 3 in (7.6 cm) wide at the bottom edge.
- After the scalloped hem: the skirt is 2 in (5.1 cm) long and 3.5 in (8.9 cm) wide.
- After both wings: 3.75 in (9.5 cm) from wing tip to wing tip.
If your head is too big (over 1.5 in / 3.8 cm), go down to a 2.5 mm hook. If it is too small (under 1 in / 2.5 cm), go up to a 3.0 mm hook. Also check that the center ring isn’t pulled so tight that Round 1 cups.
If you swap in a thinner thread or a thicker yarn, the stitch counts still work. Only the size changes, so keep all your checkpoints in proportion to your own head measurement.
Head
Round 1: Make a magic ring. Ch 3 (counts as the first dc), then work 11 dc in the ring. Pull the ring closed, leaving a small hole in the center. Sl st to the top of the beginning ch-3. (12 dc)
Round 2: Ch 1. Work 2 sc in each of the next 6 dc. In the next dc (the 7th dc, directly opposite the join), work sc, ch 18, sc. This ch-18 is the hanging loop. Work 2 sc in each of the remaining 5 dc. Sl st to the first sc. (24 sc plus 1 ch-18 loop)
Check the count: 12 + 2 + 10 = 24 sc. The join now sits at the bottom center of the head and the loop sits at the top center.
Keep the 18 loop chains even and relaxed. Count them twice before you close the loop, because a short loop is hard to fix later.
Number the sc starting at the join: the first sc of the round is sc 1 and the last is sc 24. Place a marker in sc 1. Do not fasten off.
Skirt
The skirt is worked in rows across 7 sc at the bottom of the head: sc 22, 23, 24, 1, 2, 3, and 4. Sc 1 is the center.
The lace is reversible, so don’t worry about which side is facing you. Pick the neater side as the front when you block.
Set-up: Sl st in each of the next 3 sc (sc 2, 3, 4).
Row 1: Ch 3, turn (counts as the dc in sc 4). Dc in sc 3, 2, 1, 24, 23, and 22. (7 dc)
These 7 dc are the 7 spokes of the skirt. Every row after this keeps 7 dc, one on top of each spoke. Only the chain bars between the spokes get longer.
Row 2: Ch 4, turn (counts as dc + ch 1). Dc in next dc, [ch 1, dc in next dc] 4 times, ch 1, dc in top of turning ch-3. (7 dc, 6 ch-1 sps)
Row 3: Ch 5, turn (counts as dc + ch 2). Dc in next dc, [ch 2, dc in next dc] 4 times, ch 2, dc in 3rd ch of turning ch-4. (7 dc, 6 ch-2 sps)
Row 4: Ch 6, turn (counts as dc + ch 3). Dc in next dc, [ch 3, dc in next dc] 4 times, ch 3, dc in 3rd ch of turning ch-5. (7 dc, 6 ch-3 sps)
The last dc of each row always goes into the 3rd chain of the turning chain below, because that chain stands in for a dc. If you work into the wrong chain, the edge spoke will lean.
Check: 7 dc + (6 × 3 ch) = 25 sts across. The skirt should now be 3 in (7.6 cm) wide at the bottom. Do not fasten off. The hem comes next, in the Border section.
Wings
Each wing is a small fan worked into 2 free sc at the side of the head, right next to the skirt.
Right wing, Row 1: Join yarn with a sl st in sc 5. Ch 3 (counts as dc), 3 dc in the same sc, 4 dc in sc 6. (8 dc)
Row 2: Ch 5, turn (counts as dc + ch 2). Dc in next dc, [ch 2, dc in next dc] 5 times, ch 2, dc in top of beginning ch-3. (8 dc, 7 ch-2 sps)
Row 3 (wing edge): Ch 1, turn. Sc in first dc, [ch 4, sc in next dc] 6 times, ch 4, sc in 3rd ch of turning ch-5. (8 sc, 7 ch-4 arcs) Fasten off.
Left wing: Join yarn with a sl st in sc 20. Ch 3, 3 dc in the same sc, 4 dc in sc 21. (8 dc) Work Rows 2 and 3 exactly as for the right wing. Fasten off.
Sc 5 and sc 21 mirror each other around the center at sc 1, so both wings sit at the same height. The 13 sc from sc 7 to sc 19, including the loop, stay free and form the smooth top of the head.
Work both wings at the same tension. A wing worked tighter will be noticeably shorter, even with the same stitch count.
Border
The border is the scalloped hem across the bottom of the skirt. The ch-4 arcs on the wings, worked above, are the matching wing edge.
Border gauge: each Shell is about 0.5 in (1.3 cm) wide and 0.5 in (1.3 cm) deep.
Hem Row: Continue from Skirt Row 4. Ch 1, turn. Sc in first dc, [Shell in next ch-3 sp, sc in next dc] 5 times, Shell in last ch-3 sp, sc in 3rd ch of turning ch-6. Fasten off.
Count: 7 sc and 6 Shells (42 dc) across the hem.
Why the math works: 7 spokes always make exactly 6 spaces between them. One Shell goes in each space and one sc anchors each spoke, so the hem has 6 scallops with a spoke under every dip. The Shell has 7 dc, an odd number, so its 4th dc is a true center point and every scallop is symmetrical.
A ch-3 space is 3 sts wide but holds 7 dc. That extra fullness makes the hem flare to 3.5 in (8.9 cm) instead of staying at 3 in (7.6 cm), which gives the skirt its bell shape.
On the wings, 8 dc spokes make 7 spaces, and each ch-4 arc spans one space. That gives each wing edge 7 matching loops.
Work the Shells at an even, relaxed tension. Tight Shells pull the hem into a straight line and the scallops lose their roundness.
Final Blocking
- Weave in all ends along the spokes so the tails stay hidden.
- Soak the angel in cool water for 5 minutes, then roll it in a towel to remove the extra water.
- Lay it flat on a foam mat with your chosen front side up.
- Pin the head into a circle 1.25 in (3.2 cm) across.
- Pin the skirt so the 7 spokes are straight and evenly spread. The bottom of Row 4 should measure 3 in (7.6 cm).
- Pin the center dc of each Shell to open the scallops. The hem should measure 3.5 in (8.9 cm).
- Pin each wing open into a fan, with a pin in each ch-4 arc. It should measure 3.75 in (9.5 cm) from wing tip to wing tip.
- Straighten the hanging loop and lay it flat above the head.
- Spray with starch or brush on fabric stiffener. Let it dry completely, at least 6 hours, before removing the pins.
Final Quality-Control Checklist
- The head is flat with a small, neat center hole.
- Head Round 2 has 24 sc plus the ch-18 loop.
- The hanging loop is centered at the top of the head and not twisted.
- The skirt has 7 straight spokes in every row.
- Skirt Rows 2, 3, and 4 have 6 spaces each, growing from ch-1 to ch-2 to ch-3.
- The hem has 6 even Shells and 7 sc anchors.
- Both wings have 8 spokes and 7 ch-4 arcs.
- The wings sit at the same height on each side of the head.
- The total size is 3.75 in (9.5 cm) wide and 3.25 in (8.3 cm) tall without the loop.
- All ends are woven in and trimmed.
Troubleshooting
The head cups or ruffles. Cupping means the Round 1 dc are too short or too tight, so loosen the magic ring slightly. Ruffling means too many stitches, so recount Round 2.
The skirt pulls to one side. You probably skipped the turning chain or worked into it twice. Each row must start and end on a spoke, with 7 dc in total.
The spokes look curved. Make sure every dc goes into the top of the dc below, not into the chain space.
The hem curls up. The Shells are too tight. Loosen your dc, or work the Shells with a hook one size larger.
The wings droop. Use more starch, and pin the wings slightly upward while they dry.
The loop is twisted. Check the ch-18 before blocking. If it is twisted, undo Round 2 back to the loop and rework it.
One wing sits lower than the other. Check that you joined in sc 5 and sc 20, counting from the marker in sc 1.
Care
Hand wash in cool water with mild soap, reshape, and dry flat. Starch the angel again after washing if she loses her crisp shape.
Final Notes
Every measurement in this angel builds on the one before it. It starts with the head: 12 dc become 24 sc, which gives a circle 1.25 in (3.2 cm) across. Seven of those sc hold the 7 skirt spokes. The chain bars grow from ch-1 to ch-3, so after Row 4 the skirt is 3 in (7.6 cm) wide and 1.5 in (3.8 cm) long.
Six Shells, one in each space, finish the hem at 3.5 in (8.9 cm) wide and add 0.5 in (1.3 cm) of depth. Two 8-spoke wings bring the span to 3.75 in (9.5 cm). The finished angel is 3.25 in (8.3 cm) tall, plus a 1.25 in (3.2 cm) loop.
If your head checkpoint is right, the rest will follow. Make one angel, check her against these numbers, and then make a whole flock at the same steady pace.
Happy crocheting!