

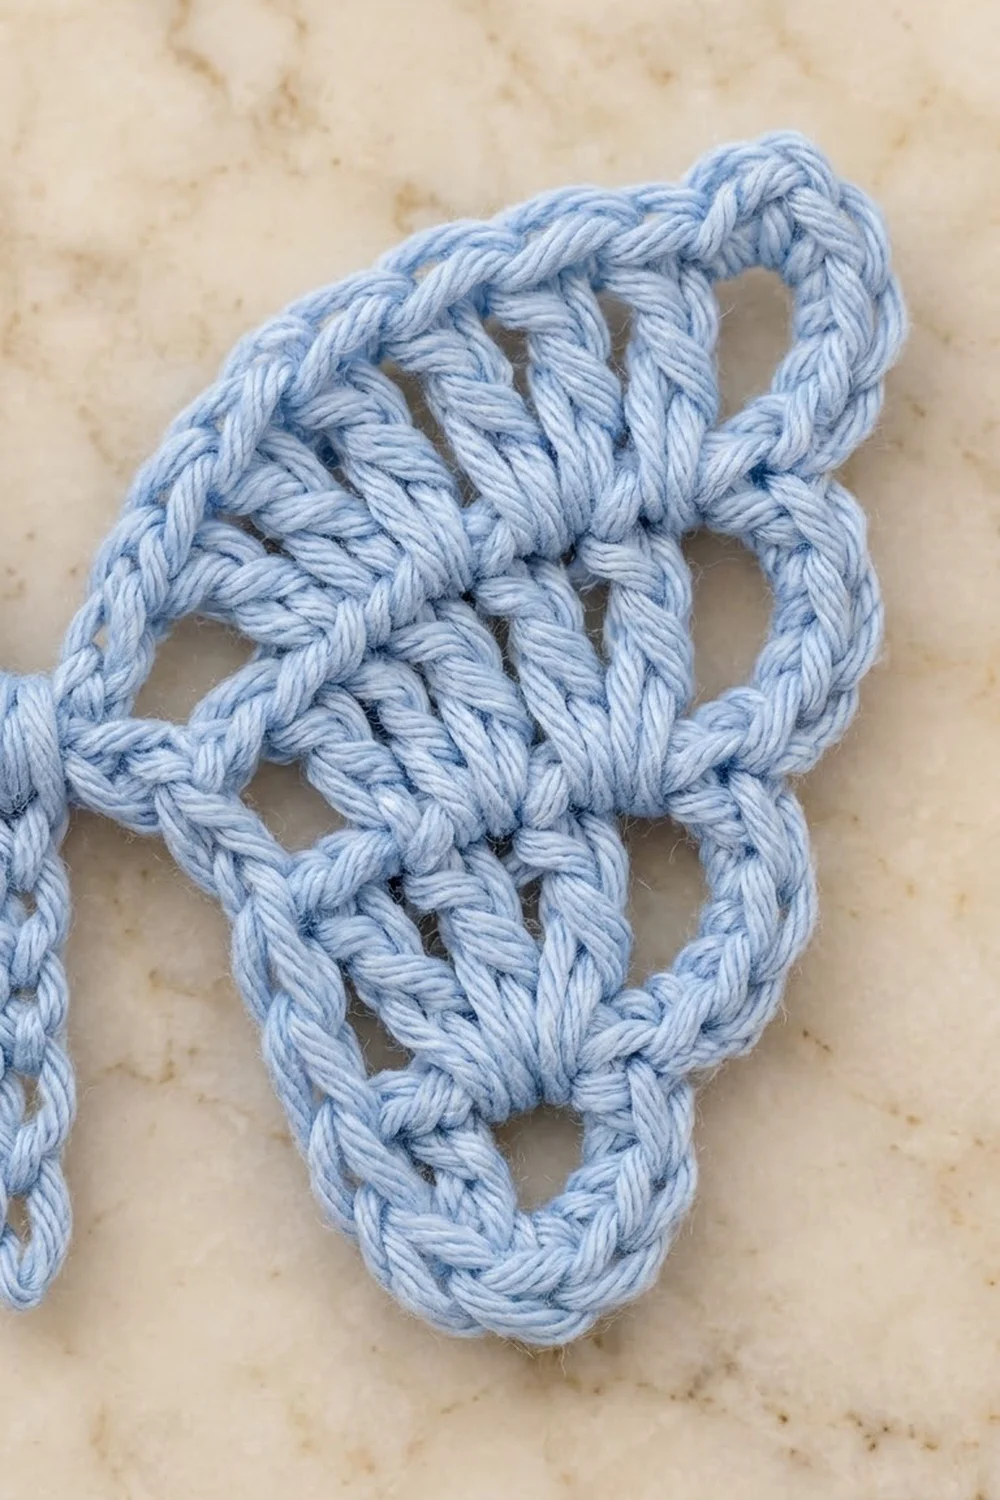
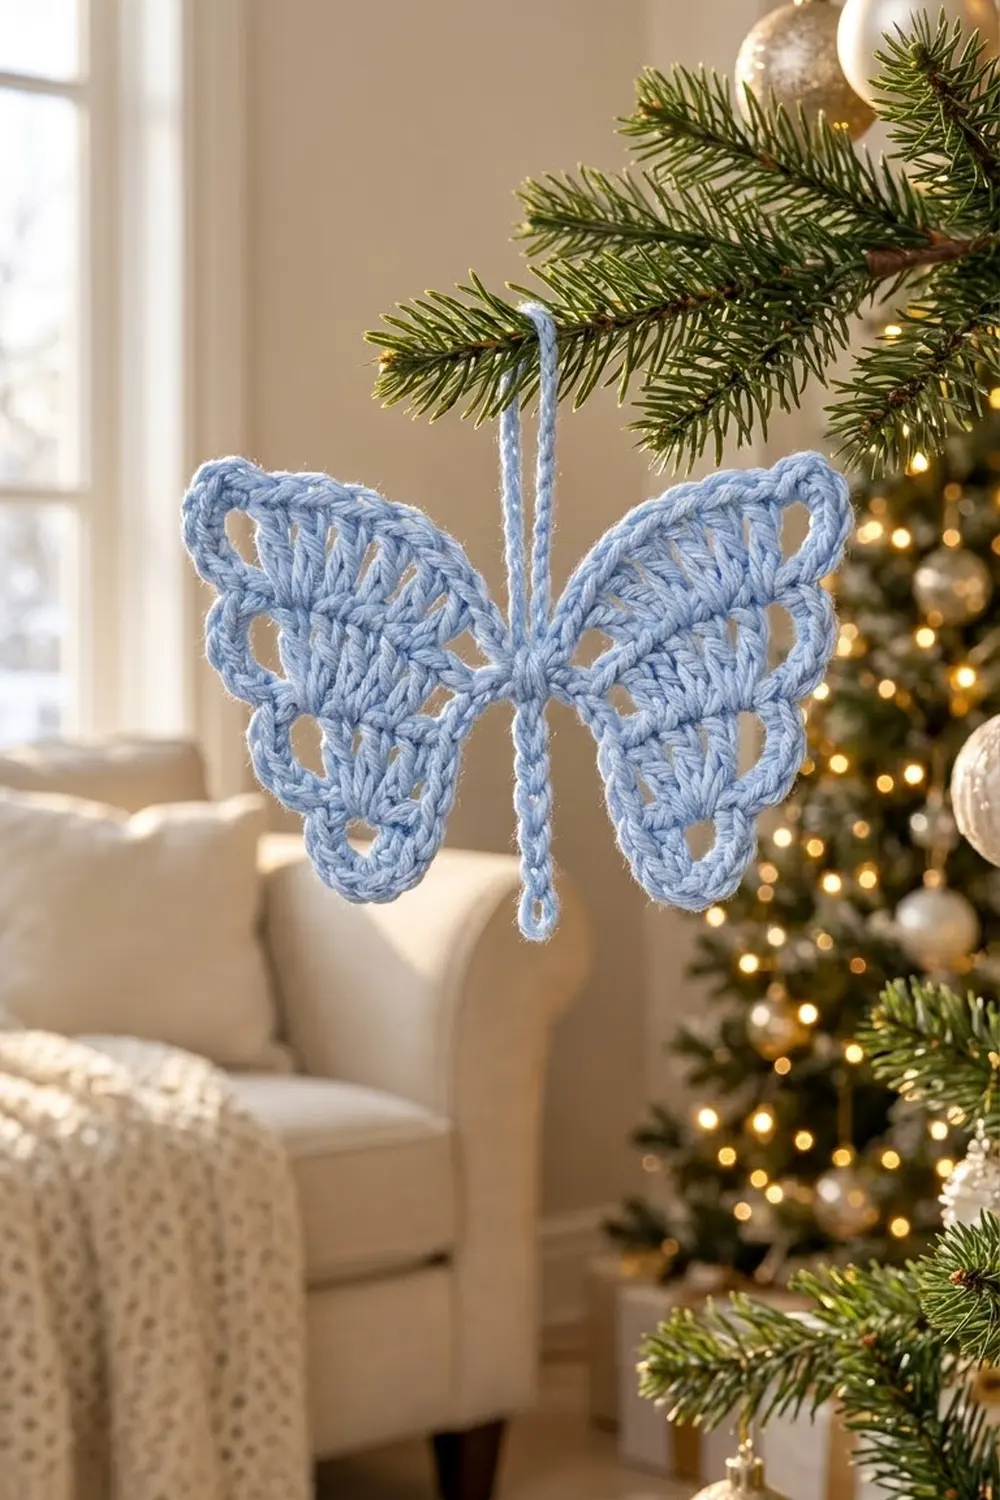
The Bluebell Flutter Butterfly is a small, open, lacy butterfly worked in a soft powder blue. Each wing has a large rounded upper lobe and a smaller lower lobe, filled with tiers of double crochet fans separated by rows of chain loops. A neat single crochet outline frames the whole shape, and a short chain tail hangs below the wrapped center body.
The motif is made in one color and as one piece. It is light, flat, and quick, so it works well as an appliqué, gift tag, bookmark charm, or hanging ornament. You can string several onto a chain later for a simple hanging strand, but this pattern covers the single butterfly only.
This pattern uses US crochet terms throughout. The finished butterfly measures 4.5 in (11.4 cm) wide by 3.25 in (8.3 cm) tall, not counting the chain tail.
Construction is simple. You start with one round of double crochet in a magic ring, then build each wing outward in turned rows on its own half of that ring. A single crochet border goes around the whole butterfly in one pass, a short chain makes the tail, and a yarn wrap forms the body.
Finished Size and Construction
- Finished size: 4.5 in (11.4 cm) wide x 3.25 in (8.3 cm) tall
- Chain tail: about 1.25 in (3.2 cm) below the body
- Skill level: Easy
- Terminology: US crochet terms
- Yarn weight: DK / light (#3)
- Hook: 3.5 mm (E-4)
- Number of pieces: 1 (single motif)
- Layout: two mirrored wings worked from one shared center ring
- Piece size: 4.5 in x 3.25 in (11.4 cm x 8.3 cm)
- Size before border: 4 in x 2.75 in (10.2 cm x 7.0 cm)
- Border depth: 0.25 in (0.6 cm) on every edge
Materials
Choose a smooth, tightly plied cotton or cotton blend in DK weight. Cotton gives crisp stitch definition and holds the wing shape after blocking. Avoid fuzzy or brushed yarns, because they hide the open loops that give the wings their lacy look.
- Powder blue DK yarn: 5 g, about 12 m (13 yd)
- 3.5 mm (E-4) crochet hook
- Tapestry needle
- Scissors
- 1 stitch marker
- Blocking mat or folded towel
- Rust-proof pins
- Spray bottle with water
The quantity above includes a margin of about 25 percent for a test piece, joins, the body wrap, and weaving in ends. The butterfly itself uses close to 4 g, about 9.5 m (10.4 yd).
Abbreviations (US Terms)
- ch – chain
- sl st – slip stitch
- sc – single crochet
- dc – double crochet
- st(s) – stitch(es)
- ch-3 loop – the space under a chain of 3
- ch-4 loop – the space formed by a chain of 4
- RS – right side
Special technique – standing sc: Start with a slip knot on the hook. Insert the hook into the stitch, yarn over and pull up a loop, then yarn over and pull through both loops. This joins new yarn and makes a sc in one step.
Turning chains: Ch 3 at the start of a dc row counts as 1 dc. Ch 1 at the start of a sc row does not count as a stitch.
Gauge and Checkpoints
Gauge: 20 sc and 22 rows = 4 in (10.2 cm) in sc with a 3.5 mm hook.
Gauge is not critical for a decorative motif, but it controls the final size. Make one test butterfly first and measure it at each checkpoint below before you make more.
- After Round 1: the dc ring measures 1 in (2.5 cm) across.
- After Row 3: each wing extends 1.25 in (3.2 cm) from the center.
- After Row 5: both wings together measure 4 in (10.2 cm) wide and 2.75 in (7.0 cm) tall.
- After the border: 4.5 in (11.4 cm) wide x 3.25 in (8.3 cm) tall.
If your butterfly is too big, go down to a 3.25 mm (D-3) hook. If it is too small, go up to a 3.75 mm (F-5) hook. If only the outer lobes ruffle, your dc are shorter than average. Loosen your yarn overs on Row 5, or go up a half size for that row only.
Main Pattern
Round 1: Center Ring
Make a magic ring.
Round 1: Ch 3 (counts as dc), 15 dc in ring. Pull the ring tight and join with a sl st to the top of the beginning ch-3. (16 dc)
Hold the ring with the join at the top. Working counterclockwise, sts 1–8 run down the left half from top to bottom. Sts 9–16 run up the right half from bottom to top. Each half carries one wing.
Place a marker in st 9 so you can find it later. Do not fasten off.
Left Wing (Wing A)
Worked in rows over sts 1–8 only.
Row 2 (loop row): Ch 1, sc in same st as join, (ch 3, sc in next dc) 7 times, ending in st 8. Turn. (8 sc, 7 ch-3 loops)
Row 3 (first fan): Sl st into first ch-3 loop, ch 3 (counts as dc), 2 dc in same loop, 3 dc in each of next 6 loops. Turn. (21 dc)
Row 4 (second loop row): Ch 1, sc in first dc, (ch 3, skip 1 dc, sc in next dc) 10 times, ending in the top of the turning ch-3. Turn. (11 sc, 10 ch-3 loops)
Check: 1 sc + (10 x 2 sts) = 21 sts used, which matches the 21 dc of Row 3.
Row 5 (lobe row): This row starts at the bottom of the wing.
- Lower lobe: Sl st into first ch-3 loop, ch 3 (counts as dc), 2 dc in same loop, 3 dc in each of next 3 loops. (12 dc)
- Notch: Sc in next sc. (1 sc)
- Upper lobe: 4 dc in each of next 6 loops. (24 dc)
Row 5 total: 12 dc + 1 sc + 24 dc = 37 sts. Fasten off.
The sc at the notch sits lower than the dc on either side, and that dip separates the small lower lobe from the large upper lobe. The lower lobe has 4 loops with 3 dc each, and the upper lobe has 6 loops with 4 dc each, so the upper lobe is both wider and fuller.
Right Wing (Wing B)
Worked in rows over sts 9–16 only. With RS facing, make a standing sc in the marked st 9 at the bottom of the ring. Remove the marker.
Row 2 (loop row): (Ch 3, sc in next dc) 7 times, ending in st 16. Turn. (8 sc, 7 ch-3 loops)
Row 3 (first fan): Sl st into first ch-3 loop, ch 3 (counts as dc), 2 dc in same loop, 3 dc in each of next 6 loops. Turn. (21 dc)
Row 4 (second loop row): Ch 1, sc in first dc, (ch 3, skip 1 dc, sc in next dc) 10 times. Turn. (11 sc, 10 ch-3 loops)
Row 5 (lobe row): This row starts at the top of the wing, so the lobes come in reverse order.
- Upper lobe: Sl st into first ch-3 loop, ch 3 (counts as dc), 3 dc in same loop, 4 dc in each of next 5 loops. (24 dc)
- Notch: Sc in next sc. (1 sc)
- Lower lobe: 3 dc in each of next 4 loops. (12 dc)
Row 5 total: 24 dc + 1 sc + 12 dc = 37 sts. Fasten off.
The two wings now mirror each other. Lay the piece flat and check the size before the border: 4 in (10.2 cm) wide x 2.75 in (7.0 cm) tall.
Border
Border gauge: one round of sc adds 0.25 in (0.6 cm) on every edge. That adds 0.5 in (1.3 cm) to the total width and 0.5 in (1.3 cm) to the total height.
Each wing has three edges:
- a short straight lower edge (the row ends from the center out)
- the curved outer edge (Row 5)
- a short straight upper edge (the row ends back to the center)
On the straight edges, work 1 sc in each sc row end and 2 sc in each dc row end.
Border Round: With RS facing, join with a sl st in the bottom center gap between sts 8 and 9 of Round 1. Work counterclockwise.
Right wing (Wing B):
- Lower straight edge: 1 sc in Row 2 end, 2 sc in Row 3 end, 1 sc in Row 4 end, 2 sc in Row 5 end. (6 sc)
- Lower lobe: Sc in each of next 6 dc, ch 4, sc in each of next 6 dc. (12 sc, 1 ch-4 loop)
- Notch: Sl st in notch sc. (1 sl st)
- Upper lobe: Sc in each of next 12 dc, ch 4, sc in each of next 12 dc. (24 sc, 1 ch-4 loop)
- Upper straight edge: 2 sc in Row 5 end, 1 sc in Row 4 end, 2 sc in Row 3 end, 1 sc in Row 2 end. (6 sc)
Sl st in the top center gap between sts 16 and 1.
Left wing (Wing A):
- Upper straight edge: 1 sc in Row 2 end, 2 sc in Row 3 end, 1 sc in Row 4 end, 2 sc in Row 5 end. (6 sc)
- Upper lobe: Sc in each of next 12 dc, ch 4, sc in each of next 12 dc. (24 sc, 1 ch-4 loop)
- Notch: Sl st in notch sc. (1 sl st)
- Lower lobe: Sc in each of next 6 dc, ch 4, sc in each of next 6 dc. (12 sc, 1 ch-4 loop)
- Lower straight edge: 2 sc in Row 5 end, 1 sc in Row 4 end, 2 sc in Row 3 end, 1 sc in Row 2 end. (6 sc)
Join with a sl st to the first sl st.
Border totals: each wing has 6 + 12 + 24 + 6 = 48 sc, plus 1 notch sl st and 2 ch-4 loops. The whole border has 96 sc, 2 notch sl sts, 1 top center sl st, and 4 ch-4 loops. It opens and closes with a sl st at the bottom center.
Tail: Without breaking the yarn, ch 7. Fasten off and trim close. The chain hangs about 1.25 in (3.2 cm) below the body.
Why the math works: On the curved edge, every stitch of Row 5 gets exactly 1 sc. That keeps the edge the same length, so it lies flat. The 12-dc lobe splits into 6 + 6 and the 24-dc lobe into 12 + 12, so each ch-4 loop sits at the tip of its lobe. On the straight edges, a dc row is about twice as tall as a sc row. Working 2 sc per dc row end and 1 sc per sc row end keeps those edges from puckering or flaring.
Body Wrap
Cut a 12 in (30.5 cm) length of yarn. Wrap it 5 times around the center over Round 1, passing through the top gap and the bottom gap. Pull gently so the wings pinch in slightly at the center. Tie off on the back and weave in the ends.
Final Blocking
- Weave in all ends on the wrong side before blocking.
- Pin the butterfly face up on a blocking mat at 4.5 in (11.4 cm) wide x 3.25 in (8.3 cm) tall.
- Pin each ch-4 loop open at the tip of its lobe.
- Push a pin into each notch to set the dip between the upper and lower lobes.
- Straighten the tiers so each ch-3 loop row forms a smooth arc.
- Spray until damp, not soaked.
- Let it dry completely, at least 6 hours, before unpinning.
Final Quality-Control Checklist
- Round 1 has 16 dc and sits flat at 1 in (2.5 cm) across.
- Each wing has 7 loops in Row 2, 21 dc in Row 3, 10 loops in Row 4, and 37 sts in Row 5.
- Upper lobes have 24 dc and lower lobes have 12 dc.
- The border has 96 sc and 4 ch-4 loops.
- Both wings mirror each other in size and shape.
- The butterfly measures 4.5 in (11.4 cm) x 3.25 in (8.3 cm).
- The chain tail hangs straight from the bottom center.
- All ends are woven in securely.
Troubleshooting
Round 1 will not close. Pull the short tail of the magic ring firmly before joining. If 16 dc crowd the ring, make the dc slightly taller rather than leaving stitches out.
The wings cup upward. Your loop rows are too tight. Make each ch 3 a little looser, or go up a hook size for Rows 2 and 4.
The upper lobe ruffles. Your dc are short. Pull up a taller loop on Row 5, or block firmly to the 3.25 in (8.3 cm) height.
The wings do not mirror. Check where you joined Wing B. It must start in st 9 at the bottom, so that its Row 5 starts with the upper lobe.
The straight edges pucker. Make sure you are working 2 sc in each dc row end, not 1.
The notch disappears. Use a sl st at the notch in the border, not a sc, and pin it during blocking.
Care
Hand wash in cool water with mild soap, press out excess water in a towel, and dry flat. Reshape the wings and loops while damp.
Final Notes
The measurement chain is short and easy to follow. Round 1 sets a 1 in (2.5 cm) center. Row 3 brings each wing to 1.25 in (3.2 cm). Row 5 takes the butterfly to 4 in (10.2 cm) x 2.75 in (7.0 cm). The border adds 0.25 in (0.6 cm) on every edge, for a finished size of 4.5 in (11.4 cm) x 3.25 in (8.3 cm), with a 1.25 in (3.2 cm) chain tail below.
Check your test piece at each stage and match the counts, and the rest will fall into place.
Happy crocheting!