

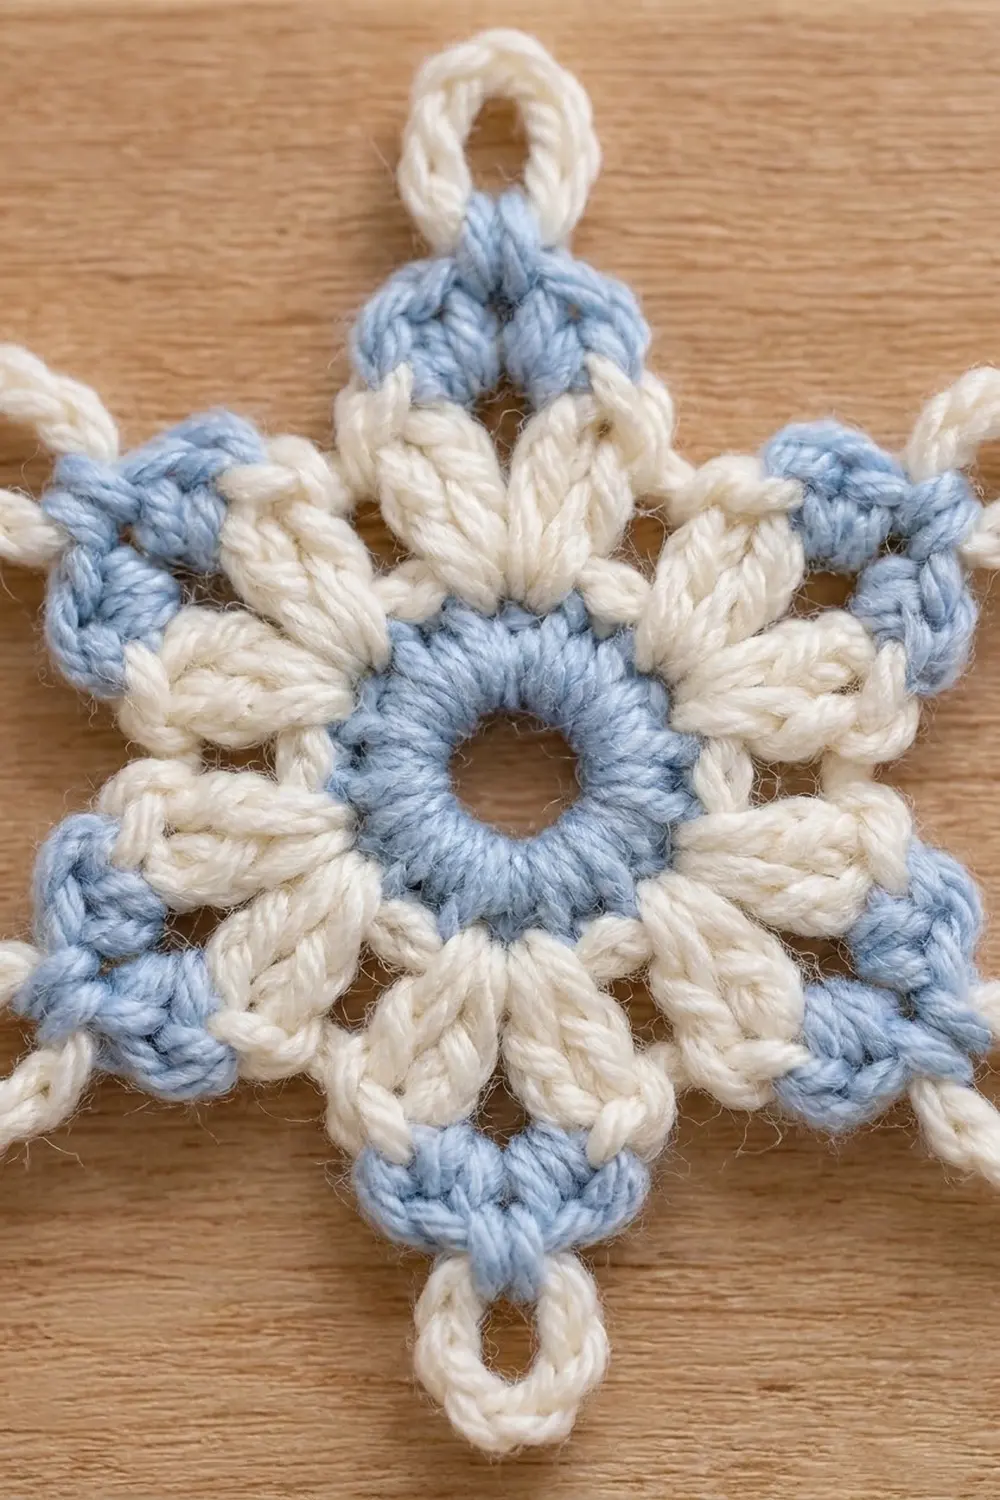
The Frosty Petal Snowflake is a small six-pointed motif in two winter colors. A powder-blue ring frames an open center. Twelve chubby cream petals surround it, and six blue arms finish in neat little loops. It looks delicate but feels sturdy, so it holds its shape well as an ornament.
The palette is soft and calm: powder blue and creamy white. The blue gives the center and arms a clear outline. The cream petals and outer edge keep the look light and snowy. It suits Scandinavian, cottage, or pastel holiday decor.
This pattern uses US crochet terms. The finished snowflake is 4.75 in (12.1 cm) from tip to tip, plus a 1 in (2.5 cm) hanging loop.
The snowflake is worked in the round in five rounds with four color changes. You make a blue ring, then cream cluster petals, then a cream base round. Next come the blue arms, and last a cream edging round with the tip loops and hanging loop. There is no sewing and no joining, just one piece.
Finished Size and Construction
- Finished size: 4.75 in (12.1 cm) tip to tip, not including the hanging loop
- Skill level: Easy / advanced beginner
- Terminology: US crochet terms
- Yarn weight: Worsted weight (#4), smooth cotton or cotton blend
- Hook: US 7 / 4.5 mm
- Number of pieces: 1
- Layout: Single six-pointed motif, worked in the round
- Piece size: 4.75 in (12.1 cm) tip to tip
- Size before border: 4.25 in (10.8 cm) tip to tip after Round 4
- Border depth: 0.25 in (0.6 cm) per tip (Round 5), plus a 1 in (2.5 cm) hanging loop
Materials
Yarn advice: Choose a smooth worsted-weight cotton or cotton-acrylic blend, about 200 m per 100 g (219 yd per 3.5 oz). Cotton gives crisp petals and picots and blocks flat. Avoid fuzzy or very loosely plied yarn, because it blurs the cluster shapes.
- Color A – Powder Blue: 6 g, about 12 m (13 yd)
- Color B – Cream White: 8 g, about 16 m (17.5 yd)
These quantities include a margin of about 25% for your gauge swatch, weaving in ends, and tension differences.
Tools:
- US 7 / 4.5 mm crochet hook
- Tapestry needle
- Scissors
- Stitch marker
- Ruler or tape measure
- Blocking mat and rust-proof pins
- Spray bottle with water
- Optional: fabric stiffener for a firmer ornament
Abbreviations (US Terms)
- ch – chain
- sl st – slip stitch
- sc – single crochet
- hdc – half double crochet
- dc – double crochet
- sp – space
- st(s) – stitch(es)
- sk – skip
- rep – repeat
Special stitches:
- Cluster (cl): Yarn over, insert hook in the stitch, yarn over and pull up a loop, yarn over and pull through 2 loops. Repeat from * to * twice more in the same stitch (4 loops on hook). Yarn over and pull through all 4 loops. This is a 3-dc cluster.
- Beginning cluster (beg cl): Ch 2, then work a 2-dc cluster in the same stitch: work the first part of a dc twice, then yarn over and pull through all 3 loops. The ch 2 plus the 2-dc cluster count as 1 cluster.
- Picot: Ch 3, sl st in the 3rd ch from the hook.
Gauge and Checkpoints
Exact gauge is not essential for an ornament. It does matter if you want several snowflakes to match. Make one test snowflake first and measure it after every round.
Checkpoints (lightly pressed flat):
- After Round 1: Ring diameter 1.25 in (3.2 cm), center hole about 0.5 in (1.3 cm)
- After Round 2: 2.5 in (6.4 cm) across, measured from petal pair to opposite petal pair
- After Round 3: 3.25 in (8.3 cm) across, measured from arm space to opposite arm space
- After Round 4: 4.25 in (10.8 cm) tip to tip
- After Round 5: 4.75 in (12.1 cm) tip to tip
If your piece is too big: Change to a 4.0 mm hook (US G-6) and work Round 1 again. A Round 1 more than 0.12 in (0.3 cm) too large will grow to about 0.5 in (1.3 cm) too large by the end.
If your piece is too small: Change to a 5.0 mm hook (US H-8). Check that your clusters are not pulled tight, because tight clusters make short, narrow petals.
Pattern
Round 1 – Blue Center Ring (Color A)
With Color A, ch 6. Sl st in the first ch to form a ring.
Ch 1 (does not count as a st). Work 18 sc into the ring. Sl st in the first sc to join.
Stitch count: 18 sc.
Fasten off Color A. The ring should stay open in the middle, about 0.5 in (1.3 cm) across. If the sc are bunching, ease them evenly around the ring before joining.
Think of the 18 sc as 6 sections of 3 sc each. Each section will hold one petal pair.
Round 2 – Cream Petal Pairs (Color B)
Join Color B with a sl st in any sc.
Beg cl in the same sc, ch 2, cl in the same sc (first petal pair made). Ch 2, sk next 2 sc.
(Cl, ch 2, cl) in next sc, ch 2, sk next 2 sc. Repeat from * to * 4 more times.
Sl st in the top of the beg cl to join.
Stitch count: 12 clusters (6 pairs), 6 V ch-2 sps (inside each pair), 6 between ch-2 sps.
Check: 6 sections × (1 sc worked + 2 sc skipped) = 18 sc used, which matches Round 1. Do not fasten off.
Round 3 – Cream Arm Base (Color B)
Sl st into the first V ch-2 sp (inside the first petal pair).
Ch 1 (does not count as a st). 3 sc in the V ch-2 sp. In the next between ch-2 sp, work (dc, ch 3, dc). Repeat from * to * 5 more times.
Sl st in the first sc to join.
Stitch count: 18 sc, 12 dc, 6 arm ch-3 sps.
The 3 sc cap the top of each petal pair. Each (dc, ch 3, dc) group sits in the gap between two pairs and becomes the base of an arm. Fasten off Color B.
Round 4 – Blue Arms (Color A)
Join Color A with a sl st in any arm ch-3 sp.
Ch 1 (does not count as a st). In the same arm sp, work (2 hdc, picot, ch 4, picot, 2 hdc). This is the first arm. The two picots sit on either side of the ch-4 tip space.
Sc in the next dc, sc in each of the next 3 sc, sc in the next dc. That gives 5 sc along the valley between arms.
In the next arm ch-3 sp, work (2 hdc, picot, ch 4, picot, 2 hdc). Sc in the next dc, sc in each of the next 3 sc, sc in the next dc. Repeat from * to * 4 more times.
Sl st in the first hdc to join.
Stitch count: 24 hdc, 30 sc, 12 picots, 6 ch-4 tip sps.
Per section: 4 hdc + 5 sc = 9 stitches, plus 2 picots and 1 tip space. Six sections × 9 = 54 stitches (24 hdc + 30 sc). Fasten off Color A.
Checkpoint: 4.25 in (10.8 cm) tip to tip. Pin out lightly if the arms curl.
Round 5 – Cream Edging, Tip Loops and Hanging Loop (Color B)
This round works as the border. See the Border section below for the gauge and math.
Border
Border gauge: 4 sc = 1 in (2.5 cm) along the edge, worked into Round 4 stitches. The round adds 0.25 in (0.6 cm) at each tip.
Choose the arm you want at the top. Join Color B with a sl st in that arm’s ch-4 tip sp.
Top tip (hanging loop): Ch 1 (does not count as a st). In the same tip sp, work (sc, ch 12, sc). The ch-12 loop is the hanging loop, about 1 in (2.5 cm) long.
Section repeat: Sk the picot and keep it in front of your work. Sc in each of the next 2 hdc. Sc in each of the next 5 sc. Sc in each of the next 2 hdc. Sk the picot.
Each remaining tip: In the next ch-4 tip sp, work (sc, ch 7, sc).
Repeat the section repeat and the tip from Section repeat 4 more times. Then work the section repeat once more to return to the top arm. Sl st in the first sc to join.
Counts per section:
- Tip: 2 sc + 1 loop (ch 7, or ch 12 at the top)
- Edge: 2 + 5 + 2 = 9 sc
Round total: 66 sc, 5 ch-7 tip loops, 1 ch-12 hanging loop.
Why the math works: Round 4 has 9 stitches per section (4 hdc + 5 sc). Round 5 works exactly 1 sc into each of those 9 stitches, so 6 × 9 = 54 sc. The tips add 2 sc each: 6 × 2 = 12 sc. That gives 54 + 12 = 66 sc. The 12 picots are skipped, not worked into. They stand outside the cream outline as the small blue side loops at each tip. The edge has no added increases, so it lies flat without ruffling.
Fasten off and weave in all ends on the back, following stitches of the same color.
Final Blocking
- Weave in all ends before blocking. Don’t trim them flush yet.
- Lay the snowflake right side up on a blocking mat.
- Mist it evenly with water until it is damp but not dripping.
- Pin the center hole open with a pin at the edge of the ring, so it stays about 0.5 in (1.3 cm) across.
- Pin each arm tip so the snowflake measures 4.75 in (12.1 cm) tip to tip. Pin through each ch-7 loop so it stays round and open.
- Shape the two blue picots on each arm so they angle outward evenly.
- Puff each cream cluster petal lightly with your fingertips so the pairs look even.
- Optional: brush on fabric stiffener for a firmer ornament, then re-pin.
- Let it dry completely, for 6–12 hours.
- Unpin and trim the woven ends.
Final Quality-Control Checklist
- Round 1 has exactly 18 sc and an open center about 0.5 in (1.3 cm) wide
- Round 2 has 12 clusters in 6 even pairs
- Round 3 has 18 sc, 12 dc and 6 arm ch-3 sps
- Round 4 has 24 hdc, 30 sc, 12 picots and 6 ch-4 tips
- Round 5 has 66 sc, 5 ch-7 loops and 1 ch-12 loop
- All six arms are the same length within 0.12 in (0.3 cm)
- Measures 4.75 in (12.1 cm) tip to tip after blocking
- Hanging loop is at the top of one arm, not between arms
- Snowflake lies flat with no cupping or ruffling
- All ends are secure and invisible from the front
Troubleshooting
Center hole closes up: The ring was pulled too tight. Work Round 1 again, and don’t pull the starting ring closed after adding the sc.
Snowflake cups like a bowl: Your Round 2 clusters are too short, or Round 3 is tight. Go up 0.5 mm in hook size for Rounds 2–3.
Edges ruffle: Check Round 5. Work exactly 1 sc per stitch and never into the picots.
Petals look flat or thin: Pull up each cluster loop to full height before closing it. Give each petal a light puff during blocking.
Arms are different lengths: Count the chains in each tip space and loop. Check that each arm has 2 hdc on each side.
Picots twist backward: Pull them forward while you work Round 5, then pin them during blocking.
Color changes show: Join new colors in a chain space, and weave tails behind same-color stitches.
Care
Hand wash in cool water with mild soap, press out the water in a towel, and dry flat, pinned to shape. If you stiffened the snowflake, spot clean only.
Final Notes
Here is the measurement chain in one place. Round 1 is a 1.25 in (3.2 cm) ring with 18 sc. Round 2 adds 12 cream petals for 2.5 in (6.4 cm). Round 3 builds the arm bases for 3.25 in (8.3 cm). Round 4 adds blue arms for 4.25 in (10.8 cm). Round 5 outlines the edge with 66 sc and finishes at 4.75 in (12.1 cm) tip to tip, plus a 1 in (2.5 cm) hanging loop.
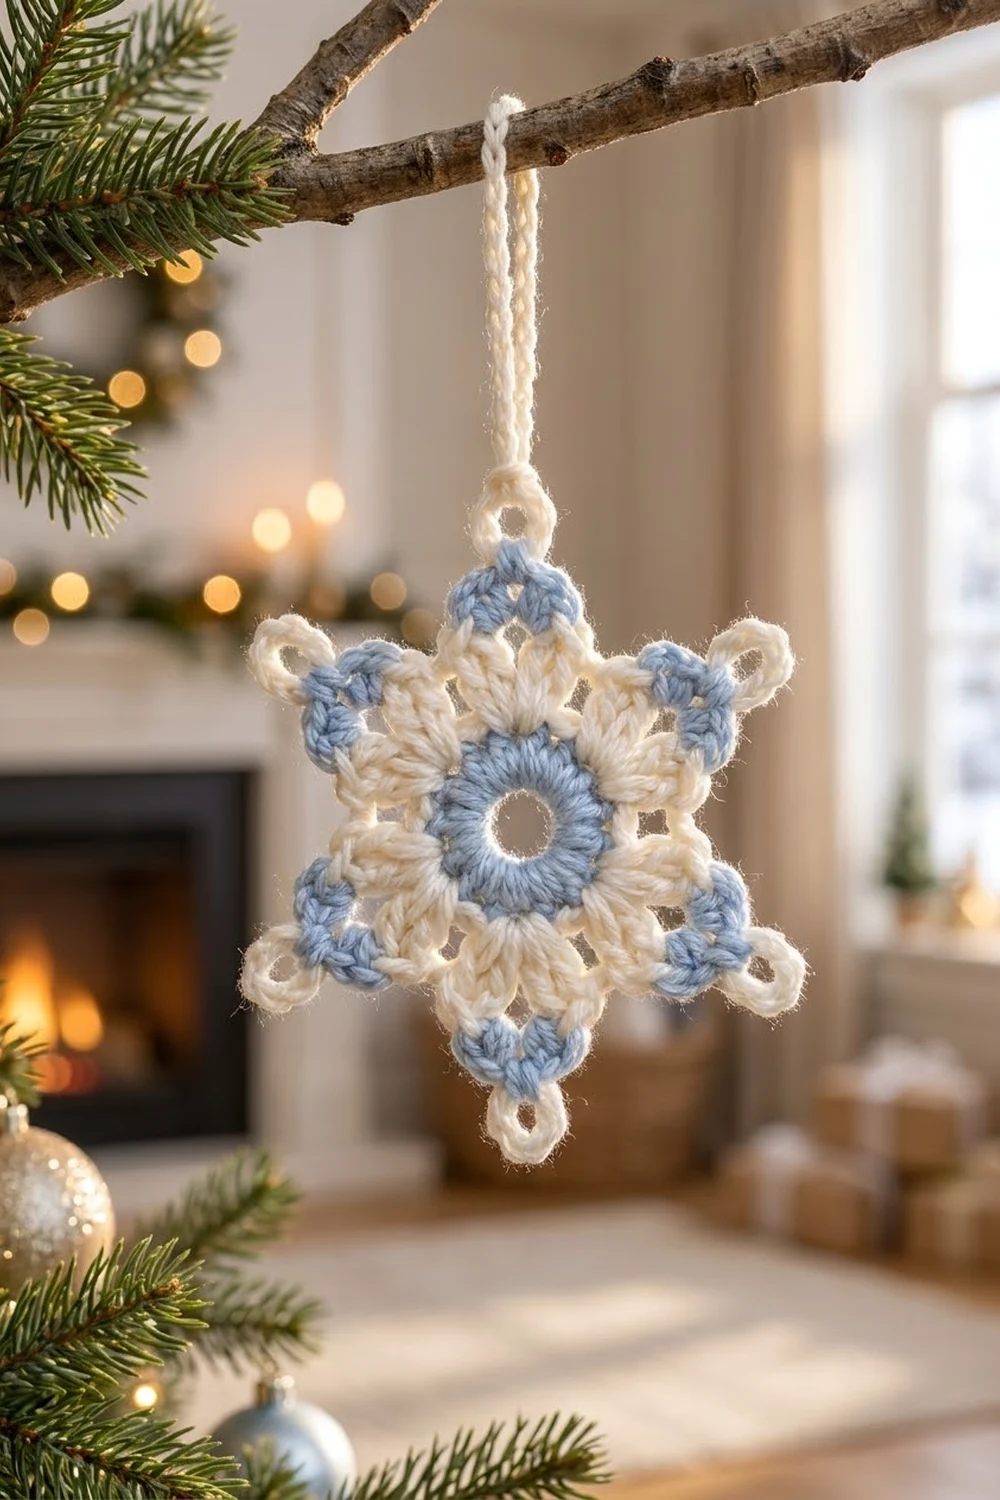
If your first snowflake matches each checkpoint, every one you make after it will match too. Hang one on a tree branch, tie it onto a gift, or put it in a window.
Happy crocheting!