

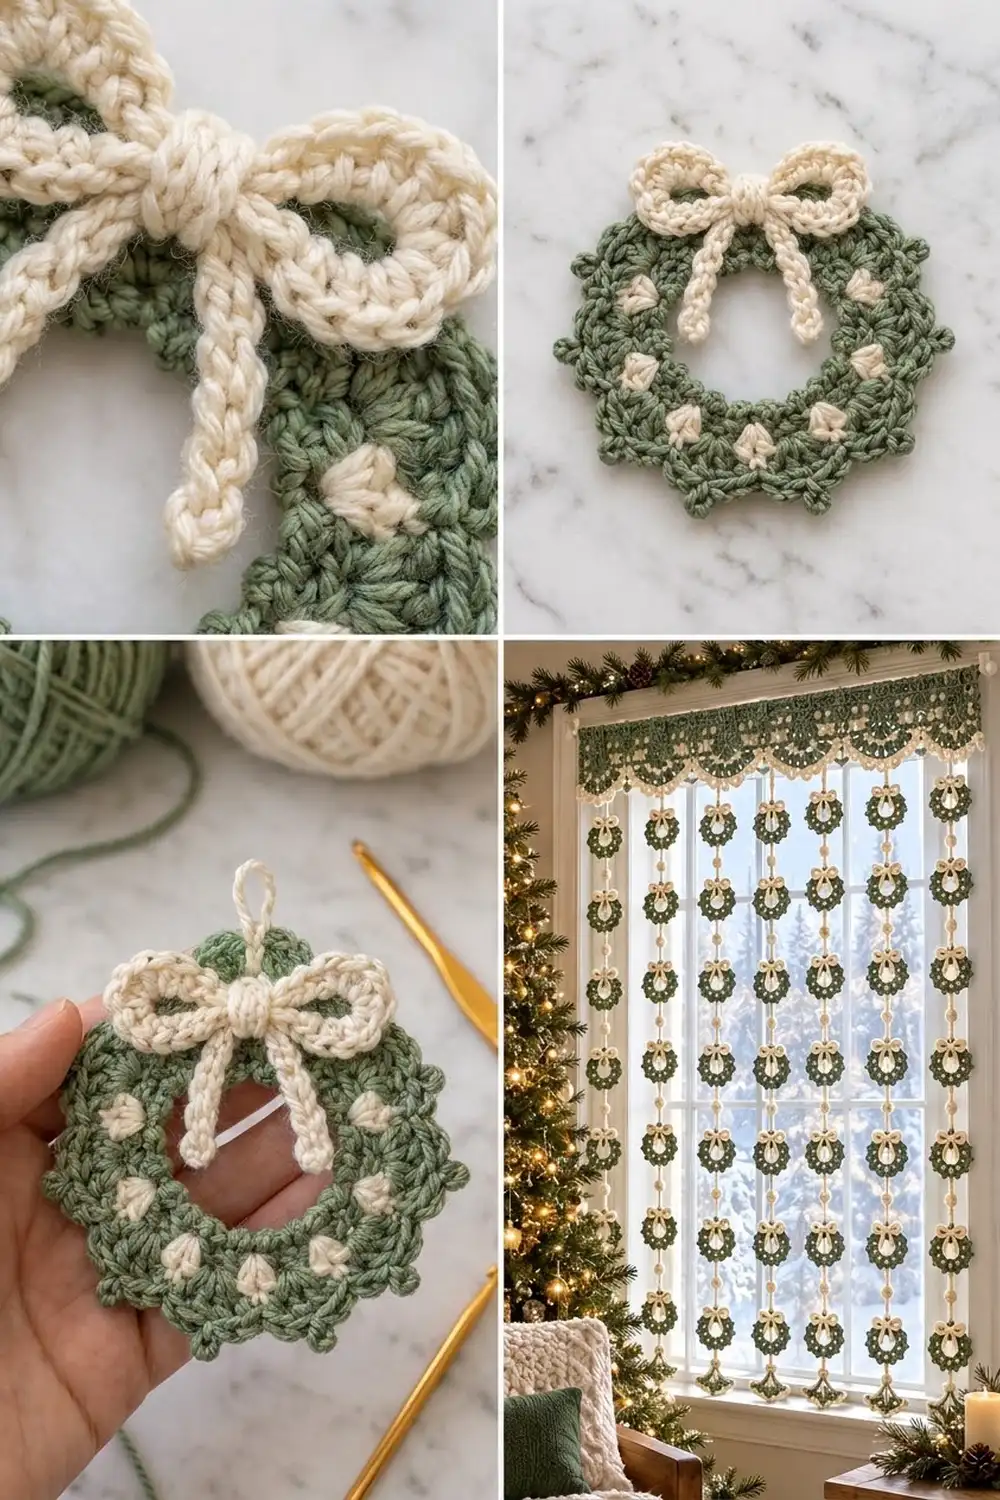
This little wreath is a single, flat motif: a sage-green ring with a row of cream dots, a softly scalloped outer edge, and a chunky cream bow sewn to the top. It looks cozy and handmade, which makes it a good fit for a tree, a gift tag, or a window.
The palette uses just two colors. Sage green makes up the whole ring and the scallops. Cream is used for the twelve puff-stitch dots and for the bow, so the light color shows up all around the piece and ties it together.
The pattern uses US crochet terms. The finished wreath measures 4.25 in (10.8 cm) across. With the bow attached, the whole ornament is about 5.5 in (14.0 cm) tall, and the bow is about 3 in (7.6 cm) wide.
Construction is simple. You chain a ring, work four rounds outward (one of them a round of cream puffs), and finish with a scalloped picot edge. The bow is made from three short cords that you fold, wrap, and sew on.
Finished Size and Construction
- Finished size: 4.25 in (10.8 cm) wreath diameter; 5.5 in (14.0 cm) total height with bow
- Skill level: Easy-intermediate (simple color change, puff stitch)
- Terminology: US crochet terms
- Yarn weight: DK (light worsted, #3)
- Hook: 4 mm (G-6)
- Number of pieces: 1 wreath ring + 3 bow cords, assembled into one ornament
- Layout: Single motif; bow centered at the top
- Center opening: 1.25 in (3.2 cm)
- Size before border: 3.6 in (9.1 cm) after Rnd 4
- Border depth: about 0.3 in (0.8 cm) of scallops all around, plus picot tips
Materials
Choose a smooth, matte DK cotton or cotton blend. Cotton gives crisp stitch definition and keeps the puff dots round. Acrylic works too, but it may need steam blocking to lie flat.
- Sage green (Color A): 10 g, about 23 m (25 yd)
- Cream (Color B): 5 g, about 12 m (13 yd)
Tools:
- 4 mm (G-6) crochet hook
- Tapestry needle
- Scissors
- 2 stitch markers
- Ruler or tape measure
- Blocking mat and rustproof pins
- Spray bottle or steam iron
All quantities include a margin of roughly 30% for a test piece and for weaving in ends.
Abbreviations (US Terms)
- ch: chain
- sl st: slip stitch
- sc: single crochet
- hdc: half double crochet
- dc: double crochet
- st(s): stitch(es)
- yo: yarn over
- rnd: round
- rep: repeat
Special stitches
Puff: (Yo, insert hook in st, yo and pull up a loop to the height of a hdc) 3 times, then yo and pull through all 7 loops on hook. One puff counts as 1 st.
Picot: Ch 3, sl st in the 3rd ch from hook. A picot does not count as a stitch.
Color change: Work the last st before the new color until 2 loops remain on the hook. Drop the old color, yo with the new color, and pull through.
Gauge and Checkpoints
Make one complete wreath before you plan a larger batch. Gauge is measured by diameter at each stage, because that is the easiest way to check a round motif.
Checkpoints (laid flat, not stretched):
- After Rnd 1: 1.75 in (4.4 cm) across
- After Rnd 2: 2.4 in (6.1 cm) across
- After Rnd 3: 2.9 in (7.4 cm) across
- After Rnd 4: 3.6 in (9.1 cm) across
- After Rnd 5: 4.25 in (10.8 cm) across
- Bow cords: 5 sc = 1 in (2.5 cm)
If your wreath is too big: go down to a 3.5 mm hook, or work your starting chain more tightly. If it is too small: go up to a 4.5 mm hook. Adjust after Rnd 2, not at the end. A small error early on grows with every round.
If the ring ruffles, your dc are too loose. If it cups like a bowl, your sc are too tight. Fix either problem before you move on.
Wreath Ring
Work in joined rounds with the right side facing. Do not turn.
Place a stitch marker in the first stitch of each round. It makes the join easy to find and helps you count repeats as you go.
Foundation: With Color A, ch 24. Sl st in the first ch to form a ring, taking care not to twist the chain. The ring should measure about 1.25 in (3.2 cm) across.
Rnd 1 (conversion round): Ch 1. Working into each ch of the ring: sc in next ch, 2 sc in next ch; rep from * 11 more times. Sl st in first sc to join.
Count: 24 sc worked 1 per ch + 12 added = 36 sc*.
Rnd 2 (growth round): Ch 3 (counts as dc). Dc in next st, 2 dc in next st, dc in each of next 2 sts, 2 dc in next st; rep from * 10 more times. Sl st in top of beginning ch-3 to join.
Count: 48 dc* (12 repeats of 4 sts).
Rnd 3 (dot round): Ch 1. Lay Color B along the top of the round and work over it, so it stays hidden inside the sc.
Sc in each of next 3 sts with Color A, changing to Color B in the last sc. Puff in next st with Color B, changing back to Color A as you close the puff; rep from * 11 more times. Sl st in first sc to join. Cut Color B, leaving a 6 in (15.2 cm) tail.
Count: 36 sc + 12 puffs = 48 sts*. You now have 12 cream dots evenly spaced around the ring.
Gently push each puff toward the right side with your fingertip so the dots stand out.
Rnd 4 (growth round): Ch 3 (counts as dc). 2 dc in next sc, dc in next sc, dc in top of next puff. Dc in next sc, 2 dc in next sc, dc in next sc, dc in top of next puff; rep from * 10 more times. Sl st in top of beginning ch-3 to join.
Count: 60 dc* (12 repeats of 5 sts).
Putting the increase in the middle sc keeps a single dc directly above each puff. The dots stay crisp and the round stays flat.
Checkpoint: the ring now measures 3.6 in (9.1 cm) across, with a 1.25 in (3.2 cm) opening.
Border (Scalloped Picot Edge)
The border is one round of Color A worked directly into Rnd 4. It adds about 0.3 in (0.8 cm) all around.
Border gauge: one scallop spans 5 sts of Rnd 4, which is about 0.95 in (2.4 cm) of outer edge before blocking.
Rnd 5 (trim round): Continue with Color A. Ch 1. *Sc in next st, hdc in next st, (dc, picot, dc) in next st, hdc in next st, sc in next st; rep from * 11 more times. Sl st in first sc to join. Fasten off.
Count: 60 sts worked 1 per st + 12 extra dc = 72 sts, plus 12 picots. That is 6 sts and 1 picot per scallop.
Why the math works: Rnd 4 has 60 sts. Each scallop uses exactly 5 sts, and 60 ÷ 5 = 12. Twelve scallops match the twelve puff dots, so each scallop peak sits above a cream dot. No stitches are skipped, so the edge does not pull in, and the extra dc at each peak gives the edge enough flare to lie flat.
Checkpoint: the finished wreath measures 4.25 in (10.8 cm) across, picot tip to picot tip.
Bow
Make all three cords with Color B. Each cord is a single row of sc worked into the back bumps of the chain. That gives a round, rope-like edge on both sides, like the chunky bow on the finished wreath.
Loop cord: Ch 31. Sc in back bump of 2nd ch from hook and in each ch across.
Count: 30 sc, about 6 in (15.2 cm) long. Fasten off, leaving short tails.
Tail cord: Ch 21. Sc in back bump of 2nd ch from hook and in each ch across.
Count: 20 sc, about 4 in (10.2 cm) long. Fasten off.
Center band: Ch 7. Sc in back bump of 2nd ch from hook and in each ch across.
Count: 6 sc, about 1.25 in (3.2 cm) long. Fasten off, leaving an 8 in (20.3 cm) tail for sewing.
If a cord twists into a spiral, steam it lightly or roll it between your palms before you shape the bow.
Shape the bow:
- Lay the loop cord flat. Bring both ends to the middle so they overlap by about 0.4 in (1.0 cm). You now have two equal loops, each about 1.5 in (3.8 cm) wide, for a total bow width of about 3 in (7.6 cm).
- Fold the tail cord in half into a narrow upside-down V. Place the fold behind the center of the loops so two tails, each about 2 in (5.1 cm) long, hang down.
- Wrap the center band around the middle of all the layers and sew its ends together at the back. Pull slightly so the loops pinch in at the center and puff out.
- Make a few stitches through all layers at the back to lock the shape.
Attaching the Bow
Center the bow at the top of the wreath. The center band should sit over Rnds 4 and 5. The loops rise about 1.25 in (3.2 cm) above the scalloped edge, and the tails hang down over the ring toward the opening.
Using the 8 in (20.3 cm) tail of the center band, sew through the back of the band and into the back loops of Rnds 3 and 4. Tack each tail down at one point near its middle so it lies on the ring and doesn’t flip.
For an optional hanging loop, join Color B at the top behind the bow, ch 15, and sl st back into the same st. Fasten off.
Final Blocking
- Weave in all ends on the wrong side, through stitches of the same color.
- Lightly mist the wreath with water until it is damp, not soaked.
- Pin it to a blocking mat at 4.25 in (10.8 cm) across. Use a ruler to check two diameters at right angles to each other.
- Pin each picot tip outward so all twelve scallops look even.
- Pin the edge of the center opening at four points to keep it round at 1.25 in (3.2 cm).
- Shape the bow loops by hand. Tuck a little tissue inside each loop if you want them to stay open.
- Let it dry fully, at least 6 hours, before you unpin it.
For acrylic, hold a steam iron about 1 in (2.5 cm) above the piece instead of misting. Never press the iron down on the stitches.
Final Quality-Control Checklist
- Rnd 1 has 36 sc, Rnd 2 has 48 dc, Rnd 3 has 48 sts, and Rnd 4 has 60 dc.
- Rnd 5 has 72 sts and 12 picots in 12 scallops.
- All 12 cream puffs are visible and evenly spaced.
- Each scallop peak sits above a puff.
- No Color B strands show through the green on the right side.
- The wreath measures 4.25 in (10.8 cm) across and lies flat.
- The center opening is round and about 1.25 in (3.2 cm) across.
- The bow is about 3 in (7.6 cm) wide and centered, with tails of equal length.
- All ends are woven in and trimmed.
Troubleshooting
The wreath ruffles. Your dc are too loose, or you added extra stitches. Recount Rnd 2 and Rnd 4, then try a smaller hook.
The wreath cups. Rnd 1 or Rnd 3 is too tight. Loosen your sc or go up half a hook size.
Cream shows between the green stitches. Keep the carried strand slack and lay it along the top of the round, not in front of it.
The puffs look flat. Pull each loop up to hdc height before closing, then push the puffs to the right side.
The scallops are uneven. Check that each repeat uses exactly 5 sts. A miscount usually shows up as one wide or one narrow scallop near the join.
The center opening is too small or too large. Check your starting chain. Twenty-four loose chains should form a 1.25 in (3.2 cm) ring. If yours is tighter, chain with a hook one size larger.
The bow droops. Pull the center band tighter and add a stitch at the back through every layer.
The starting ring is stretched out of shape. Weave the starting tail around the base of Rnd 1 and snug it up before blocking.
Care
Hand wash in cool water with mild soap, press out the water in a towel, and dry flat, reshaping the scallops and bow. Do not tumble dry.
Final Notes
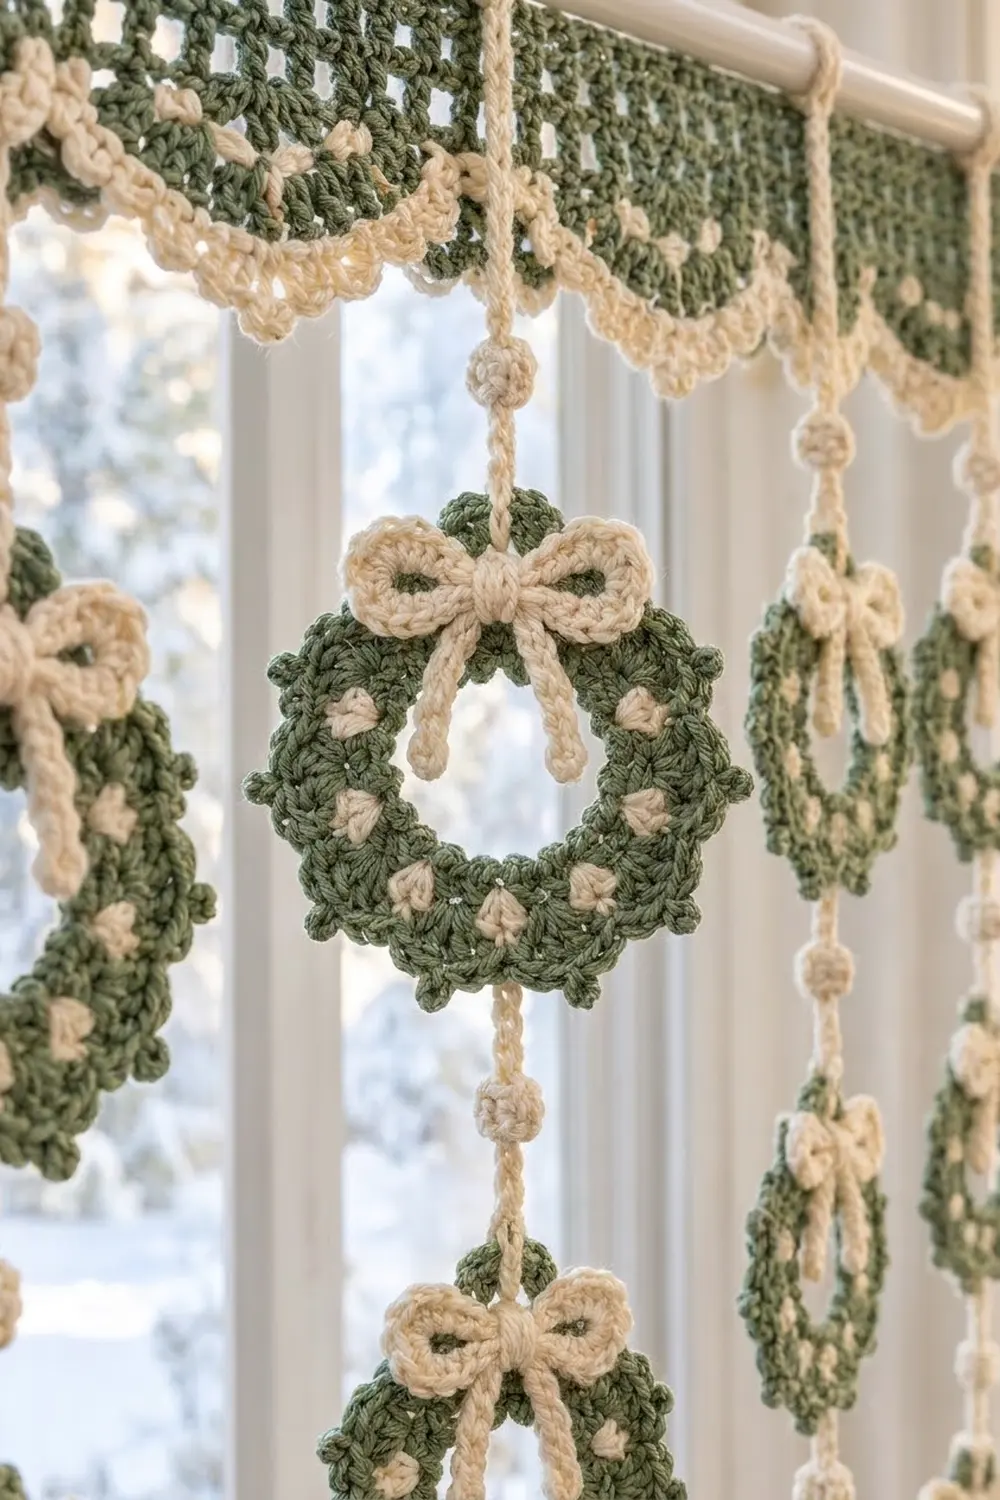
The measurement chain is short and easy to follow. A 24-ch ring gives a 1.25 in (3.2 cm) opening. Rnd 1 brings the piece to 1.75 in (4.4 cm), Rnd 2 to 2.4 in (6.1 cm), and the dot round to 2.9 in (7.4 cm). Rnd 4 reaches 3.6 in (9.1 cm) with 60 sts, and the 12-scallop border finishes the wreath at 4.25 in (10.8 cm). The bow adds about 1.25 in (3.2 cm) of height, for a total of 5.5 in (14.0 cm).
The stitch counts follow one simple rule: everything comes in twelves. There are 12 increases per growth round, 12 puffs, and 12 scallops. If a count is ever off, divide by 12 and you will quickly find the repeat that went wrong.
If every checkpoint matches, your wreath will match too. Once you have one you love, the same pattern is quick to repeat for a set of ornaments or gift toppers.
Happy crocheting!