

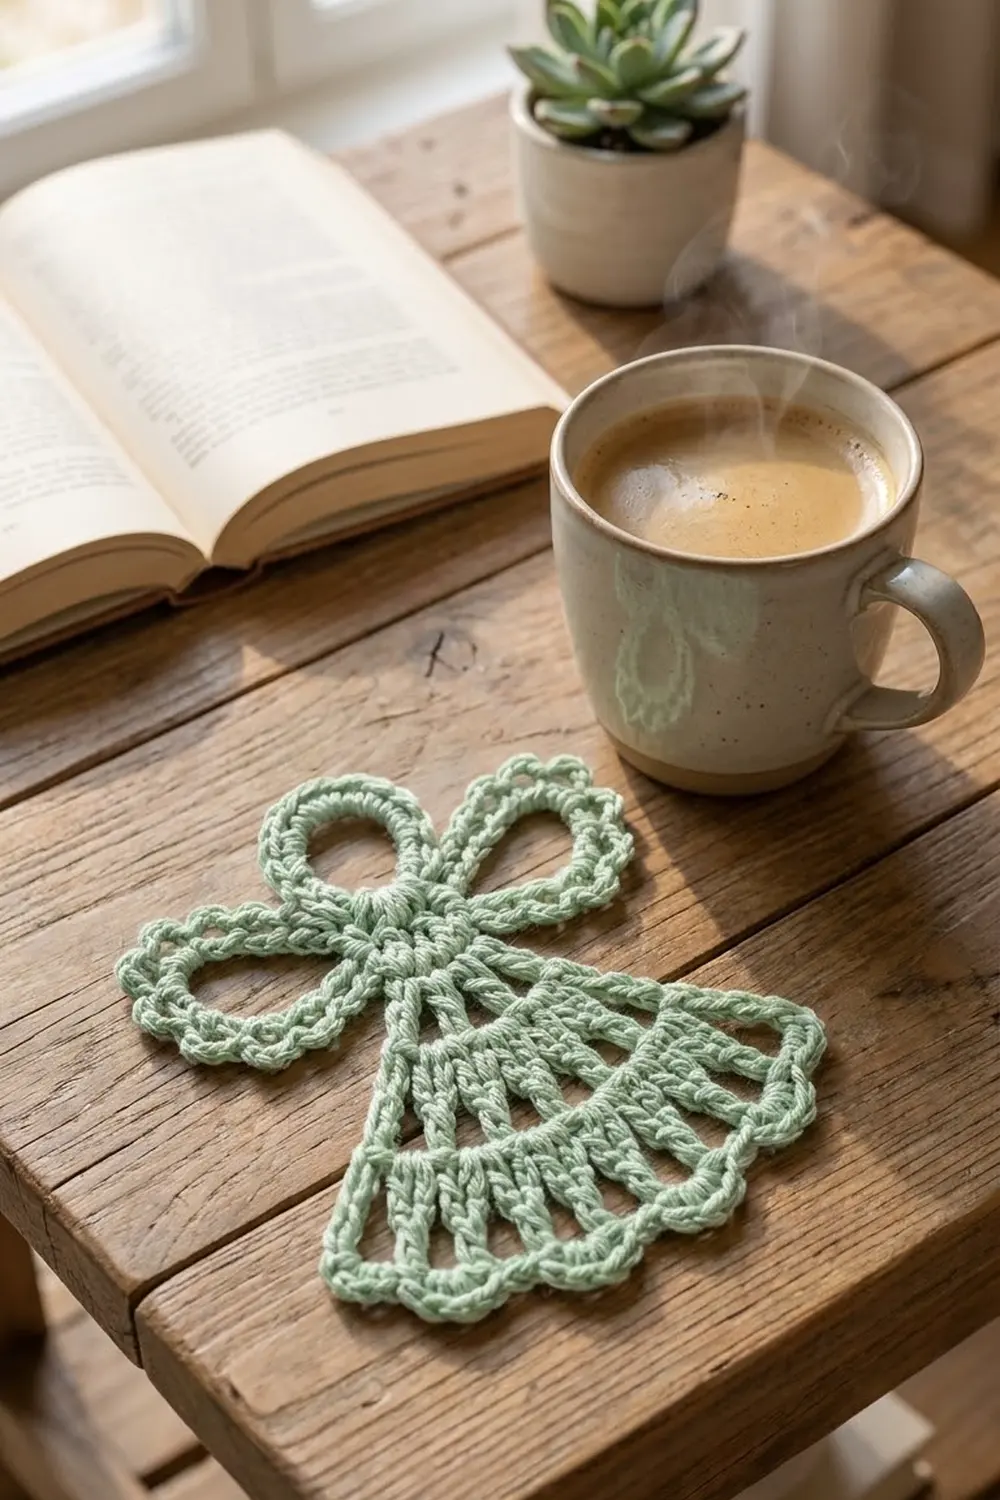
This lacy little angel is made with one strand of soft mint green cotton. She has an open ring head, a small solid circle at the chest, two looped wings, and a fan-shaped skirt that ends in a row of rounded scallops. She looks light and airy, but she lies flat and holds her shape.
The style is classic thread lace, scaled up to DK cotton so it’s quick to make and easy to see. One angel makes a sweet ornament, gift tag, or card topper. Because she lies flat, she also looks lovely pinned to a window or a lampshade.
The pattern uses US crochet terms throughout. The finished angel measures 5 in (12.7 cm) wide from wing tip to wing tip and 5 in (12.7 cm) tall from the top of the head to the lowest scallop.
There’s almost no sewing. You start with a magic ring for the chest, then add the head loop and both wings. Next you work the skirt back and forth in rows straight off the chest circle. The scalloped hem forms the border.
Finished Size and Construction
- Finished size: 5 in (12.7 cm) wide x 5 in (12.7 cm) tall
- Skill level: Easy
- Terminology: US crochet terms
- Yarn weight: DK / light (3), cotton or cotton blend
- Hook: 3.5 mm (E-4)
- Number of pieces: 1 single motif
- Layout: one stand-alone angel, no joining
- Piece size: 5 in (12.7 cm) wide x 5 in (12.7 cm) tall
- Size before border: 5 in (12.7 cm) wide x 4.5 in (11.4 cm) tall
- Border depth: 0.5 in (1.3 cm), scalloped hem only
Materials
Choose a smooth mercerized or combed cotton in DK weight. Cotton gives crisp stitch definition and keeps the open spaces neat after blocking. Avoid fuzzy or very stretchy yarns, because the chain loops will lose their shape.
Yarn:
- Mint green: 10 g, about 25 m (27 yd) of DK cotton
One angel uses about 8 g. The amount above includes extra yarn for your gauge check and yarn tails.
Tools:
- 3.5 mm (E-4) crochet hook
- Tapestry needle
- Scissors
- 1 stitch marker
- Rust-proof pins
- Blocking mat or folded towel
- Spray bottle with water
- Optional: fabric stiffener or light spray starch for an ornament
Abbreviations (US Terms)
- ch – chain
- sl st – slip stitch
- sc – single crochet
- dc – double crochet
- tr – treble crochet
- sk – skip
- sp – space
- st(s) – stitch(es)
- RS / WS – right side / wrong side
- [ ] – repeat the steps inside the brackets the stated number of times
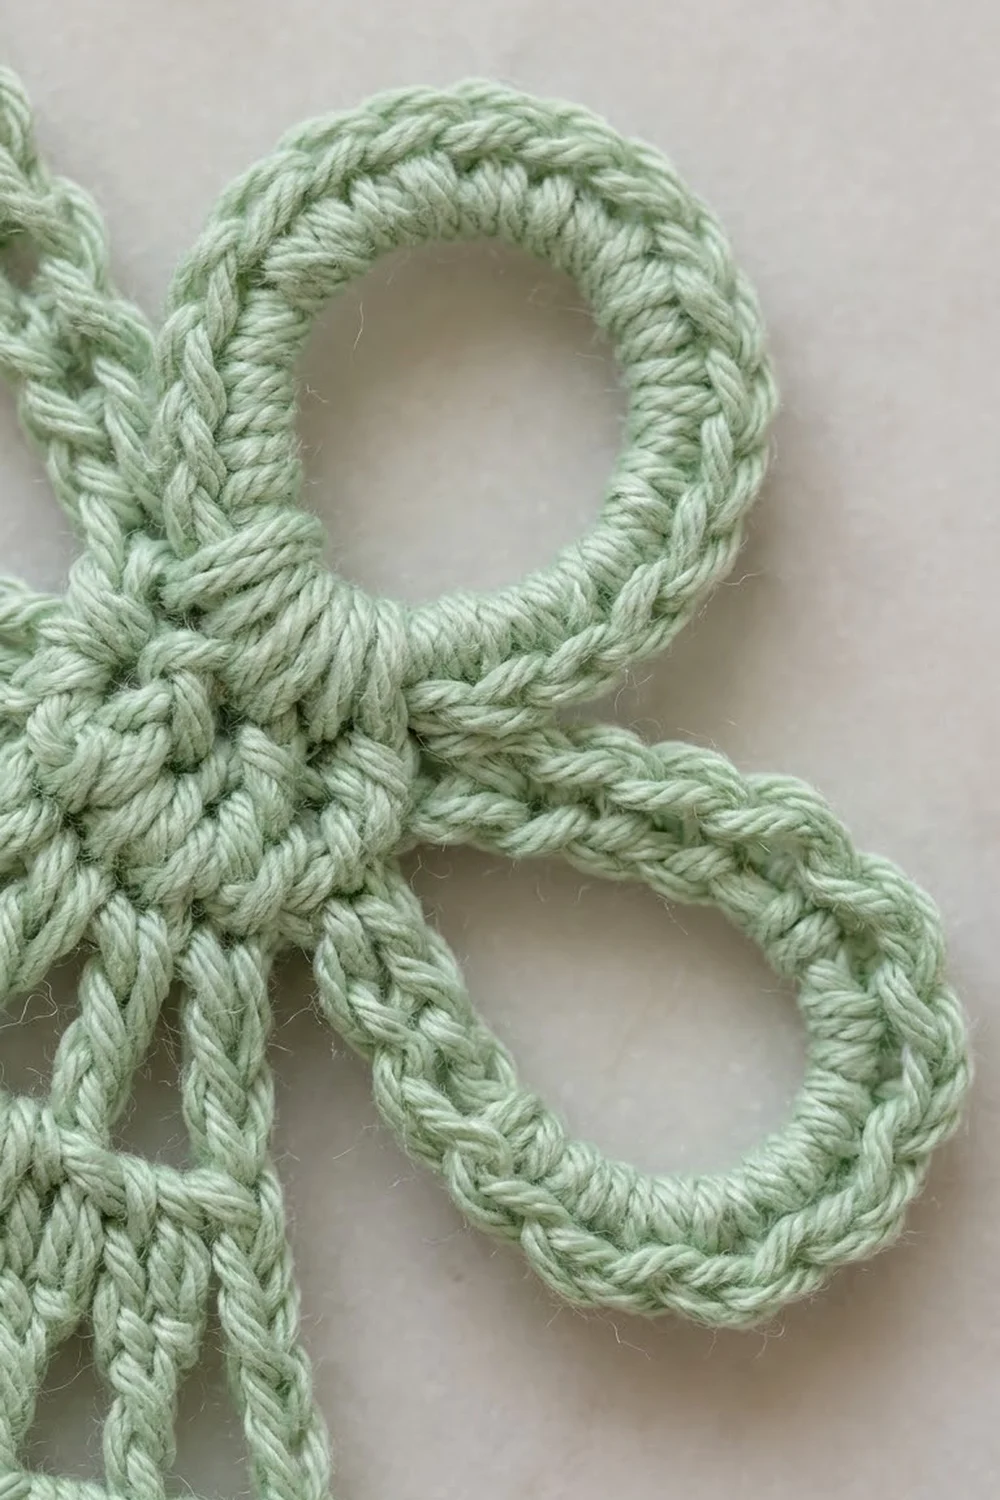
Special technique – covered loop: Make the stated chain, then sl st back into the same base stitch to close it into a loop. Ch 1 and work the stated number of sc into the loop, going around the chain rather than into each chain. Push the stitches together as you go so the loop is fully covered.
Gauge and Checkpoints
Exact gauge doesn’t matter much for a single motif, but matching it keeps the proportions right. Make the chest circle first and measure it before you go on.
- Chest (Rnd 1): 1 in (2.5 cm) across
- Head loop: 1.25 in (3.2 cm) across, outer edge
- Wing loop: 2 in (5.1 cm) long from chest to tip
- Skirt after Row 3: 3 in (7.6 cm) wide at the lower edge
- Skirt after Row 5: 4.5 in (11.4 cm) wide, 2.25 in (5.7 cm) deep
- Hem after Row 7: 4.75 in (12.1 cm) wide
If your chest circle is too big, go down to a 3.25 mm (D-3) hook. If it’s too small, go up to a 3.75 mm (F-5) hook. Measure the circle again before you continue. A difference of more than 0.25 in (0.6 cm) at the chest grows to almost 1 in (2.5 cm) across the hem.
Pattern
Chest
Rnd 1: Make a magic ring. Ch 3 (counts as first dc), then work 11 dc in the ring. Pull the ring closed and sl st to the top of the beginning ch-3. (12 dc)
Number the stitches 1 to 12 in your working direction. The beginning ch-3 is st 1 and sits at the top of the angel. Don’t fasten off.
Checkpoint: the circle measures 1 in (2.5 cm) across.
Where each part attaches to the chest:
- st 1 – head
- sts 2–3 – left bare
- st 4 – Wing A
- sts 5–9 – base of the skirt
- st 10 – Wing B
- sts 11–12 – left bare
This puts 3 stitches between the head and each wing, and centers the skirt on st 7, directly opposite the head.
Head
You’re at st 1.
Ch 14, then sl st in the same st 1 to form a loop. Ch 1 and work 22 sc in the ch-14 loop. Sl st in st 1 again. (22 sc on the loop)
Checkpoint: the head ring is 1.25 in (3.2 cm) across and stands straight above the chest.
Wing A
Sl st in each of sts 2, 3 and 4. You’re now at st 4.
Ch 18, then sl st in the same st 4 to form a loop. Ch 1 and work 28 sc in the ch-18 loop. Sl st in st 4 again. (28 sc on the loop)
The wing is one long teardrop-shaped loop. The packed sc give it a thick, beaded outline. You’ll shape the rounded upper part and the narrower lower edge when you block.
Remove your hook and put a stitch marker in the live loop. You’ll come back to it for the skirt.
Checkpoint: the wing measures 2 in (5.1 cm) from the chest to the tip.
Wing B
Join a new strand of yarn with a sl st in chest st 10.
Ch 18, then sl st in the same st 10 to form a loop. Ch 1 and work 28 sc in the ch-18 loop. Sl st in st 10 again, then sl st in sts 11 and 12. (28 sc on the loop)
Fasten off this strand.
Checkpoint: both wings are 2 in (5.1 cm) long. Measured from wing tip to wing tip, the angel is 5 in (12.7 cm) wide.
Skirt
Put the live loop from Wing A back on your hook. The skirt is worked in rows across chest sts 5 through 9 only. Turn at the end of every row.
Row 1 (RS): Sl st in st 5. Ch 3 (counts as first dc), dc in the same st 5, then work 2 dc in each of sts 6, 7, 8 and 9. Turn. (10 dc)
Row 2 (WS): Ch 4 (counts as dc + ch 1), dc in next dc, [ch 1, dc in next dc] 8 times. Work the last dc in the top of the turning ch. Turn. (10 dc and 9 ch-1 sps)
These rows make the spokes that fan out at the top of the skirt.
Row 3 (RS): Ch 3 (counts as first dc), [2 dc in next ch-1 sp, dc in next dc] 4 times, 3 dc in next ch-1 sp (the center sp), dc in next dc, [2 dc in next ch-1 sp, dc in next dc] 4 times. Work the last dc in the 3rd ch of the turning ch-4. Turn. (29 dc)
Count check: 1 + 12 + 3 + 1 + 12 = 29 dc. The extra dc in the center space makes the count odd, so the hem scallops will line up evenly on both sides. This dense row forms the solid middle band.
Checkpoint: the lower edge of Row 3 is 3 in (7.6 cm) wide.
Row 4 (WS): Ch 1, sc in each dc across, working the last sc in the top of the turning ch. Turn. (29 sc)
This row makes the firm horizontal ridge across the skirt.
Row 5 (RS): Ch 5 (counts as tr + ch 1), tr in next sc, [ch 1, tr in next sc] 27 times. Turn. (29 tr and 28 ch-1 sps)
Count check: the turning ch counts as tr 1, then 1 tr, then 27 tr in the brackets, for 29 tr. Each of the 29 sc from Row 4 gets exactly one tr.
These tall, open spokes give the lower skirt its lacy flare. Don’t fasten off.
Checkpoint: Row 5 is 4.5 in (11.4 cm) wide, and the skirt is 2.25 in (5.7 cm) deep from the chest to the top of the tr. The whole angel now measures 5 in (12.7 cm) wide x 4.5 in (11.4 cm) tall.
Border
The border is the scalloped hem along the bottom of the skirt. You work it as two rows straight on from Row 5. The slanted sides of the skirt, the head and the wings get no extra edging.
Border gauge: each finished scallop is about 0.68 in (1.7 cm) wide and 0.5 in (1.3 cm) deep. Seven scallops measure 4.75 in (12.1 cm) across.
Row 6 (WS): Ch 1, sc in first tr, [ch 5, sk next 4 ch-1 sps and 3 tr, sc in next tr] 7 times. Work the last sc in the 4th ch of the turning ch-5. Turn. (8 sc and 7 ch-5 loops)
Each repeat moves from one tr to the 4th tr after it, so the sc land on tr 1, 5, 9, 13, 17, 21, 25 and 29.
Row 7 (RS): Ch 1, sc in first sc, [9 sc in next ch-5 loop, sc in next sc] 7 times. (71 sc: 7 scallops of 9 sc each, plus 8 single sc between and at the ends)
Count check: 8 + (7 x 9) = 8 + 63 = 71 sc. Fasten off.
Packing 9 sc onto each 5-chain loop makes the loop bow outward into a rounded scallop.
Why the math works: Row 5 has 29 tr. Each scallop moves 4 tr along the row, so 1 + (4 x 7) = 29 tr. The first and last sc sit exactly on the outer tr, with no partial repeat left over. The middle scallop (loop 4) spans tr 13 to tr 17, so it’s centered on tr 15. That’s the center stitch of the row, directly below the head, so the hem is perfectly symmetrical.
Weave in all ends along the back of the chest and skirt rows.
Final Blocking
- Weave in every tail before blocking so the ends set in place.
- Soak the angel in cool water for 10 minutes, or mist it until it’s damp all the way through.
- Roll it in a towel and press gently to remove extra water. Don’t wring it.
- Lay it RS up on the blocking mat.
- Pin the head into a round circle 1.25 in (3.2 cm) across.
- Pin each wing so the upper edge curves up into a rounded shape and the tip points slightly upward. The wing tips should be 5 in (12.7 cm) apart.
- Spread the skirt into an even fan. Pin the hem to 4.75 in (12.1 cm) wide, with one pin at the center of each scallop.
- Check that the overall height is 5 in (12.7 cm) from the top of the head to the lowest scallop.
- For an ornament, brush or spray on fabric stiffener now.
- Let it dry completely, at least 12 hours, before you remove the pins.
Final Quality-Control Checklist
- The chest has 12 dc and lies flat without cupping.
- The head loop has 22 sc and is centered above the skirt.
- Each wing has 28 sc, and both wings are the same length.
- There are exactly 2 bare chest stitches between the head and each wing.
- Row 3 has 29 dc, with 3 dc in the center space only.
- Rows 4 and 5 each have 29 stitches (29 sc, then 29 tr).
- The hem has 7 scallops of 9 sc, and the middle scallop is centered.
- The finished size is 5 in (12.7 cm) x 5 in (12.7 cm).
- All tails are woven in and can’t be seen from the RS.
Troubleshooting
The chest circle cups or ruffles. If it cups, the dc are too tight. If it ruffles, they’re too loose. Redo Rnd 1 and keep exactly 12 dc.
The wings or head loop look bare. The sc aren’t packed together. Slide them along the chain as you work, and keep the counts at 22 and 28 sc.
The skirt pulls inward. The ch-1 spaces in Rows 2 and 5 are too tight. Make each ch-1 as tall as a relaxed loop on your hook.
The skirt ripples at the hem. Your tr are too loose compared with your dc. Try working Row 5 with a hook 0.25 mm smaller.
The scallops don’t line up. Recount Row 5. You need exactly 29 tr before you start Row 6.
The angel leans to one side. The skirt was started on the wrong chest stitches. It has to be centered on st 7, directly opposite the head at st 1.
Care
Hand wash in cool water with mild soap, press out the water in a towel, and dry flat. If a starched ornament softens over time, pin it out again and re-apply stiffener.
Final Notes
Here’s how the measurements add up. The chest circle is 1 in (2.5 cm) across. The head adds 1.25 in (3.2 cm) above it. The skirt adds 2.25 in (5.7 cm) below it, which makes the angel 4.5 in (11.4 cm) tall before the border. The 0.5 in (1.3 cm) scalloped hem brings the height to 5 in (12.7 cm). Across, the two 2 in (5.1 cm) wings and the 1 in (2.5 cm) chest add up to a 5 in (12.7 cm) wingspan.
There are two key checkpoints: the chest circle and Row 5. If both match, your angel will come out at the finished size. Make one for a tree, a gift, or a window, and enjoy how quickly she comes together.
Happy crocheting!