

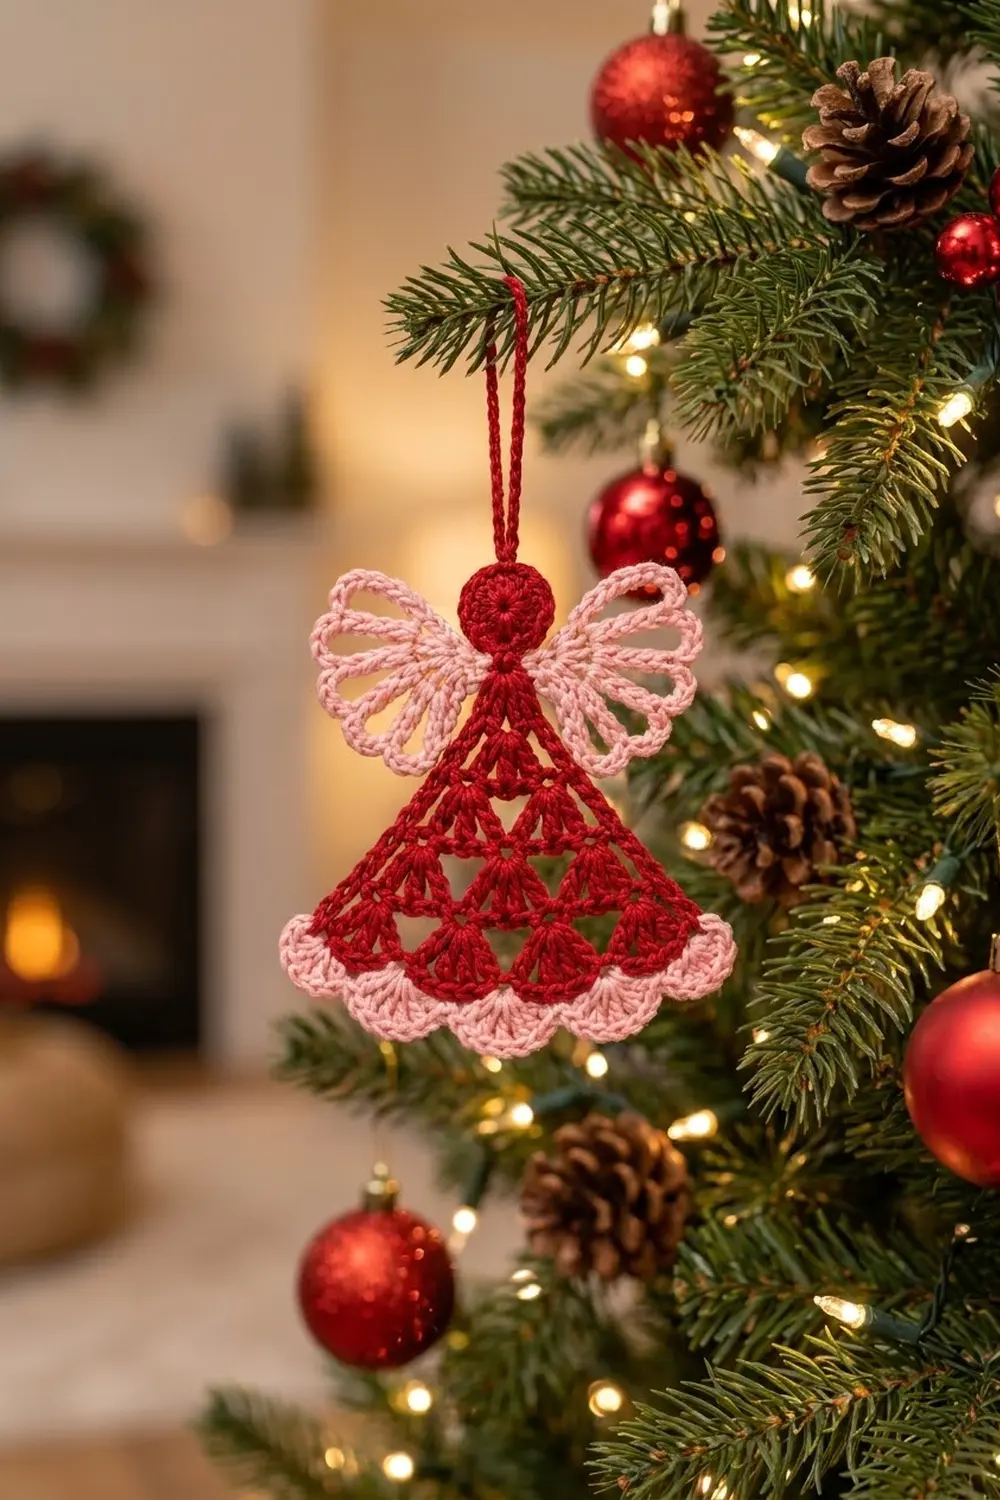
The Rosy Wing Angel is a lacy little Christmas angel with a deep cranberry-red body and soft blush-pink wings and hem. A solid round head sits on top of an open triangular skirt full of small triangle-shaped windows. A covered hanging loop sits on top of the head.
The wings are the signature detail. Each wing is a fan of four long chain loops covered in single crochet, so they look like airy outlined petals rather than solid shapes. A pink scalloped edging finishes the hem with seven neat shells.
This pattern uses US crochet terms. The finished angel measures about 6.25 in (15.9 cm) wide at the hem. It is 5.75 in (14.6 cm) tall from the top of the head to the scallops, not counting the 1.5 in (3.8 cm) hanging loop.
Construction is simple:
– Work the head in two rounds and add the hanging loop.
– Work the skirt in rows straight off the bottom of the head.
– Finish the hem with a two-row pink border.
– Make the two wings separately and stitch them to the back at the neck.
Finished Size and Construction
- Finished size: 6.25 in (15.9 cm) wide x 5.75 in (14.6 cm) tall, plus a 1.5 in (3.8 cm) loop
- Skill level: Easy-Intermediate
- Terminology: US crochet terms
- Yarn weight: DK (light worsted, category 3)
- Hook: 4.0 mm (G-6)
- Number of pieces: 1 angel body (head, loop and skirt worked as one) + 2 wings
- Layout: single standalone ornament, worked flat
- Head size: 1.5 in (3.8 cm) diameter
- Size before border: 6 in (15.2 cm) wide x 5 in (12.7 cm) tall
- Border depth: 0.75 in (1.9 cm)
- Wing size: 2.5 in (6.4 cm) long x 2.25 in (5.7 cm) wide each
Materials
A smooth mercerized cotton or cotton blend in DK weight gives the crispest loops and the clearest triangle holes. Acrylic also works, but it relaxes more and the wings may need firmer blocking. The amounts below assume a yarn of about 115 m per 50 g.
- Red (cranberry): 10 g, about 23 m (head, loop, skirt)
- Pink (blush): 12 g, about 28 m (wings, hem border)
These amounts include a margin of about 30 percent for swatching and weaving in ends.
Tools:
- 4.0 mm (G-6) crochet hook
- Tapestry needle
- Scissors
- Stitch markers (2)
- Rustproof pins and a blocking mat
- Spray bottle with water
- Ruler or tape measure
Abbreviations (US Terms)
- ch – chain
- sl st – slip stitch
- sc – single crochet
- dc – double crochet
- tr – treble crochet
- sp – space
- st(s) – stitch(es)
- RS / WS – right side / wrong side
- tch – turning chain
- rep – repeat
Special stitch – tr group: 3 tr worked into the same stitch or space. In this pattern, groups are always separated by ch 1.
Scallop: 5 dc worked into the same stitch.
Gauge and Checkpoints
General gauge: 18 dc = 4 in (10.2 cm) with a 4.0 mm hook. Because the angel is small, the best swatch is the head itself. Make the head first and measure it before you continue.
Checkpoints:
- Head, Round 1: about 1 in (2.5 cm) across.
- Head, Round 2: 1.5 in (3.8 cm) across.
- Skirt, Row 3: about 3.25 in (8.3 cm) wide across Row 3, and 1.75 in (4.4 cm) long from the bottom of the head.
- Skirt, Row 6: 6 in (15.2 cm) wide, and 3.5 in (8.9 cm) long from the bottom of the head.
- After border: 6.25 in (15.9 cm) wide at the scallops.
If your head is bigger than 1.5 in (3.8 cm) by more than 0.25 in (0.6 cm), go down half a hook size to 3.5 mm. If it is smaller, go up to 4.5 mm. A head that is off by 0.25 in (0.6 cm) leads to a skirt that is off by about 1 in (2.5 cm), so it is worth fixing now.
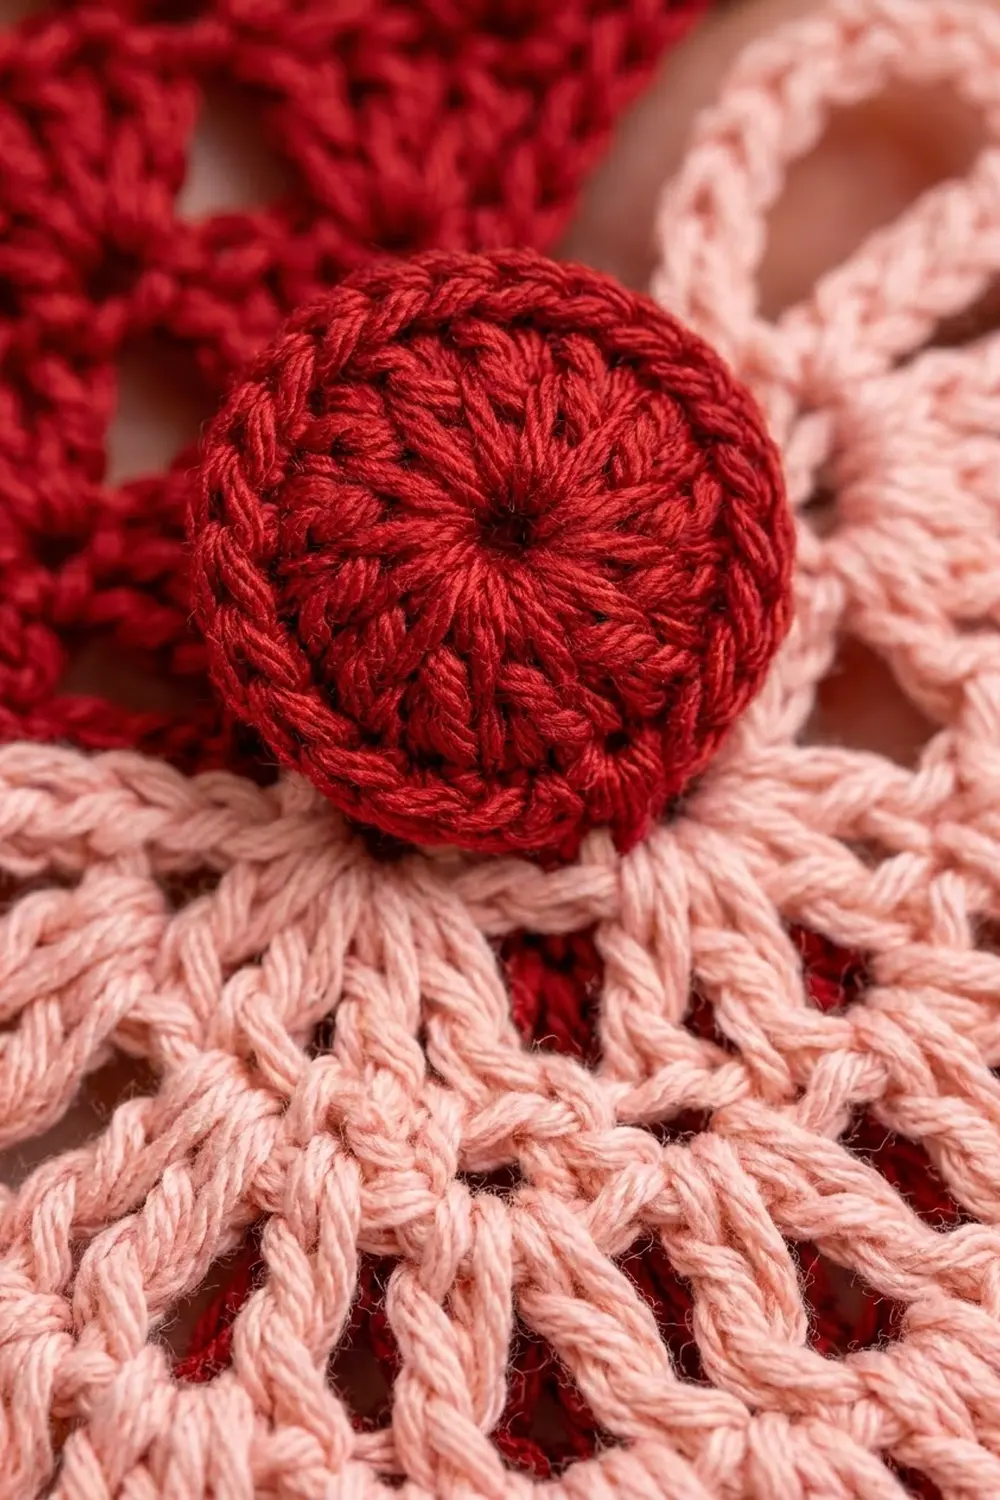
Head and Hanging Loop (Red)
Round 1: Make a magic ring. Ch 3 (counts as dc), 11 dc in ring. Pull the ring closed and join with sl st to top of beginning ch-3. (12 dc)
Round 2: Ch 3 (counts as dc), dc in same st, 2 dc in each st around. Join with sl st to top of beginning ch-3. (24 dc)
The head should lie flat and measure 1.5 in (3.8 cm). Mark the join with a stitch marker. This is the top of the angel.
Hanging loop: Do not fasten off. Ch 18, sl st in the same st as the join. Work 24 sc over the ch-18 loop, then sl st in the same st at the base. Fasten off and weave in the tail.
The loop should measure about 1.5 in (3.8 cm) from the head to its tip. Covering the chain with sc makes it firm and cord-like.
Skirt (Red)
The skirt is worked flat in rows directly off the bottom of the head. Each row adds one tr group, so the skirt grows into a triangle with offset groups, like bricks in a wall. The gaps between the offset groups form the small triangle-shaped holes.
Set-up: Hold the head RS facing, with the loop at the top. Count 12 sts from the marked join to find the bottom-center st. This is the 13th st, directly opposite the loop. Place a marker in it.
Row 1 (RS): Join red in the st to the right of the marked bottom-center st. Ch 4 (counts as tr), 2 tr in same st, ch 1, skip marked st, 3 tr in next st. Turn. (2 groups: 6 tr, 1 ch-1 sp)
Rows 2-6: Ch 4 (counts as tr), 2 tr in first st (at base of ch-4), ch 1. *3 tr in next ch-1 sp, ch 1; rep from * across to tch. 3 tr in top of tch. Turn.
Each row has one more group than the row before: one group in the first st, one in every ch-1 sp, and one in the top of the tch.
Stitch counts:
- Row 2 (WS): 3 groups: 9 tr, 2 ch-1 sps
- Row 3 (RS): 4 groups: 12 tr, 3 ch-1 sps
- Row 4 (WS): 5 groups: 15 tr, 4 ch-1 sps
- Row 5 (RS): 6 groups: 18 tr, 5 ch-1 sps
- Row 6 (WS): 7 groups: 21 tr, 6 ch-1 sps
Fasten off red at the end of Row 6.
Row 6 has 21 tr plus 6 ch-1 sps, for 27 stitch widths. At 4.5 sts per inch, that gives the 6 in (15.2 cm) checkpoint width. Six tr rows at about 0.58 in (1.5 cm) each give the 3.5 in (8.9 cm) length.
Wings (Pink, Make 2)
Each wing is a fan of four chain loops worked into a magic ring and then covered with sc. The two longer loops form the upper half of the wing and sweep upward. The two shorter loops form the lower half.
Round 1: Make a magic ring. Ch 1, sc in ring, ch 24, sc in ring, ch 24, sc in ring, ch 18, sc in ring, ch 18, sc in ring. Pull the ring tight. Do not join. (5 sc, 4 ch-loops)
Round 2: Ch 1, turn. 24 sc in first ch-18 loop, sl st in next sc. 24 sc in next ch-18 loop, sl st in next sc. 32 sc in next ch-24 loop, sl st in next sc. 32 sc in last ch-24 loop, sl st in last sc. (112 sc, 4 sl sts)
Fasten off, leaving a 10 in (25.4 cm) tail for sewing.
Each loop is covered at 4 sc for every 3 ch (24 over 18, and 32 over 24). This fills each loop smoothly without rippling, so the petals stay flat and open in the center. Each wing should measure about 2.5 in (6.4 cm) from the ring to the tip of the longest petal.
Make the second wing the same way. When you attach the wings, flip one over so the long petals point up on both sides. The two wings then mirror each other.
Assembly
- Lay the body RS down.
- Place one wing on each side of the neck, just below the head on skirt Row 1. Each ring center should sit about 0.25 in (0.6 cm) from the center line.
- Angle the long ch-24 petals upward and outward, and the short ch-18 petals out to the side, so the wings fan out level with the head.
- Use the tail to sew each ring firmly to the back of the head and skirt Row 1. Use small stitches that don’t show on the RS.
- Tack the base of the lowest petal to the skirt edge with 1-2 stitches so the wing doesn’t flop forward.
The finished wingspan should be about 6 in (15.2 cm), roughly the same as the skirt width.
Border (Pink)
The border is a hem edging worked across the bottom of Row 6 only. The skirt sides stay red, and no stitches are added along them.
Border gauge: 7 scallops across 6 in (15.2 cm), so each scallop is about 0.85 in (2.2 cm) wide.
Border Row 1 (RS): With RS facing, join pink in the first st at the right-hand corner of Row 6. Ch 1, 2 sc in same st. Sc in each tr and each ch-1 sp across to the last st, then 2 sc in last st (top of tch). Turn. (29 sc)
Count check: Row 6 has 27 stitches and spaces (21 tr + 6 ch-1 sps). One sc in each gives 27, plus 2 extra sc (one at each corner), for 29 sc.
Border Row 2 (WS): Ch 1, sc in first sc. Skip 1 sc, 5 dc in next sc, skip 1 sc, sc in next sc; rep from * 6 more times. Fasten off. (7 scallops: 35 dc, 8 sc)*
Why the math works: Each scallop repeat uses 4 sts (skip, scallop, skip, sc). One starting sc plus 7 repeats uses 1 + (7 x 4) = 29 sts, exactly the count of Row 1. The row starts and ends with an sc, so both corners are anchored evenly. The two extra corner sc in Row 1 let the end scallops flare slightly past the skirt edge, which brings the hem to 6.25 in (15.9 cm).
Weave in all ends along stitches of the same color.
Final Blocking
- Spray the angel until damp, or wet it and roll it in a towel to remove extra water.
- Lay it RS up on the blocking mat.
- Pin the head into a 1.5 in (3.8 cm) circle.
- Pin the hem straight at 6.25 in (15.9 cm) wide, with one pin in the tip of each scallop.
- Pin the skirt sides straight so the skirt measures 3.5 in (8.9 cm) from the head to the bottom of Row 6.
- Open each wing petal. Pin the tip and gently stretch the loop so the center opening is clear.
- Check that the wingspan is 6 in (15.2 cm) and both wings sit at the same angle.
- Shape the hanging loop into a neat oval.
- Let it dry completely before unpinning. For a stiffer ornament, use a light spray starch before drying.
Final Quality-Control Checklist
- Head is 24 dc and measures 1.5 in (3.8 cm).
- Hanging loop is centered above the head and covered with 24 sc.
- Skirt Row 6 has 7 groups (21 tr, 6 ch-1 sps).
- Skirt is 6 in (15.2 cm) wide and 3.5 in (8.9 cm) long.
- Border Row 1 has 29 sc, and Row 2 has 7 even scallops.
- Hem measures 6.25 in (15.9 cm) at the scallops.
- Each wing has 4 covered loops: 2 long (32 sc) and 2 short (24 sc).
- Wings mirror each other and are sewn invisibly from the back.
- Total height is 5.75 in (14.6 cm) without the loop.
- All ends are woven in securely.
Troubleshooting
The skirt curls or cups. Your tr groups are too tight. Go up a hook size for the skirt only, or loosen the ch-1 between groups.
The skirt ruffles at the edges. Check that each row adds only one new group. A common mistake is working an extra group in the last ch-1 sp and then another in the tch.
The skirt leans to one side. Row 1 was not centered. The skipped st must be exactly opposite the loop.
The wing loops twist. The chain twisted before you closed the loop. Pull out Round 2 and make sure each chain lies flat before covering it.
The wing petals ripple. Your sc are too tight for the 4-to-3 ratio. Work fewer sc (for example, 30 over a ch-24 loop) or loosen your tension.
The scallops don’t fit evenly. Recount Border Row 1. It must be exactly 29 sc for the 4-stitch repeat to work.
The head isn’t flat. If it cups, your dc are too tight. If it waves, you added extra increases. Round 2 must be 24 dc.
Care
Hand wash in cool water with mild soap, press out the water in a towel, and reshape and pin flat to dry. Store flat or hang it by the loop, away from direct sun so the red doesn’t fade.
Final Notes
The whole angel comes down to one chain of measurements:
– A 1.5 in (3.8 cm) head gives a centered start for the skirt.
– Six tr rows grow from 2 to 7 groups, ending at 27 stitch widths and 6 in (15.2 cm) across.
– The 29-sc border row divides evenly into 7 scallops, so the hem finishes at 6.25 in (15.9 cm).
– Two mirrored 2.5 in (6.4 cm) wings give a 6 in (15.2 cm) wingspan.
Check the head first, and everything after it falls into place.
One angel takes about an evening, so it is easy to make several in the same red and pink as tree ornaments, gift toppers or window hangings.
Happy crocheting!