

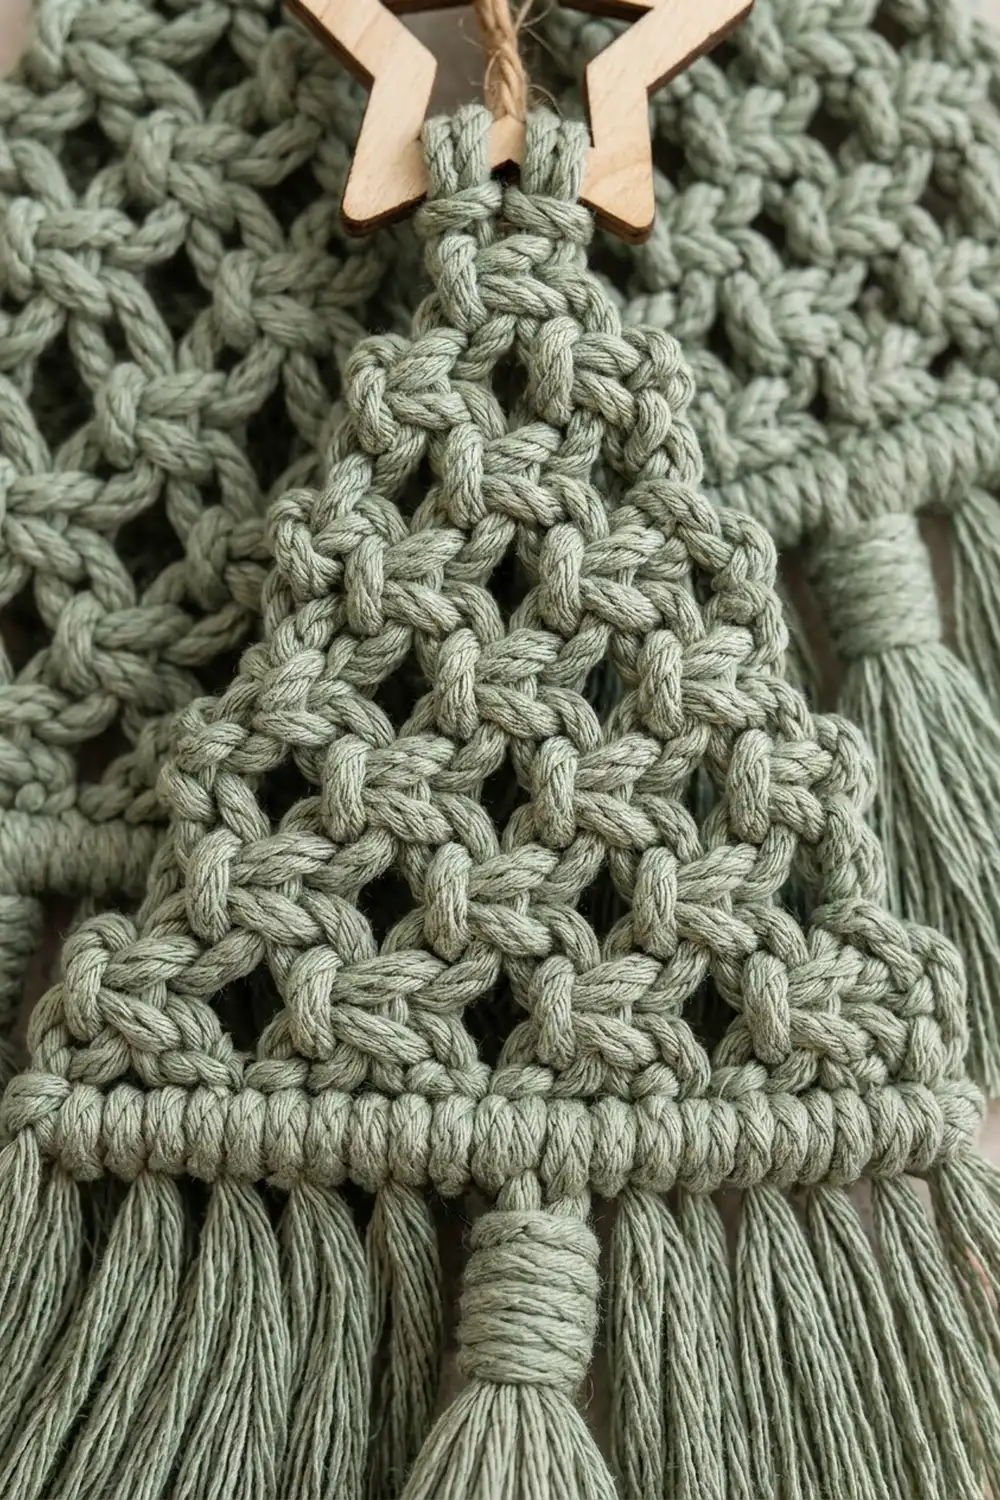
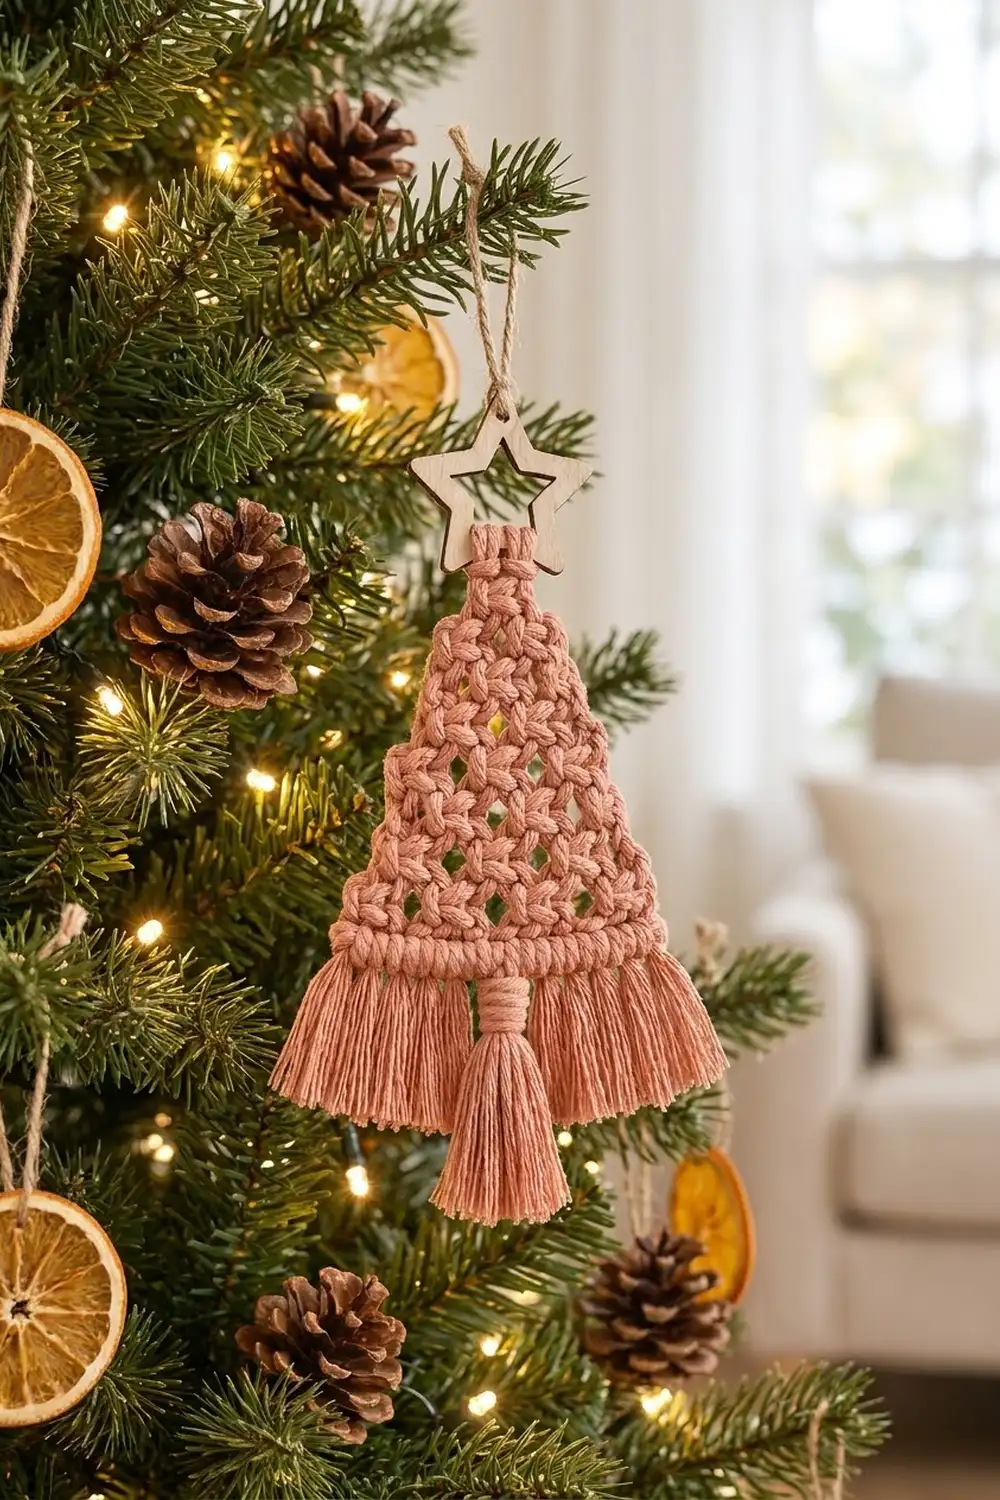
This little tree is one flat, triangular crochet piece. Its body is an open lattice of chunky three-double-crochet clusters. A solid single-crochet band runs across the bottom, a full fringe hangs below it, and a wrapped tassel in the center forms the trunk. A cut-out wooden star sits at the tip, and a jute twine loop lets it hang from a branch.
The design comes in three soft colorways: dusty coral, natural cream, and muted sage green. Each ornament uses one color only. In cotton cord the texture looks almost like macramé knotwork, but every stitch is plain crochet.
The pattern uses US crochet terms. The finished body is 4 in (10.2 cm) wide at the base and 4.5 in (11.4 cm) tall. The trunk hangs 3.5 in (8.9 cm) below the band, so the tree measures 8 in (20.3 cm) from tip to trunk. With the star on top, the ornament is about 9.75 in (24.8 cm) long, not counting the twine loop.
You start at the tip, working into a small ring, and work flat rows downward. Each lattice row adds one cluster, which shapes the triangle. Two rows of single crochet finish the base. Then you single crochet up one slanted side and down the other, with a chain loop at the tip. Last, you knot on the fringe and trunk and tie on the star.
Finished Size and Construction
- Finished size: 4 in (10.2 cm) wide × 4.5 in (11.4 cm) tall body; 8 in (20.3 cm) tip to trunk; about 9.75 in (24.8 cm) with the star
- Skill level: Easy / advanced beginner
- Terminology: US crochet terms
- Yarn weight: Worsted (#4) cotton cord or soft cotton
- Hook: 4.5 mm (US 7)
- Number of pieces: 1 crocheted triangle, plus fringe, a trunk tassel, and a wooden star
- Layout: Single triangular motif, worked flat from tip to base
- Piece size: 4 in × 4.5 in (10.2 cm × 11.4 cm)
- Size before border: 3.75 in (9.5 cm) wide × 4.25 in (10.8 cm) tall
- Border depth: 0.25 in (0.6 cm) along each slanted side
Materials
Yarn advice: Use a smooth, firm worsted-weight cotton cord or a tightly plied cotton, about 180 m per 100 g. Cotton gives crisp clusters and a fringe that combs out nicely. Acrylic also works, but the lattice will be softer and fuzzier.
Choose one color per ornament:
- Dusty Coral: 18 g (about 32 m / 35 yd)
- Natural Cream: 18 g (about 32 m / 35 yd)
- Sage Green: 18 g (about 32 m / 35 yd)
To make all three colorways, you need 18 g (32 m) of each color.
Tools and notions:
- 4.5 mm (US 7) crochet hook
- 1 wooden star with an open center, about 1.75 in (4.4 cm) across
- 10 in (25.4 cm) of natural jute twine
- Sharp scissors
- Fine-tooth comb or pet slicker brush, for the fringe
- Tapestry needle
- Ruler or tape measure
- Spray bottle and pins, for blocking
The yarn amounts include a generous margin for your test rows, fringe trimming, and differences in tension.
Abbreviations (US Terms)
- ch – chain
- sl st – slip stitch
- sc – single crochet
- dc – double crochet
- sp – space
- st(s) – stitch(es)
- yo – yarn over
- rep – repeat
- RS – right side
Special stitch – Cluster (CL): (Yo, insert your hook in the given sp, yo and pull up a loop, yo and draw through 2 loops) 3 times. You now have 4 loops on the hook. Yo and draw through all 4 loops. Each CL counts as 1 stitch.
The turning ch-3 at the start of each lattice row counts as 1 dc.
Gauge and Checkpoints
Gauge matters because the fringe, edging, and star are sized to fit the triangle. This is a single piece, so Rows 1–3 serve as your test. Measure them before you go on.
- Band gauge: 17 sc = 3.75 in (9.5 cm), about 4.5 sc per inch
- Lattice gauge: 7 rows = 3.75 in (9.5 cm) tall
Checkpoints:
- After Row 3: about 2 in (5.1 cm) wide at the base × 1.6 in (4.1 cm) tall
- After Row 5: about 2.9 in (7.4 cm) wide × 2.7 in (6.9 cm) tall
- After Row 7: 3.75 in (9.5 cm) wide × 3.75 in (9.5 cm) tall
- After Row 9: 3.75 in (9.5 cm) wide × 4.25 in (10.8 cm) tall
- After the edging: 4 in (10.2 cm) wide × 4.5 in (11.4 cm) tall
If your piece is too big, change to a 4.0 mm hook. If it’s still too big, your cord is probably heavier than worsted. If it’s too small, change to a 5.0 mm hook. Change the hook, not the stitch counts. The fringe and trunk placement depend on exactly 17 sts across the base.
Pattern: Tree Body
The triangle grows because each lattice row has one more ch-1 sp than it has clusters. On the next row you work one cluster into every space. That row then has one more cluster and one more space than the row before.
Foundation: Ch 4, then sl st in the first ch to form a ring.
Row 1 (RS): Ch 3 (counts as dc), ch 1, CL in ring, ch 1, dc in ring. Turn. (1 CL, 2 ch-1 sps, 2 dc = 5 sts and sps)
Row 2: Ch 3 (counts as dc), ch 1, CL in next ch-1 sp; rep from * across, ch 1, dc in top of turning ch. Turn. (2 CL, 3 ch-1 sps, 2 dc = 7)*
Rows 3–7: Rep Row 2. Each row has one more CL and one more ch-1 sp than the row before it.
- Row 3: 3 CL, 4 ch-1 sps, 2 dc = 9
- Row 4: 4 CL, 5 ch-1 sps, 2 dc = 11
- Row 5: 5 CL, 6 ch-1 sps, 2 dc = 13
- Row 6: 6 CL, 7 ch-1 sps, 2 dc = 15
- Row 7: 7 CL, 8 ch-1 sps, 2 dc = 17
Each count above is that row’s full total: (2 × row number) + 3. Check Row 7 against the 3.75 in (9.5 cm) checkpoint before you start the band.
Row 8 (conversion row): Ch 1, sc in first dc, sc in next ch-1 sp, sc in next CL; rep from * 6 more times, sc in last ch-1 sp, sc in top of turning ch. Turn.
Count: 9 sc worked 1 per existing stitch (7 CL + 2 dc) + 8 sc added in the ch-1 sps = 17 sc.*
Row 9: Ch 1, sc in each sc across. Turn. (17 sc)
Don’t fasten off. Go straight on to the edging.
Border: Side Edging and Hanging Loop
The edging firms up the two slanted sides and adds a small chain loop at the tip. The bottom edge, the 17 sc of Row 9, gets no edging because the fringe hangs from it.
Border gauge: The edging is plain sc at the band gauge of about 4.5 sc per inch. One row of sc adds 0.25 in (0.6 cm) along each slanted side. This takes the base from 3.75 in (9.5 cm) to 4 in (10.2 cm) and the height from 4.25 in (10.8 cm) to 4.5 in (11.4 cm).
Edging Row: With the RS facing, turn the piece so you can work up the right slanted side.
- Right side (20 sc): Work 1 sc in the end of Row 9 (this is the bottom corner stitch) and 1 sc in the end of Row 8. Then work up the lattice row-ends, around the post of each edge dc or turning ch: 3 sc in Row 7, 2 sc in Row 6, 3 sc in Row 5, 2 sc in Row 4, 3 sc in Row 3, 2 sc in Row 2, and 3 sc in Row 1. (2 + 18 = 20 sc)
- Tip: Ch 6 for the hanging loop.
- Left side (20 sc): Working down the other side, work 3 sc in Row 1, 2 sc in Row 2, 3 sc in Row 3, 2 sc in Row 4, 3 sc in Row 5, 2 sc in Row 6, and 3 sc in Row 7. Then work 1 sc in the end of Row 8 and 1 sc in the end of Row 9 (the bottom corner stitch). (18 + 2 = 20 sc)
Fasten off and weave in the ends.
Edging total: 20 sc + ch 6 + 20 sc. Each side’s 20 sc already includes that side’s single bottom corner stitch, so you don’t add any extra corner stitches. There’s no corner sc at the tip because the ch-6 loop sits there.
Why the math works: Each slanted side is about 4.6 in (11.7 cm) long, based on a half-width of 1.875 in (4.8 cm) and a height of 4.25 in (10.8 cm). Twenty sc over 4.6 in is about 4.3 sc per inch, just under the 4.5 sc gauge. A bias edge stretches a little, so slightly fewer stitches keep the sides straight and firm instead of wavy. Alternating 3 and 2 sc spreads the stitches evenly over the tall dc row-ends without bunching.
Fringe and Trunk Tassel
Fringe: Cut 42 strands, each 6 in (15.2 cm) long. Number the 17 sc of Row 9 from right to left.
Hold 3 strands together and fold them in half. With the wrong side facing, put your hook through sc 1 from front to back, catch the fold, and pull it through to make a loop. Pull all 6 ends through the loop and tighten. This is a lark’s head knot.
Repeat in sc 2–7 and sc 11–17, for 14 fringe knots in all. Leave sc 8 and sc 10 empty. The small gaps set the trunk apart from the fringe.
Trunk tassel: Cut 12 strands, each 9 in (22.9 cm) long, plus 1 wrapping strand 18 in (45.7 cm) long. Fold the 12 strands in half and attach them to sc 9 with one lark’s head knot. You now have 24 ends, each about 4.5 in (11.4 cm) long.
Starting 0.5 in (1.3 cm) below the band, wrap the 18 in (45.7 cm) strand tightly around the bundle for 0.5 in (1.3 cm). Thread the tail onto your needle, slide it up under the wraps, and trim it flush.
Comb and trim: Comb the fringe straight and trim it evenly to 2.5 in (6.4 cm) below the band. Trim the trunk to 3.5 in (8.9 cm) below the band, so it hangs 1 in (2.5 cm) below the fringe.
Star: Thread the 10 in (25.4 cm) jute twine through the star’s open center and through the ch-6 tip loop. Pull it snug so the tree’s tip sits just below the star. Tie the twine ends in an overhand knot to make a hanging loop.
Final Blocking
- Before the final trim, mist the whole ornament until it’s damp but not soaked.
- Lay it flat on a blocking mat or folded towel, RS up.
- Pin the base corners 4 in (10.2 cm) apart. Pin the tip 4.5 in (11.4 cm) above the base, centered between them.
- Pin each slanted side in a straight line from the tip to the corner.
- Use your fingertips to open each lattice hole so the clusters sit evenly in staggered rows.
- Comb the damp fringe and trunk straight down.
- Let it dry completely, for at least 6 hours.
- Unpin it and trim the fringe to 2.5 in (6.4 cm) and the trunk to 3.5 in (8.9 cm).
Final Quality-Control Checklist
- Row 7 has 7 CL and 8 ch-1 sps
- Rows 8 and 9 each have exactly 17 sc
- Each slanted side has 20 edging sc, with the ch-6 loop at the tip
- The base measures 4 in (10.2 cm) and the body is 4.5 in (11.4 cm) tall
- There are 14 fringe knots, and sc 8 and sc 10 are empty
- The trunk sits centered on sc 9, wrapped for 0.5 in (1.3 cm)
- The fringe is an even 2.5 in (6.4 cm) and the trunk is 3.5 in (8.9 cm)
- The star sits snug against the tip and the twine knot is secure
- All ends are woven in and can’t be seen from the RS
Troubleshooting
The triangle leans to one side. You probably skipped the last dc in the top of the turning ch on some rows. Count the spaces: every lattice row needs one more sp than CL.
The sides curve inward. The edging is too tight, or you worked 2 sc in every row-end. Use the 3-2 pattern and a looser hand.
The sides ripple. You have too many edging sc. Check for 20 per side and make sure you didn’t add a corner sc at the tip.
The lattice holes look closed. Your clusters are too tight. Go up a hook size, or pull each cluster loop up to full dc height.
The band flares wider than the lattice. Work Row 8 more firmly. Don’t add stitches; it must stay at 17 sc.
The trunk looks thin. Add 2–4 more strands, or use a slightly thicker cord just for the trunk.
The fringe is frizzy. That’s normal for combed cotton. Mist it, smooth it with your fingers, and trim again.
Care
Spot clean with cool water and a drop of mild soap, then reshape and dry flat. Store the ornament flat or hanging, away from heat, so the fringe stays straight.
Final Notes
The measurements build on each other in a short chain. Seven lattice rows grow from 5 to 17 sts and measure 3.75 in (9.5 cm) square. Two band rows keep the 17 sc and bring the height to 4.25 in (10.8 cm). The edging adds 20 sc per side, so the body finishes at 4 in × 4.5 in (10.2 cm × 11.4 cm). A 2.5 in (6.4 cm) fringe, a 3.5 in (8.9 cm) trunk, and a 1.75 in (4.4 cm) star bring the ornament to about 9.75 in (24.8 cm). If your Row 7 checkpoint matches, everything after it will match too.
Happy crocheting!