

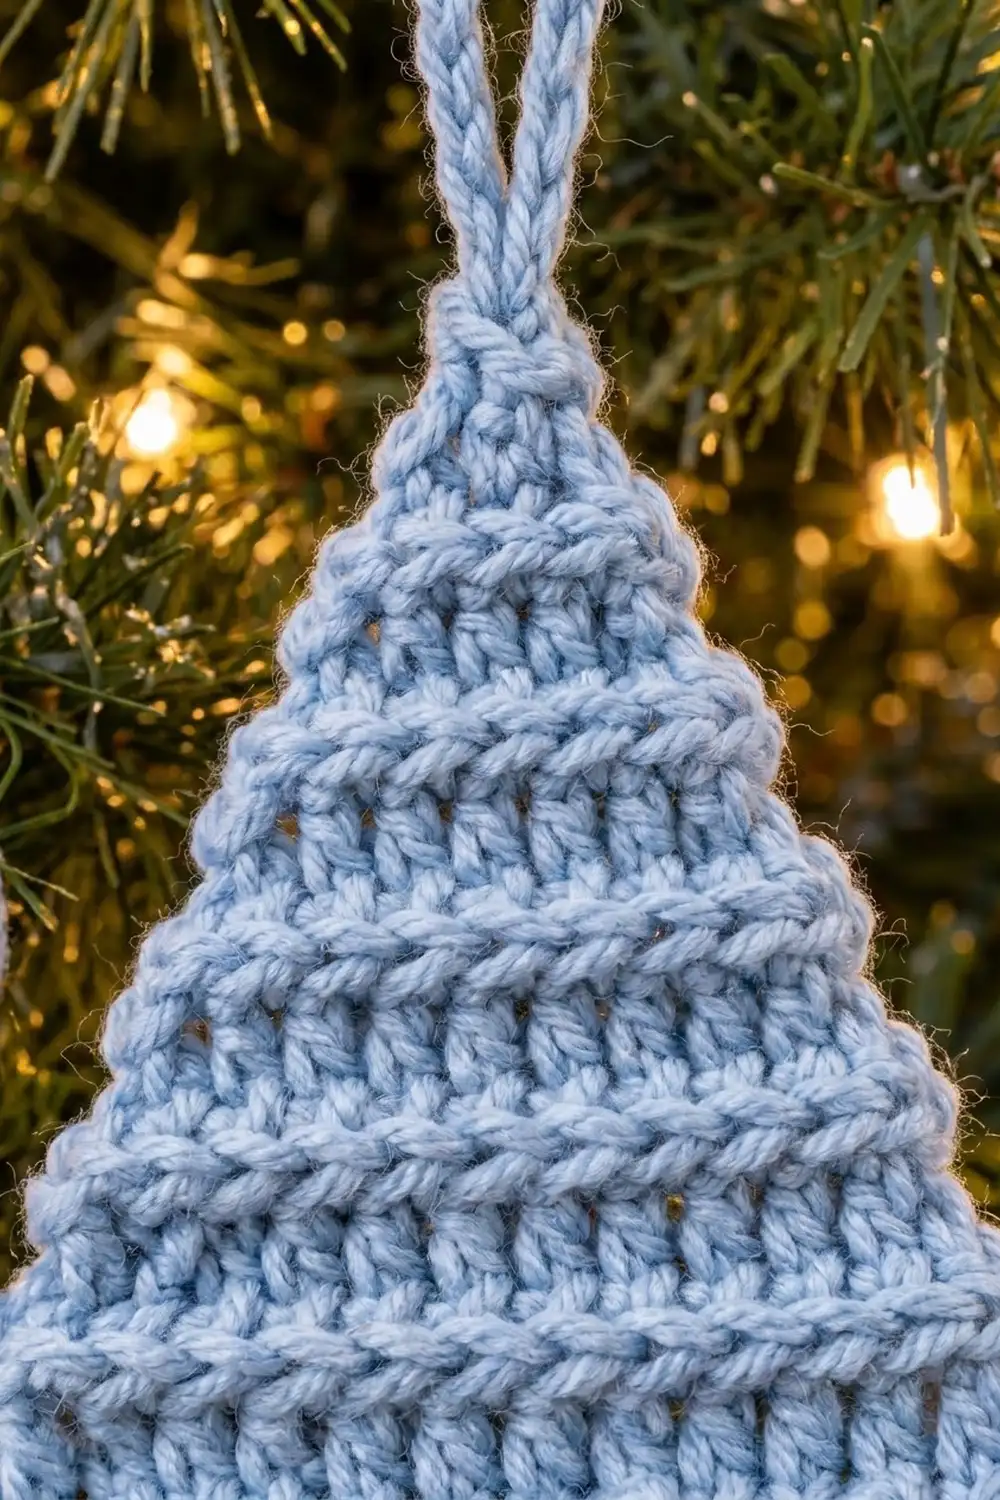
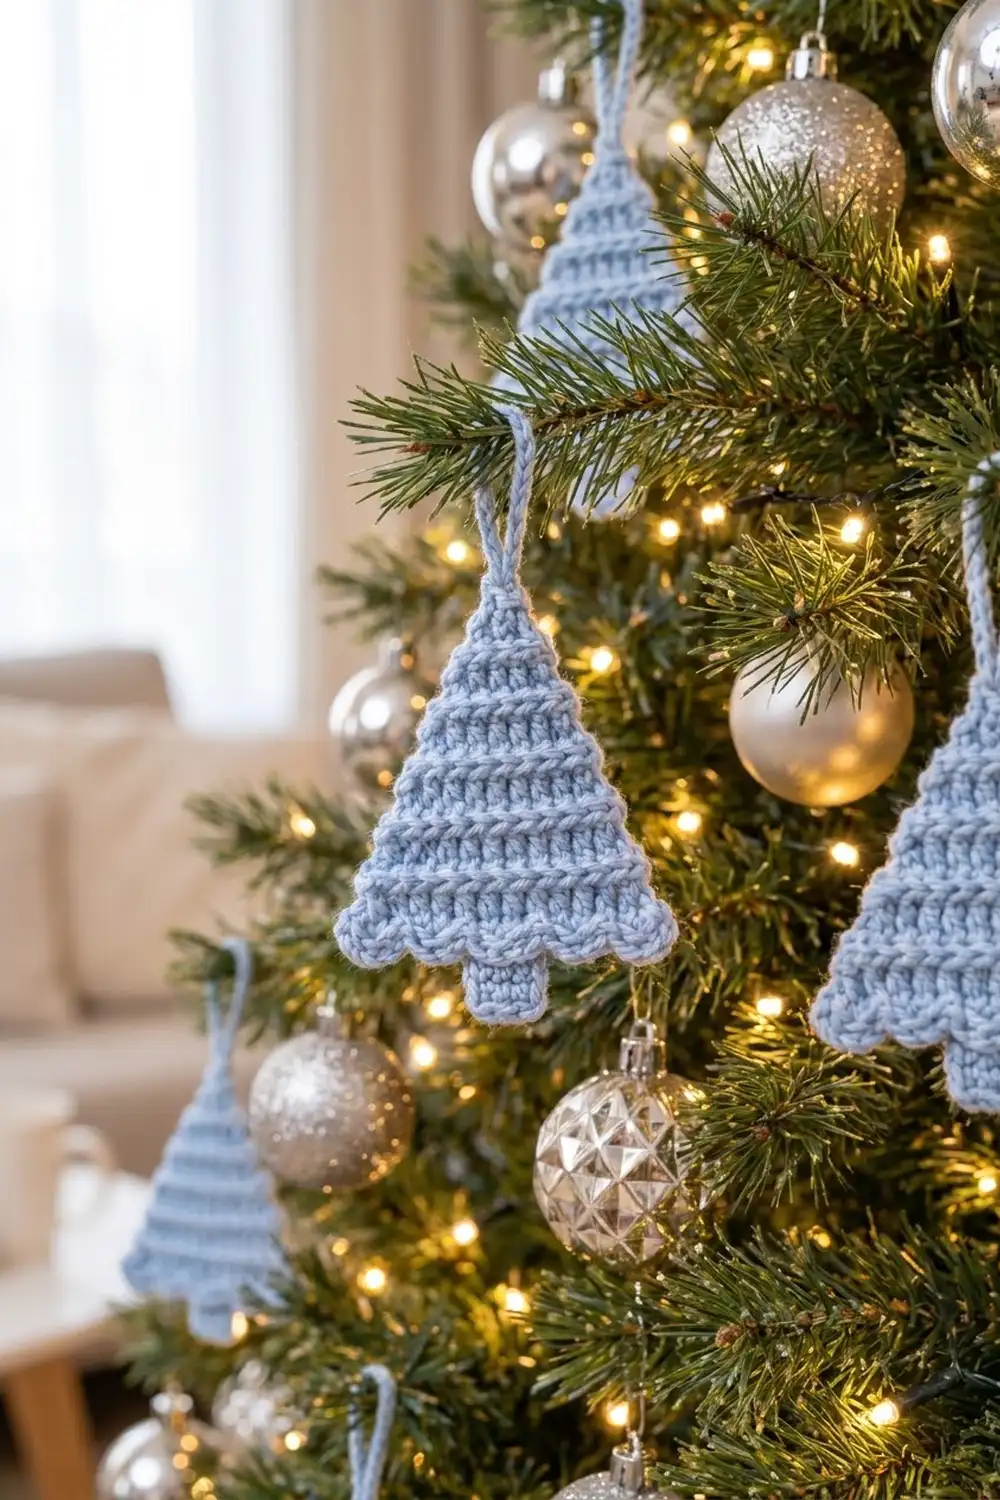
This little tree ornament is quick to make and looks tidy on the branch. The body is a solid triangle with a raised ridge between every row. The ridges look like soft bands of frost or garland. A row of shell scallops finishes the bottom, a small trunk sits in the center, and a chain loop at the top is ready for hanging.
The sample uses one powder-blue yarn. It looks calm and wintry against green branches and silver baubles. You can make it in any single color. Light colors show the ridges best.
The pattern uses US crochet terms. The finished ornament measures 4.25 in (10.8 cm) wide at the scallops and 5.25 in (13.3 cm) tall from the scallop tips to the top point, plus the trunk. The hanging loop adds 1.5 in (3.8 cm), for a total of 6.75 in (17.1 cm) from trunk to loop tip.
You work the tree from the bottom up in 8 turned rows of double crochet, decreasing at both ends of every row. Working in the back loop on right-side rows and the front loop on wrong-side rows puts every ridge on the front. Next, you crochet a 3-row trunk into the center of the foundation chain. One edging round then adds the side edges, the scallops and the trunk outline, and ends with the hanging loop.
Finished Size and Construction
- Finished size: 4.25 in (10.8 cm) wide × 5.25 in (13.3 cm) tall, plus a 1.5 in (3.8 cm) loop
- Skill level: Easy
- Terminology: US crochet terms
- Yarn weight: Worsted (#4)
- Hook: 4.0 mm (G-6)
- Number of pieces: 1
- Layout: Single flat piece, no joining
- Piece size before edging: 3.75 in (9.5 cm) wide × 4 in (10.2 cm) tall triangle
- Trunk before edging: 0.75 in (1.9 cm) wide × 0.75 in (1.9 cm) tall
- Edging depth: About 0.25 in (0.6 cm) on the sides; scallops reach 0.5 in (1.3 cm) below the base
Materials
Yarn: Use a smooth worsted-weight yarn with good stitch definition, such as acrylic, cotton blend or wool blend. Fuzzy or very loose yarns blur the ridges. A slightly firm yarn helps the ornament hang flat.
- Powder blue (main color): 15 g, about 30 m (33 yd), enough for one ornament
The quantity includes a safety margin. One ornament uses about 9–10 g, so the extra covers swatching, ripped-back rows and tails. For a set of ornaments, multiply by the number you plan to make.
Tools:
- 4.0 mm (G-6) crochet hook
- Tapestry needle
- Scissors
- Stitch marker
- Ruler or tape measure
- Pins and a blocking mat or folded towel
- Spray bottle with water
Abbreviations (US Terms)
- ch – chain
- sl st – slip stitch
- sc – single crochet
- dc – double crochet
- BLO – back loop only
- FLO – front loop only
- RS / WS – right side / wrong side
- st(s) – stitch(es)
Special stitches:
- dc2tog (double crochet 2 together): Yarn over, insert the hook in the next st, yarn over and pull up a loop, yarn over and pull through 2 loops. Repeat in the following st. Yarn over and pull through all 3 loops on the hook. This turns 2 sts into 1.
- dc3tog (double crochet 3 together): Work as for dc2tog, but over 3 sts, then pull through all 4 loops on the hook. This turns 3 sts into 1.
- Shell: 5 dc in the same st.
Loop rule: On RS rows (odd rows), work every st and every leg of a decrease in the BLO. On WS rows (even rows), work in the FLO. The unused loop always stays on the RS and forms the ridge.
Gauge and Checkpoints
Gauge: 16 dc and 8 rows = 4 in (10.2 cm) in the ridged BLO/FLO pattern. That is 4 dc per inch and 2 rows per inch. Each row is 0.5 in (1.3 cm) tall.
Make one ornament first and treat it as your gauge test. Measure it at each checkpoint below.
- After Row 1: 15 dc, 3.75 in (9.5 cm) wide.
- After Row 4: 9 dc at the top of the row. The piece is 2 in (5.1 cm) tall and the top row is about 2.25 in (5.7 cm) wide.
- After Row 8: The point is complete and the triangle is 4 in (10.2 cm) tall.
- After the trunk: The trunk is 0.75 in (1.9 cm) wide and 0.75 in (1.9 cm) tall.
- After the edging: 4.25 in (10.8 cm) wide at the scallops and 5.25 in (13.3 cm) tall without the loop.
If the piece is too big: Go down to a 3.75 mm (F-5) hook, or check that your turning chains are not loose.
If the piece is too small: Go up to a 4.5 mm (7) hook. Tight dc rows also hide the ridges, so a slightly looser tension helps.
Small differences of 0.125 in (0.3 cm) are fine for an ornament. Just keep every ornament in a set at the same gauge so they match on the tree.
Tree Body
The ch-2 at the start of each row does not count as a stitch.
Foundation: Ch 17.
Row 1 (RS): Dc in the 3rd ch from the hook and in each ch across. Turn. (15 dc)
Place a marker on this side of the work to mark it as the RS.
Row 2 (WS): Working in the FLO: ch 2, dc2tog over the first 2 sts, dc in each st to the last 2 sts, dc2tog over the last 2 sts. Turn. (13 sts: 11 dc + 2 dc2tog)
Row 3 (RS): Working in the BLO: ch 2, dc2tog, dc in each st to the last 2 sts, dc2tog. Turn. (11 sts)
Row 4 (WS): Repeat Row 2 in the FLO. Turn. (9 sts)
Row 5 (RS): Repeat Row 3 in the BLO. Turn. (7 sts)
Row 6 (WS): Repeat Row 2 in the FLO. Turn. (5 sts)
Row 7 (RS): Repeat Row 3 in the BLO. Turn. (3 sts)
Row 8 (WS): Working in the FLO: ch 2, dc3tog over the 3 sts. (1 st) Fasten off and weave in the end.
Count check: Each row is 2 sts smaller than the row before it: 15, 13, 11, 9, 7, 5, 3, 1. That makes 8 rows at 0.5 in (1.3 cm) each, so the triangle is 4 in (10.2 cm) tall. Check the RS now. You should see 7 raised ridges, one between each pair of rows.
Trunk
You work the trunk downward into the unused loops on the bottom of the foundation chain.
Turn the triangle upside down with the RS facing you. Count the 15 free foundation loops from the right. The trunk uses loops 7, 8 and 9, which are the center 3.
Row 1 (RS): Join the yarn in loop 7 with a sl st. Ch 1 (does not count), sc in loops 7, 8 and 9. Turn. (3 sc)
Row 2: Ch 1, sc in each st across. Turn. (3 sc)
Row 3: Ch 1, sc in each st across. (3 sc) Fasten off and weave in the end.
Checkpoint: The trunk is 3 sc wide and 3 rows long, about 0.75 in (1.9 cm) each way. Leave 6 free foundation loops on each side of it, loops 1–6 and 10–15.
Edging, Scallops and Hanging Loop
This one round finishes the whole outline. On the sides, 2 sc in each dc row-end keeps the edge flat because one dc row is about as tall as 2 sc. Across the bottom, each 3-st group takes one shell.
Edging gauge: 2 sc per dc row-end; 1 shell (5 dc) per 3 foundation loops.
Hold the ornament point-up with the RS facing you.
Edging Round:
- Top point: Join the yarn in the single st of Row 8 with a sl st. Ch 1 (does not count) and sc in the same st. (1 sc)
- First side: Work 2 sc in the end of each row, Rows 8 down to 1. (16 sc)
- Bottom, first half: Working in the free foundation loops: sc in loop 1, shell in loop 2, sc in loop 3, sc in loop 4, shell in loop 5, sc in loop 6. (2 shells; 14 sts: 4 sc + 10 dc)
- Trunk, first side: Sc in the end of each trunk row, Rows 1 to 3. (3 sc)
- Trunk bottom: Working across the sts of trunk Row 3: 2 sc in the first st, sc in the next st, 2 sc in the last st. (5 sc)
- Trunk, second side: Sc in the end of each trunk row, Rows 3 up to 1. (3 sc)
- Bottom, second half: Sc in loop 10, shell in loop 11, sc in loop 12, sc in loop 13, shell in loop 14, sc in loop 15. (2 shells; 14 sts)
- Second side: Work 2 sc in the end of each row, Rows 1 up to 8. (16 sc)
- Hanging loop: Ch 16, then sl st in the first sc of the round to join. Fasten off.
Round total: 1 + 16 + 14 + 11 + 14 + 16 = 72 sts, plus the ch-16 loop.
Why the math works:
- Bottom: The 15 foundation loops split into three groups: 6 + 3 + 6. Each 6-loop group makes 2 shells of 3 loops each, set as sc–shell–sc. The center 3 loops carry the trunk, so no foundation loop is used twice and none is skipped.
- Trunk: The trunk outline is 3 + 5 + 3 = 11 sc. The 2 extra sts at the trunk bottom turn the corners.
- Sides: Both sides get exactly 16 sc from 8 rows, so the tree stays symmetrical.
Checkpoint: 4.25 in (10.8 cm) across the widest scallops, 5.25 in (13.3 cm) from trunk bottom to the top point, and a loop about 1.5 in (3.8 cm) tall.
Final Blocking
- Weave in all ends along the WS edging, not through the ridges.
- Lightly spray the ornament with water until it is damp but not soaked.
- Lay it RS up on the blocking mat.
- Pin the top point first, then the 2 outer scallop tips, so the base measures 4.25 in (10.8 cm).
- Line up the trunk with the center of the point and pin its 2 bottom corners.
- Pin the tip of each shell so all 4 scallops curve evenly.
- Lay the hanging loop straight up from the point.
- Gently brush the ridges with a fingertip so they all sit up on the RS.
- Let it dry completely before you remove the pins.
Final Quality-Control Checklist
- 7 ridges are visible on the RS, one between each pair of rows.
- Both slanted sides are straight and the same length.
- The 4 scallops are evenly sized, with 2 on each side of the trunk.
- The trunk is centered under the top point.
- The edging is flat, without ruffles or puckers.
- The hanging loop is centered and firmly joined.
- All ends are hidden on the WS.
- The size is about 4.25 in × 5.25 in (10.8 cm × 13.3 cm), plus the loop.
Troubleshooting
The ridges show on both sides, or only every other row. You used the same loop on every row. Use the BLO on RS rows and the FLO on WS rows.
The triangle leans to one side. You missed a decrease at one end. Count the sts after every row: 15, 13, 11, 9, 7, 5, 3, 1.
The sides ruffle. Your sc are too loose. Go down half a hook size for the edging only.
The sides pucker. You worked fewer than 2 sc per row-end. Check for 16 sc per side.
The scallops cup forward. Your shell dc are too tight. Relax your tension, or block the shells flat with a pin in each tip.
The trunk is off-center. Count the foundation loops again. The trunk must start in loop 7.
The loop twists. Chain loosely, then block the loop flat.
Care
Hand wash in cool water, press out the water in a towel, and dry flat. Store flat or hanging so the point and scallops keep their shape.
Final Notes
Each stage builds on the one before it. At 4 dc and 2 rows per inch, the 15-st first row gives 3.75 in (9.5 cm) of width. The 8 decreasing rows give 4 in (10.2 cm) of height and finish at a single st. The 3-row trunk uses the center 3 of the 15 foundation loops. The 72-st edging round then brings the ornament to 4.25 in × 5.25 in (10.8 cm × 13.3 cm), with a 1.5 in (3.8 cm) loop on top. If your Row 1 measures correctly, the rest of the measurements will follow.
Happy crocheting!