

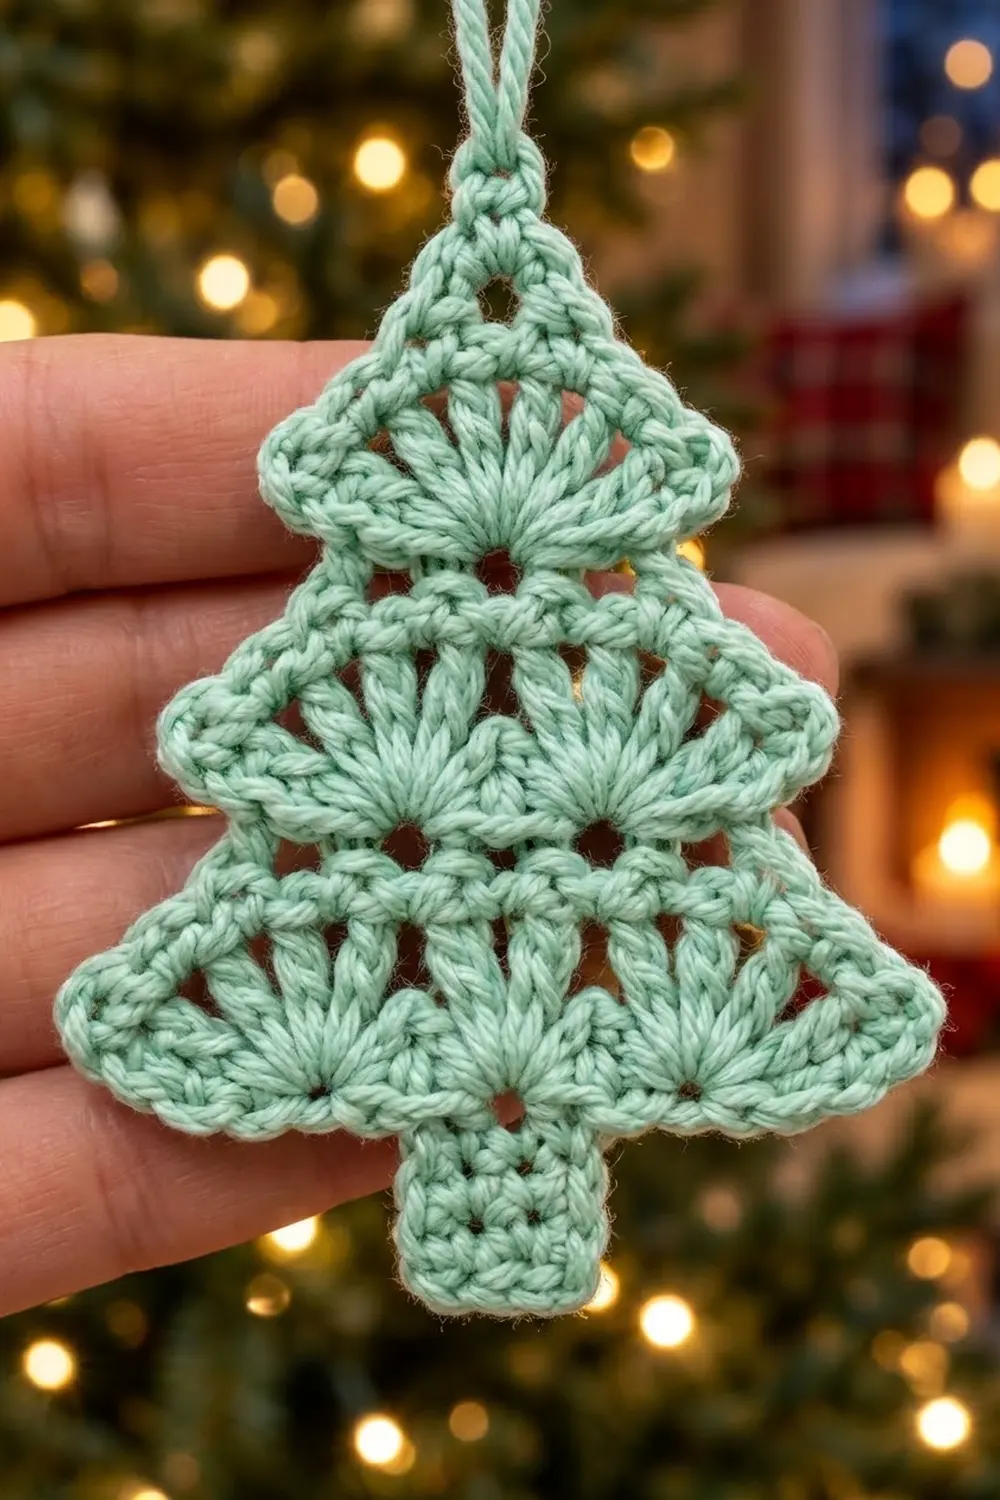
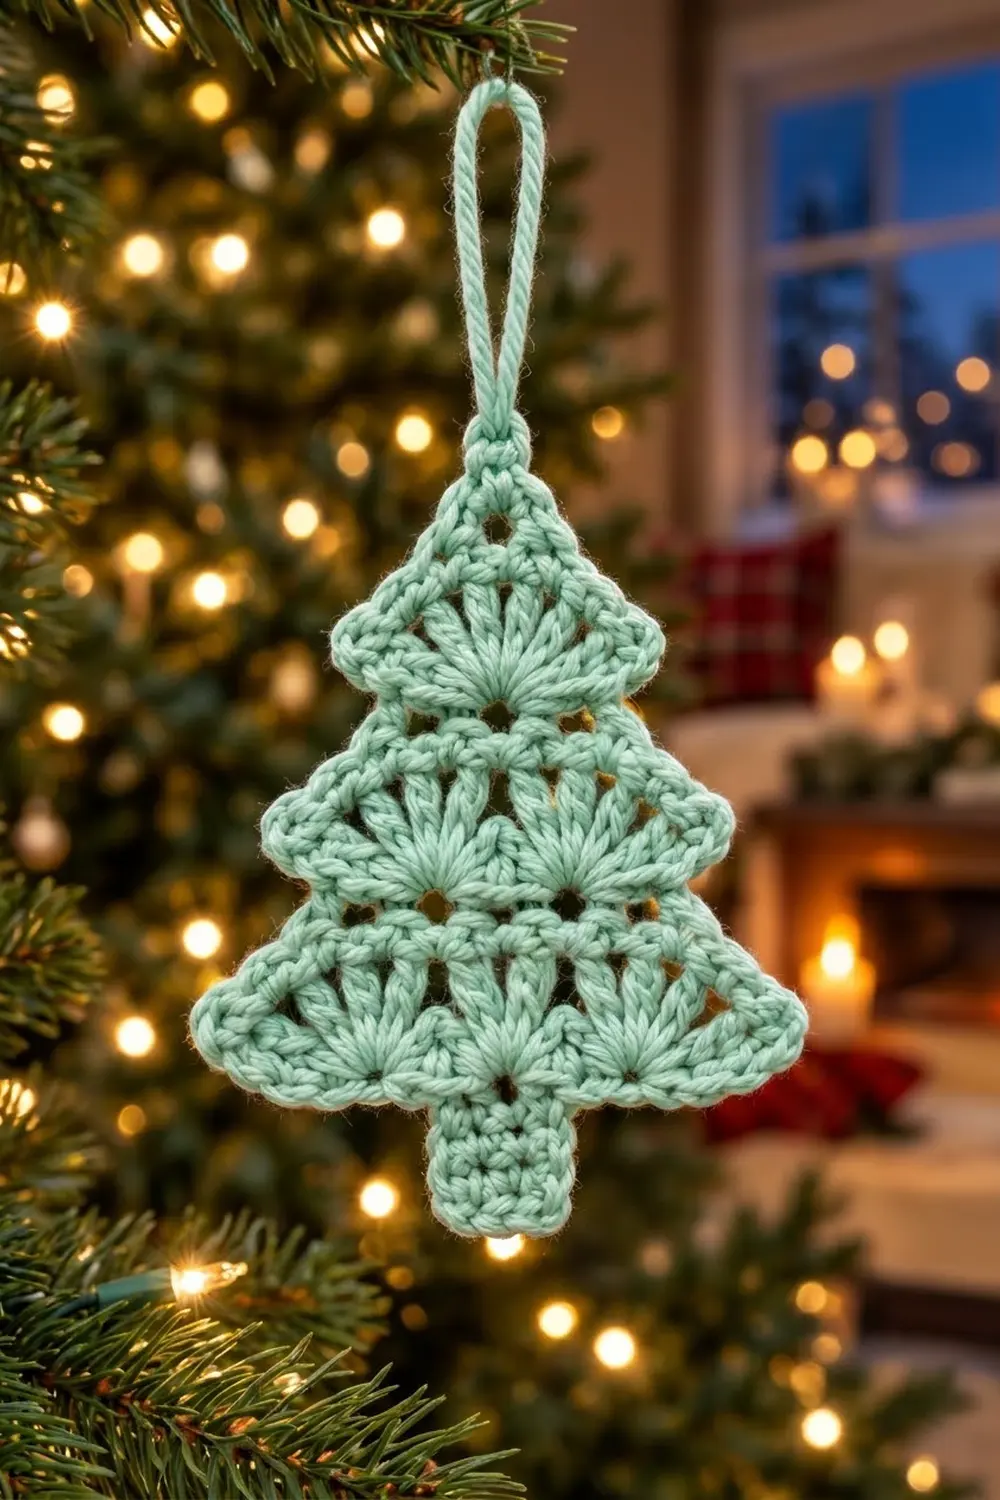
The Mint Frost Tree is a small, flat Christmas ornament with three tiers of fans. Each tier is a row of tall shells that open upward from a small eyelet. The tiers get narrower toward the top, so the tree has a classic layered shape with neat pointed tips on both sides.
It is worked in one soft mint green, which looks fresh and a little Nordic against dark branches and warm lights. A single round of single crochet frames the whole outline and makes the edge firm and tidy. A slim chain loop at the top point is used to hang it.
This pattern uses US crochet terms. The finished ornament measures about 3.3 in (8.4 cm) wide and 3.75 in (9.5 cm) tall without the loop, or about 5.75 in (14.6 cm) including the loop.
Construction is simple. You work the tree body in rows from the bottom up, with one shell row per tier and a short single-crochet row between tiers. Then you work the trunk into the foundation chain, add one border round and finish with the hanging loop.
Finished Size and Construction
- Finished size: 3.3 in (8.4 cm) wide × 3.75 in (9.5 cm) tall, excluding loop
- With loop: about 5.75 in (14.6 cm) tall
- Skill level: Easy / advanced beginner
- Terminology: US
- Yarn weight: #2 fine (sport) cotton
- Hook: 2.75 mm (US C-2)
- Number of pieces: 1
- Layout: Single flat motif, worked in one piece
- Piece size before border: 3.0 in (7.6 cm) wide × 3.45 in (8.8 cm) tall
- Border depth: about 0.15 in (0.4 cm) on every edge
Materials
Yarn advice: Use a smooth mercerized or combed cotton in sport (#2 fine) weight. Cotton shows the shell spokes clearly and holds its shape on the tree. Avoid fuzzy or very stretchy yarns, because they blur the fans and make the tips droop.
- Mint green: 6 g (about 18 m)
That quantity includes a safety margin of about 50 percent. One ornament usually uses closer to 4 g (12 m). Making a set? Multiply by the number of trees and round up to the next full ball.
Tools:
– 2.75 mm (US C-2) crochet hook
– Tapestry needle
– Scissors
– Stitch marker (optional)
– Blocking mat and rustproof pins
– Spray bottle; spray starch (optional, for a crisper ornament)
– Ruler or tape measure
Abbreviations (US Terms)
- ch – chain
- sl st – slip stitch
- sc – single crochet
- tr – treble crochet
- sc3tog – single crochet 3 together
- sk – skip
- st(s) – stitch(es)
- RS / WS – right side / wrong side
Special stitch: Shell. Work 5 tr in the same stitch. Each shell is one fan of the tree. Its 5 tr are numbered tr1 to tr5 in the order you work them.
Gauge and Checkpoints
Gauge: 7 sc = 1 in (2.5 cm) wide. One sc row is about 0.15 in (0.4 cm) tall, and one shell row is about 0.6 in (1.5 cm) tall.
Use Rows 1 and 2 as your gauge test. Measure before you go further.
Checkpoints:
– After Row 1: 19 sc = 2.7 in (6.9 cm) wide.
– After Row 2: Bottom tier measures 3.0 in (7.6 cm) from tip to tip, and Rows 1–2 are 0.75 in (1.9 cm) tall.
– After Row 4: Middle tier measures 2.2 in (5.6 cm) from tip to tip.
– After Row 6: Top tier measures 1.3 in (3.3 cm) from tip to tip.
– After Row 8: Body is 2.55 in (6.5 cm) tall.
– After the trunk: Total height is 3.45 in (8.8 cm).
– After the border: 3.3 in (8.4 cm) × 3.75 in (9.5 cm).
Too big? Go down one hook size, to 2.5 mm, or tighten your tr so the loops don’t grow while you pull through.
Too small? Go up to 3.0 mm.
Being slightly off is fine for an ornament. If your width is more than 0.2 in (0.5 cm) off, though, change hooks so a set of trees comes out matching.
Tree Body
The body is worked in rows from the bottom tier up. Each tier is one shell row followed by a shorter sc row. That sc row starts and ends at the center of the outermost shells, which creates the half-fan overhang.
Row 1 (foundation): Ch 20. Sc in 2nd ch from hook and in each ch across. (19 sc)
Bottom Tier
Row 2 (RS): Ch 1, turn. Sc in first st, [sk 2, Shell in next st, sk 2, sc in next st] 3 times. (3 shells + 4 sc = 19 sts)
The shells open upward from the sc of Row 1. A small eyelet forms at the base of each fan.
Row 3: Turn. Do not ch. Sl st loosely in the first 4 sts: sc, tr1, tr2, tr3. The last sl st lands in the center tr of the first shell. Ch 1, then sc in the same st as the last sl st and in each of the next 12 sts. You stop in the center tr of the last shell. (13 sc; 3 sts left unworked at the end)
On both sides of this row, 3 stitches stay uncovered. That stepping-in makes the first tier’s pointed tips.
Middle Tier
Row 4: Ch 1, turn. Sc in first st, [sk 2, Shell in next st, sk 2, sc in next st] 2 times. (2 shells + 3 sc = 13 sts)
Row 5: Turn. Sl st loosely in the first 4 sts. Ch 1, then sc in the same st as the last sl st and in each of the next 6 sts. (7 sc; 3 sts left unworked)
Top Tier
Row 6: Ch 1, turn. Sc in first st, sk 2, Shell in next st, sk 2, sc in last st. (1 shell + 2 sc = 7 sts)
Row 7: Turn. Sl st loosely in the first 3 sts: sc, tr1, tr2. Ch 1, then sc in the same st as the last sl st and in each of the next 2 sts (tr2, tr3, tr4). (3 sc; tr5 and the last sc are left unworked)
Row 8: Ch 1, turn. Sc3tog. (1 st) This is the top point.
Fasten off and weave in the end.
Checkpoint: The body should be 2.55 in (6.5 cm) tall, with three clear tiers and 1, 2 and 3 fans from top to bottom.
Trunk
Turn the tree upside down with the RS facing you. You will work into the free loops on the underside of the foundation chain. These are the same 19 stitch positions as Row 1. Counting from either corner, skip the first 7 loops.
Row 1: Join yarn in the 8th loop. Ch 1, then sc in the same loop and in each of the next 4 loops. (5 sc) That leaves 7 loops free on each side, so the trunk is perfectly centered.
Rows 2–6: Ch 1, turn, sc in each st across. (5 sc)
Fasten off and weave in the end.
Checkpoint: The trunk is 0.7 in (1.8 cm) wide and 0.9 in (2.3 cm) long, and the total height is now 3.45 in (8.8 cm).
Border
Border gauge: One round of sc adds about 0.15 in (0.4 cm) to every edge. Along straight edges, work it at the same 7 sc per inch as the body.
Here are the placement rules used below:
– 1 sc in each sc row end
– 2 sc around the post of each outer tr
– 1 sc in each exposed stitch top
– 3 sc in each tip
Where an edge stitch holds a sl st, work into the sl st and the stitch under it together.
Round 1: With the RS facing, join yarn in the first st of trunk Row 6. Work around the piece in the order below.
- Trunk bottom: Ch 1. 3 sc in the first st, 1 sc in each of the next 3 sts, 3 sc in the last st. (9 sc, both corners included)
- Trunk side A: 1 sc in each of the row ends of trunk Rows 5 to 1. (5 sc)
- Bottom edge A: 1 sc in each of the next 6 free foundation loops, then 2 sc in the corner loop. (8 sc)
- Side A, bottom tier: 1 sc in the Row 1 row end, 1 sc in the first sc of Row 2, 2 sc around the post of the outer tr, 3 sc in the top of that tr (the tier tip), and 1 sc in the next tr. (8 sc)
- Side A, middle tier: Repeat step 4, but use the Row 3 row end and the first sc of Row 4. (8 sc)
- Side A, top tier: 1 sc in the Row 5 row end, 1 sc in the first sc of Row 6, 2 sc around the post of the outer tr, and 3 sc in the top of that tr. (7 sc) The next tr is already covered by Row 7.
- Top point: 1 sc in the Row 7 row end, 3 sc in the sc3tog, and 1 sc in the other Row 7 row end. (5 sc)
- Side B, top tier: 3 sc in the top of the outer tr (the tip), 2 sc down its post, 1 sc in the last sc of Row 6, and 1 sc in the Row 5 row end. (7 sc)
- Side B, middle tier: 1 sc in the next exposed tr, 3 sc in the outer tr top (the tip), 2 sc down its post, 1 sc in the last sc of Row 4, and 1 sc in the Row 3 row end. (8 sc)
- Side B, bottom tier: Repeat step 9, but use the last sc of Row 2 and the Row 1 row end. (8 sc)
- Bottom edge B: 2 sc in the corner foundation loop, then 1 sc in each of the next 6 free loops. (8 sc)
- Trunk side B: 1 sc in each of the row ends of trunk Rows 1 to 5. (5 sc)
Sl st to the first sc. (86 sc total)
Hanging loop: Sl st into the center sc of the 3 sc at the top point. Ch 30, then sl st in the same sc. Fasten off and weave the ends into the border. The loop hangs about 2 in (5.1 cm) above the point.
Why the math works: The tree is mirror-symmetric, so each long side gets the same count. On each side, that is 5 (trunk side) + 8 (bottom edge) + 8 + 8 + 7 (three tiers) = 36 sc. Two sides make 72, and adding the trunk bottom (9) and the top point (5) gives 86.
Each tier’s count matches what is actually exposed. The bottom and middle tiers leave two tr tops uncovered on each side, which gives 8 sc. The top tier leaves only one uncovered, which gives 7 sc.
Corner stitches are counted once only, inside the segment where they are worked. That’s why the trunk bottom’s 9 already includes both of its corners.
Final Blocking
- Weave in all the ends securely before blocking.
- Spray the ornament until it is evenly damp, but not dripping.
- Lay it RS up on a blocking mat.
- Pin the top point and both tips of each tier. Make the bottom tips 3.3 in (8.4 cm) apart.
- Pin the trunk straight. Check that the total height is 3.75 in (9.5 cm).
- Gently open each fan with your fingertips so the tr spokes are evenly spaced.
- For a stiffer ornament, mist with spray starch now.
- Leave it pinned until completely dry, usually 4–6 hours.
- Unpin it and lay the hanging loop flat to straighten it.
Final Quality-Control Checklist
- Fans per tier, from the bottom up: 3, 2, 1
- Every shell has 5 tr
- Row counts: 19, 19, 13, 13, 7, 7, 3, 1
- Trunk is 5 sc wide, 6 rows long and centered, with 7 free foundation loops on each side
- Border has 86 sc and no gaps at the tips
- Both sides mirror each other
- Size is 3.3 in (8.4 cm) × 3.75 in (9.5 cm)
- Loop is secure and about 2 in (5.1 cm) tall
- No visible ends on the RS
Troubleshooting
The tiers look lopsided. Count the sl sts at the start of Rows 3, 5 and 7, and the stitches left unworked at the end. Both sides must match: 3 and 3 for Rows 3 and 5, 2 and 2 for Row 7.
The fans cup or ruffle. Your tr are too loose. Shorten them by pulling the yarn snug after each yarn over, or go down a hook size.
The tips curl in. Make sure you work the full 3 sc in each tip during the border, and pin the tips firmly while blocking.
There are gaps where the trunk meets the tree. Work the trunk-side sc into the full row-end stitch rather than just a strand, and keep the corner stitches snug.
The trunk is off-center. Recount the foundation loops. There should be exactly 7 free on each side of the trunk.
The ornament is floppy. Use spray starch or a diluted fabric stiffener, then dry it pinned flat.
Care
Hand wash in cool water, press out the water in a towel and dry flat, re-pinning the tips if needed. Store flat so the loop and tips stay crisp until next season.
Final Notes
Each stage builds on the one before. Row 1 sets the base at 19 sc = 2.7 in (6.9 cm). The three shell tiers flare to 3.0 in (7.6 cm), 2.2 in (5.6 cm) and 1.3 in (3.3 cm) tip to tip, and the body reaches 2.55 in (6.5 cm). The trunk brings the piece to 3.45 in (8.8 cm), and the 86-sc border finishes it at 3.3 in (8.4 cm) × 3.75 in (9.5 cm).
Check each measurement as you go and every tree in your set will match. Make one for every branch, or tie one onto a gift.
Happy crocheting!