

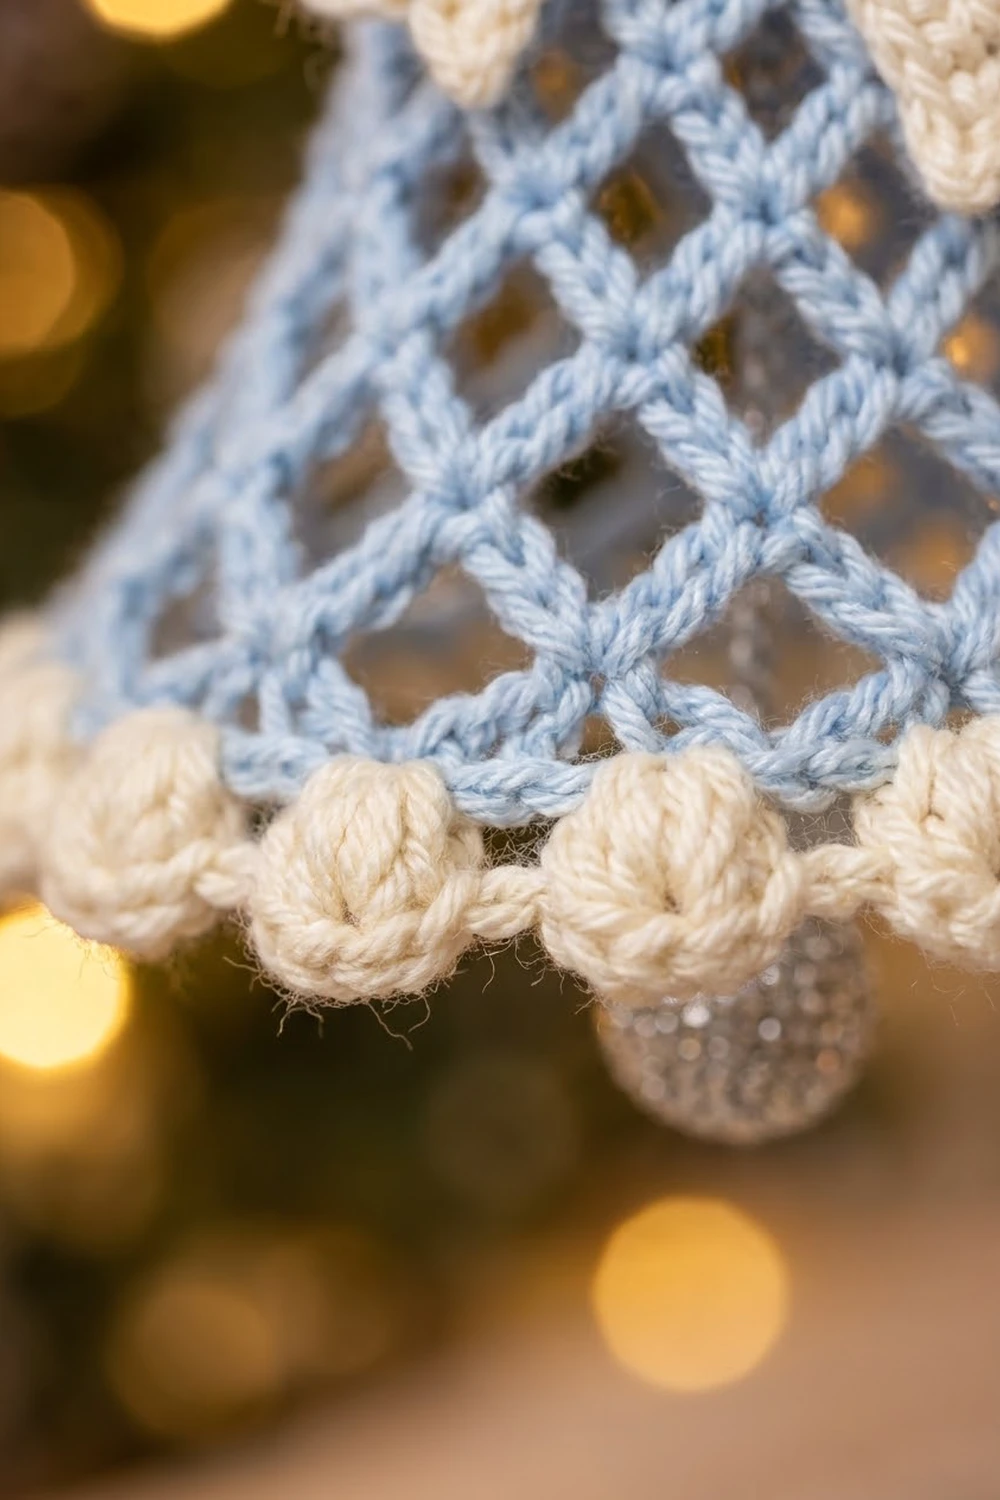
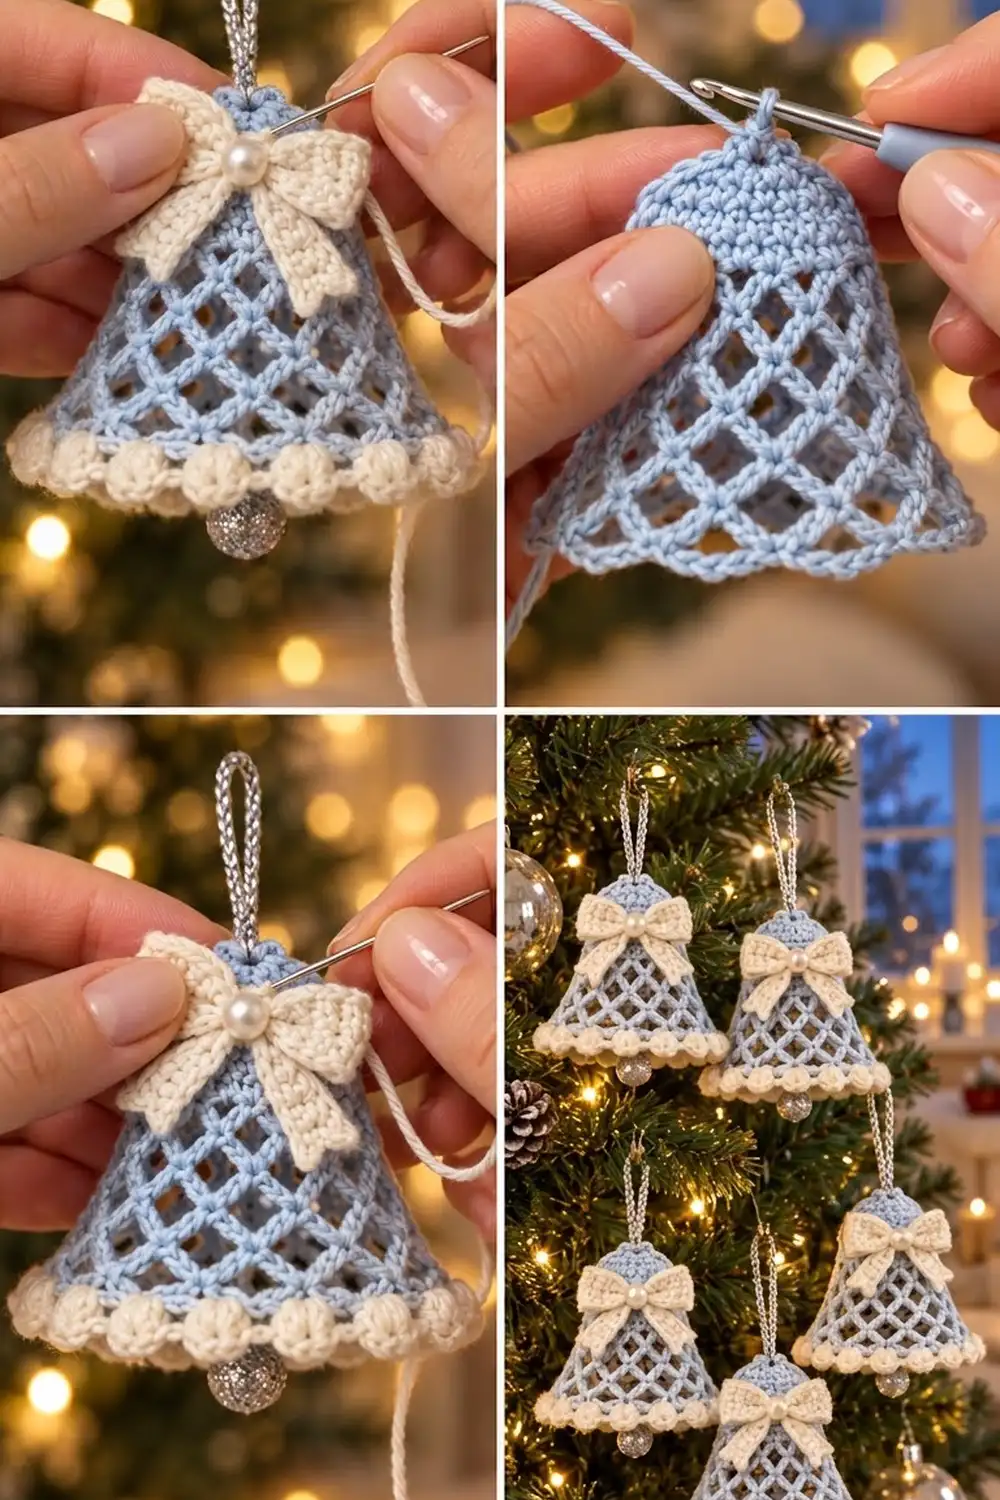
The Frosted Lattice Bell is a small, three-dimensional Christmas ornament with a solid rounded crown, an open diamond-mesh skirt and a soft cream bobble edge. A little cream bow with a pearl center sits at the front. A silver cord makes the hanging loop, and a sparkly bead dangles inside as the clapper.
The colors are quiet and wintry: pale powder blue for the bell, ivory cream for the edging and bow, and touches of silver and pearl. It looks lovely against green branches and warm fairy lights. Once you know the rhythm, it takes well under an hour.
This pattern uses US crochet terms. The finished bell is about 3 in (7.6 cm) tall from crown to bobble edge and about 3.2 in (8.1 cm) wide across the lower edge when pressed flat. These measurements don’t include the hanging loop or the clapper bead.
You work the bell from the top down in one piece, in joined rounds. It starts with a single crochet dome and a short straight crown. Six rounds of chain mesh follow, with loops that get longer to flare the skirt, and a two-round cream bobble border finishes the edge. The bow is made separately from two tiny strips and sewn on.
Finished Size and Construction
- Finished size: 3 in (7.6 cm) tall x 3.2 in (8.1 cm) wide at the lower edge (flat)
- Skill level: Easy-intermediate
- Terminology: US crochet terms
- Yarn weight: Fine (2), sport-weight cotton
- Hook: 2.75 mm (C-2)
- Number of pieces: 1 bell body worked in one piece, plus 1 small bow appliqué (made from 2 strips)
- Layout: Single ornament, with the bow sewn to the front of the crown
- Crown size: about 1.6 in (4.1 cm) wide and 0.75 in (1.9 cm) tall
- Size before border: 2.5 in (6.4 cm) tall x 2.75 in (7.0 cm) wide at the lower edge
- Border depth: 0.5 in (1.3 cm)
Materials
Choose a smooth, mercerized cotton or cotton blend in sport weight, roughly 160 m per 50 g. Mercerized cotton gives crisp stitch definition, which keeps the mesh diamonds open and the bobbles round. Avoid fuzzy or very stretchy yarns, because the mesh will sag.
- Color A, powder blue: 6 g (about 19 m)
- Color B, ivory cream: 5 g (about 16 m)
These amounts include a small margin for swatching and weaving in ends.
Tools and notions:
- 2.75 mm (C-2) crochet hook
- Tapestry needle
- Sewing needle and cream thread
- 1 pearl bead, 8 mm, for the bow center
- 1 silver or crystal bead, 10 mm, for the clapper
- Silver metallic cord, 6 in (15.2 cm), for the hanging loop
- Stitch marker
- Scissors
- Fabric stiffener or spray starch
- A small cup or shot glass about 2.75 in (7.0 cm) across, for shaping
Abbreviations (US Terms)
- ch – chain
- sl st – slip stitch
- sc – single crochet
- dc – double crochet
- inc – 2 sc in the same stitch
- sk – skip
- sp – space
- st(s) – stitch(es)
- RS – right side
Special stitch – Bobble: Yarn over, insert the hook in the stitch, pull up a loop, then yarn over and draw through 2 loops (2 loops on hook). Repeat this 3 more times in the same stitch (5 loops on hook). Yarn over and draw through all 5 loops. Each bobble counts as 1 stitch.
Gauge and Checkpoints
Gauge: 7 sc and 8 rounds = 1 in (2.5 cm) in sc worked in the round.
Make one test crown (Rounds 1–6) before you commit to the whole bell. It takes five minutes and tells you whether your gauge matches.
Checkpoints:
- After Round 6, the flat disc measures 1.5 in (3.8 cm) across.
- After Round 9, the crown is about 1.6 in (4.1 cm) wide and 0.75 in (1.9 cm) tall.
- After Round 12, the lower edge of the mesh measures about 2.2 in (5.6 cm) across, flat.
- After Round 15, the bell is 2.5 in (6.4 cm) tall and 2.75 in (7.0 cm) wide at the lower edge.
- After the border, the bell is 3 in (7.6 cm) tall and 3.2 in (8.1 cm) wide.
A difference of up to 1/8 in (0.3 cm) is fine. If your disc is too big, go down one hook size (to 2.5 mm). If it is too small, go up one size (to 3 mm). Don’t change the stitch counts, because the mesh and border math depend on them.
Bell Body
Work with Color A. Join each round with a sl st. The ch 1 at the start of a round does not count as a stitch. Keep the RS facing you the whole time, and the dome will curl naturally with the RS on the outside.
Crown
Round 1: Make a magic ring, ch 1, 6 sc in ring, sl st to first sc. (6 sts)
Round 2: Ch 1, inc in each st around, sl st to first sc. (12 sts)
Round 3: Ch 1, sc in next st, inc in next st 6 times, sl st to first sc. (18 sts)
Round 4: Ch 1, sc in next 2 sts, inc in next st 6 times, sl st to first sc. (24 sts)
Round 5: Ch 1, sc in next 3 sts, inc in next st 6 times, sl st to first sc. (30 sts)
Round 6: Ch 1, sc in next 4 sts, inc in next st 6 times, sl st to first sc. (36 sts)
Check the disc now: it should be 1.5 in (3.8 cm) across.
Rounds 7–9: Ch 1, sc in each st around, sl st to first sc. (36 sts in each round)
These three straight rounds turn the disc down into a rounded cap. Pull the magic ring tight but leave the tail long, because you’ll use it for the clapper.
Diamond Mesh Skirt
Every mesh round has 12 chain loops. In each round you work a sc into the center of a loop from the round below, which creates the diamond lattice. The loops get longer every two rounds, so the skirt flares into a bell shape without adding loops.
Round 10: Ch 1, sc in first st, ch 5, sk next 2 sts, sc in next st 11 times, ch 2, sk last 2 sts, dc in first sc. (12 ch-5 loops) The ch 2 + dc counts as the 12th loop and leaves your hook at the center of that loop.
Check: 12 sc anchors x 3 sts each (1 worked + 2 skipped) = 36 sts, which matches Round 9 exactly.
Round 11: Ch 1, sc around the post of the dc just made, ch 5, sc in next ch-5 sp 11 times, ch 2, dc in first sc. (12 ch-5 loops)
Round 12: Ch 1, sc around the post of the dc just made, ch 6, sc in next ch sp 11 times, ch 3, dc in first sc. (12 ch-6 loops)
Round 13: Ch 1, sc around the post of the dc just made, ch 6, sc in next ch-6 sp 11 times, ch 3, dc in first sc. (12 ch-6 loops)
Round 14: Ch 1, sc around the post of the dc just made, ch 7, sc in next ch-6 sp 11 times, ch 4, dc in first sc. (12 ch-7 loops)
Round 15: Ch 1, sc around the post of the dc just made, ch 7, sc in next ch-7 sp 11 times, ch 7, sl st to first sc. (12 ch-7 loops)
Round 15 ends with a full ch 7 instead of a ch + dc, so all 12 loops on the lower edge are true chain loops, ready for the border. Fasten off Color A.
Check: the bell is now 2.5 in (6.4 cm) tall and 2.75 in (7.0 cm) wide at the lower edge.
Border
Work with Color B. The border’s gauge is 8 sc in each ch-7 loop. That fills the loops so the edge sits flat with a slight ruffle and gives the bobbles a firm base. Each bobble repeat is 4 sts wide.
Border Round 1: With RS facing, join Color B with a sl st in any ch-7 sp. Ch 1, 8 sc in each ch-7 sp around, sl st to first sc. (96 sts: 12 loops x 8 sc)
Border Round 2: Ch 1, sc in next st, ch 1, sk next st, bobble in next st, ch 1, sk next st 24 times, sl st to first sc. (24 bobbles, 24 sc, 48 ch-1 sps)
Fasten off and weave in the end.
Why the math works: 12 loops x 8 sc = 96 sts. Each bobble repeat uses 4 sts (sc + skipped st + bobble st + skipped st), and 96 ÷ 4 = 24 repeats with nothing left over. That puts exactly 2 bobbles over each mesh loop, so the bobbles line up evenly under the diamonds. The ch 1 on each side of a bobble replaces the skipped stitch, so the edge keeps its length and doesn’t pull in.
Check: the bell is 3 in (7.6 cm) tall and 3.2 in (8.1 cm) wide at the lower edge.
Bow Appliqué
Work with Color B in rows, turning at the end of each row. The ch 1 at the start of a row does not count as a stitch.
Bow Loops
Foundation: Ch 21.
Row 1: Sc in 2nd ch from hook and in each ch across, turn. (20 sts)
Rows 2–4: Ch 1, sc in each st across, turn. (20 sts in each row)
Fasten off, leaving a 10 in (25.4 cm) tail. The strip is about 2.9 in (7.4 cm) long and 0.5 in (1.3 cm) tall.
Fold both short ends to the center of the strip so they overlap slightly at the back. This makes two bow loops, each about 0.8 in (2.0 cm) wide.
Bow Tails
Foundation: Ch 11.
Row 1: Sc in 2nd ch from hook and in each ch across, turn. (10 sts)
Row 2: Ch 1, sc in each st across. (10 sts)
Fasten off. The strip is about 1.4 in (3.6 cm) long. Fold it in half into an upside-down V.
Assemble the Bow
Place the folded bow loops on top of the V-shaped tails. Use the long tail to wrap the center of the bow tightly 4–5 times, cinching it into a bow shape, and secure it at the back. Sew the 8 mm pearl bead over the wrapped center with cream thread.
The finished bow is about 1.6 in (4.1 cm) wide and 1.2 in (3.0 cm) tall.
Hanging Loop and Clapper
Fold the 6 in (15.2 cm) silver cord in half and knot the ends together. From inside the bell, push the folded end up through the center of the magic ring so a 2 in (5.1 cm) loop shows on top. The knot stays inside.
Thread the clapper bead onto the magic ring tail. Adjust it so the bead hangs about 0.25 in (0.6 cm) below the bobble edge, then tie the tail firmly around the cord knot. Add a drop of glue to the knot if you like.
Final Blocking
- Lightly dampen the bell, or mist it with water.
- Stretch the bell over an upturned cup or shot glass about 2.75 in (7.0 cm) across.
- Gently pull each mesh loop down so the diamonds open evenly all the way around.
- Shape the border so the bobbles stand out and the lower edge sits level.
- Spray with starch or brush on fabric stiffener, focusing on the mesh.
- Let it dry completely, about 12 hours, before removing it.
- With cream thread, sew the bow to the front of the crown, centered over Rounds 6–9.
Final Quality-Control Checklist
- The crown has 36 sts and no gaps at the increases.
- The mesh has 12 loops in every round from Round 10 to Round 15.
- All the diamonds are the same size around the bell.
- Border Round 1 has 96 sc, and Border Round 2 has 24 bobbles.
- The bell measures 3 in (7.6 cm) tall and 3.2 in (8.1 cm) wide.
- The bow is centered and the pearl is secure.
- The hanging loop is centered and the bell hangs straight.
- The clapper hangs just below the edge and doesn’t snag.
- All ends are woven in and trimmed.
Troubleshooting
The crown is flat, not domed. Your tension may be loose. Go down a hook size, or add one more straight round of 36 sc.
The crown ruffles. Check that each increase round has exactly 6 increases and the right stitch count.
The mesh looks lopsided. Count the loops. If you have 11 or 13, rework the round; every round needs 12 loops.
The skirt doesn’t flare. Make sure the chains grow to ch 6 and then ch 7 as written, and block over a cup.
The border ruffles too much. If your chains are very tight, work 7 sc per loop instead of 8 in Border Round 1. Then work Border Round 2 as 21 repeats (84 ÷ 4 = 21).
The bobbles look flat. Pull the last loop of each bobble snug, and push the bobble to the RS before you work the next ch 1.
The bell droops after hanging. Apply stiffener again and re-block over the cup.
Care
Spot clean gently with cool water and mild soap, then reshape the bell over a cup and let it dry. Store it flat or lightly stuffed with tissue so it keeps its shape.
Final Notes
Each measurement leads to the next. The disc is 1.5 in (3.8 cm) across at Round 6 and becomes a 1.6 in (4.1 cm) crown by Round 9. Six mesh rounds bring the bell to 2.5 in (6.4 cm) tall and 2.75 in (7.0 cm) wide. The 96-stitch, 24-bobble border adds 0.5 in (1.3 cm), for a finished bell 3 in (7.6 cm) tall and 3.2 in (8.1 cm) wide. If your piece matches each checkpoint, your bell will match too.
Make one in an evening, then a few more for the tree, a gift topper or a window display.
Happy crocheting!