

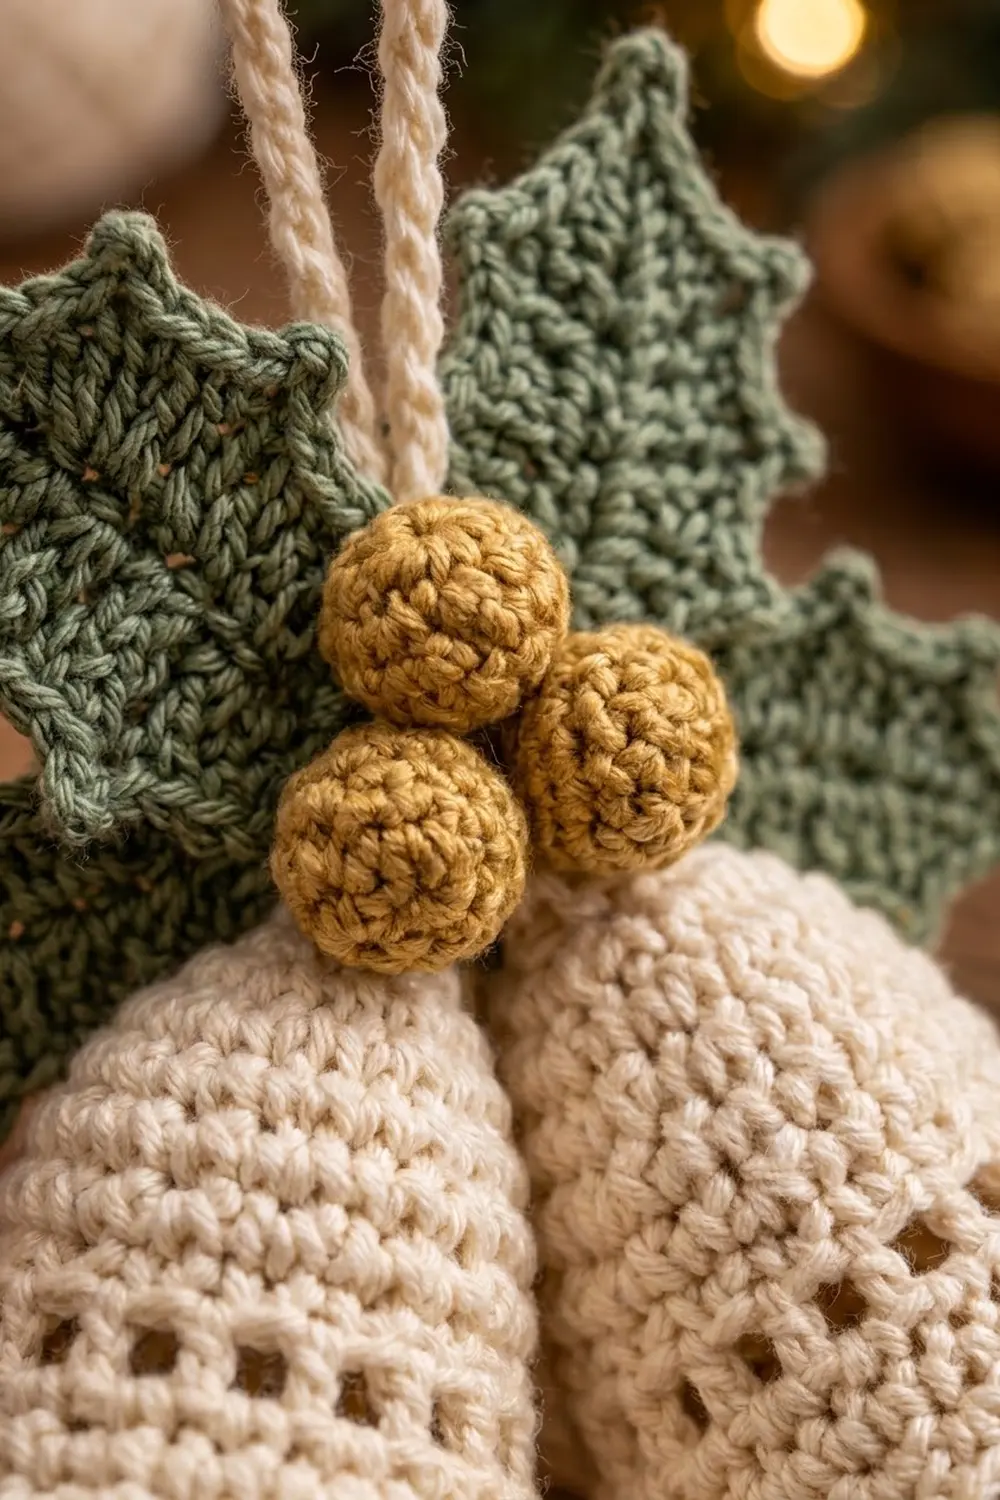
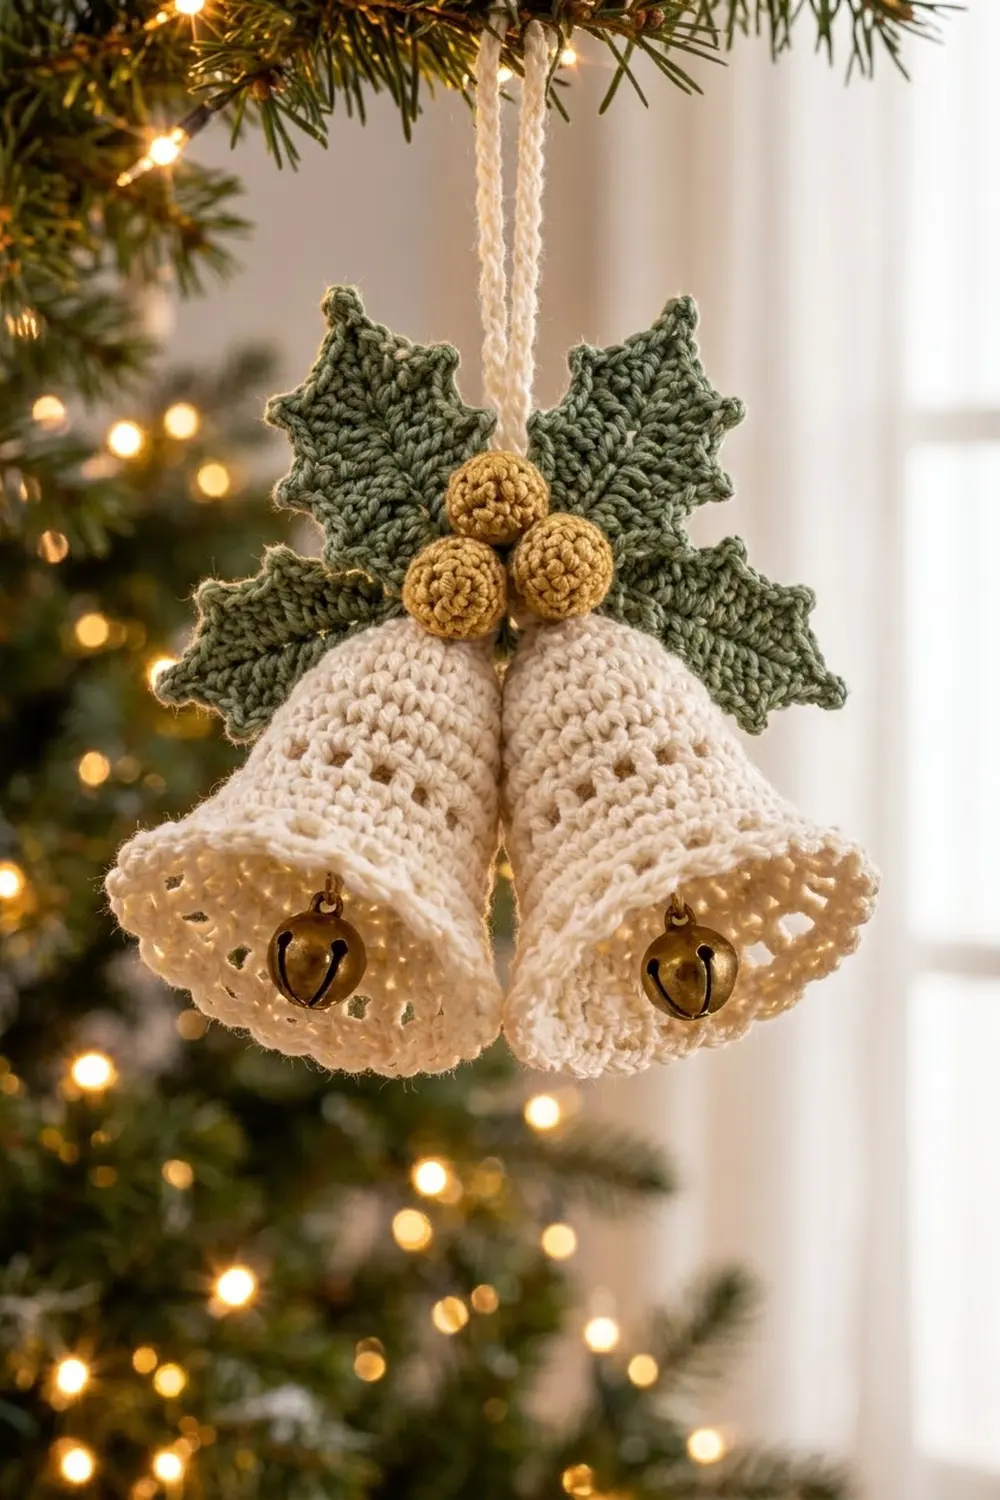
This Christmas ornament is two small cream bells hanging side by side. Above them are four sage-green holly leaves and three round golden berries, and the whole thing hangs from a cream cord loop. A gold jingle bell hangs inside each crochet bell, so the ornament rings softly when you touch the branch.
The bells are dense single crochet with two bands of small open “windows,” one high on the bell and one just above the flare. The skirt flares out and ends in a corded reverse single crochet rim. The cream, sage, and gold palette suits a rustic, natural tree.
This pattern uses US crochet terms. The finished ornament measures about 6.5 in (16.5 cm) wide and 5 in (12.7 cm) tall from the top leaf points to the bell rims. The hanging loop adds about 2.5 in (6.4 cm), for a total height of about 7.5 in (19.1 cm).
You work each bell top-down in joined rounds, starting from a magic ring. The leaves are worked around a foundation chain, the berries are tiny stuffed balls, and the loop is a slip-stitched chain cord. Then you sew everything together into one ornament.
Finished Size and Construction
- Finished size: 6.5 in (16.5 cm) wide x 5 in (12.7 cm) tall, plus a 2.5 in (6.4 cm) loop
- Skill level: Easy-intermediate
- Terminology: US crochet terms
- Yarn weight: DK / light (#3) cotton or cotton blend
- Hook: 3.5 mm (E-4)
- Number of pieces: 10 crocheted pieces (2 bells, 4 leaves, 3 berries, 1 cord), plus 2 metal jingle bells
- Layout: two bells side by side, leaves fanned behind the bell tops, berries clustered at the center
- Piece size (one bell): 3 in (7.6 cm) tall, rim diameter 3.1 in (7.9 cm)
- Bell size before border: 2.7 in (6.9 cm) tall
- Border depth: 0.3 in (0.8 cm), 2 rounds
Materials
Use a smooth DK cotton with about 115 m per 50 g. Cotton keeps the bells stiff and the stitches crisp.
- Cream (main color): 18 g / 40 m, for both bells and the hanging cord
- Sage green: 9 g / 20 m, for 4 holly leaves
- Mustard gold: 5 g / 12 m, for 3 berries
These quantities include a margin of about 25% for swatching and sewing tails.
Tools:
- 3.5 mm (E-4) crochet hook
- 2 gold jingle bells, 0.6 in (1.5 cm) across
- Small amount of fiberfill
- Tapestry needle
- 2 stitch markers
- Scissors
- Starch spray or fabric stiffener (optional)
- Blocking pins and a small foam mat
Abbreviations (US Terms)
- ch – chain
- sl st – slip stitch
- sc – single crochet
- hdc – half double crochet
- dc – double crochet
- inc – 2 sc in the same stitch
- sc2tog – single crochet 2 together
- sk – skip
- sp – space
- MR – magic ring
- rev sc – reverse single crochet (crab stitch)
Special stitches
- Picot: ch 3, sl st in the 3rd ch from the hook. This makes each holly point.
- Reverse single crochet (rev sc): Work from left to right (right-handed). Insert the hook in the next stitch to the right, yarn over, pull up a loop, yarn over, and pull through both loops. This gives a twisted, corded edge.
Gauge and Checkpoints
Gauge: 22 sc and 24 rounds = 4 in (10.2 cm) in sc worked in joined rounds. That is 5.5 stitches and 6 rounds per inch.
Make one bell before you start the rest. It works as your swatch, and every other measurement in the pattern depends on it.
Checkpoints for one bell:
- After Round 3: the flat top circle is 1 in (2.5 cm) across.
- After Round 8: the bell is 1.3 in (3.3 cm) tall.
- After Round 14: the bell is 2.3 in (5.8 cm) tall and 2.1 in (5.3 cm) across at the bottom edge.
- After Round 16: the bell is 2.7 in (6.9 cm) tall, with a rim 3.1 in (7.9 cm) across.
- After the border: the bell is 3 in (7.6 cm) tall.
If the bell is too big: go down to a 3.25 mm hook. A loose bell won’t hold its shape.
If the bell is too small: go up to a 3.75 mm hook.
Bell (Make 2)
Use cream. Join each round with a sl st to the first sc and ch 1. The ch 1 does not count as a stitch. Place a marker in the first stitch of each round.
Round 1: Work 6 sc in a MR. Pull the ring closed. (6 sts)
Round 2: Inc in each st around. (12 sts)
Round 3: (Sc in next st, inc) 6 times. (18 sts)
The top is now a flat disc 1 in (2.5 cm) across.
Round 4: Sc in each st around. (18 sts)
Working a round without increases makes the edge turn down and starts the sides of the bell.
Round 5: (Sc in next 2 sts, inc) 6 times. (24 sts)
Round 6: Sc in each st around. (24 sts)
Round 7 (upper window round): (Sc in next 3 sts, ch 1, sk 1 st) 6 times. (18 sc + 6 ch-1 sps = 24 sts)
Round 8: Sc in each sc and in each ch-1 sp around. (24 worked 1 per existing st + 0 added = 24 sts)
The bell should be 1.3 in (3.3 cm) tall at this point.
Round 9: (Sc in next 3 sts, inc) 6 times. (30 sts)
Round 10: Sc in each st around. (30 sts)
Round 11: (Sc in next 4 sts, inc) 6 times. (36 sts)
Round 12: Sc in each st around. (36 sts)
Round 13 (lower window round): (Sc in next 2 sts, ch 1, sk 1 st) 12 times. (24 sc + 12 ch-1 sps = 36 sts)
Round 14: Sc in each sc and in each ch-1 sp around. (36 worked 1 per existing st + 0 added = 36 sts)
Checkpoint: 2.3 in (5.8 cm) tall and 2.1 in (5.3 cm) across.
Round 15 (flare): (Sc in next 3 sts, inc) 9 times. (45 sts)
Round 16 (flare): (Sc in next 4 sts, inc) 9 times. (54 sts)
The skirt now flares out clearly. Checkpoint: 2.7 in (6.9 cm) tall, with a rim 3.1 in (7.9 cm) across. Don’t fasten off. Go straight on to the Border section below.
Holly Leaf (Make 4)
Use sage green. Each leaf is worked around both sides of a foundation chain and has 7 points: 3 on each side plus 1 at the tip.
Foundation: Ch 12.
Side 1 (along the chain): Sl st in the 2nd ch from the hook (chain 1), sc in the next ch (2), hdc in the next ch (3), picot, dc in the next ch (4), dc in the next ch (5), picot, dc in the next ch (6), dc in the next ch (7), picot, hdc in the next ch (8), hdc in the next ch (9), sc in the next ch (10). (10 sts + 3 picots)
Tip: In the last ch (11), work sc, picot, sc. (2 sts + 1 picot)
Side 2 (along the opposite side of the chain): Sc in the next ch (10), hdc in the next ch (9), hdc in the next ch (8), picot, dc in the next ch (7), dc in the next ch (6), picot, dc in the next ch (5), dc in the next ch (4), picot, hdc in the next ch (3), sc in the next ch (2), sl st in the next ch (1). (10 sts + 3 picots)
Total: 22 sts + 7 picots. Sl st into the first sl st and fasten off, leaving a 6 in (15.2 cm) tail for sewing.
Each finished leaf is about 2.25 in (5.7 cm) long and 1.25 in (3.2 cm) wide, measured across the points.
Berry (Make 3)
Use mustard gold. Work in continuous rounds without joining.
Round 1: Work 6 sc in a MR. (6 sts)
Round 2: Inc in each st around. (12 sts)
Rounds 3–4: Sc in each st around. (12 sts)
Stuff firmly with a small pinch of fiberfill.
Round 5: Sc2tog 6 times. (6 sts)
Fasten off, leaving a 6 in (15.2 cm) tail. Thread the tail through the front loops of the last 6 sts, pull them closed, and keep the tail for sewing. Each berry is about 0.75 in (1.9 cm) across.
Hanging Cord (Make 1)
Use cream. Ch 34. Sl st in the back bump of the 2nd ch from the hook and in each ch across. (33 sl sts)
The cord should measure 6 in (15.2 cm). Fasten off and leave both tails long.
Make All Pieces
Before you assemble, check that you have everything:
- Cream: 2 bells, 1 cord
- Sage green: 4 leaves
- Mustard gold: 3 berries
- Hardware: 2 jingle bells
Layout grid (front view):
        [ cord loop ]
  [Leaf A]  (B1)  [Leaf B]
[Leaf C] (B2) (B3) [Leaf D]
     [Bell 1][Bell 2]
       (jb)    (jb)
Leaves A and B point up and outward. Leaves C and D point sideways. B1–B3 are the berries, and jb is the jingle bell hanging inside each bell.
Joining (Assembly)
Jingle bells: Thread a 5 in (12.7 cm) cream strand through a jingle bell’s loop. Pass both ends through the magic ring of one bell from the inside and tie them off on top. The jingle bell should hang about 0.5 in (1.3 cm) above the rim. Repeat for the second bell.
Bells: Place the bells side by side so that their top discs touch. Count down 6 rounds from the top on each bell, along the edges that face each other. Whipstitch the bells together stitch to stitch, one sc on Bell 1 to the matching sc on Bell 2, for 6 rounds. That gives a seam 1 in (2.5 cm) long. Below Round 6 the bells hang free, so the skirts can splay slightly apart.
Tension: Sew snugly, but don’t pull so hard that the bells dimple. The seam should lie flat without puckering.
Leaves: Lay the 4 leaves behind the bell tops, using the grid as your guide. Sew the base of each leaf (the starting sl st end) to the back of the bell tops. Then tack each leaf to the bell once at its midpoint so it can’t flop forward.
Berries: Sew B1 centered above the seam, then B2 and B3 just below it on each side, covering where the bells meet. Knot the tails inside the bells.
Cord: Fold the cord in half. Sew both ends behind the berry cluster, through the two magic rings.
Size checkpoint: The assembled ornament measures 6.5 in (16.5 cm) wide across the leaf tips and 5 in (12.7 cm) tall, with a loop of about 2.5 in (6.4 cm).
Border (Bell Rim)
Work the border on each bell straight after Round 16, before you assemble the ornament. The border has no corners or sides. Instead, think of the rim as 9 equal sections of 6 stitches, matching the 9 increase repeats in Rounds 15 and 16.
Border gauge: 5.5 sts per inch, the same as the body. 54 sts = 9.8 in (24.9 cm) around the rim, which gives a diameter of 3.1 in (7.9 cm).
Round 17: Sc in each st around. (54 worked 1 per existing st + 0 added = 54 sts; 6 sts in each of the 9 sections)
Round 18: Ch 1. Do not turn. Rev sc in each st around. (54 worked 1 per existing st + 0 added = 54 sts) Join and fasten off.
Why the math works: All of the flare comes from Rounds 15 and 16. The border adds no stitches, so 54 stays 54 and the rim neither ruffles nor pulls in. Because rev sc is short and twisted, it rolls the edge slightly, which gives the corded rim. The 2 border rounds add 0.3 in (0.8 cm), bringing the bell from 2.7 in (6.9 cm) to 3 in (7.6 cm).
Final Blocking
- Weave in all ends except the sewing tails.
- Lightly spray each bell with water or starch until it is damp but not dripping.
- Push a bell-shaped form inside each bell. A small funnel, a shot glass, or a cone of rolled card all work.
- Shape the flare by hand so the rim is round and 3.1 in (7.9 cm) across.
- Pin each leaf flat to the mat with a pin through every point. Each leaf should measure 2.25 in (5.7 cm) long.
- Leave everything to dry completely, which takes about 6–8 hours.
- If you are using fabric stiffener, brush it lightly onto the inside of each bell and leave it to dry on the form.
- Assemble the ornament once every piece is dry.
Final Quality-Control Checklist
- Each bell has 54 sts at the rim and is 3 in (7.6 cm) tall.
- Both window bands have even spacing: 6 windows in the upper band and 12 in the lower.
- The rev sc rim lies smooth with no gaps.
- Each leaf has 7 crisp points.
- The berries are firm and round, with the closing hidden at the back.
- The jingle bells ring freely and stay inside the rims.
- The seam is centered and doesn’t pucker.
- The ornament hangs straight from the loop.
Troubleshooting
- The bell flattens instead of turning down: Check that Rounds 4 and 6 have no increases.
- The rim ruffles: You may have added extra stitches. Recount to 54, or go down a hook size for the border.
- The rim curls inward: Your rev sc is too tight. Loosen your tension or use a 3.75 mm hook for Round 18 only.
- The windows are hard to see: Make the ch-1 slightly looser, and make sure you skip a stitch under every ch.
- The leaf points are floppy: Pull each picot sl st tight, then pin it out during blocking.
- The ornament tilts: Move the cord attachment so it sits directly above the bell seam.
Care
Spot clean with a damp cloth, or hand-wash in cool water and reshape over the blocking forms to dry. Store the ornament flat in a box so the bells keep their shape.
Final Notes
Every measurement in this ornament depends on your gauge of 22 sc per 4 in (10.2 cm). Use these checkpoints to confirm you are on track:
- After Round 3, the top disc is 1 in (2.5 cm) across.
- After Round 14, the bell is 2.3 in (5.8 cm) tall.
- After Round 16, the bell is 2.7 in (6.9 cm) tall with a 54-stitch rim.
- After the stitch-neutral border, the bell is 3 in (7.6 cm) tall.
Add the 2.25 in (5.7 cm) leaves and the berry cluster, and the finished ornament measures 6.5 in (16.5 cm) by 5 in (12.7 cm). If your first bell matches its checkpoints, the rest of the ornament will come out the right size.
Happy crocheting!