

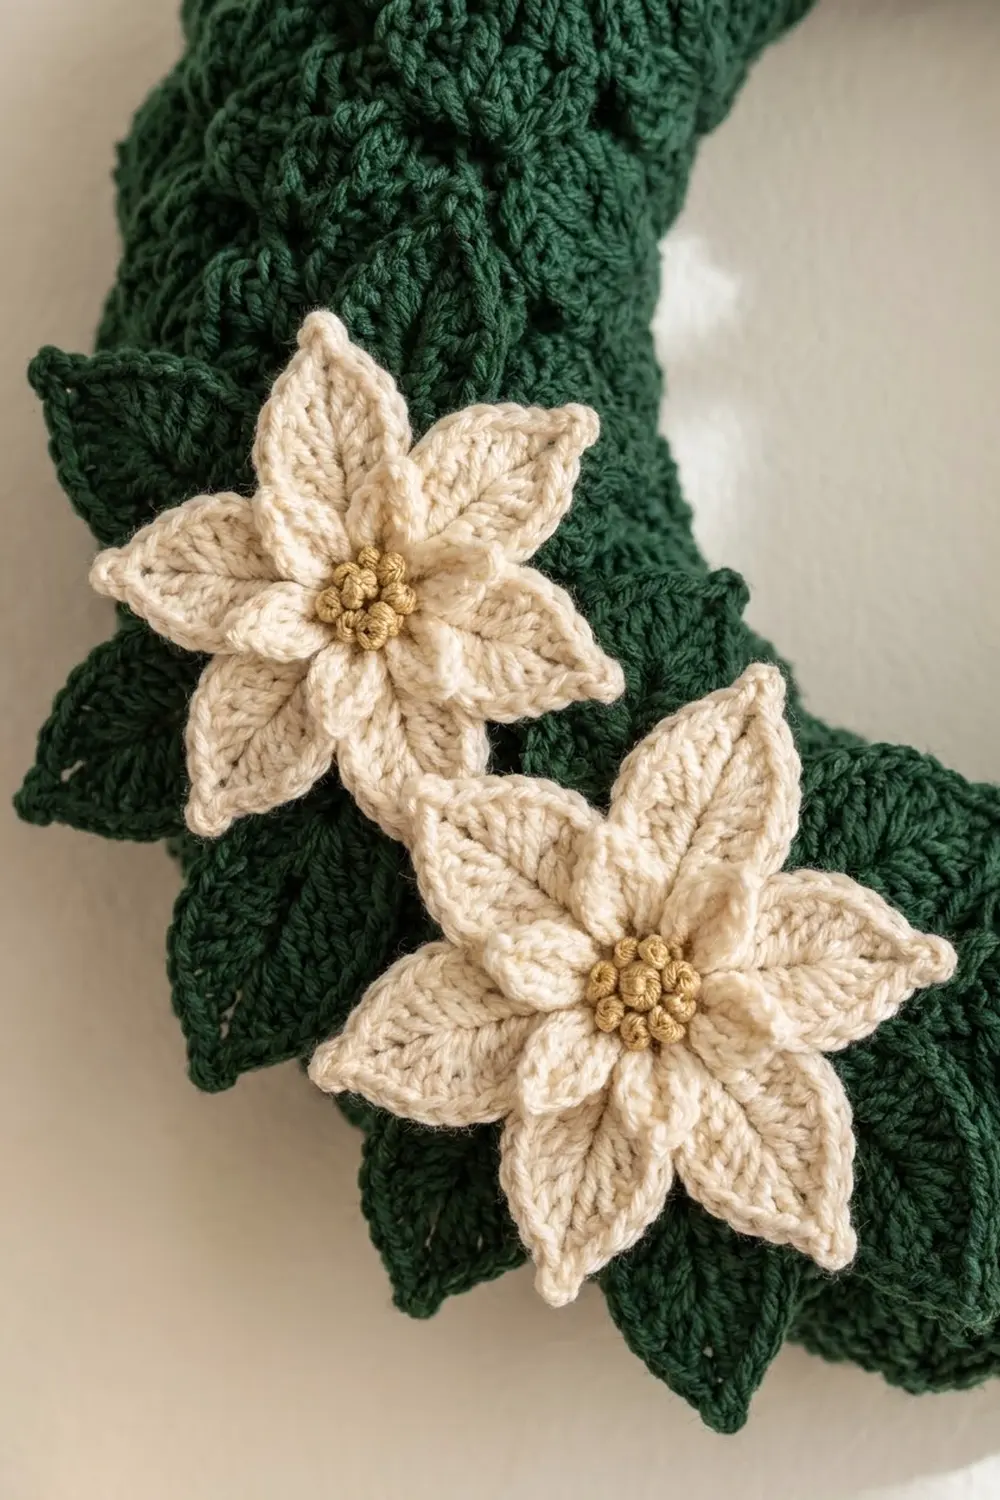
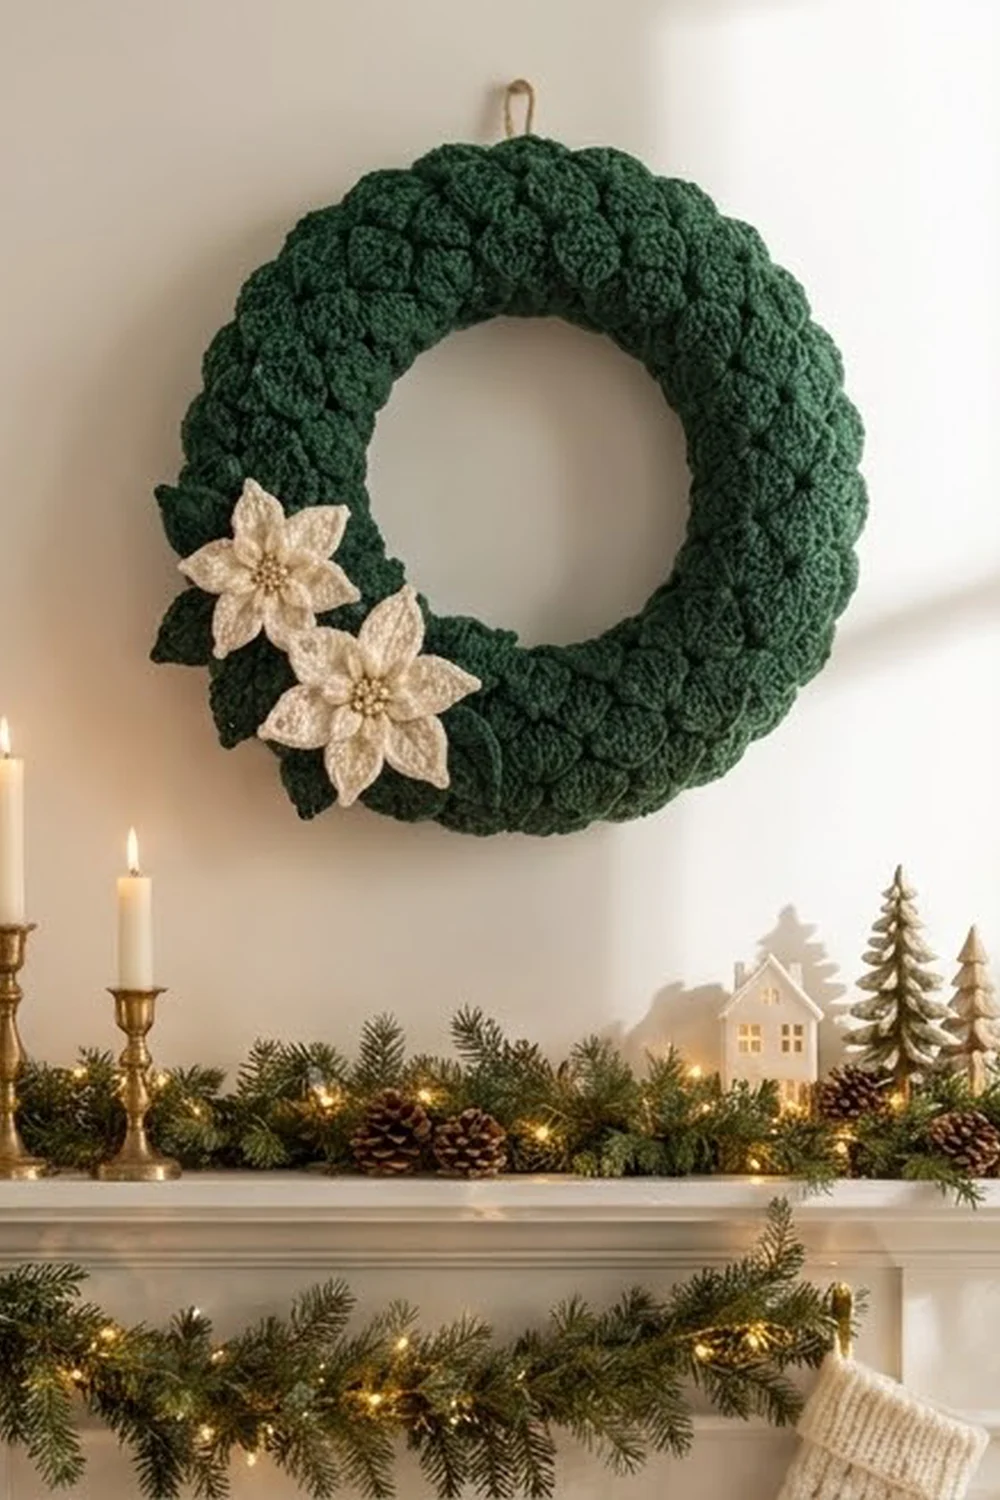
This wreath is a calm, classic holiday piece. A deep forest green cover in plump shell stitch wraps a round wreath form, and the staggered rows of fan-shaped shells look like soft evergreen scales. Two cream poinsettias with golden knot centers sit on a cluster of pointed green leaves in the lower left.
The palette is just forest green, warm cream, and a touch of gold. It suits rustic, farmhouse, and minimalist rooms, and it looks good on a door, on a wall, or above a mantel.
This pattern uses US crochet terms. The finished wreath is about 12.5 in (31.8 cm) across, with an opening of about 6.5 in (16.5 cm).
How it’s made: You crochet one long, flat strip in shell stitch and add a single round of sc border. Then you wrap the strip around a 12 in (30.5 cm) form and sew it closed on the back. You make the poinsettia layers and leaves separately and sew them on at the end.
Finished Size and Construction
- Finished wreath: 12.5 in (31.8 cm) outer diameter; 6.5 in (16.5 cm) opening
- Skill level: Intermediate
- Terminology: US terms
- Yarn weight: Worsted (#4) for the cover; DK (#3) for the appliqués
- Hooks: 5.0 mm (H-8) and 3.5 mm (E-4)
- Number of pieces: 1 wreath cover, plus 4 poinsettia layers (2 large, 2 small) and 6 leaves
- Layout: One continuous cover around the ring; the flower cluster sits at the lower left (about 7–8 o’clock)
- Cover piece size before border: 7.5 × 31.5 in (19.1 × 80.0 cm)
- Cover piece size after border: 8 × 32 in (20.3 × 81.3 cm)
- Border depth: 0.25 in (0.6 cm) on each edge
Materials
Yarn: For the cover, use a smooth acrylic or wool-blend worsted yarn with good stretch. Shells need a little give to spread over the curved outer edge of the form. For the appliqués, use a mercerized cotton or crisp acrylic DK so the petal points stay sharp.
- Forest green, worsted: 150 g / 300 m (about 200 m per 100 g)
- Forest green, DK (for leaves and hanging loop): 25 g / 58 m
- Cream, DK: 20 g / 46 m
- Gold or tan, DK: 5 g / 12 m
All quantities include a margin of about 15–20%.
Tools:
- 5.0 mm (H-8) and 3.5 mm (E-4) hooks
- 12 in (30.5 cm) round foam or straw wreath form with a 2.5 in (6.4 cm) thick tube
- Tapestry needle
- Scissors
- Stitch markers
- Measuring tape
- Pins
- Optional: spray starch for the petals
Abbreviations (US Terms)
- ch – chain
- sl st – slip stitch
- sc – single crochet
- hdc – half double crochet
- dc – double crochet
- tr – treble crochet
- sk – skip
- st(s) – stitch(es)
- RS / WS – right side / wrong side
Special stitch: Shell. Work 5 dc into the same stitch. The “center dc” is the 3rd dc of the shell.
Gauge and Checkpoints
Cover gauge (5.0 mm hook, shell stitch): 4 shell repeats (24 sts) = 6 in (15.2 cm), and 8 rows = 4 in (10.2 cm). That means 1 repeat = 1.5 in (3.8 cm) and 2 rows = 1 in (2.5 cm).
Test first. Before starting the cover:
- Ch 26 and work Rows 1–3 of the cover pattern below, then repeat Rows 2–3 three more times, for 9 rows in total.
- Measure across the middle of the swatch.
- Also make one large poinsettia layer to check the DK gauge (Checkpoint D below).
Checkpoints:
- A, after Row 1: width is 7.5 in (19.1 cm)
- B, after Row 16: length is 8 in (20.3 cm)
- C, after Row 63: length is 31.5 in (80.0 cm)
- D, one large poinsettia layer: 4.25 in (10.8 cm) from petal tip to opposite petal tip
If your piece is too big, go down a hook size. If it’s too small, go up a hook size. Don’t add or remove repeats. The width is set to hug a 2.5 in (6.4 cm) tube, which is about 7.85 in (19.9 cm) around, so the bordered strip needs to stay at 8 in (20.3 cm).
Wreath Cover
Use worsted green and the 5.0 mm hook. The cover is worked in rows across the short width, so the strip gets longer with every row.
Foundation: Ch 32.
Row 1 (RS): Sc in 2nd ch from hook. Sk 2 ch, shell in next ch, sk 2 ch, sc in next ch. Repeat from * 4 more times. Turn.
Count: 31 sts (5 shells, 6 sc).
Row 2: Ch 3 (counts as dc), 2 dc in first sc (half shell). Sc in center dc of next shell, shell in next sc. Repeat from * 3 more times. Sc in center dc of last shell, 3 dc in last sc. Turn.
Count: 3 + (4 × 6) + 1 + 3 = 31 sts (4 shells, 2 half shells, 5 sc).
Row 3: Ch 1, sc in first dc. Shell in next sc, sc in center dc of next shell. Repeat from * 3 more times. Shell in next sc, sc in top of turning ch-3. Turn.
Count: 1 + (4 × 6) + 5 + 1 = 31 sts (5 shells, 6 sc).
Row 3 is the same as Row 1, so the shells now alternate positions every row. That offset is what creates the scale-like texture.
Rows 4–63: Repeat Rows 2–3 thirty more times. Each row keeps exactly 31 sts.
- After Row 16, check Checkpoint B: 8 in (20.3 cm).
- After Row 32, the length should be 16 in (40.6 cm).
- End on Row 63, which is a full-shell row. Do not fasten off.
Size before border: 7.5 × 31.5 in (19.1 × 80.0 cm).
Poinsettias (Make 2)
Use the 3.5 mm hook. Each flower has one large layer and one small layer.
Large Layer (cream)
Rnd 1: Magic ring, 10 sc in ring. Join with sl st to first sc.
Count: 10 sc.
Rnd 2 (petals): Ch 9. Starting in 2nd ch from hook, work back down the chain: sc, hdc, dc, dc, tr, tr, dc, hdc (8 sts). Sk next sc of Rnd 1, sl st in next sc. Repeat from * 4 more times.
Count: 5 petals of 8 sts each, with each petal anchored over 2 sc of Rnd 1.
Rnd 3 (outline): For each petal:
- Sc in each of the 8 sts along the first side.
- In the tip ch, work (sc, ch 2, sc).
- Sc in each of the 8 free loops along the other side.
- Sl st in the sl st between petals.
Count: 18 sc and one ch-2 tip per petal. Fasten off.
The outline gives each petal a raised edge and a sharp point. Checkpoint D: 4.25 in (10.8 cm) across.
Small Layer (cream)
Rnd 1: Work the same as Rnd 1 of the large layer (10 sc).
Rnd 2: Ch 7. Starting in 2nd ch from hook: sc, hdc, dc, dc, dc, hdc (6 sts). Sk next sc, sl st in next sc. Repeat from * 4 more times.
Count: 5 petals of 6 sts each.
Rnd 3: For each petal, work 6 sc up the first side, (sc, ch 2, sc) in the tip ch, 6 sc down the other side, and sl st between petals.
Count: 14 sc and one ch-2 tip per petal. Fasten off and leave a 10 in (25.4 cm) tail.
Size: 3.25 in (8.3 cm) across.
Assemble Each Flower
- Place the small layer on top of the large layer, centered, so each small petal sits between two large petals.
- Whipstitch the two Rnd 1 rings together.
- Center: With gold DK, work 7 French knots (1 in the middle and 6 around it), wrapping the needle 3 times for each knot. The center should be about 0.75 in (1.9 cm) across.
Leaves (Make 6)
Use green DK and the 3.5 mm hook.
Foundation: Ch 11.
First side: Starting in 2nd ch from hook, work toward the base: sc, hdc, dc, dc, tr, tr, dc, dc, hdc, sc (10 sts).
Base: Ch 1. Turn the work and continue along the free loops of the chain.
Second side: Sc, hdc, dc, dc, tr, tr, dc, dc, hdc, sc (10 sts).
Tip: Ch 2, sl st in 2nd ch from hook, sl st in the tip. Fasten off and leave a tail for sewing.
Count: 20 sts and a pointed tip. The two mirrored sides create a central vein. Each leaf is 2.5 in (6.4 cm) long.
Hanging Loop
With green DK: ch 20, sl st in 2nd ch from hook and in each ch across (19 sl sts). Fasten off and leave a long tail. Fold the strip into a loop about 3 in (7.6 cm) long.
Border
Use worsted green and the 5.0 mm hook. Continue straight from Row 63 without turning.
Border gauge: 4 sc = 1 in (2.5 cm), worked into row ends.
Rnd 1:
- Ch 1. Rotate the work to the first long edge and work 2 sc in each row end: 126 sc.
- Ch 1 at the corner.
- Along the foundation edge, work 1 sc in each foundation st: 31 sc.
- Ch 1 at the corner.
- Along the second long edge, work 2 sc in each row end: 126 sc.
- Ch 1 at the corner.
- Along the Row 63 edge, work 1 sc in each st: 31 sc.
- Ch 1 at the corner and join with sl st to the first sc.
Count: 126 + 31 + 126 + 31 = 314 sc, plus 4 corner ch-1 spaces. The ch-1 corners are not counted as stitches, so the side counts above are exact.
Fasten off and leave a 60 in (152.4 cm) tail for seaming.
Why the math works: The long edges have 63 rows × 2 sc = 126 sc. At 4 sc per inch, that is 126 ÷ 4 = 31.5 in (80.0 cm), exactly the length of the strip, so the edges won’t ruffle or pull in. The short edges take 1 sc per existing stitch, so the width doesn’t change. After the border, the strip measures 8 × 32 in (20.3 × 81.3 cm).
Mount the Cover
- Lay the form on the WS of the strip, with the strip’s length running around the ring.
- Wrap both long edges up the back of the form so they meet.
- Whipstitch the long edges together through the back loops, matching the 126 sc on one side 1-to-1 with the 126 sc on the other. Work around the ring as you go.
- The fabric stretches over the outer curve and eases in along the inner curve. Keep the seam centered on the back.
- Bring the two short ends together and whipstitch 31 sc to 31 sc to close the ring.
- Weave in all ends.
Attach the Appliqués
- Pin 3 leaves fanned behind each flower in the lower-left area of the wreath. Overlap the two flowers slightly, with the second flower sitting lower and further right.
- Sew each leaf at its base and center.
- Sew each flower through its center ring.
- Tack each large petal tip down with one small stitch.
- Sew the hanging loop to the back seam at the 12 o’clock position.
Final Blocking
- Before mounting, spray the strip lightly with water, pin it to 8 × 32 in (20.3 × 81.3 cm), and let it dry.
- Block the flower layers and leaves flat, pinning each petal tip and leaf tip into a point.
- If you like, mist the petals with spray starch so they hold their shape.
- Once the cover is mounted, hold a steamer 1 in (2.5 cm) away from the surface and steam it lightly. Do not touch the yarn with the steamer.
- While the cover is still warm, plump each shell with your fingers.
- Let the wreath dry fully, lying flat, before you hang it.
Final Quality-Control Checklist
- Every cover row has 31 sts, and the strip has 63 rows.
- The strip measured 7.5 × 31.5 in (19.1 × 80.0 cm) before the border.
- The border has 126 sc on each long side and 31 sc on each short side.
- The back seam is centered and doesn’t show from the front.
- Shells look evenly spaced, with no stretched gaps on the outer curve.
- Each flower has 5 large and 5 small petals, offset from each other.
- Each flower has 7 gold knots in a firm, tidy center.
- There are 6 leaves, all with sharp tips.
- The hanging loop is secure and the wreath hangs level.
Troubleshooting
- Strip too narrow to close around the form: Your gauge is tight. Remake the cover with a larger hook so the bordered width reaches 8 in (20.3 cm).
- Shells gap open on the outer edge: The strip is too short. Check that you worked all 63 rows, or block it longer before mounting.
- Inner edge bunches up: This is normal for a ring. Push the extra fabric toward the back seam and ease it in evenly.
- Long edge ruffles: You added extra sc. Count back to 126 per side.
- Petals curl: Re-block them with starch and pin each tip.
- French knots pull through: Wrap the needle 3 times and keep the yarn snug as you pass back through.
Care
Spot clean with a damp cloth only. Store the wreath flat in a bag, away from heat and direct sunlight, so the shells and petals keep their shape.
Final Notes
Here is how the measurements build on each other:
- Shell gauge: 1.5 in (3.8 cm) per repeat and 2 rows per inch.
- Cover width: 5 repeats = 7.5 in (19.1 cm).
- Cover length: 63 rows = 31.5 in (80.0 cm).
- Border: 126 sc and 31 sc per side bring the strip to 8 × 32 in (20.3 × 81.3 cm), which fits snugly around a 12 in (30.5 cm) form.
- Finished wreath: 12.5 in (31.8 cm) across, with two layered cream poinsettias as the finishing touch.
Check each number as you reach it, and the wreath will come together smoothly.
Happy crocheting!