

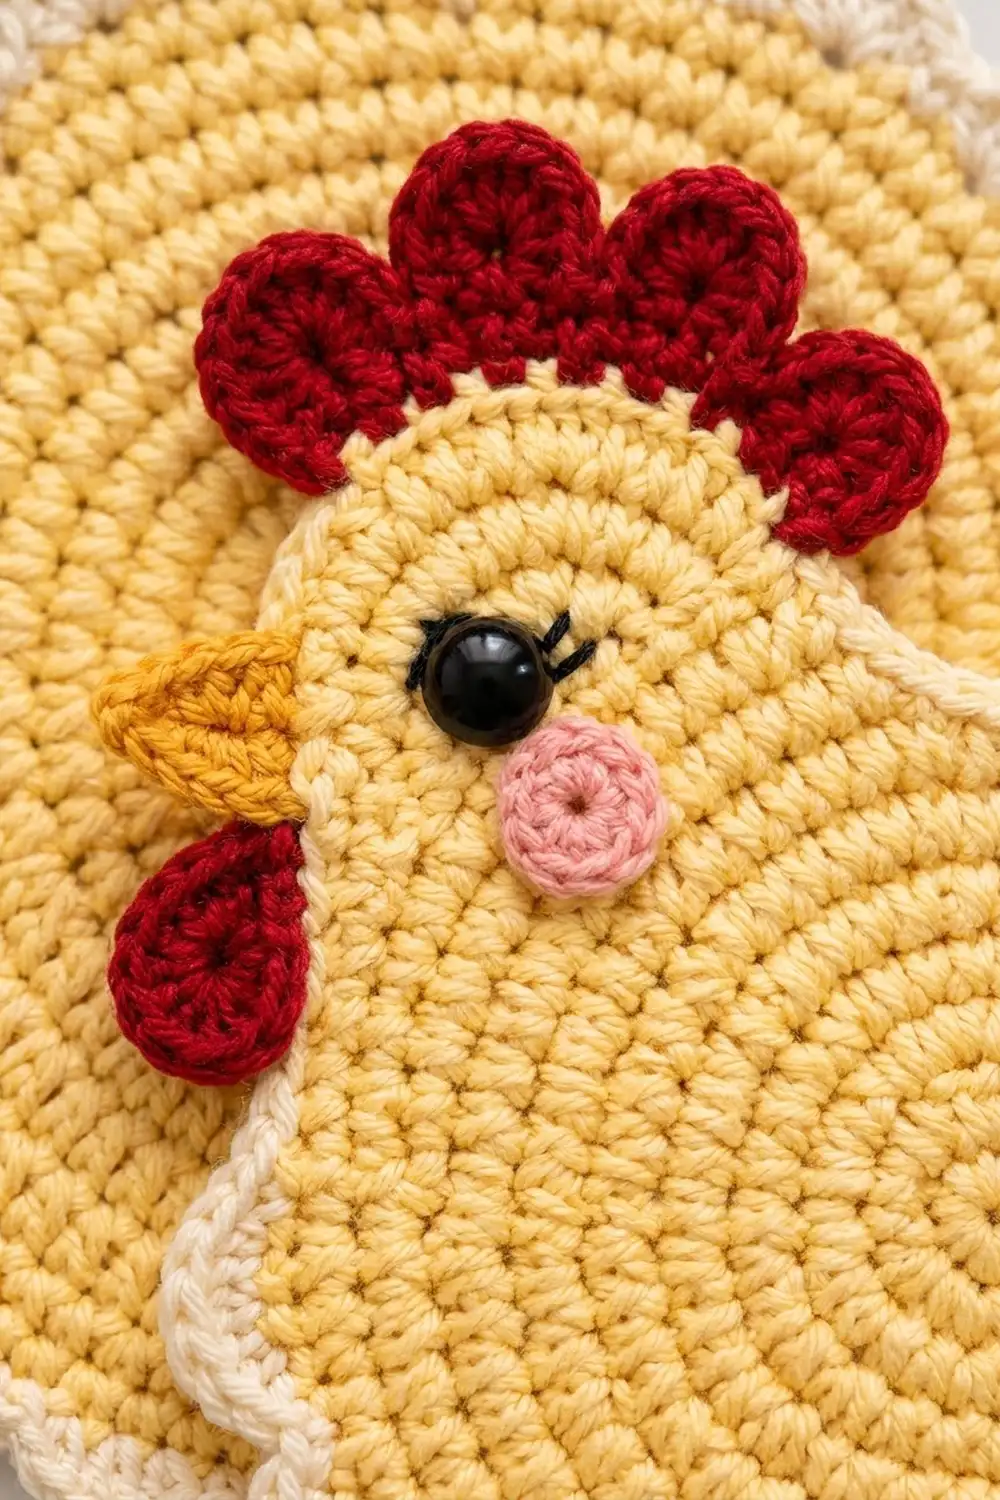
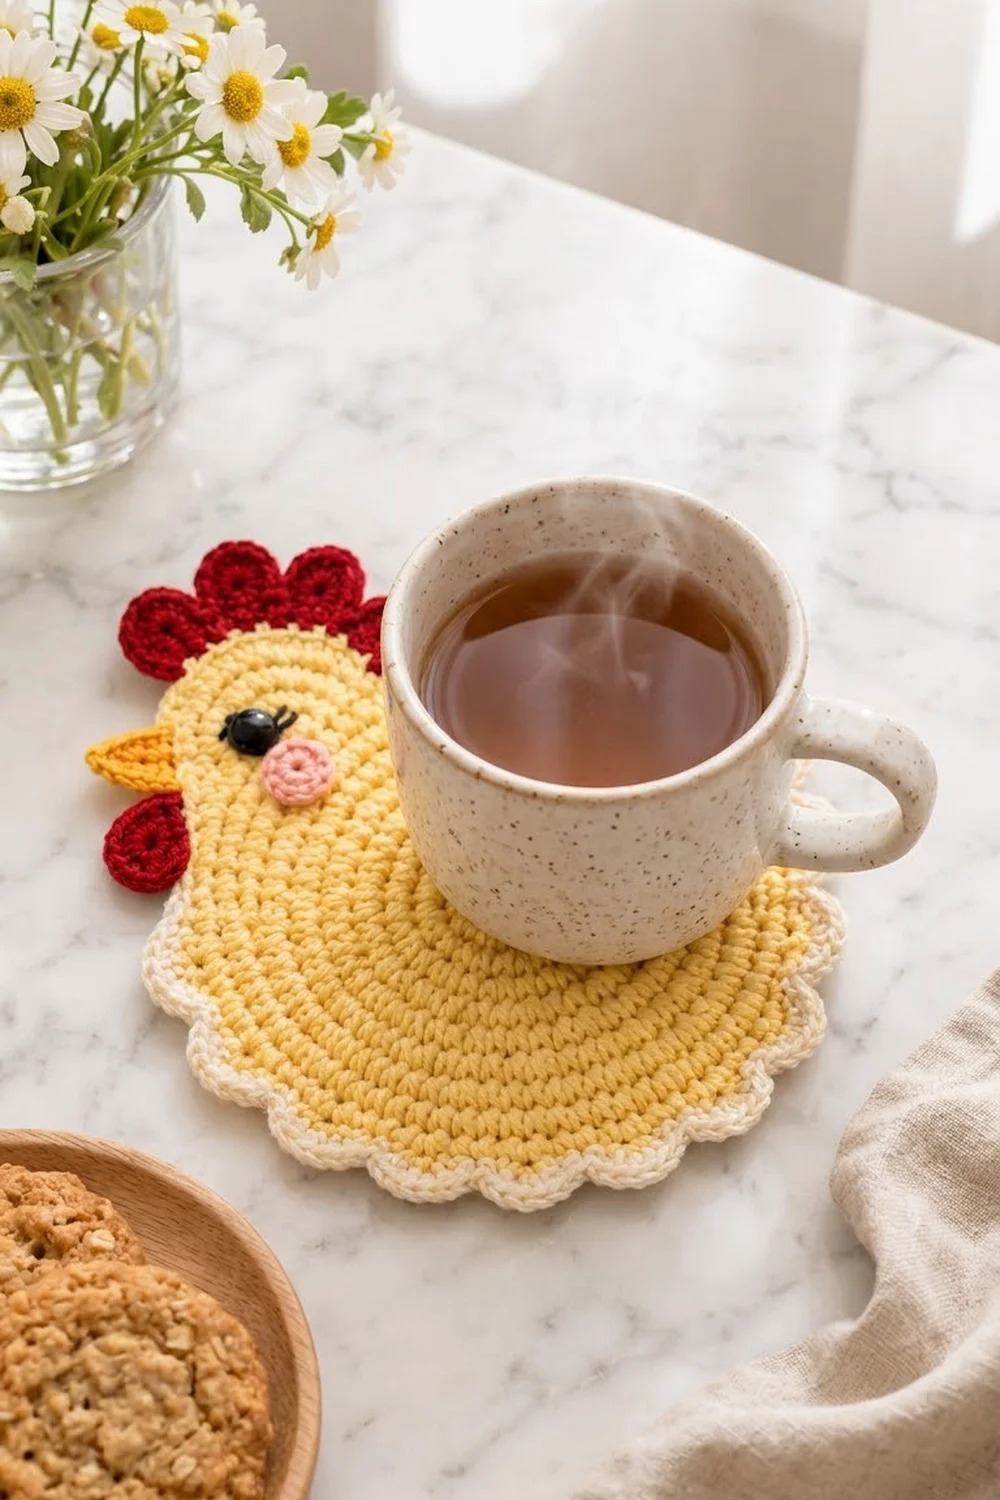
This cheerful hen is a single flat coaster with a soft, spiraled center and a scalloped cream edge. She has a butter-yellow body, a red three-petal comb, a little golden beak, a red wattle and a pink cheek. The small details make her look finished even though she’s quick to make.
The style is classic farmhouse kitchen: soft colors, round shapes and clean single crochet texture. The cream scallops trim only the tail and lower body, so the head and back keep a smooth yellow outline.
This pattern uses US crochet terms. The finished coaster measures about 6.6 in (16.8 cm) wide by 6.8 in (17.3 cm) tall without the comb, and 7.4 in (18.8 cm) tall to the top of the comb.
Construction is simple. You crochet a flat circle in a spiral, then work short rows for the head and tail directly onto it. A yellow edge round smooths the whole outline, and two rows of cream add the scallops. Finally you crochet the comb, beak, wattle and cheek and sew them on.
Finished Size and Construction
- Finished size: 6.6 in (16.8 cm) wide x 6.8 in (17.3 cm) tall; 7.4 in (18.8 cm) tall including comb
- Skill level: Easy / Advanced Beginner
- Terminology: US
- Yarn weight: DK (light worsted, #3) cotton
- Hook: 3.5 mm (E-4)
- Number of pieces: 1 coaster body + 4 small appliqués (comb, beak, wattle, cheek)
- Layout: single piece; no joining
- Body circle (Rnd 12): 5 in (12.7 cm) diameter
- Size before border (after yellow edge round): 5.4 in (13.7 cm) wide x 6.2 in (15.7 cm) tall
- Border depth: about 0.6 in (1.5 cm)
Materials
Choose a smooth 100% cotton or cotton blend in DK weight, about 50 g / 110 m per ball (roughly 2.2 m per gram). Cotton handles heat and moisture and lies flat, which matters for a coaster. Acrylic will curl more and soak up less.
- Butter yellow (body): 15 g / 33 m
- Cream (border): 4 g / 9 m
- Red (comb and wattle): 3 g / 7 m
- Golden orange (beak): 1 g / 2 m
- Pink (cheek): 1 g / 2 m
- Black embroidery floss or yarn (lashes): a short length
These quantities include a small margin, so you won’t run short.
Tools:
– 3.5 mm (E-4) crochet hook
– One 8 mm flat black button or bead without a shank (stays flat under a mug), or an 8 mm safety eye if the coaster will be decorative only
– Tapestry needle
– 2 locking stitch markers
– Scissors
– Pins and a blocking mat
Abbreviations (US Terms)
- MR – magic ring
- ch – chain
- sl st – slip stitch
- sc – single crochet
- hdc – half double crochet
- dc – double crochet
- inc – 2 sc in same stitch
- sc2tog – single crochet 2 together
- sk – skip
- st(s) – stitch(es)
- RS / WS – right side / wrong side
Special stitch – Scallop: sk 1 st, 5 dc in next st, sk 1 st, sl st in next st. Each scallop uses 4 stitches.
Gauge and Checkpoints
Gauge isn’t critical for a coaster. Still, check it, because the head, tail and border counts are tied to a 72-stitch circle that lies flat.
Gauge: each sc round adds about 0.2 in (0.5 cm) to the radius, or about 0.4 in (1.0 cm) to the diameter.
Make the body circle first and use it as your test piece.
Checkpoints:
– After Rnd 3: 1.25 in (3.2 cm) diameter
– After Rnd 9: 3.75 in (9.5 cm) diameter
– After Rnd 12: 5 in (12.7 cm) diameter
– After the head and tail: head rises 0.8 in (2.0 cm), tail rises 1 in (2.5 cm)
– After the yellow edge round: 5.4 in (13.7 cm) wide
– After the border: 6.6 in (16.8 cm) x 6.8 in (17.3 cm)
If the circle is too big (over 5.25 in / 13.3 cm at Rnd 12), go down to a 3.25 mm hook. If it’s too small (under 4.75 in / 12.1 cm), go up to a 3.75 mm hook. If the circle ruffles, your tension is loose for the increases; if it cups, it’s tight. Fix this before you move on, because every later count assumes a flat 72-stitch circle.
Body Circle
Work in a continuous spiral with butter yellow. Move a stitch marker to the first stitch of each round.
Rnd 1: 6 sc in MR. (6)
Rnd 2: inc in each st around. (12)
Rnd 3: (sc 1, inc) 6 times. (18)
Rnd 4: (sc 2, inc) 6 times. (24)
Rnd 5: (sc 1, inc, sc 2) 6 times. (30)
Rnd 6: (sc 4, inc) 6 times. (36)
Rnd 7: (sc 2, inc, sc 3) 6 times. (42)
Rnd 8: (sc 6, inc) 6 times. (48)
Rnd 9: (sc 3, inc, sc 4) 6 times. (54)
Rnd 10: (sc 8, inc) 6 times. (60)
Rnd 11: (sc 4, inc, sc 5) 6 times. (66)
Rnd 12: (sc 10, inc) 6 times. (72)
Sl st in the next stitch to smooth the step of the spiral, then fasten off. Pull the starting tail snug and weave it in.
The staggered increases in the odd rounds stop the circle from turning into a hexagon.
Numbering the Stitches
Lay the circle flat with RS up. Pick the stitch at top center (12 o’clock) and mark it as st 72. Count clockwise around the circle: the next stitch to the right is st 1, the stitch at 3 o’clock is st 18, 6 o’clock is st 36 and 9 o’clock is st 54.
With 72 stitches there are 6 stitches per “hour” on the clock face.
- Head: sts 61–72 (10 to 12 o’clock)
- Back dip: sts 1–8
- Tail: sts 9–24 (about 1:30 to 4 o’clock)
- Lower body: sts 25–60
When you work right to left with RS facing, you move counterclockwise, so you’ll count down through the numbers.
Head
Row 1 (RS): Join yellow with sc in st 72, sc in each st from st 71 down to st 61. (12)
Row 2 (WS): Ch 1, turn, sc in each st across. (12)
Row 3: Ch 1, turn, sc2tog, sc 8, sc2tog. (10)
Row 4: Ch 1, turn, sc2tog, sc 6, sc2tog. (8)
Fasten off. The head is a soft dome rising about 0.8 in (2.0 cm) above the circle.
Tail
Row 1 (RS): Join yellow with sc in st 24, sc in each st from st 23 down to st 9. (16)
Row 2 (WS): Ch 1, turn, sc across. (16)
Row 3: Ch 1, turn, sc across. (16)
Row 4: Ch 1, turn, sc2tog, sc 14. (15)
Row 5: Ch 1, turn, sc 13, sc2tog. (14)
Fasten off. Both decreases fall on the back edge, nearest the head. They slope the tail toward the dip and leave the outer edge straight and tall. The tail rises about 1 in (2.5 cm).
Border
Border Gauge
Each sc border stitch is about 0.2 in (0.5 cm) wide. Each scallop spans 4 stitches, or about 0.8 in (2.0 cm). The cream sc row plus the scallop row adds about 0.6 in (1.5 cm) of depth.
Yellow Edge Round
With RS facing, join yellow with sc in st 60, just below the head. Work counterclockwise:
- Lower body: sc in st 60 and each st down to st 25 = 36 sc
- Tail outer side: 1 sc in each row end = 5 sc
- Tail top: 3 sc in first st, sc 12, 3 sc in last st = 18 sc
- Tail back side: 1 sc in each row end = 5 sc
- Back dip: sc in sts 8 down to 1 = 8 sc
- Head right side: 1 sc in each row end = 4 sc
- Head top: 3 sc in first st, sc 6, 3 sc in last st = 12 sc
- Head left side: 1 sc in each row end = 4 sc
Sl st to the first sc. Total: 92 sts.
Count check:
– Circle stitches not covered by the head or tail: 72 − 12 − 16 = 44, which matches 36 + 8.
– Row ends: 5 + 5 + 4 + 4 = 18.
– Top stitches with corners: tail 14 + 4 and head 8 + 4 = 30.
– 44 + 18 + 30 = 92.
Fasten off. Checkpoint: 5.4 in (13.7 cm) wide.
Cream Row 1 (RS)
Join cream with sc in the edge-round stitch above body st 57 (about 9:30). Work counterclockwise:
- Lower body: sc in each edge st above sts 57 down to 25 = 33 sc
- Tail outer side: 5 sc
- Tail top: sc in first st, 3 sc in corner (middle) st, sc 14, 3 sc in corner (middle) st, sc in last st = 22 sc
- Tail back side: 5 sc, ending where the tail meets the back dip
Total: 65 sc. This is the 61 edge stitches worked one-for-one, plus 4 corner increases. Turn.
Cream Row 2 (Scallops)
Ch 1, sl st in first sc, then work the Scallop 16 times. (16 scallops)
Why the math works: each scallop uses 4 stitches, and you need 1 starting sl st. 1 + (16 x 4) = 65, so the last sl st lands exactly in the final sc.
The scallops look the same on both sides, so working this row with WS facing is fine. Fasten off.
The cream starts at 9:30 and ends at the back dip. That leaves the head, the back dip and the 3 edge stitches below the head plain yellow, just like the finished piece. Checkpoint: 6.6 in (16.8 cm) x 6.8 in (17.3 cm).
Appliqués
Comb (Red)
Ch 8.
Row 1: sc in 2nd ch from hook and each ch across. (7)
Row 2: Ch 1, turn, sl st in st 1, 7 dc in st 2, sl st in st 3, 7 dc in st 4, sl st in st 5, 7 dc in st 6, sl st in st 7. (3 petals: 21 dc + 4 sl st = 25 sts)
Fasten off with a long tail. The comb is about 1.8 in (4.6 cm) wide and 0.7 in (1.8 cm) tall.
Beak (Golden Orange)
Ch 4.
Row 1: sc in 2nd ch from hook and each ch across. (3)
Row 2: Ch 1, turn, sc2tog, sc 1. (2)
Row 3: Ch 1, turn, sc2tog. (1)
Fasten off with a long tail. The triangle is about 0.6 in (1.5 cm) on each side.
Wattle (Red)
Ch 4. In 2nd ch from hook work sc, hdc in next ch, 6 dc in last ch. Turn the chain and work along the other side of the foundation: hdc in next ch, sc in next ch. Sl st to first sc. (10 sts)
Fasten off with a long tail. This gives a teardrop about 0.8 in (2.0 cm) long.
Cheek (Pink)
8 sc in MR, sl st to first sc. (8)
Pull the ring only partly closed so a small hole stays in the center. Fasten off with a long tail. The cheek is about 0.5 in (1.3 cm) across.
Assembly
- Comb: pin the straight sc edge behind Row 4 of the head, centered, so the petals stand about 0.6 in (1.5 cm) above the head. Whipstitch along the base on the WS.
- Beak: sew the wide end to the left edge of the head at about 10 o’clock, with the point facing outward.
- Wattle: sew its narrow end just below the beak. It covers the point where the cream border starts.
- Eye: sew the black button between Rnds 10 and 11 at about st 66 (11 o’clock). With black floss, embroider 2–3 short lashes angled up and back.
- Cheek: sew it about 0.4 in (1.0 cm) below and to the right of the eye.
Weave in all ends on the WS.
Final Blocking
- Wet the coaster in cool water and press out the water gently in a towel. Don’t wring it.
- Lay it RS up on the blocking mat.
- Pin the circle into a true circle about 5.4 in (13.7 cm) across the yellow edge.
- Pin the tail top straight and the head into a rounded dome.
- Pin out each of the 16 scallops so they fan evenly.
- Lift the comb petals so they lie flat and separate.
- Let it dry completely, at least 12 hours.
- Check the final size: 6.6 in (16.8 cm) x 6.8 in (17.3 cm).
Final Quality-Control Checklist
- Rnd 12 has 72 stitches and lies completely flat
- The head covers sts 61–72 and the tail covers sts 9–24
- The yellow edge round has 92 stitches
- Cream Row 1 has 65 stitches and Row 2 has 16 even scallops
- The head and back dip have only the yellow edge
- The comb has 3 round petals and sits centered behind the head
- The beak points outward and the wattle covers the start of the border
- The eye, lashes and cheek are secure
- All ends are woven in invisibly
- The coaster sits flat with no cupping
Troubleshooting
The circle cups or ruffles. Count each round. Cupping means you’re short on increases or your tension is tight; ruffling means extra increases or loose stitches. Change hook size if your counts are correct.
The head or tail edges pucker. Check that each row end got exactly 1 sc in the edge round.
There aren’t enough stitches for the scallops. Recount Cream Row 1. It must be exactly 65; the 4 corner increases are the usual missing stitches.
The scallops flare. Change to a hook 0.25 mm smaller for Cream Row 2.
The comb flops over. Sew along the full base, then add a few stitches partway up each petal.
The button lifts the mug. Use a flatter button or embroider a satin-stitch eye instead.
Care
Hand wash in cool water with mild soap and lay flat to dry. Reshape the scallops while the coaster is still damp.
Final Notes
The whole hen grows from one measurement chain. The 72-stitch circle measures 5 in (12.7 cm). The head and tail rows add 0.8 in (2.0 cm) and 1 in (2.5 cm) on top. The 92-stitch yellow edge round brings the width to 5.4 in (13.7 cm). The 65-stitch cream row and 16 scallops finish the hen at 6.6 in (16.8 cm) x 6.8 in (17.3 cm), or 7.4 in (18.8 cm) to the top of the comb. If the circle is right, every count after it works out.
Happy crocheting!