

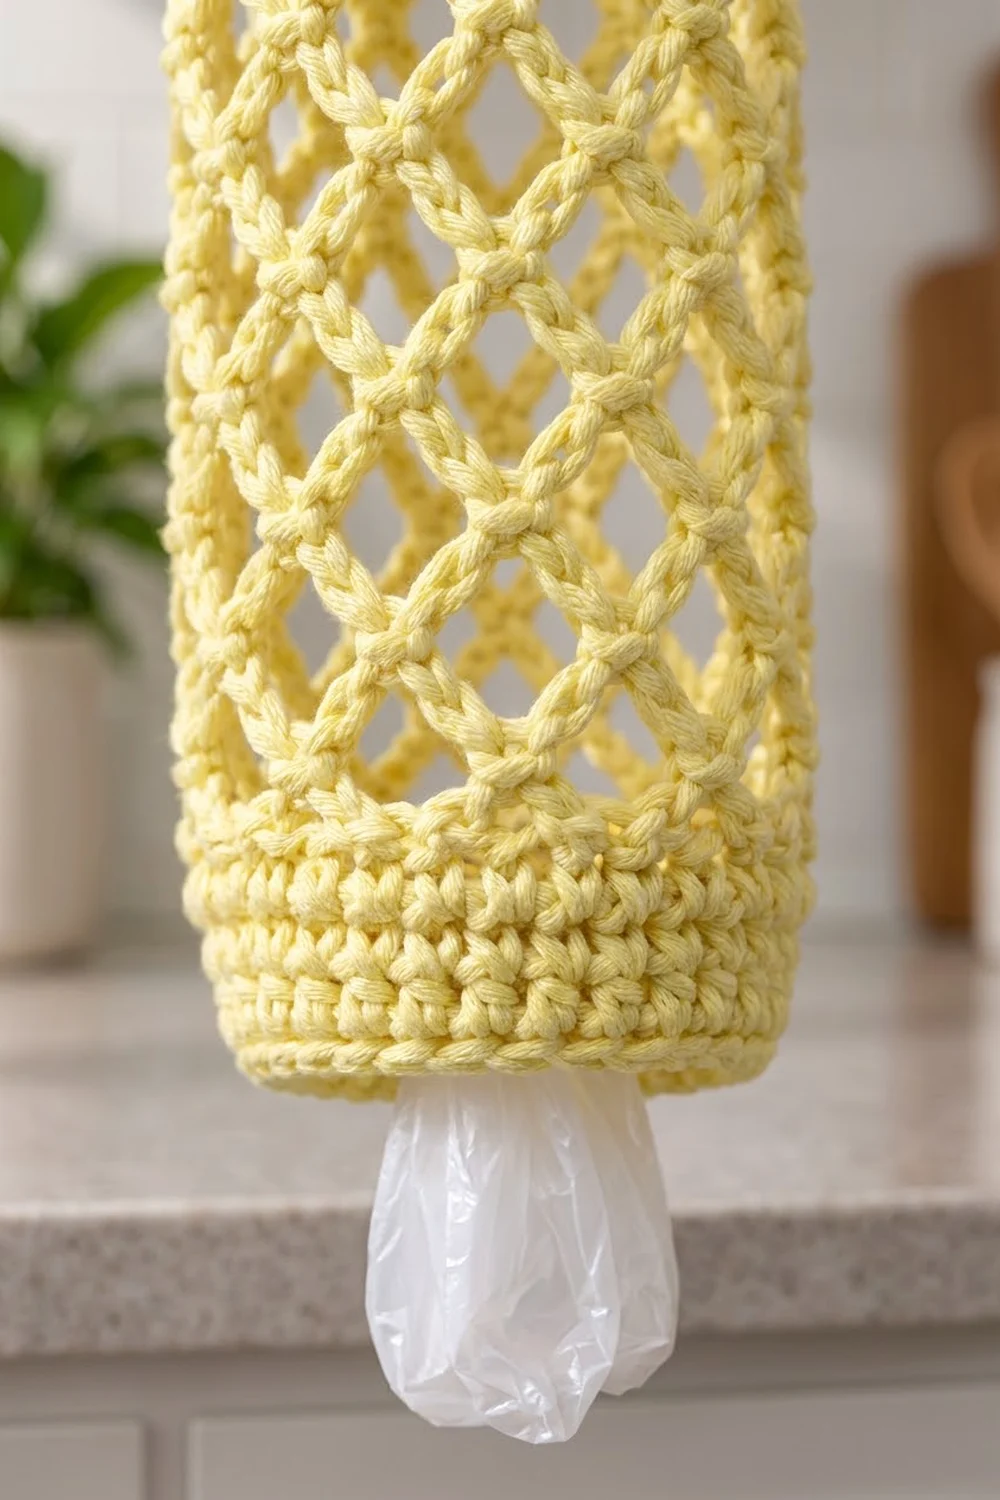
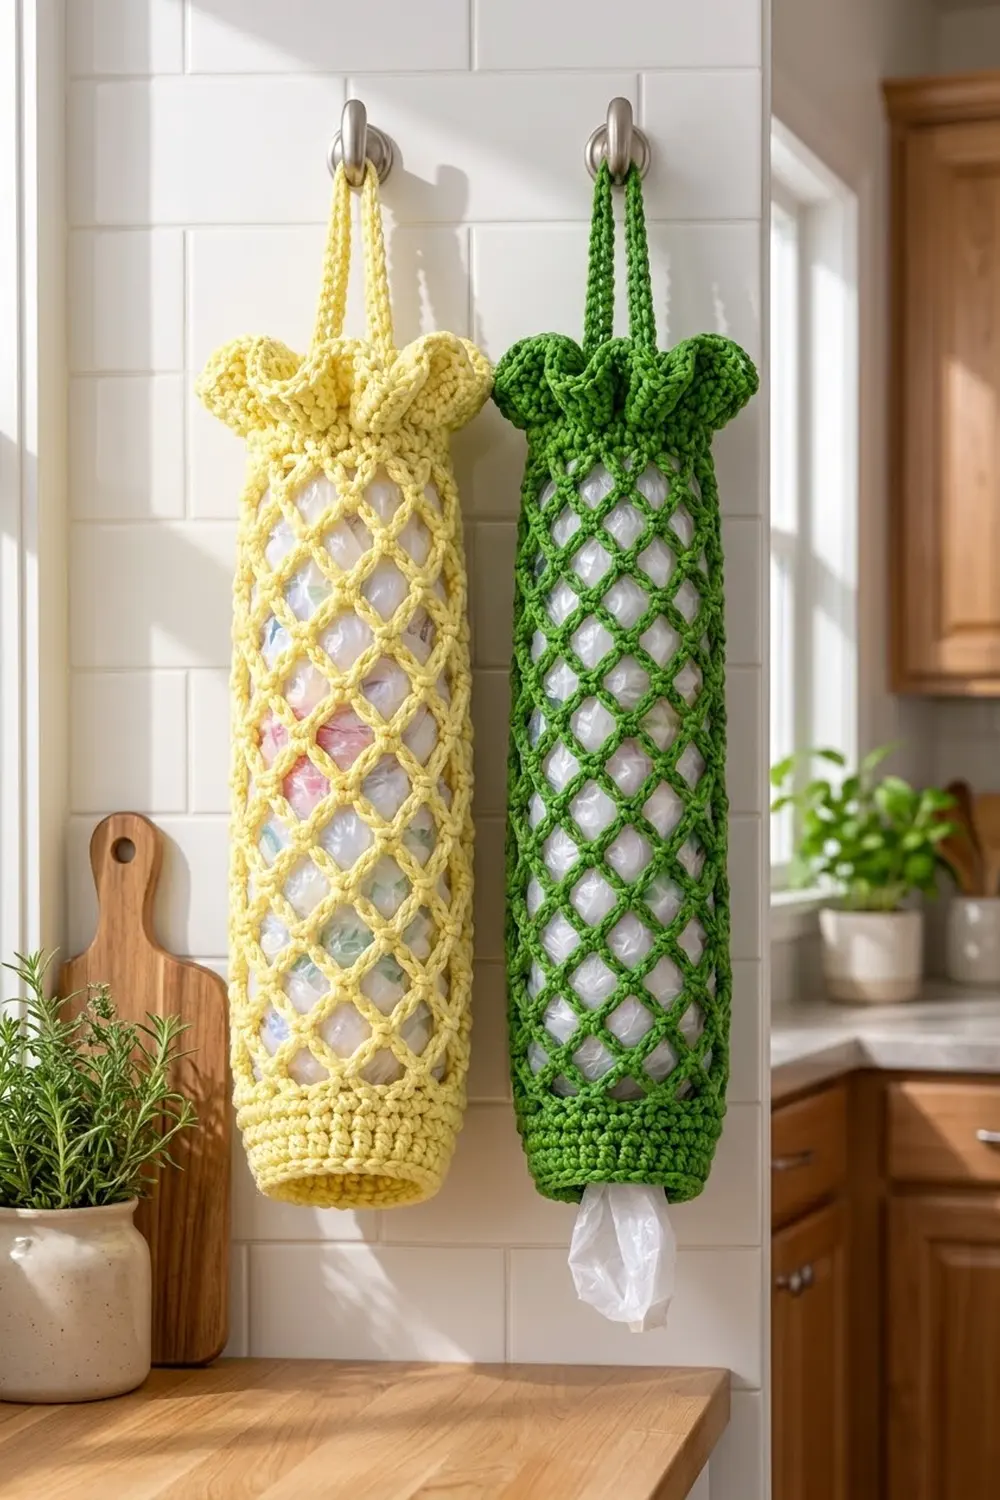
This plastic bag holder is a tall, slim tube that keeps grocery bags tidy and still lets you see when you need to refill it. The body is an open diamond lattice, so the bags show through and you can tell at a glance how many are left. Solid bands at the top and bottom keep it stable, and a full ruffle around the neck adds a soft, cheerful finish.
The samples shown are pale butter yellow and leaf green. Each holder uses one color only, so choose a shade that suits your kitchen. A smooth cotton gives crisp stitches and clear diamonds, and it stands up to daily use.
The finished holder is about 16 in (40.6 cm) tall, not counting the strap. It measures 7.5 in (19.1 cm) wide when laid flat, or about 4.75 in (12.1 cm) across when hanging and filled. All instructions use US crochet terms.
The construction is simple. You crochet one seamless tube from the bottom up: a solid single-crochet band, then a chain-loop diamond mesh, then a gathered top band. A double-crochet ruffle and a hanging strap finish the piece. There is no sewing apart from weaving in the ends.
Finished Size and Construction
- Finished size: about 16 in (40.6 cm) tall; 7.5 in (19.1 cm) flat width at the body
- Skill level: Easy / advanced beginner
- Terminology: US crochet terms
- Yarn weight: worsted, #4 medium, cotton
- Hook: 5.0 mm (H-8)
- Number of pieces: 1 seamless tube
- Layout: vertical tube; bottom band, mesh body, top band, ruffle, strap
- Piece size before border: about 14.75 in (37.5 cm) tall
- Border depth (ruffle): about 1.25 in (3.2 cm)
- Strap: 10 in (25.4 cm) long; it rises about 3.5 in (8.9 cm) above the neck
Materials
Yarn: Use a worsted weight (#4) cotton or cotton blend of about 190 m per 100 g. Cotton holds the shape of the diamonds and does not stretch out under the weight of the bags. Avoid fuzzy or very stretchy acrylic. The lattice will sag and the stitches will be less crisp.
- One color per holder, for example Butter Yellow or Leaf Green: about 70 g / 135 m (148 yd)
These quantities include a margin of roughly 15% for your gauge swatch and for differences between yarns.
Tools:
– 5.0 mm (H-8) crochet hook
– Stitch marker
– Tapestry needle
– Scissors
– Measuring tape
– Spray bottle and rust-proof pins for blocking
– Rolled towel, about 4.75 in (12.1 cm) across, to use as a blocking form
Abbreviations (US Terms)
- ch – chain
- sl st – slip stitch
- sc – single crochet
- dc – double crochet
- sc2tog – single crochet 2 together
- sk – skip
- st(s) – stitch(es)
- rnd(s) – round(s)
- ch-6 loop – the space under a chain of 6
Special technique – closing loop (ch 3, dc): At the end of most mesh rounds, ch 3 and then dc in the first sc. The dc is about as tall as 3 chains, so the ch 3 plus the dc together equal one ch-6 loop. It also leaves your hook sitting in the middle of a loop, ready to start the next round without slip-stitching across.
Gauge and Checkpoints
Gauge: 16 sc and 18 rnds = 4 in (10.2 cm) worked in the round.
Mesh gauge: each mesh round is about 0.75 in (1.9 cm) tall when the piece hangs lightly.
Crochet the bottom band first and treat it as your test piece. Measure it before you start the mesh, because its width sets the width of the whole tube.
Checkpoints:
1. After bottom Rnd 1: the ring measures 12 in (30.5 cm) around, or 6 in (15.2 cm) flat.
2. After bottom Rnd 8: flat width is 7.5 in (19.1 cm) and band height is about 1.75 in (4.4 cm).
3. After mesh Rnd 8: total length is about 7.75 in (19.7 cm).
4. After mesh Rnd 16: total length is about 13.75 in (34.9 cm).
5. After top Rnd 4: total length is about 14.75 in (37.5 cm), and the neck is 4.5 in (11.4 cm) flat.
6. After the ruffle: total length is about 16 in (40.6 cm).
If your piece is too big: if it is more than 0.25 in (0.6 cm) too wide at Checkpoint 2, go down to a 4.5 mm hook and start again.
If your piece is too small: if it is narrower than 7.25 in (18.4 cm) flat, go up to a 5.5 mm hook.
If the mesh is too long or too short: add or remove mesh rounds in the middle of the body rather than changing the hook. Each round adds or removes about 0.75 in (1.9 cm).
Bottom Band
Start with ch 48 and join with a sl st to the first ch to form a ring. Make sure the chain is not twisted.
Rnd 1: Ch 1, sc in each ch around, sl st to first sc. (48 sts)
Rnds 2–4: Ch 1, sc in each st around, sl st to first sc. (48 sts)
These first four rounds form the narrower bottom opening. Bags are pulled out through it one at a time.
Rnd 5 (increase): Ch 1, sc in next 3 sts, 2 sc in next st; repeat from * 12 times total, sl st to first sc. (60 sts)
This round has 12 repeats of 5 sts each, and 12 × 5 = 60.
Rnds 6–8: Ch 1, sc in each st around, sl st to first sc. (60 sts)
Check your width now (Checkpoint 2). Place a stitch marker in the first sc of Rnd 8.
Lattice Mesh Body
The mesh has 12 chain loops in every round. Because 60 ÷ 5 = 12, each loop uses one anchor sc plus 4 skipped stitches.
Mesh Rnd 1: Ch 1, sc in first st. Ch 6, sk 4 sts, sc in next st; repeat from * 11 times. Ch 3, sk last 4 sts, dc in first sc.
(11 ch-6 loops + 1 closing loop = 12 loops)
The sc stitches land on stitches 1, 6, 11, and so on, up to stitch 56. The last 4 stitches (57–60) are skipped under the closing loop, so the loops are evenly spaced all the way around.
Mesh Rnds 2–15: Ch 1, sc around the post of the closing dc just made. Ch 6, sc in next ch-6 loop; repeat from * 11 times. Ch 3, dc in first sc.
(12 loops each round)
Each sc lands in the center of a loop from the round below. This offset is what turns the chain loops into diamonds. Check Checkpoint 3 after Mesh Rnd 8.
Mesh Rnd 16 (closing round): Ch 1, sc around the post of the closing dc. Ch 6, sc in next ch-6 loop; repeat from * 11 times. Ch 6, sl st to first sc.
(12 full ch-6 loops, 12 sc)
This round ends with a full ch-6 loop instead of the ch 3, dc. That gives the top band 12 even loops to work into.
The mesh is now about 12 in (30.5 cm) long (Checkpoint 4). For a longer or shorter holder, change the number of rounds in Rnds 2–15. Always finish with Mesh Rnd 16.
Top Band
Rnd 1 (conversion): Ch 1, sc in same sc as the join, 4 sc in next ch-6 loop. Sc in next sc, 4 sc in next ch-6 loop; repeat from * 11 times, sl st to first sc.
(12 sc worked 1 per existing sc + 48 sc worked into the loops = 60 sts)
Placing 4 sc in each 6-chain loop gathers the mesh slightly. This firms up the top edge.
Rnd 2 (decrease): Ch 1, sc in next 3 sts, sc2tog; repeat from * 12 times total, sl st to first sc. (48 sts)
This round has 12 repeats of 4 sts each, and 12 × 4 = 48.
Rnd 3 (decrease): Ch 1, sc in next 2 sts, sc2tog; repeat from * 12 times total, sl st to first sc. (36 sts)
This round has 12 repeats of 3 sts each, and 12 × 3 = 36. Place a marker in st 1 and another in st 19. These two stitches sit directly opposite each other, and the strap will attach here later.
Rnd 4: Ch 1, sc in each st around, sl st to first sc. (36 sts)
The neck now measures 9 in (22.9 cm) around, or 4.5 in (11.4 cm) flat. This is wide enough to stuff bags in easily but narrow enough to hold them. Check Checkpoint 5.
Border: Ruffle Edging and Hanging Strap
Border gauge: 2 rnds of dc measure about 1.25 in (3.2 cm) tall when the ruffle is relaxed.
For the counts below, “side” means one half of the tube when it is laid flat with the strap markers at the two folds.
Ruffle Rnd 1 (Rnd 5): Ch 3 (counts as dc), dc in same st, 2 dc in each remaining st around, sl st to top of ch 3.
(72 sts: 36 per side)
Ruffle Rnd 2 (Rnd 6): Ch 3 (counts as dc), dc in same st, 2 dc in each remaining st around, sl st to top of ch 3.
(144 sts: 72 per side)
Fasten off.
Why the math works: each ruffle round doubles the stitch count, from 36 to 72 to 144. The outer edge ends up 4 times as long as the neck, which forces the fabric to fold into deep waves instead of lying flat. Because every stitch is doubled evenly, the waves stay spaced evenly all the way around.
Hanging Strap: Turn the holder so you can reach the inside of the neck. The strap attaches to Rnd 3, which sits under the ruffle and hides the attachment points.
- Join yarn with a sl st in the marked st 1 of Rnd 3.
- Ch 40.
- Sl st in the marked st 19 of Rnd 3, on the opposite side.
- Ch 1, turn, sc in each ch back along the chain. (40 sc)
- Sl st in st 1 of Rnd 3 again and fasten off.
The finished strap is 40 sc long, which is 10 in (25.4 cm) at gauge. Each end is anchored twice, so the strap holds a full load of bags. Remove the markers.
Final Blocking
- Weave in all ends along the solid bands, never through the mesh, where they would show.
- Soak the holder in cool water for 10 minutes. Gently squeeze out the water; do not wring.
- Roll a towel into a firm tube about 4.75 in (12.1 cm) across. Slide the holder over it.
- Ease the diamonds open so they look even, and set the mesh length to about 12 in (30.5 cm).
- Pinch the ruffle into even waves and pin the outer edge if needed.
- Let it dry completely, standing upright.
- Remove it from the form and check the final length of 16 in (40.6 cm).
Final Quality-Control Checklist
- [ ] Bottom band is 7.5 in (19.1 cm) flat, with no twist in the starting ring
- [ ] Every mesh round has exactly 12 loops
- [ ] Diamonds stack in straight vertical columns with no spiraling
- [ ] Top band Rnd 1 has 60 sts, Rnd 3 has 36 sts
- [ ] Ruffle has 144 sts and the waves are evenly spaced
- [ ] Strap is anchored at opposite stitches (st 1 and st 19)
- [ ] The holder hangs straight when the strap is on a hook
- [ ] All ends are woven into solid areas
Troubleshooting
The mesh spirals around the tube. Make sure each round starts with the sc around the closing dc, not in the next loop.
I have 11 or 13 loops. You missed or added a loop. Count in groups of 3 and pull back to the error.
The diamonds look uneven in size. Keep every chain the same tension, and avoid tightening the ch 6 as you insert the hook.
The top band ripples. Your sc stitches are too loose. Work Rnd 1 with a firmer hand, or use 4.5 mm for the top band only.
The ruffle is flat rather than wavy. Check that you have 144 sts. Missing increases reduce the fullness.
The holder leans to one side. The strap is not centered. Re-anchor it at stitches exactly 18 apart.
Bags fall out of the bottom. Tighten the starting chain, or work Rnds 1–4 with a smaller hook.
Care
Machine wash on a gentle cycle in cool water, then reshape and dry flat or over the towel form. Avoid high dryer heat, which can shrink cotton.
Final Notes
The measurements build on each other:
- Bottom band: a 16-sc gauge gives a 12 in (30.5 cm) opening, which grows to 7.5 in (19.1 cm) flat.
- Mesh: 16 rounds of 12 loops add 12 in (30.5 cm).
- Top band: gathers the tube to a 4.5 in (11.4 cm) flat neck at about 14.75 in (37.5 cm) total.
- Ruffle: two doubling rounds bring the holder to its final 16 in (40.6 cm).
- Strap: 10 in (25.4 cm) long.
If your counts match at each checkpoint, the finished holder will match too.
Happy crocheting!