

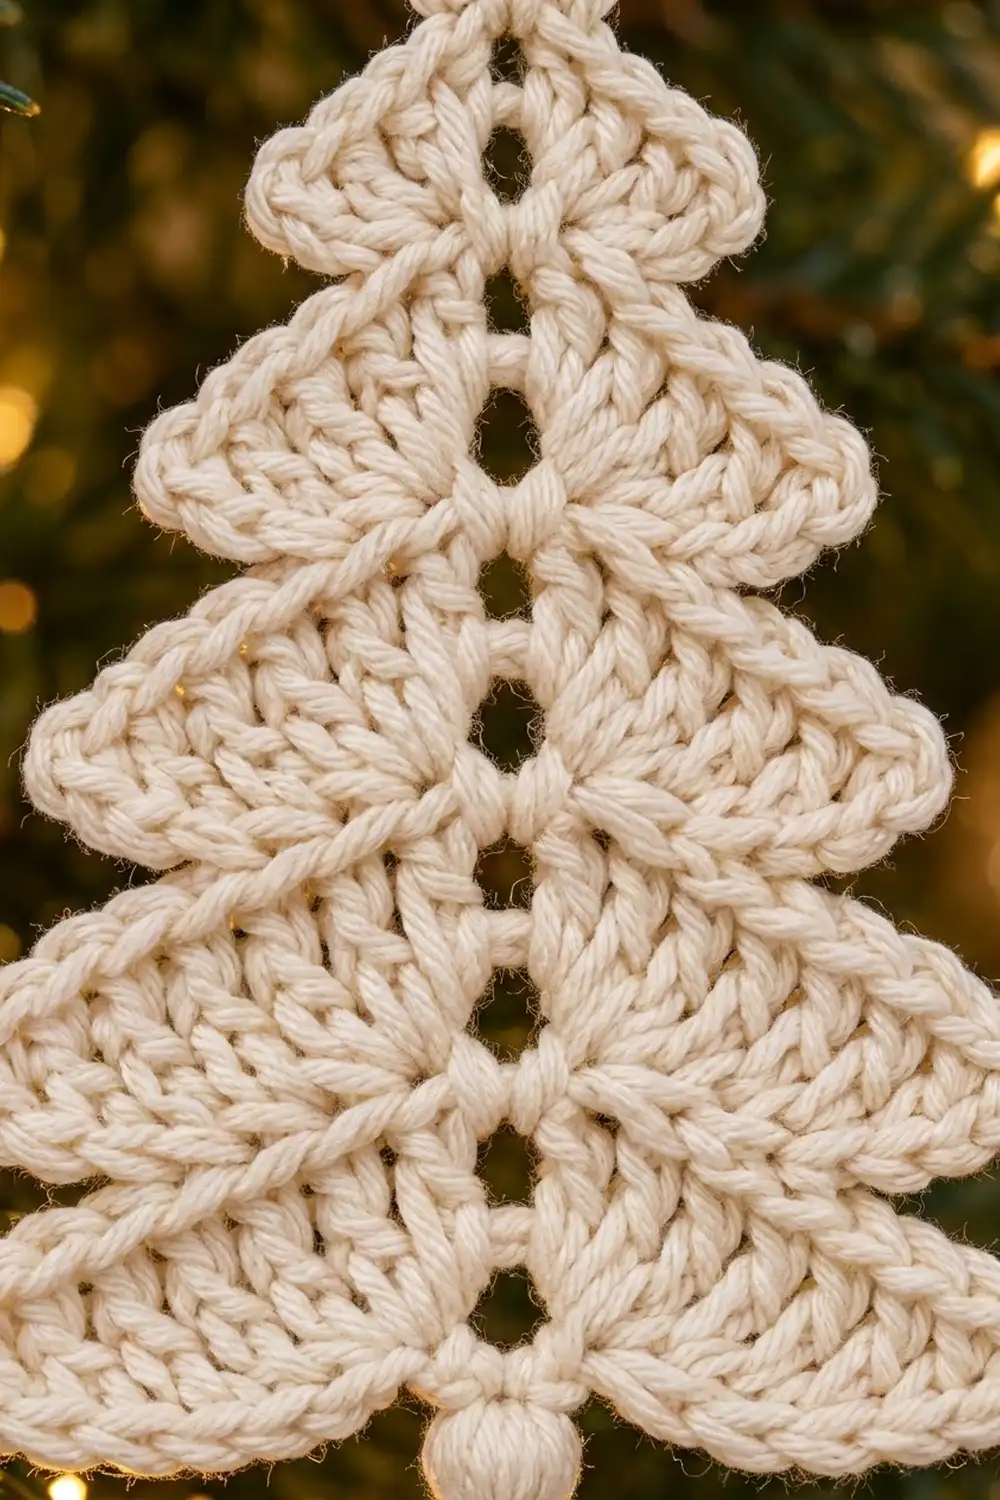
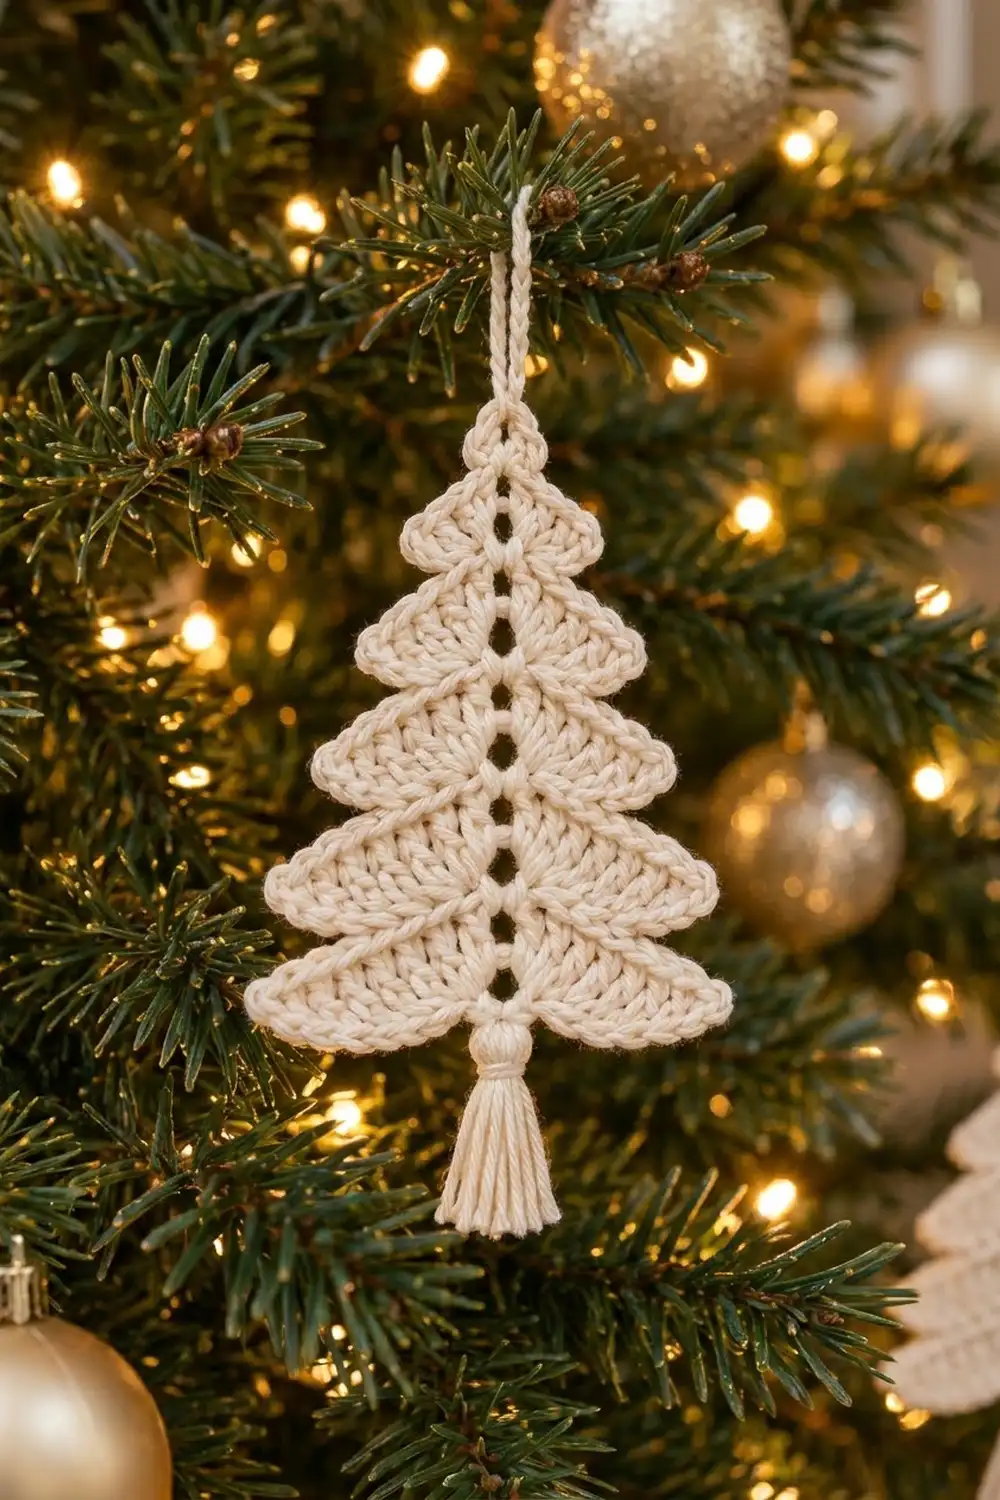
This little tree ornament is made in a single cream color. Down the middle runs a narrow spine of open eyelets, and five stacked tiers of pointed branches grow out of each side. A neat, rope-like single crochet rim outlines the whole silhouette, so every tier stands out clearly against the lights on a real tree.
The look is calm and Scandinavian-inspired: one soft ivory cotton, no stuffing, no beads, just texture and shape. It works on a tree, as a gift-wrap topper, or hung in a window.
This pattern uses US crochet terms. The finished tree body measures 3.75 in (9.5 cm) wide and 4 in (10.2 cm) tall. With the 2 in (5.1 cm) hanging loop and the 1.75 in (4.4 cm) tassel, it hangs 7.75 in (19.7 cm) long.
Construction is simple and all in one piece. You crochet the eyelet spine as one short filet-style row. You then work five chain-based wedges up one long side of the spine, rejoin the yarn, and work five matching wedges up the other side. One round of single crochet outlines everything. The loop and tassel finish it off.
Finished Size and Construction
- Finished size: 3.75 in (9.5 cm) wide x 4 in (10.2 cm) tall, not counting the loop and tassel
- Total hanging length: 7.75 in (19.7 cm)
- Skill level: Easy-intermediate
- Terminology: US crochet terms
- Yarn weight: Fine / sport (#2) cotton
- Hook: 3.0 mm
- Number of pieces: 1 (one ornament)
- Layout: Vertical spine with 5 tiers on each side
- Spine strip: 3.5 in (8.9 cm) long x 0.5 in (1.3 cm) wide
- Size before border: 3.25 in (8.3 cm) wide x 3.5 in (8.9 cm) tall
- Border depth: 0.25 in (0.6 cm) on every edge
Materials
Yarn: Use a smooth, firm, sport-weight cotton or cotton blend. Mercerized cotton gives the crispest wedge points and a clean rim. Soft matte cotton, as in the photo, gives a cozier look. Avoid fuzzy or very stretchy yarns, because the tiers will not keep their points.
- Cream / ivory: 6 g (about 18 m / 20 yd) per ornament, including the tassel
This quantity includes a margin of about 25% for your gauge swatch, the tails, and trimming the tassel.
Tools:
– 3.0 mm crochet hook
– Tapestry needle
– Scissors
– A piece of cardboard 2 in (5.1 cm) tall, for the tassel
– Rustproof pins and a foam blocking mat
– Spray bottle; spray starch (optional)
Abbreviations (US Terms)
- ch – chain
- sl st – slip stitch
- sc – single crochet
- hdc – half double crochet
- dc – double crochet
- tr – treble crochet (yarn over twice, insert hook, pull up a loop, [yarn over, pull through 2 loops] 3 times)
- sk – skip
- sp – space
- st(s) – stitch(es)
- rep – repeat
Special terms:
- Post position (P): the top of one dc post in the spine.
- Eyelet position (E): one ch-1 space in the spine.
- Free loop: the unworked loop on the underside of the foundation chain.
- Wedge: a chain worked outward from the spine, then worked back toward the spine in stitches that get taller as they go. This gives a short point at the outer tip and a tall edge next to the spine.
Gauge and Checkpoints
Gauge: 22 sc = 4 in (10.2 cm) with a 3.0 mm hook. In this pattern, each chain or stitch along the spine is about 0.18 in (0.5 cm) long.
Test one piece first. The spine strip is your gauge swatch, so make it and measure it before you go further.
Checkpoint 1, spine: 3.5 in (8.9 cm) long x 0.5 in (1.3 cm) wide.
Checkpoint 2, after Side A: The Tier 5 wedge reaches 1.5 in (3.8 cm) out from the spine edge. The Tier 1 wedge reaches about 0.75 in (1.9 cm).
Checkpoint 3, after Side B: 3.25 in (8.3 cm) wide across Tier 5 and 3.5 in (8.9 cm) tall.
Checkpoint 4, after the border: 3.75 in (9.5 cm) x 4 in (10.2 cm).
If your spine is longer than 3.5 in (8.9 cm), go down 0.25 mm in hook size. If it is shorter, go up 0.25 mm. Keep your chains the same tension as your stitches: tight chains make the wedges curl upward, and loose chains make them ruffle.
Pattern
Spine (Eyelet Strip)
Ch 22.
Row 1: Dc in the 6th ch from hook. The 5 skipped chains count as the first dc post plus the first ch-1 space. [Ch 1, sk 1 ch, dc in next ch] 8 times. Do not turn and do not fasten off.
Stitch count: 10 dc posts (counting the beginning chain) and 9 ch-1 eyelets, for 19 positions in total.
Hold the strip vertically, with the last dc made at the bottom and the beginning chain at the top. The dc tops and ch-1 spaces form the long edge called Side A. The foundation chain forms Side B.
Side A positions, from bottom to top:
P10, E9, P9, E8, P8, E7, P7, E6, P6, E5, P5, E4, P4, E3, P3, E2, P2, E1, P1
Your hook is now at P10, at the bottom of Side A.
Side A Tiers (worked bottom to top)
Each wedge starts at one spine position, skips 2 positions, and anchors in the next one. As you work back along the chain, keep the new stitches rising upward, toward the anchor point.
Tier 5 (bottom): Ch 9. Sl st in the 2nd ch from hook, then work 1 st in each remaining ch: sc, hdc, hdc, dc, dc, tr, tr. Sk E9 and P9, then sl st in E8.
Wedge count: 8 sts.
Tier 4: Sl st in P8. Ch 8. Sl st in the 2nd ch from hook, then sc, hdc, dc, dc, tr, tr. Sk E7 and P7, then sl st in E6.
Wedge count: 7 sts.
Tier 3: Sl st in P6. Ch 7. Sl st in the 2nd ch from hook, then sc, hdc, dc, tr, tr. Sk E5 and P5, then sl st in E4.
Wedge count: 6 sts.
Tier 2: Sl st in P4. Ch 6. Sl st in the 2nd ch from hook, then sc, hdc, dc, tr. Sk E3 and P3, then sl st in E2.
Wedge count: 5 sts.
Tier 1 (top): Sl st in P2. Ch 5. Sl st in the 2nd ch from hook, then sc, hdc, dc. Sk E1, then sl st in P1 (the top of the beginning chain).
Wedge count: 4 sts.
Fasten off and weave in the tail.
Position check: Tiers 5 to 2 each use 4 positions, and Tier 1 uses 3. That is 4 + 4 + 4 + 4 + 3 = 19, which matches the spine. Eyelets E9, E7, E5, E3, and E1 are skipped, so they sit behind the wedges. Eyelets E8, E6, E4, and E2 each hold only one slip stitch, so the column of holes stays visible down the center.
Side B Tiers (worked bottom to top)
Turn the strip so the foundation chain faces up. Side B has 19 free loops, from ch 22 (the first chain you made, at the bottom) up to ch 4 (at the base of the beginning chain). Treat them exactly like the Side A positions, starting from the bottom.
Join the yarn with a sl st in the free loop of ch 22, directly under P10.
Repeat Tiers 5 through 1 exactly as for Side A. Replace each P or E with the matching free loop:
– Start in the joining loop, sk 2 loops, sl st in the next loop.
– Sl st in the next loop to start the following tier.
End Tier 1 with a sl st in the last free loop, at the base of the beginning chain. Fasten off and weave in the tail.
Stitch count for each side: 8 + 7 + 6 + 5 + 4 = 30 wedge sts, for 60 wedge sts in total.
Check Checkpoint 3 now.
Border
Border gauge: The border is 1 sc deep, about 0.25 in (0.6 cm). It adds 0.5 in (1.3 cm) to the total width and 0.5 in (1.3 cm) to the total height. It also gives the rope-like rim around each tier.
Round 1: With the front of the tree facing you, join the yarn with a sc in the free loop of the Tier 5 chain on Side A, in the chain right next to the spine. This sc counts as the first st.
Side A, for each tier from Tier 5 up to Tier 1:
- Work 1 sc in each free loop along the wedge chain, moving outward. Do not work into the tip chain.
- Work 3 sc in the tip chain.
- Skip the sl st at the tip. Work 1 sc in the top of each remaining wedge st, moving inward toward the spine.
- On Tiers 5, 4, 3, and 2 only, sl st in that tier’s anchor sl st. This forms the inner corner between tiers.
| Tier | Along chain | Tip | Along top | Total sc |
|---|---|---|---|---|
| 5 | 8 | 3 | 7 | 18 |
| 4 | 7 | 3 | 6 | 16 |
| 3 | 6 | 3 | 5 | 14 |
| 2 | 5 | 3 | 4 | 12 |
| 1 | 4 | 3 | 3 | 10 |
Side A total: 70 sc and 4 corner sl sts.
Top end: Work 3 sc evenly across the top end of the spine.
Hanging loop: In the center sc of those 3, ch 22, then sl st in the same sc. Sl st in the back bump of each of the 22 ch around the loop, then sl st in the same center sc. This makes a firm, cord-like loop about 2 in (5.1 cm) long.
Side B, for each tier from Tier 1 down to Tier 5: Work the same steps in reverse order. First sc across the wedge tops moving outward, skipping the tip sl st. Then work 3 sc in the tip chain. Then sc in each chain free loop moving inward. On Tiers 1 to 4, sl st in the anchor sl st of the next tier down.
Each tier uses the same counts as in the table. Side B total: 70 sc and 4 corner sl sts.
Bottom end: Work 3 sc evenly across the side of the last dc post (P10). Sl st into the first sc to join. Fasten off and weave in the tail.
Round total: 70 + 3 + 70 + 3 = 146 sc, plus 8 corner sl sts. The hanging loop is extra.
Why the math works: Each tier gets exactly one sc for every chain loop and one for every stitch top, except the tip slip stitch. That tip slip stitch is replaced by 3 sc in the tip chain, which sharpens the point. The top edge is the longer, sloped side, but it gets one fewer sc than the chain edge. That slight gather pulls the tip downward into the gentle droop you see in the photo. The slip stitches at the inner corners take up no length, so each tier stays separate. The top and bottom ends each need 3 sc to cover the 0.5 in (1.3 cm) spine width at 5.5 sts per inch.
Tassel
Wrap the yarn 20 times around the 2 in (5.1 cm) cardboard. Slide a 6 in (15.2 cm) strand under the wraps at the top edge and tie it tightly. Cut the wraps open at the bottom edge.
Wrap a separate 12 in (30.5 cm) strand around the tassel 0.25 in (0.6 cm) below the tie, 6 times, to form the neck. Knot it and bury the ends inside the tassel. Trim the strands to 1.75 in (4.4 cm).
Use the tie strand to sew the tassel to the center sc of the bottom end of the tree.
Final Blocking
- Lightly mist the ornament with water until it is damp, not soaking.
- Lay it face up on the blocking mat.
- Pin the spine straight, at 4 in (10.2 cm) from the top border to the bottom border.
- Pin the two Tier 5 tips 3.75 in (9.5 cm) apart. Pin the other tips so each pair is level and centered on the spine.
- Smooth each tier so its chain edge lies flat and its tip points slightly downward.
- Use a hook tip to open each eyelet into a round hole.
- For a crisper ornament, spray it with starch.
- Let it dry completely, at least 8 hours.
- Comb out the tassel with your fingers and trim any uneven strands.
Final Quality-Control Checklist
- The body measures 3.75 in (9.5 cm) x 4 in (10.2 cm).
- There are 5 tiers on each side, and the tiers get larger toward the bottom.
- The left and right tips of each tier are level with each other.
- Eyelets E8, E6, E4, and E2 are clearly open down the center.
- The border has 146 sc, and every tier tip has 3 sc.
- The loop is centered, firm, and about 2 in (5.1 cm) long.
- The tassel is 1.75 in (4.4 cm) long and sewn on securely at the center.
- All tails are woven in and hidden on the back.
Troubleshooting
The wedges curl upward: Your chains are too tight. Make the wedge chains with a hook 0.5 mm larger, then switch back to your main hook for the stitches.
The wedges ruffle: The stitches are taller than the spine span. Try working the inner tr stitches a little tighter, or swap the final tr on Tier 2 for a dc.
The tiers don’t match from side to side: You probably miscounted the free loops on Side B. Count the 19 loops and mark P8, P6, P4, and P2 with pins before you start.
The tips are rounded: Make sure all 3 sc go into the single tip chain. Then pin the tips firmly while blocking.
The eyelets have closed up: You may have worked into a skipped eyelet by mistake. Check that Tiers 5 to 2 each anchor in an eyelet, not a post.
The loop twists: Block it by pinning it straight while it dries.
Care
Hand wash in cool water with a mild soap and press out the water in a towel. Reshape the ornament and dry it flat, then store it flat so the tips stay crisp.
Final Notes
The measurements build on each other. A 3.5 in (8.9 cm) spine makes Tier 5 wedges that reach 1.5 in (3.8 cm), which gives a 3.25 in (8.3 cm) width before the border. The 0.25 in (0.6 cm) border brings the body to 3.75 in (9.5 cm) x 4 in (10.2 cm). The 2 in (5.1 cm) loop and 1.75 in (4.4 cm) tassel make a 7.75 in (19.7 cm) hanging ornament. If the spine matches its checkpoint, everything after it will fall into place. Make one, then make a whole set for the tree.
Happy crocheting!