

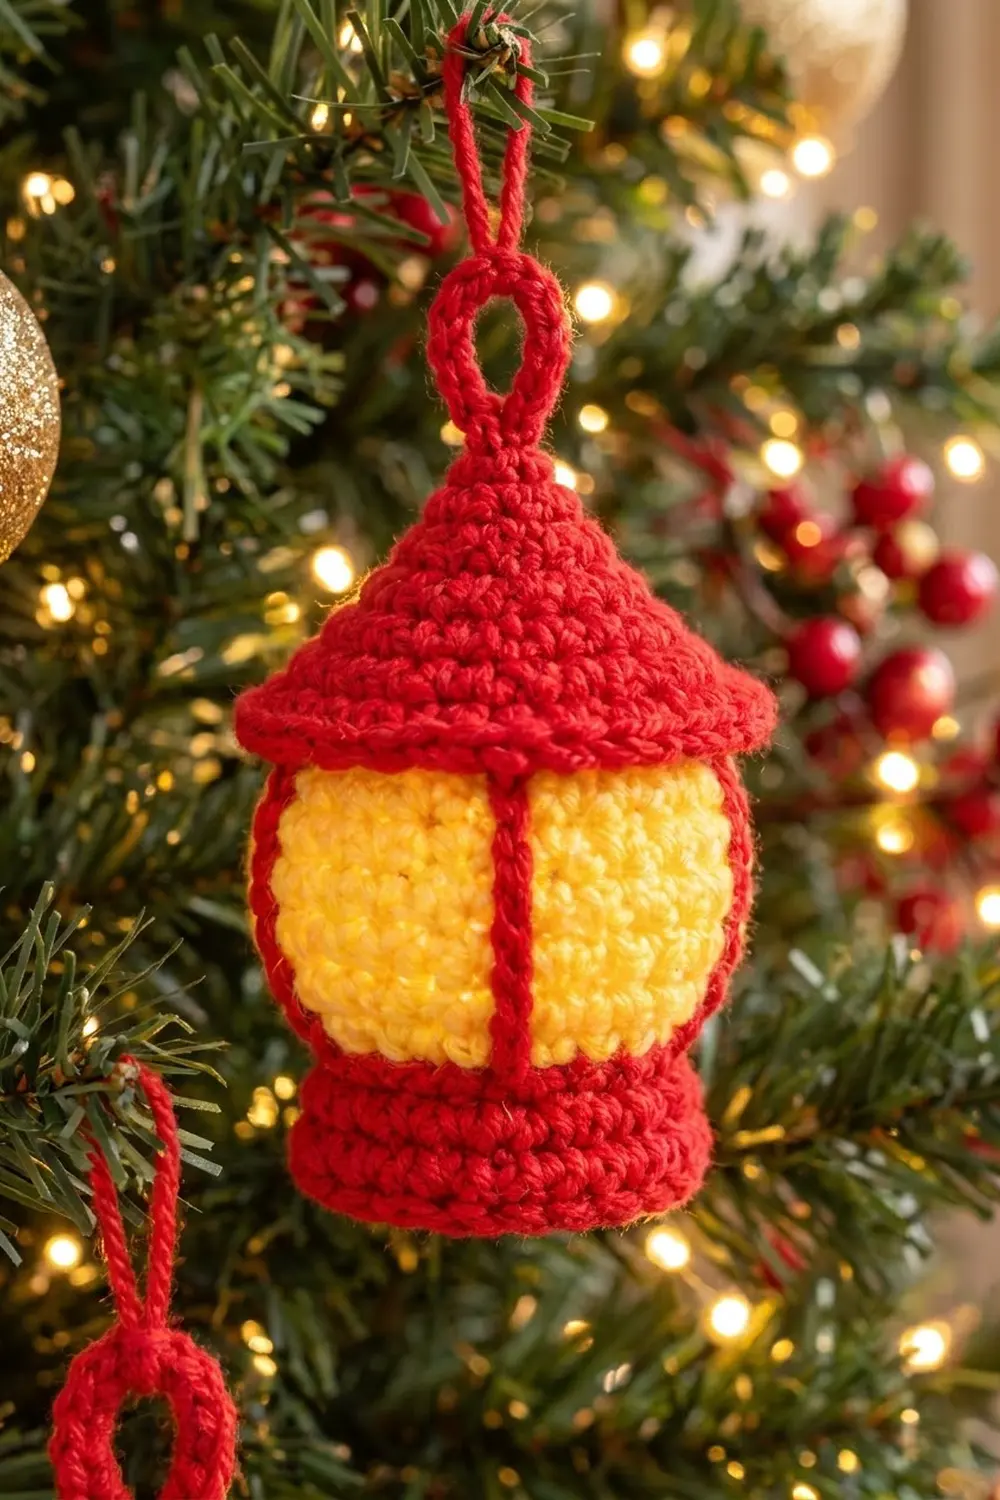
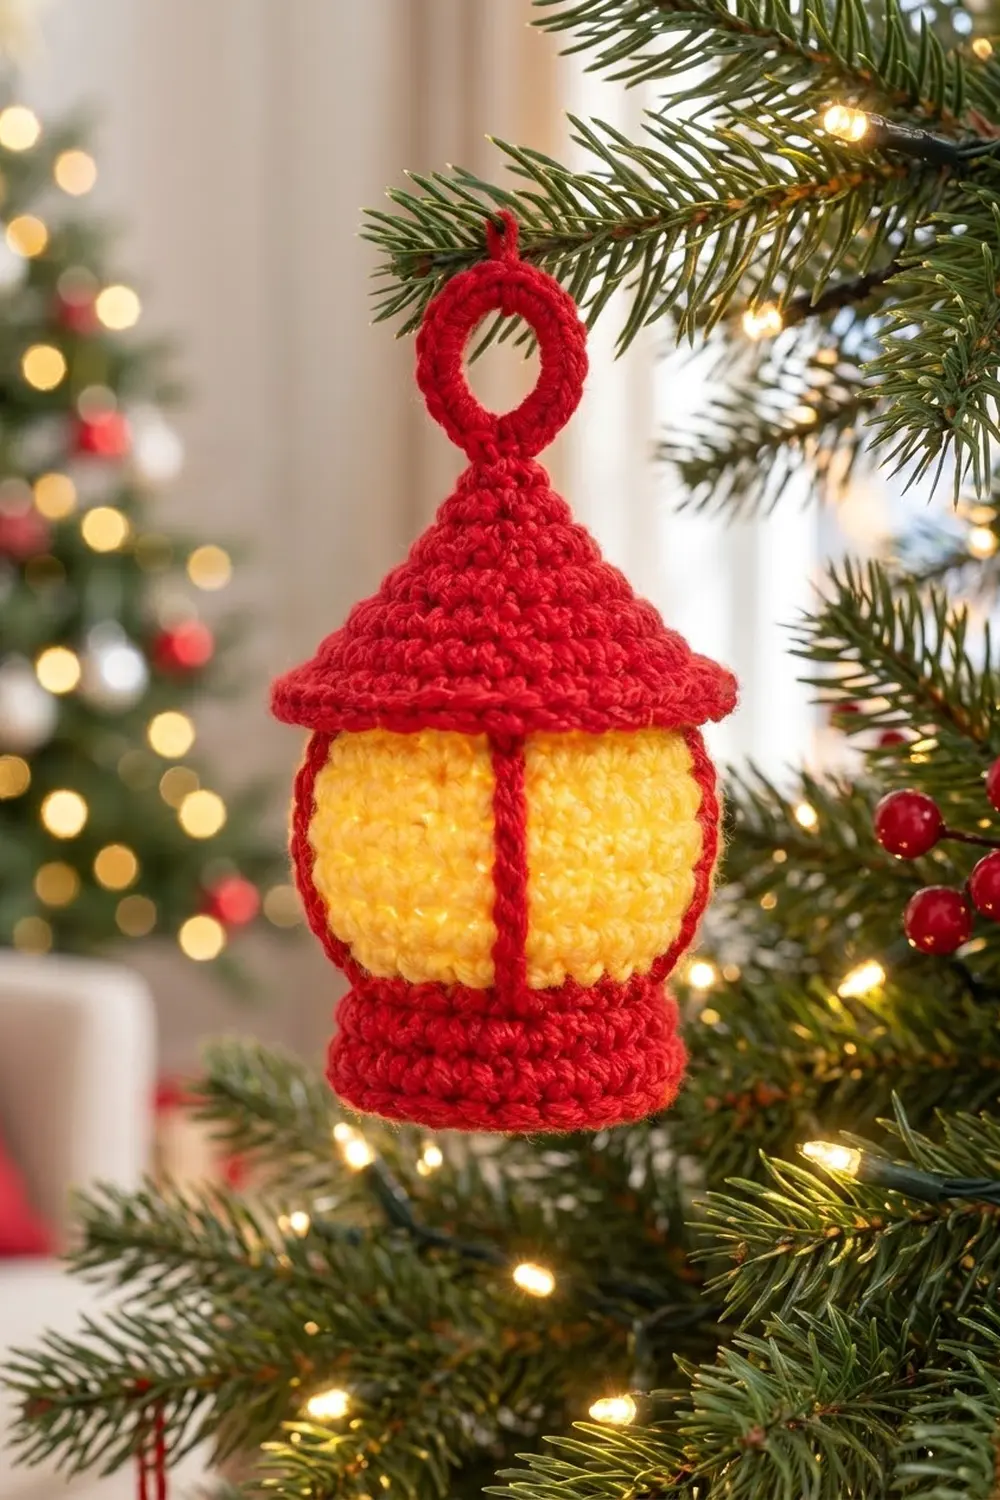
The Hearthglow Lantern is a small, chunky ornament that looks like an old-fashioned lantern with a warm light inside. A bright yellow globe is framed by red stripes and sits between a sturdy red base and a pointed red roof. A thick loop on top lets it hang straight on a branch.
You only need two colors: red for the frame, base, roof, and loop, and yellow for the glowing “glass.” The style is classic amigurumi. You work tight single crochet in continuous spirals so the fabric is firm enough to hold its shape over stuffing.
This pattern uses US crochet terms. The finished lantern is about 4 in (10.2 cm) tall without the loop and 5 in (12.7 cm) tall with it. The globe is about 2.75 in (7.0 cm) wide and the roof brim is 3 in (7.6 cm) across.
Construction is simple. You crochet the body in one piece from the base up, changing color for the globe. Then you add the red panel lines with surface slip stitches and close the top. Finally, you crochet a cone roof, sew it on, and add the hanging loop.
Finished Size and Construction
- Finished size: 4 in (10.2 cm) tall, or 5 in (12.7 cm) with the loop
- Skill level: Easy–intermediate
- Terminology: US terms
- Yarn weight: Worsted (#4), cotton or acrylic
- Hook: 3.5 mm (E-4)
- Number of pieces: 1 ornament, made from 2 crocheted parts (body and roof) plus surface details
- Layout: Single standalone ornament, no grid
- Piece size: Body is 3 in (7.6 cm) tall and 2.75 in (7.0 cm) wide; roof is 3 in (7.6 cm) across and 1.5 in (3.8 cm) tall
- Size before border: Roof is 3 in (7.6 cm) across after Round 12
- Border depth: The brim edge adds 0.25 in (0.6 cm) of downward drop and no width
Materials
Pick a smooth worsted yarn with good stitch definition. Cotton gives crisp edges and a slight sheen on the yellow. Acrylic is softer and lighter on the branch. Avoid fuzzy yarns, because they blur the raised panel lines.
- Red: 15 g, about 30 m (main color: base, rims, panel lines, roof, loop)
- Yellow: 8 g, about 16 m (globe)
- Fiberfill stuffing: about 5 g
These quantities include a margin of about 20% for gauge swatching and weaving in ends.
Tools:
– 3.5 mm (E-4) crochet hook
– Tapestry needle
– 2 stitch markers
– Scissors
– Measuring tape
Abbreviations (US Terms)
- MR: magic ring
- ch: chain
- sl st: slip stitch
- sc: single crochet
- inc: 2 sc in the same stitch
- dec: invisible decrease (insert hook in the front loops of the next 2 stitches, yarn over, pull through both front loops, yarn over, pull through 2 loops)
- BLO: back loop only
- FLO: front loop only
- st(s): stitch(es)
- rnd: round
Special stitch — surface slip stitch: Hold the working yarn inside the piece. Insert the hook from the outside into a stitch, pull up a loop, and draw it through the loop on your hook. Repeat one round higher each time. This makes a raised chain line that sits on top of the fabric.
Gauge and Checkpoints
Gauge: 20 sc and 22 rnds = 4 in (10.2 cm) in continuous rounds. That equals 5 sc and 5.5 rnds per inch (2.54 cm).
Make the base (Rounds 1–5) first and treat it as your test piece. Measure it at each checkpoint before going on:
- After Round 5: The flat circle is 1.9 in (4.8 cm) across.
- After Round 10: The base wall is 0.9 in (2.3 cm) tall.
- After Round 18: The globe circumference is 8.4 in (21.3 cm), measured flat with no stuffing.
- Roof after Round 12: 3 in (7.6 cm) across when laid flat.
If your piece is too big, go down to a 3.25 mm hook. Stuffing can show through loose amigurumi fabric.
If your piece is too small, go up to a 3.75 mm hook. Keep the fabric firm, though, because a lantern that is too soft loses its crisp silhouette.
Body
Work in continuous spirals and do not join rounds. Place a marker in the first stitch of each round and move it up as you go.
Base (Red)
Rnd 1: With red, make an MR and work 6 sc in the ring. (6)
Rnd 2: Inc in each st around. (12)
Rnd 3: (Sc 1, inc) × 6. (18)
Rnd 4: (Sc 2, inc) × 6. (24)
Rnd 5: (Sc 3, inc) × 6. (30)
Checkpoint: The circle is 1.9 in (4.8 cm) across.
Rnd 6: Working in BLO, sc in each st around. (30)
This round turns the work upward and makes a crisp bottom edge.
Rnds 7–10: Sc in each st around. (30 sts each round, 4 rounds)
Checkpoint: The base wall is 0.9 in (2.3 cm) tall and has the ridged look of the lantern foot.
Rnd 11 (lower rim): (Sc 4, inc) × 6. (36)
This last red round makes the thin rim under the globe. Change to yellow on the final yarn over of the last stitch.
Globe (Yellow)
Rnd 12: (Sc 5, inc) × 6. (42)
Rnds 13–18: Sc in each st around. (42 sts each round, 6 rounds)
Checkpoint: The globe circumference is 8.4 in (21.3 cm).
Rnd 19: (Sc 5, dec) × 6. (36)
Change to red on the final yarn over.
These shaping rounds give the bulge: the globe widens from 36 to 42 stitches, stays straight for six rounds, then narrows back to 36.
Upper Rim (Red)
Rnd 20: Sc in each st around. (36)
Do not fasten off. Take the hook out and put the live loop on a stitch marker so it can’t unravel.
Panel Lines (Red Surface Slip Stitch)
Make the panel lines now, while the top is still wide open and you can reach inside easily.
Count the 42 stitches of Rnd 12 and mark positions 1, 8, 15, 22, 29, and 36. That gives 6 lines, each 7 stitches apart. If you can, line them up with the increase points of Rnd 12 so they run straight.
For each line:
1. Cut 12 in (30.5 cm) of red. Hold the yarn inside the body.
2. Insert the hook from outside into Rnd 11 directly below the marked stitch and pull up a loop.
3. Work 1 surface sl st into each yellow round straight up, Rnds 12 through 19. (8 surface sl sts)
4. Work 1 more surface sl st into Rnd 20 to anchor the line. (9 sl sts in total per line)
5. Pull the tail to the inside and tie it to the starting tail.
Each line covers all 8 yellow rounds and joins the red rims at both ends, so every panel looks fully framed. Between neighboring lines, about 6 yellow stitches show, so each panel is roughly 1.2 in (3.0 cm) wide.
Closing the Top (Red)
Put the live loop back on your hook.
Rnd 21: Working in BLO, (sc 4, dec) × 6. (30)
The front loops of Rnd 20 that you skipped will hold the roof later.
Stuff the base and globe firmly now. Push the stuffing out into the globe so it bulges evenly.
Rnd 22: (Sc 3, dec) × 6. (24)
Rnd 23: (Sc 2, dec) × 6. (18)
Rnd 24: (Sc 1, dec) × 6. (12)
Add a last bit of stuffing.
Rnd 25: Dec × 6. (6)
Fasten off, leaving a 6 in (15.2 cm) tail. Weave the tail through the front loops of the last 6 stitches, pull it closed, and hide the end inside.
Checkpoint: The body is 3 in (7.6 cm) tall and 2.75 in (7.0 cm) wide at the widest part of the globe.
Roof
Work the roof in red, top down, in continuous spirals. Adding only 3 stitches per round in Rounds 2–9 makes a steep cone. Adding 6 per round in Rounds 10–12 makes the brim flare out.
Rnd 1: MR, 6 sc in the ring. (6)
Rnd 2: (Sc 1, inc) × 3. (9)
Rnd 3: (Sc 2, inc) × 3. (12)
Rnd 4: (Sc 3, inc) × 3. (15)
Rnd 5: (Sc 4, inc) × 3. (18)
Rnd 6: (Sc 5, inc) × 3. (21)
Rnd 7: (Sc 6, inc) × 3. (24)
Rnd 8: (Sc 7, inc) × 3. (27)
Rnd 9: (Sc 8, inc) × 3. (30)
Rnd 10: (Sc 4, inc) × 6. (36)
Rnd 11: (Sc 5, inc) × 6. (42)
Rnd 12: (Sc 6, inc) × 6. (48)
Checkpoint: The roof is 3 in (7.6 cm) across and about 1.25 in (3.2 cm) tall before the border.
Continue straight into the border below.
Border: Roof Brim Edge
The roof brim is the only true edging on this ornament. Its job is to give the eaves a firm, rounded edge.
Border gauge: Same as the main gauge, 5 sts per inch (2.54 cm). Work the slip-stitch round loosely, matching the length of your sc stitches.
Think of the brim as 6 equal sections, each lined up with one panel line on the body. That gives 8 sts per section.
Rnd 13 (trim): Sc in each st around. 48 worked 1 per existing stitch + 0 added = 48 (8 per section × 6).
Because this round has no increases, the edge turns slightly downward.
Rnd 14 (trim): Sl st loosely in each st around. 48 worked 1 per existing stitch + 0 added = 48 (8 per section × 6).
Fasten off, leaving an 18 in (45.7 cm) tail for sewing.
Why the math works: Rounds 10–12 each added exactly 6 stitches at 6 evenly spaced points. That brought the brim to 48 sts, which divides evenly into 6 sections of 8. The border rounds keep that count, so the brim lies smooth with no ruffling or cupping. The border adds 0.25 in (0.6 cm) of drop and no width, so the brim stays 3 in (7.6 cm) across.
Assembling the Lantern
- Set the roof over the top of the body so the closed dome sits inside the cone.
- Roof Rnd 10 has 36 sts, and the free front loops of body Rnd 20 also number 36. Sew them together stitch to stitch using the roof tail: go through 1 front loop on the body, then into the inside of the matching roof stitch.
- Leave Rounds 11–14 of the roof unsewn so they hang free as eaves.
- Line up the roof so each brim section sits over one panel line.
- Hide the tail inside.
Hanging Loop
- With red, join with a sl st at the center of roof Rnd 1.
- Ch 16, then sl st into the same center spot to form a ring.
- Work 22 sc over the chain ring, then sl st to the first sc.
- Fasten off and weave the end down into the roof.
The finished loop is about 1 in (2.5 cm) tall, and the sc covering keeps it thick and round.
Final Blocking
- Lightly mist the whole ornament with water. Amigurumi only needs shaping, not soaking.
- Roll the globe between your palms so the bulge is even all the way around.
- Press the base onto a flat surface so the ornament stands upright.
- Pinch the roof tip into a point and smooth the brim outward and slightly down.
- Straighten any panel line that leans by gently nudging the fabric.
- Pin the loop upright into a foam block and let everything dry for 2–3 hours.
Final Quality-Control Checklist
- [ ] Body is 3 in (7.6 cm) tall and 2.75 in (7.0 cm) wide at the globe
- [ ] Base is flat and has a crisp BLO ridge at the bottom edge
- [ ] There are 6 panel lines, each with 9 surface sl sts and evenly spaced 7 sts apart
- [ ] Every line meets the red rim at both top and bottom
- [ ] Stuffing is firm, with no fiberfill showing through the yellow
- [ ] Roof brim is 3 in (7.6 cm) across, with 48 border sts that lie flat
- [ ] Roof is sewn on straight and centered
- [ ] Loop is 1 in (2.5 cm) tall and stands upright
- [ ] Overall height is 5 in (12.7 cm) including the loop
- [ ] All ends are hidden inside
Troubleshooting
The globe looks flat, not rounded. Add more stuffing through the top before Rnd 23. Also check that Rnd 12 really ends with 42 sts.
Panel lines lean sideways. Spiral rounds naturally drift a little. Follow the column of stitches rather than counting from the marker each round.
Panel lines pucker the globe. The surface slip stitches are too tight. Pull out the line and redo it with a larger hook, such as 4.0 mm, keeping the loops loose.
The roof cups instead of flaring. Check your counts for Rnds 10–12. If they are 36, 42, and 48 and the brim still cups, work Rnd 14 even more loosely.
The roof brim ruffles. You probably added stitches by mistake. Recount Rnd 13, which should be 48.
There are jogs where you changed color. On the first stitch of the new color in the next round, work a sl st instead of an sc, then carry on.
The ornament tips sideways when hanging. The roof is off-center. Unpick the seam and sew it again stitch to stitch, 36 to 36.
Care
Spot clean with a damp cloth and mild soap, then reshape and let it air dry. Store it in tissue paper so the brim and loop keep their shape.
Final Notes
Each stage builds on the one before. If your base measures 1.9 in (4.8 cm) after Round 5, the walls will reach 0.9 in (2.3 cm). The globe will then come out at 8.4 in (21.3 cm) around, and the finished body will be 3 in (7.6 cm) tall. The roof’s 36-stitch round meets the body’s 36 free loops, so the seam lines up with no extra math. The 48-stitch brim measures 3 in (7.6 cm) across and gets its 0.25 in (0.6 cm) edge from the border rounds. Add the 1 in (2.5 cm) loop and you have a 5 in (12.7 cm) lantern ready for the tree. Check each measurement as you reach it, and your lantern will match the one in the photo.
Happy crocheting!