

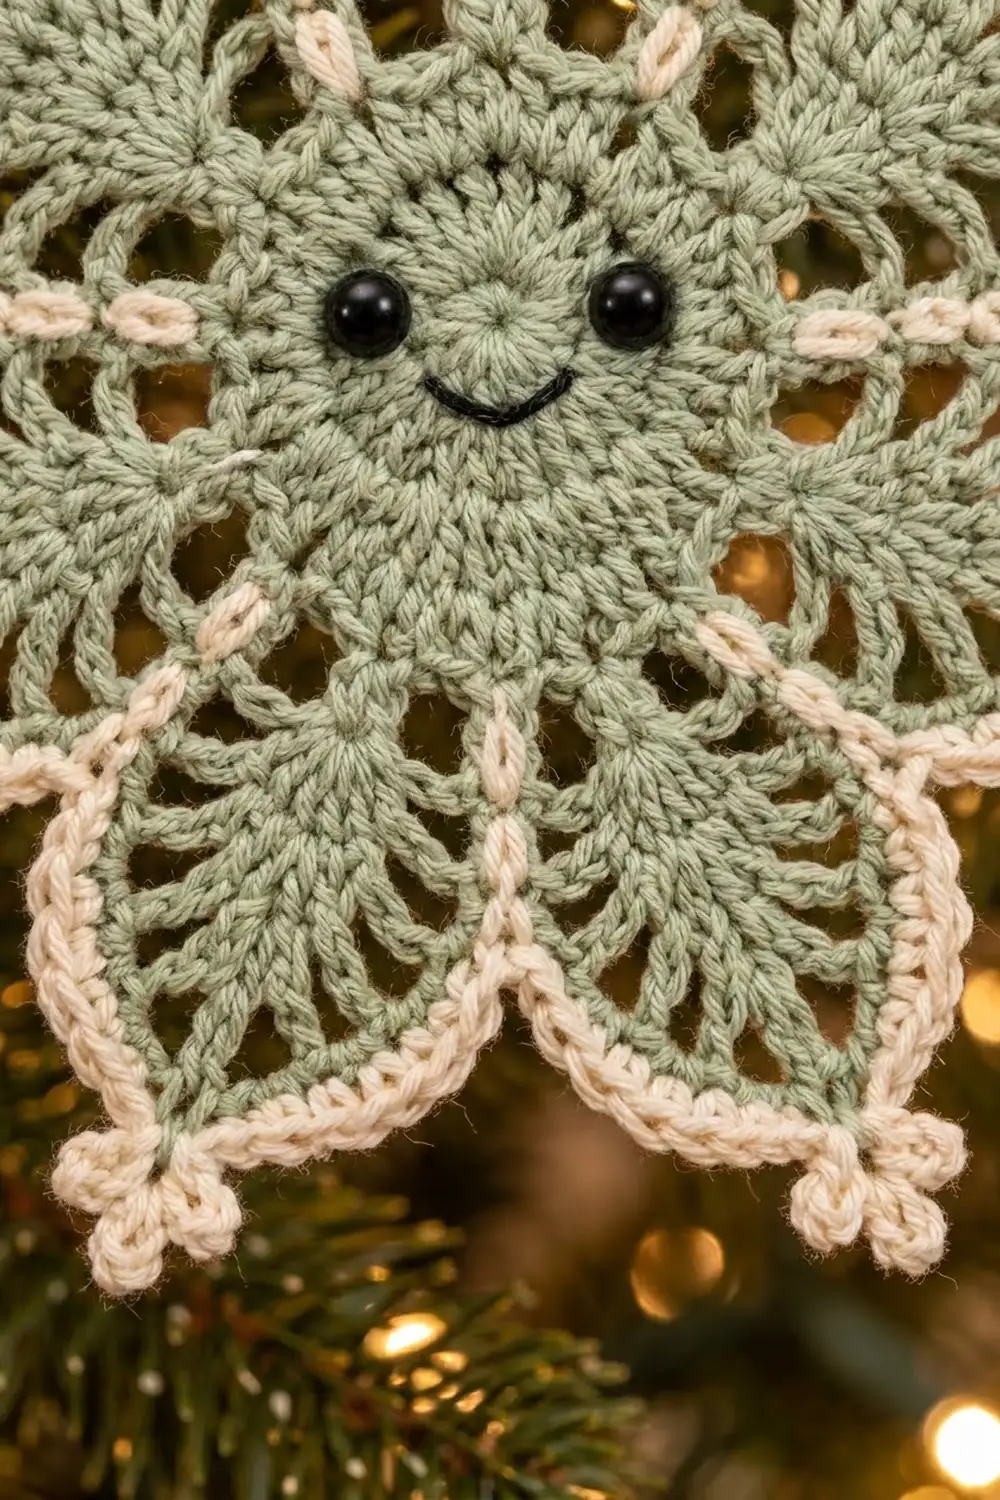
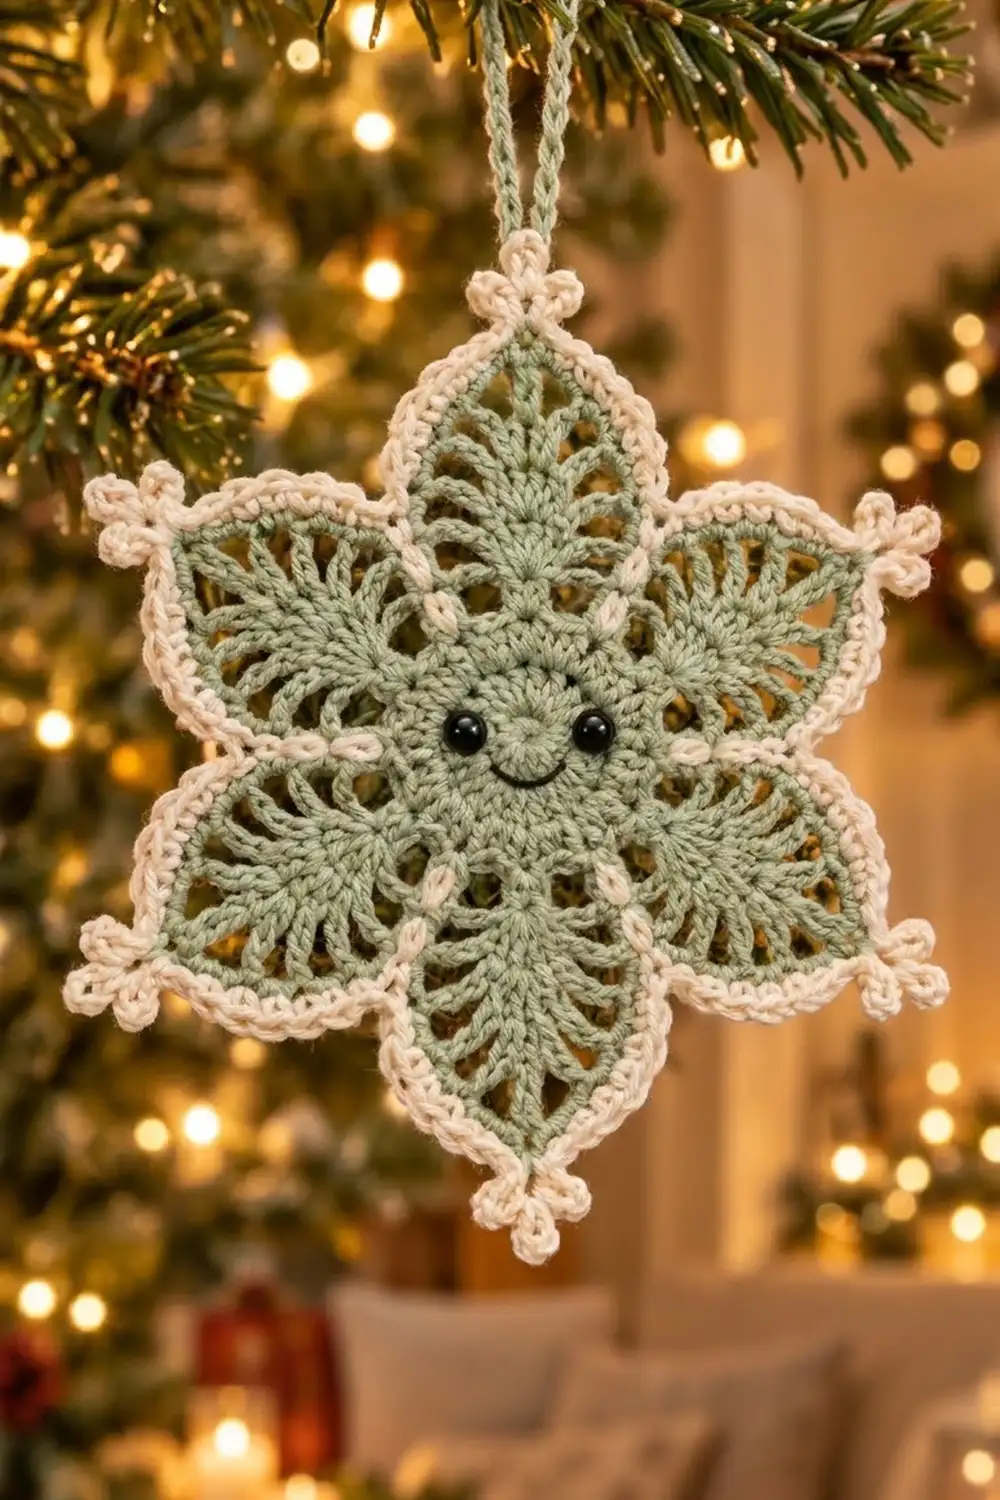
The Sage Smile Snowflake is a small lace ornament with a friendly face. A solid sage-green center disc holds two black bead eyes and a stitched smile. Six pointed, leaf-shaped petals open out around it, and a crisp cream border with tiny picot clusters on each tip finishes the shape.
The palette is soft and wintry: muted sage green for the body, warm cream for the edging and hanging loop, and a touch of black for the face. It looks at home on a natural-toned tree, tied to a gift, or hung in a window.
This pattern uses US crochet terms. The finished ornament measures about 6 in (15.2 cm) from tip to tip, including the picots, and has a 2.75 in (7.0 cm) hanging loop.
The ornament is worked in the round as a single piece. You make a solid disc first. Next comes a round of V-stitches that sets up the six petals, then three rounds that build each petal into a fan and narrow it to a point. One cream border round finishes the edge and adds the picots, valley lines, and hanging loop. Last, you add the face.
Finished Size and Construction
- Finished size: about 6 in (15.2 cm) tip to tip, including picots
- Skill level: Easy–Intermediate
- Terminology: US crochet terms
- Yarn weight: DK (light worsted, #3), cotton or cotton blend
- Hook: 3.5 mm (E-4)
- Number of pieces: 1 (single motif)
- Layout: six petals arranged evenly around a central disc
- Center disc size: about 1.9 in (4.8 cm) across after Round 3
- Size before border: about 5.5 in (14.0 cm) tip to tip after Round 7
- Border depth: about 0.25 in (0.6 cm), plus picots at the tips
Materials
Yarn advice: Choose a smooth mercerized cotton or a cotton-acrylic blend in DK weight. Cotton gives clear stitch definition and blocks into sharp points. Fluffy or very soft yarns blur the lace and make the tips droop.
- Sage green (main color): 10 g, about 23 m
- Cream (border and loop): 5 g, about 11 m
- Black embroidery floss or black DK yarn: about 0.5 m, for the smile
These quantities are for one ornament and include a safety margin of about 20%.
Tools:
– 3.5 mm (E-4) crochet hook
– Two 6 mm black beads or 6 mm black safety eyes
– Black sewing thread and a fine needle (if you use beads)
– Tapestry needle
– Scissors
– Stitch marker
– Blocking mat, rust-proof pins, and a spray bottle
– Optional: fabric stiffener or a light starch spray
Safety note: If the ornament could end up with small children or pets, embroider the eyes with black yarn instead of using beads or safety eyes.
Abbreviations (US Terms)
- ch – chain
- sl st – slip stitch
- sc – single crochet
- dc – double crochet
- sp – space
- sk – skip
- st(s) – stitch(es)
- V-st – (dc, ch 2, dc) in the same stitch
Special stitches
- Spike sc: Insert the hook two rounds below the current round, into the indicated stitch. Yarn over and pull up a long loop level with the working round, then yarn over and pull through both loops. This makes a short vertical line of contrast color.
- Triple picot: [Ch 3, sl st in 3rd ch from hook] 3 times, then sl st into the top of the sc you just made. You get a small clover-like cluster of three picots.
Gauge and Checkpoints
Gauge matters less here than in a garment, but it controls the final size and how cleanly the points sit. Work one test motif first and measure it at each checkpoint:
- After Round 2: disc measures 1.5 in (3.8 cm) across.
- After Round 3: disc measures 1.9 in (4.8 cm) across.
- After Round 5: fans measure about 3.6 in (9.1 cm) across, measured from the outer edge of one fan to the outer edge of the opposite fan.
- After Round 7: about 5.5 in (14.0 cm) tip to tip.
- After the border: about 6 in (15.2 cm) tip to tip.
If your disc is too big: go down to a 3.25 mm hook, or work the dc rounds a little tighter.
If your disc is too small: go up to a 3.75 mm hook.
Fix the size at the disc stage. Every later round is built on it, so a size difference grows with each round.
Pattern
Center Disc (Sage Green)
Round 1: Make a magic ring. Ch 3 (counts as dc), then work 11 dc into the ring. Pull the ring closed. Sl st to the top of the beginning ch-3. (12 dc)
Round 2: Ch 3 (counts as dc), dc in the same st. Work 2 dc in each remaining st around. Sl st to the top of the beginning ch-3. (24 dc)
Round 3: Ch 1. Work sc in the same st and 2 sc in the next st. Sc in the next st, 2 sc in the next st; repeat from * to * around. Sl st to the first sc. (36 sc)
Checkpoint: the disc lies flat and measures 1.9 in (4.8 cm) across. Every 6 sc of this round will become the base of one petal.
Petal Setup
Round 4: Ch 1, sc in the same st. Ch 3, sk 2 sts, V-st in the next st, ch 3, sk 2 sts, sc in the next st. Repeat from * to * 4 more times. To finish the sixth repeat: ch 3, sk 2 sts, V-st in the next st, ch 3, sk the last 2 sts, then sl st to the first sc. (6 sc, 6 V-sts, 12 ch-3 sps)
Each repeat uses exactly 6 stitches of Round 3: 1 sc, 2 skipped, 1 V-st, 2 skipped. That gives 6 × 6 = 36.
Petal Fans
Round 5: Ch 1, sc in the same sc. Ch 2, sk the ch-3 sp, work 7 dc in the ch-2 sp of the next V-st, ch 2, sk the next ch-3 sp, sc in the next sc. Repeat from * to * around. Leave out the last sc and sl st to the first sc instead. (6 sc, 6 fans of 7 dc = 42 dc)
Shaping the Points
Round 6: Ch 1, sc in the same sc. Ch 3, sk the ch-2 sp, dc in each of the first 3 dc of the fan, then work (dc, ch 2, dc) in the 4th (center) dc, dc in each of the last 3 dc, ch 3, sk the ch-2 sp, sc in the next sc. Repeat around, ending with sl st to the first sc instead of the last sc. (6 sc; per petal: 3 dc + 2 dc + 3 dc = 8 dc; total 48 dc)
The ch-2 at the center of each petal starts the vein line and pulls the fan into a point.
Round 7: Ch 1, sc in the same sc. Ch 4, sk the ch-3 sp, dc in each of the next 4 dc, work (dc, ch 3, dc) in the ch-2 sp, dc in each of the next 4 dc, ch 4, sk the ch-3 sp, sc in the next sc. Repeat around, ending with sl st to the first sc. (6 sc; per petal: 4 + 2 + 4 = 10 dc; total 60 dc; 12 ch-4 sps; 6 ch-3 tip sps)
Each petal now has 5 dc along each side: 4 plain dc plus 1 dc from the tip pair. The stacked center chain spaces make the leaf-vein line of holes.
Checkpoint: the motif measures 5.5 in (14.0 cm) tip to tip. Fasten off the sage yarn and weave in the ends.
Border (Cream)
Border gauge: 1 sc in each dc and 4 sc in each ch-4 sp. One border round adds about 0.25 in (0.6 cm) on every edge.
Definition used here: a “petal edge” is one side of a petal, running from the tip down to the valley sc. It does not include the valley stitch, which is counted on its own.
Border Round: Choose a petal to be the top. Join the cream yarn with a sc in its ch-3 tip sp. Work a triple picot, then sc in the same tip sp.
Down the petal edge: sc in each of the next 5 dc, then 4 sc in the next ch-4 sp.
Valley: skip the Round 7 sc and work a spike sc into the Round 5 sc directly below it. The long loop covers the Round 6 and Round 7 sc and makes the cream line in the valley.
Up the next petal edge: 4 sc in the next ch-4 sp, then sc in each of the next 5 dc.
Tip: (sc, triple picot, sc) in the next ch-3 tip sp.
Repeat from Down the petal edge around. The last repeat ends after the 5 sc going up the side of the top petal, just before the starting tip. Sl st to the first sc.
Counts:
– Each tip: 2 sc + 1 triple picot
– Each petal edge: 1 tip sc + 5 sc + 4 sc = 10 sc
– Each valley: 1 spike sc
– Total: 12 petal edges × 10 sc = 120 sc, plus 6 spike sc = 126 sc, plus 6 triple picots
Why the math works: each dc is about one sc wide, so 1 sc per dc keeps the edges flat. A ch-4 sp spans about 4 sc widths, so 4 sc fill it without cupping. Putting 2 sc into each tip sp, with the picot cluster between them, lets the border turn the sharp outer point. Using a single spike sc in each valley pulls the inner corner in instead of bunching extra stitches there.
Hanging Loop
Do not fasten off yet. Ch 30, then sl st into the joining sc at the top tip. This makes a loop about 2.75 in (7.0 cm) long. Fasten off and weave the tail back through the loop chain to strengthen it.
Face
- Mark the top petal. The eyes sit in the upper half of the disc, centered under that petal.
- Place the eyes between Rounds 2 and 3, with 6 sts of Round 3 between them.
- If you use beads, sew each one on firmly with black thread and tie off on the back. If you use safety eyes, push each post through and press the washer on from the back.
- Embroider the smile in black with a single backstitch curve. Run it across about 4 sts of Round 2, centered below the eyes and dipping slightly toward Round 1.
- Weave all the face tails through the back of the disc.
Final Blocking
- Weave in all remaining ends first, along stitches of the same color.
- Spray the ornament until it is evenly damp but not dripping.
- Lay it face up on the blocking mat. Pin the center disc flat.
- Pin each petal tip outward so it sits 3 in (7.6 cm) from the center. The tips should end up 6 in (15.2 cm) apart from opposite tip to opposite tip.
- Pin each valley so that all six look the same.
- Pin the three picots at each tip so they open into a clover shape.
- If you like, add a light coat of stiffener or starch for crisp points.
- Let it dry completely, at least 12 hours, before you unpin it.
Final Quality-Control Checklist
- Rounds 1–3 have 12, 24, and 36 sts, and the disc lies flat.
- There are 6 V-sts in Round 4, spaced evenly.
- Each fan has 7 dc in Round 5.
- Each petal has 8 dc in Round 6 and 10 dc in Round 7.
- All six petal tips have a clear ch-3 tip space.
- The border has 126 sc and 6 triple picots.
- All six valleys have a visible cream spike line.
- The hanging loop is centered on the top tip and is securely anchored.
- The eyes are level, firmly attached, and the smile is centered.
- The ornament measures about 6 in (15.2 cm) tip to tip after blocking.
Troubleshooting
The disc ruffles: your dc tension is loose compared with your sc. Use a hook 0.25 mm smaller for Rounds 1–2.
The disc cups: you probably missed an increase in Round 3. Count to 36.
The petals are uneven: check that each Round 4 repeat skips exactly 2 sts on both sides of the V-st.
The tips are rounded, not pointed: make sure the (dc, ch 2, dc) in Round 6 goes into the 4th dc of the fan, and that the Round 7 tip is worked into that ch-2 sp. Block the tips firmly.
The border ripples along the petal edges: you are working more than 4 sc into the ch-4 spaces, or your tension is loose. Keep it to exactly 4 sc.
The border pulls the petals inward: your sc tension is too tight. Go up to a 3.75 mm hook for the border round only.
The spike line is loose or crooked: pull up the long loop to the exact height of the border round before you finish the sc, and keep it vertical.
The ornament hangs crooked: the loop is not anchored at the true top tip. Move the loop to that tip.
Care
Hand wash in cool water with mild soap, gently press out the water in a towel, and re-block flat to dry. Store the ornament flat or hanging, not crushed, so the points and picots keep their shape.
Final Notes
Each stage depends on the one before it. A 1.9 in (4.8 cm) disc of 36 sc divides into six 6-stitch sections. Each section becomes a V-st, then a 7-dc fan, then an 8-dc point, then a 10-dc petal, which reaches 5.5 in (14.0 cm) tip to tip. The cream border adds 10 sc per petal edge and 1 spike sc per valley, 126 sc in total, bringing the ornament to about 6 in (15.2 cm). If you check your measurements at each checkpoint, the finished size will come out right.
Happy crocheting!