

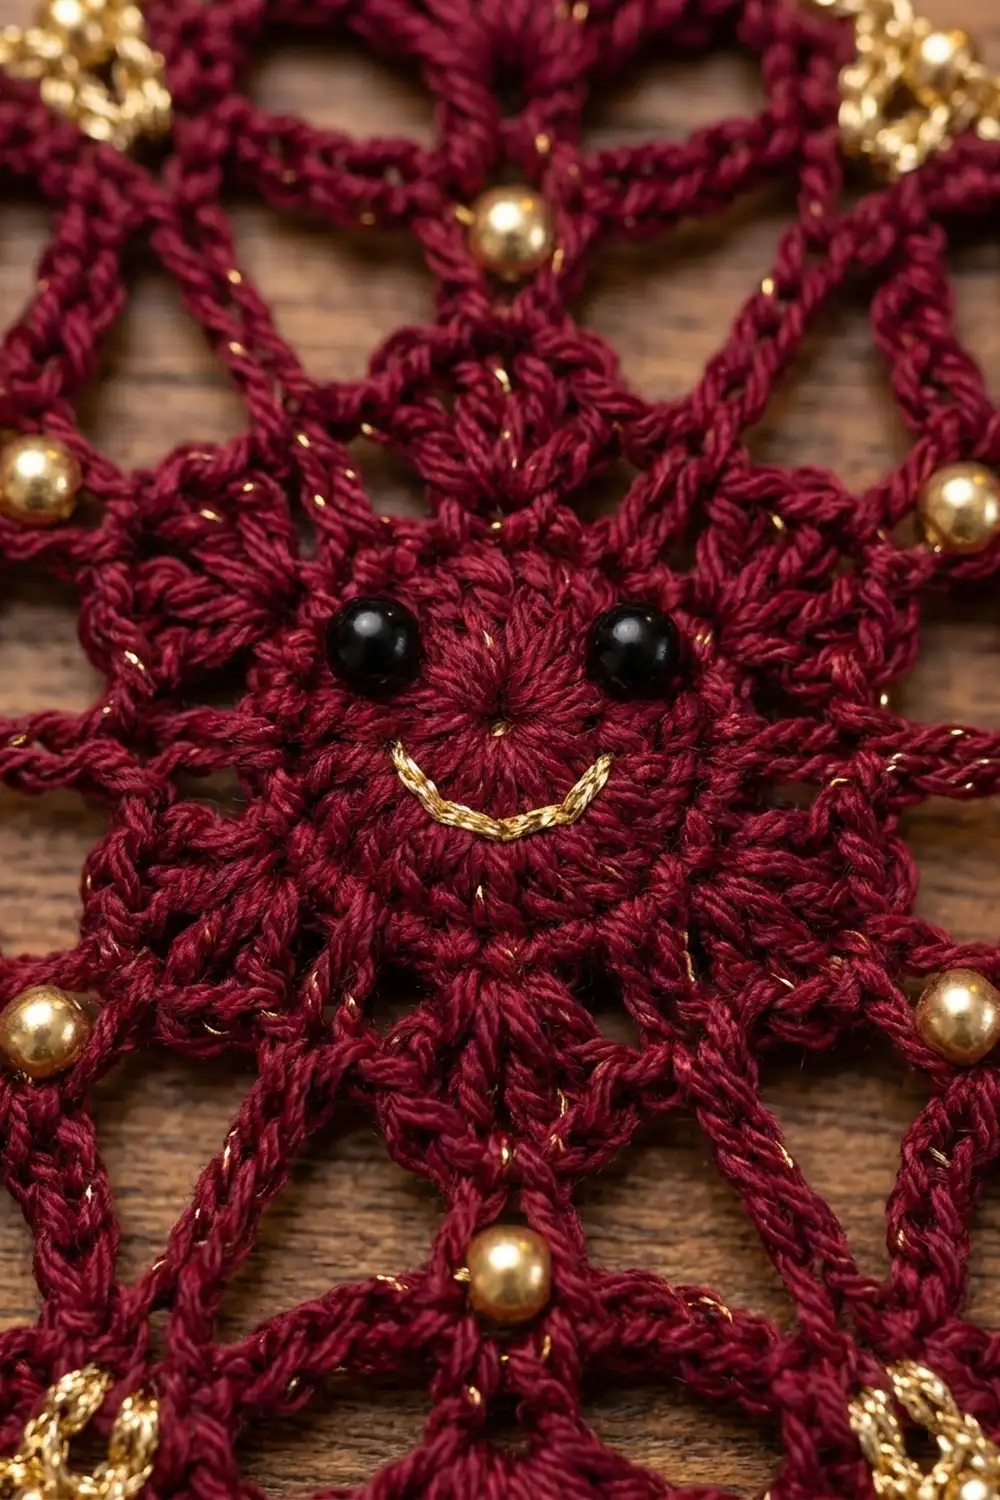
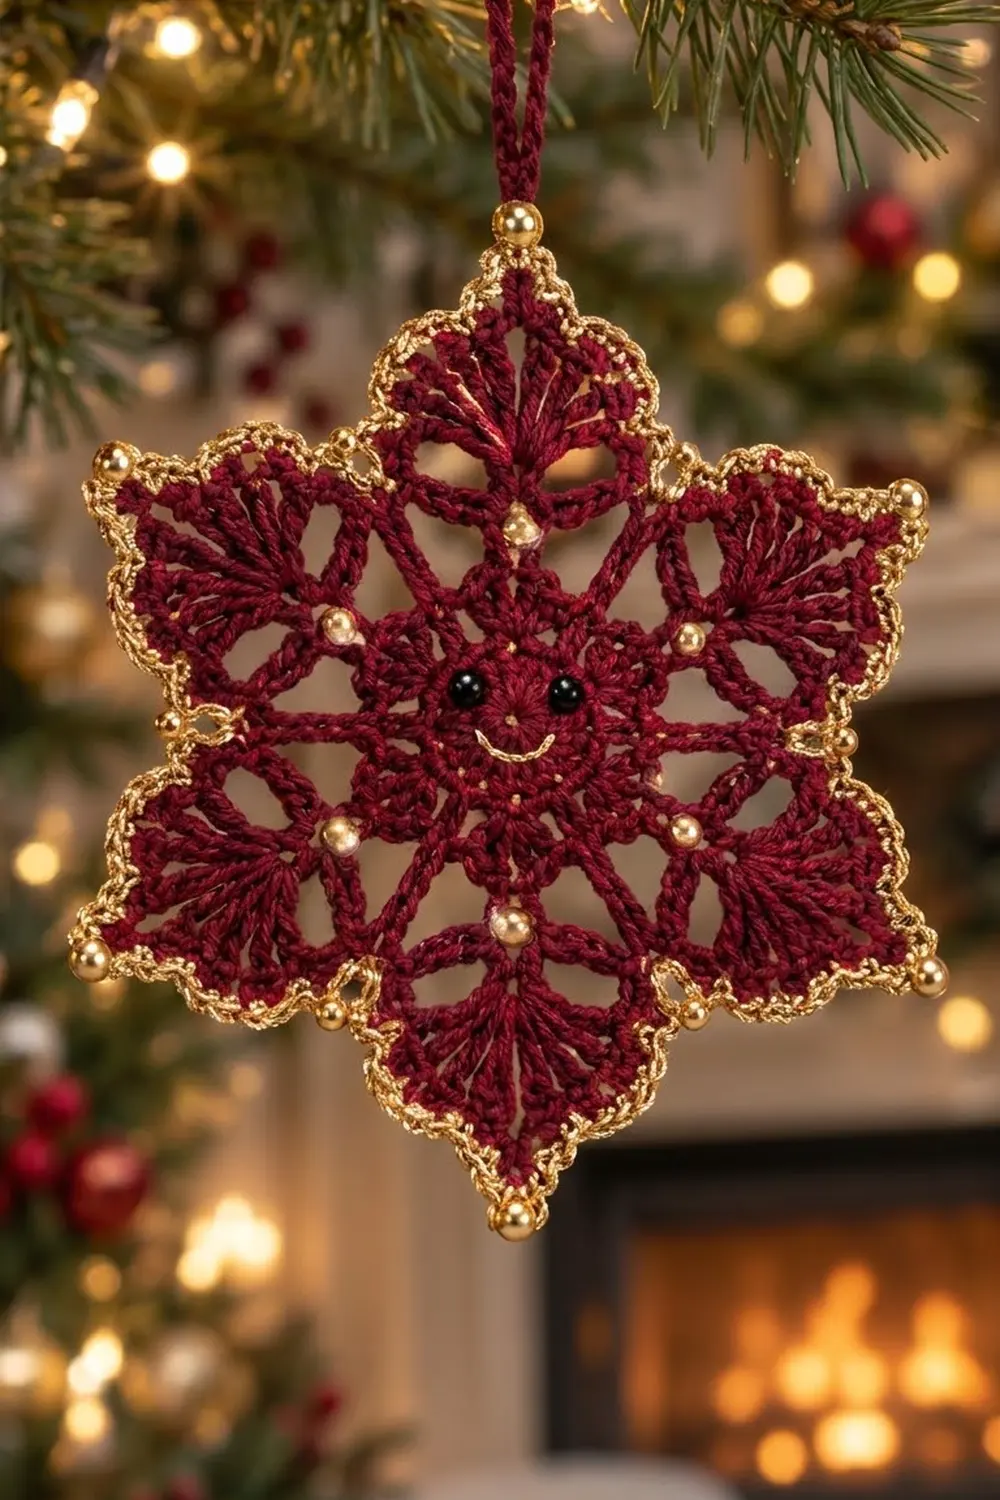
This little snowflake has a face. Its solid center disk carries two shiny black bead eyes and a stitched gold smile. Around it, six lacy fans open out into pointed tips trimmed with a fine gold picot edge and gold beads.
The palette is classic holiday: deep burgundy thread with gold metallic accents. Hang it from a tree branch, tie it onto a gift, or make a few and hang them separately along a mantel garland. The pattern uses US crochet terms throughout.
The finished ornament measures 5 in (12.7 cm) from point to point and about 3.5 in (8.9 cm) across from valley to valley after blocking.
You work the snowflake in the round from a magic ring as one single piece. Rounds 1–2 make the solid face disk. Rounds 3–6 build the open loops and the six fans. Rounds 7–8 are the border: one burgundy single crochet round that shapes the points, then one gold picot round. Beads, eyes, the smile, and the hanging loop are added at the end.
Finished Size and Construction
- Finished size: 5 in (12.7 cm) point to point; 3.5 in (8.9 cm) valley to valley
- Skill level: Intermediate (thread crochet, tall stitches, picots)
- Terminology: US crochet terms
- Yarn weight: Size 3 cotton crochet thread (CYC 1, super fine)
- Hook: 2.25 mm (US B-1)
- Number of pieces: 1 (single motif)
- Layout: Not applicable; this is one stand-alone ornament
- Piece size: 5 in (12.7 cm) point to point after the border
- Size before border (after Round 6): 4.25 in (10.8 cm) point to point
- Border depth: about 0.375 in (1.0 cm) at each tip (Rounds 7–8 together)
Materials
Use a smooth, mercerized size 3 cotton thread. It gives crisp stitch definition and holds starch well. For the edging, choose a gold metallic thread of a similar or slightly finer thickness so the picots stay small and neat.
- Burgundy (main color, MC): 10 g / 16 m (about 17.5 yd)
- Gold metallic (contrast color, CC): 3 g / 8 m (about 8.75 yd)
These quantities include a margin for your gauge swatch and the hanging loop.
Tools and notions:
– 2.25 mm (US B-1) crochet hook
– 6 gold beads, 6 mm, for the tips
– 1 gold bead, 6 mm, for the top of the hanger (optional)
– 12 gold beads, 4 mm, for the inner ring and the valleys
– 2 black beads, 4 mm, for the eyes
– Fine beading needle, plus a sewing needle with burgundy and gold sewing thread
– Tapestry needle
– Stitch marker
– Spray starch or fabric stiffener
– Blocking board and rustproof pins
– Small scissors and a ruler
Abbreviations (US Terms)
- ch: chain
- sl st: slip stitch
- sc: single crochet
- dc: double crochet
- tr: treble crochet
- sp(s): space(s)
- st(s): stitch(es)
- MC / CC: main color / contrast color
- rep: repeat
Special stitch: picot. Ch 3, then sl st into the 3rd ch from the hook (the first chain you made). The picot sits on top of the stitch just before it.
Gauge and Checkpoints
Thread gauge varies a lot from person to person, so make one snowflake first and measure it before making a set. Measure on a flat surface without stretching.
- After Round 2: the face disk is 1.25 in (3.2 cm) across.
- After Round 4: the piece is 2.25 in (5.7 cm) across, measured loop tip to loop tip.
- After Round 6: 4.25 in (10.8 cm) point to point.
- After Round 8 and blocking: 5 in (12.7 cm) point to point.
If your disk is larger than 1.25 in (3.2 cm), go down to a 2.0 mm hook. If it is smaller, go up to a 2.5 mm hook. Small errors in Round 2 roughly triple by Round 8, so fix them early. If Round 2 cups up into a bowl, your stitches are too tight; if it ruffles, they are too loose.
Pattern
The ch 3 at the start of a round counts as 1 dc, and the ch 4 counts as 1 tr. Join each round with a sl st to the top of the beginning chain unless the round says otherwise.
The Face Disk
Round 1 (MC): Make a magic ring. Ch 3, then work 11 dc into the ring. Pull the ring closed and join. (12 dc)
Round 2: Ch 3, dc in the same st, then 2 dc in each st around. Join. (24 dc)
Checkpoint: 1.25 in (3.2 cm) across, lying flat.
The Open Rings
Round 3: Ch 5 (counts as 1 dc + ch 2). Skip the next st, dc in the next st, ch 2. Rep from * 10 more times, then skip the last st and join to the 3rd ch of the beginning ch-5. (12 dc, 12 ch-2 sps)
These 12 short spokes are the open “rays” around the face.
Round 4: Sl st into the first ch-2 sp. Ch 1, sc in the same sp. Ch 6, skip the next ch-2 sp, sc in the next ch-2 sp. Rep from * 4 more times. Ch 6, skip the last ch-2 sp, and join to the first sc. (6 sc, 6 ch-6 loops)
Each sc in Round 4 is where a 4 mm inner-ring bead will go later.
Checkpoint: 2.25 in (5.7 cm) across.
The Fan Bases
Round 5: Sl st into the first ch-6 loop. Ch 3, then work (2 dc, ch 3, 3 dc) in the same loop. Ch 1, sc in the next sc, ch 1, then (3 dc, ch 3, 3 dc) in the next ch-6 loop. Rep from * 4 more times. Ch 1, sc in the last sc, ch 1, and join to the top of the beginning ch-3. (36 dc, 6 sc, 6 ch-3 tip sps, 12 ch-1 sps)
The Fans
Round 6: Sl st in the next 2 dc and into the ch-3 tip sp. Ch 4, then work 8 tr in the same sp. Ch 4, sc in the next valley sc of Round 5, ch 4, then 9 tr in the next ch-3 tip sp. Rep from * 4 more times. Ch 4, sc in the last valley sc, ch 4, and join to the top of the beginning ch-4. (54 tr, 6 sc, 12 ch-4 sps)
Each 9-tr fan opens outward to make one point. The ch-4 sps on each side of a valley sc form the deep V between points.
Checkpoint: 4.25 in (10.8 cm) point to point. This is the size before the border.
Border
The border is two rounds. Round 7 (burgundy) sharpens the points and fills the valleys. Round 8 (gold) adds the picot edge.
Border gauge: about 8 sc per 1 in (2.5 cm) along the edge of a fan.
Round 7 (MC): Ch 1. Sc in the same st as the join and in the next 3 tr (4 sc). Work (sc, ch 3, sc) in the next tr; this is the center (5th) tr of the fan. Sc in the next 4 tr. Work 4 sc in the next ch-4 sp, skip the valley sc, and work 4 sc in the next ch-4 sp. Sc in the next 4 tr, (sc, ch 3, sc) in the next tr, sc in the next 4 tr. Rep from * 4 more times. Work 4 sc in the next ch-4 sp, skip the valley sc, work 4 sc in the last ch-4 sp, and join to the first sc. Fasten off MC. (108 sc, 6 ch-3 tip sps)
Count per point: Between one ch-3 tip sp and the next there are exactly 18 sc: 1 tip sc, 4 sc on the fan, 4 + 4 sc in the valley, 4 sc on the next fan, and 1 tip sc. 18 × 6 = 108. Skipping the valley sc pulls the V in and keeps it sharp.
Round 8 (CC): Join the gold thread with a sl st in the sc just after any ch-3 tip sp. Ch 1, sc in the same sc and in the next sc, then make a picot. (Sc in the next 2 sc, picot) 7 times. Sc in the next 2 sc. Work (sc, ch 4, sc) in the ch-3 tip sp. Then (sc in the next 2 sc, picot) 8 times, and rep the bracketed section from the first * so the sequence continues around. Finish the last tip with (sc, ch 4, sc) and join to the first sc. Fasten off.
Count per point: 18 sc worked one into each existing st, plus 2 extra sc added in the tip sp, for 20 sc per section. 20 × 6 = 120 sc in total, with 8 picots per section (48 in total) and 6 ch-4 tip loops.
Why the math works: The picots fall after every 2nd sc, at sc 2, 4, 6, 8, 10, 12, 14, and 16. The valley center sits between sc 9 and sc 10, so the 5th picot lands right in the V and every section is symmetrical. Sc 17 and 18 sit next to the tip without a picot, which leaves room for the tip bead. Round 7 adds about 0.25 in (0.6 cm) at each tip and Round 8 about 0.125 in (0.3 cm), for a border depth of about 0.375 in (1.0 cm). That makes 4.25 in + 0.75 in = 5 in (12.7 cm) point to point.
Finishing Details
Eyes: Sew the 2 black beads onto Round 1, about 0.375 in (1.0 cm) apart, slightly above the center.
Smile: Thread a tapestry needle with gold metallic thread. Backstitch a shallow curve through the Round 1 sts below the eyes, about 0.375 in (1.0 cm) wide.
Inner-ring beads: Sew one 4 mm gold bead onto each of the 6 sc of Round 4.
Valley beads: Sew one 4 mm gold bead into each valley, centered over the skipped valley sc of Round 6.
Tip beads: Sew one 6 mm gold bead inside each ch-4 tip loop of Round 8.
Hanging loop: Join MC in the ch-4 tip loop of the top point. Ch 50, then sl st back into the same tip loop. Fasten off and weave the end into the back of the fan. The loop hangs about 3.5 in (8.9 cm) long. If you like, sew the optional 6 mm gold bead at the base of the loop.
Weave in all ends along the back of stitches of the same color.
Final Blocking
- Mix spray starch or fabric stiffener according to the label.
- Dampen the snowflake evenly. With liquid stiffener, soak it, then gently squeeze out the excess.
- Lay it on the blocking board, face up, with the eyes level.
- Pin the face disk flat first, with no pins through the beads.
- Pin each tip loop out to a 5 in (12.7 cm) point-to-point measurement. Check the three opposite pairs of tips with a ruler.
- Pin each valley so all six Vs are the same depth, about 0.75 in (1.9 cm) in from the line between neighboring tips.
- Open each ch-6 loop and fan with a pin so the lace sits evenly.
- Let it dry completely, at least 8 hours, before you unpin it.
Final Quality-Control Checklist
- Point to point measures 5 in (12.7 cm) across all three pairs of tips.
- Valley to valley measures about 3.5 in (8.9 cm).
- Each fan has 9 tr, and each border section has 20 gold sc and 8 picots.
- The face disk lies flat, with no cupping or ruffling.
- The eyes are level and the smile is centered.
- All 12 inner beads, 6 tip beads, and 2 eyes are secure.
- The hanging loop is attached to a tip, not to a valley.
- No thread ends show on the front.
Troubleshooting
The face disk cups. Your Round 2 tension is too tight. Remake it with a hook one size larger, or loosen your dc.
The fans flip forward. The Round 6 tr are too short. Pull up a longer first loop on each tr, then block firmly.
The valleys are shallow or rounded. Check that you skipped the valley sc in Round 7. Working into it adds a stitch and softens the V.
The gold edge ripples. The metallic thread is too thick, or the picots are too loose. Make the picots with ch 2 instead of ch 3, or use a finer gold thread.
The points aren’t symmetrical. Recount Round 7: you should have 18 sc between tip sps. Stray stitches usually hide near the valleys.
The beads droop. Sew each one twice through the same stitch, with the knot hidden on the back.
Care
Hand wash in cool water only if needed, then reshape and re-starch while damp. Store the ornament flat between tissue paper so the points don’t crush.
Final Notes
The size of this snowflake is set by a short chain of measurements. The face disk measures 1.25 in (3.2 cm) after Round 2, the piece reaches 2.25 in (5.7 cm) after Round 4 and 4.25 in (10.8 cm) after Round 6, and the border brings it to 5 in (12.7 cm) point to point. If you hit the first checkpoint, the rest usually follow, and every ornament you make will match.
Happy crocheting!